
I quite enjoy painting terrain as a break from regular miniatures, I find it quite a different experience, and a nice way to relax between big projects. I’ve painted a fair bit of terrain this year and I’ll likely make some posts about that at some stage because I’ve never really shared any of it directly, they usually end up as backdrops for miniature photos.
I’ve had these containers and crates for quite a while now, they’ve been sitting mostly built for almost a year, and I finally made time to finish building them and get them painted. They’re an MDF kit from Krommlech/Tabletop Scenics (3 of that kit in fact), and I bought them for our This is not a test games, although I plan on also using them for other games (40k for example).
With my terrain painting I tend to go for speed as my primary driver, focusing on the overall feel of the pieces rather than the detail. Here as I was targeting a post-apocalyptic feel I knew I wanted the containers to be pretty beat up and covered in sand/dust. To get a nice chipped feel to the container paint I decided early on that I wanted to do the hairspray chipping technique, which produces very realistic results.
If you don’t know the technique, I’m sure you can find plenty of tutorials on youtube and the like, but for a quick summary here’s how it goes: 1) base coat the model in the colour you want you chips to be (here I used a grey-brown spray can from the hardware store), 2) liberally spray hairspray over the whole model, 3) spray the main colour of the model over the top (good to use an airbrush for this), 4) using a wet brush/toothbrush rub away at the paint. The layer of paint over the hairspray will reactivate and scratch away quite easily. It’s very important to varnish the model afterwards or you will continue rubbing the paint away as you handle the model.
I find it quite hard to control the amount of chipping you get (i.e. it’s really easy to get massive amounts of chipping), so I only tend to use this technique when I want to get something looking really beat up, which makes it perfect for a post-apocalyptic setting.
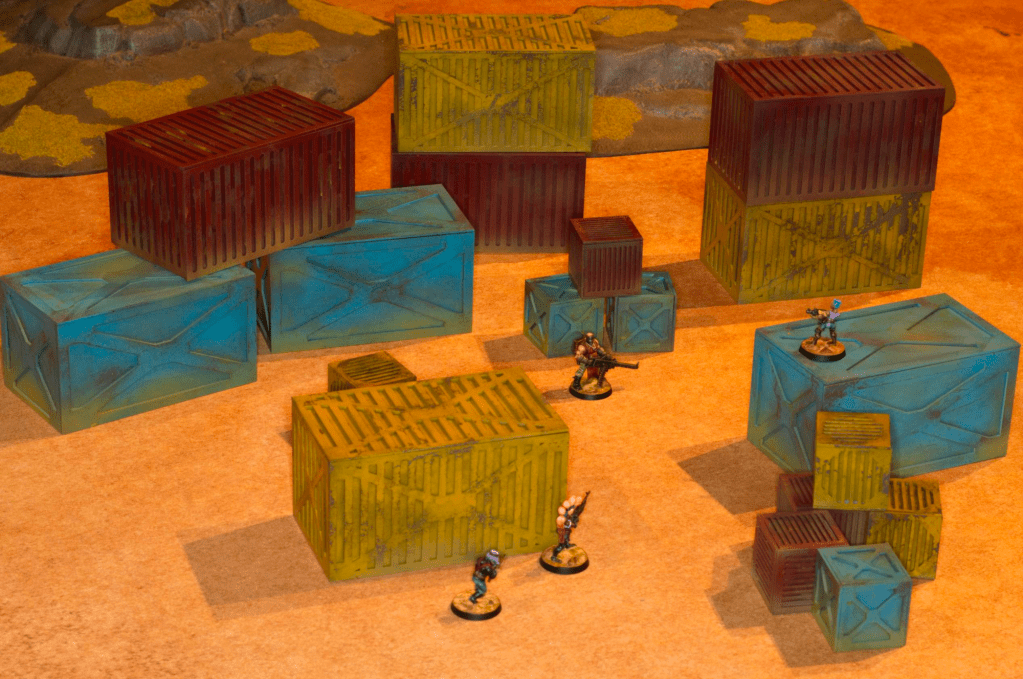
To weather the containers further, after the chipping was done I did a few washes of oil paints (payne’s grey for some darker staining, and yellow ochre to do dust marks), and sprayed some Vallejo Air Desert Yellow through the airbrush to get the dusty look you can see at the bottom of the containers and in splotches all over them.
Overall painting all of these took a coupe of hours of effort (not including drying time!), which is nice and quick for the result I think.

One thought on “Containers!”