Battle Report: A Rat in the Woods

As I mentioned in my last post my friend and I had planned a gaming day to play through a scenario of our own devising, pitting my Skaven against his Wood Elves in a game of Warhammer Fantasy. Well the day has come and the scenario fought out! I took a bunch of photos during the game with the hope of pulling together a battle report, and while they’re not amazing I think they do a decent job of capturing what happened during the game!

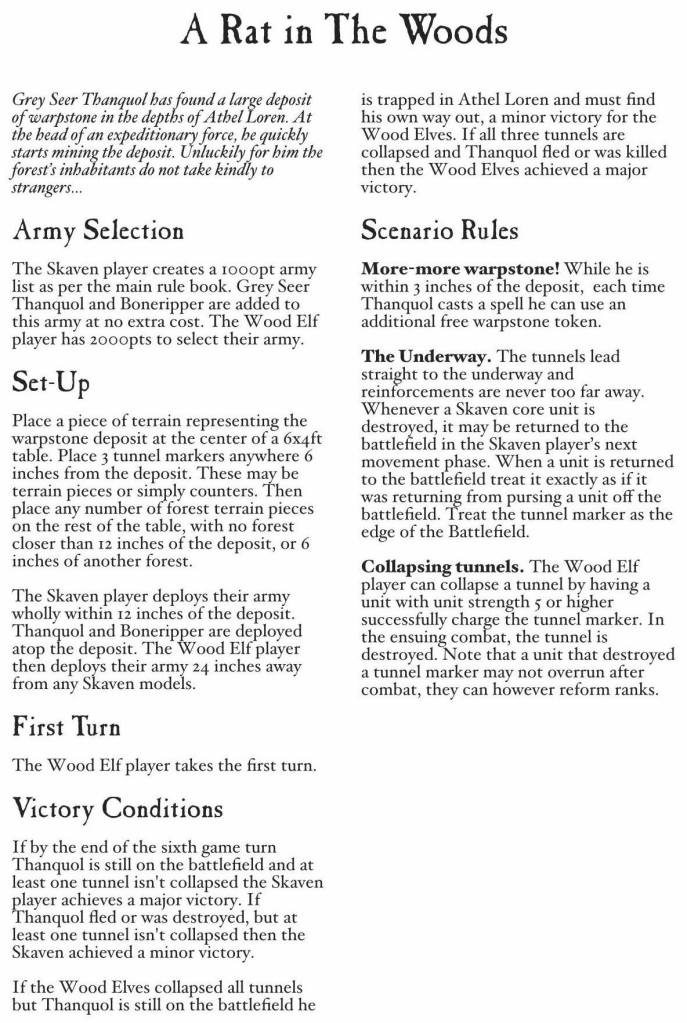
First up here’s the scenario:

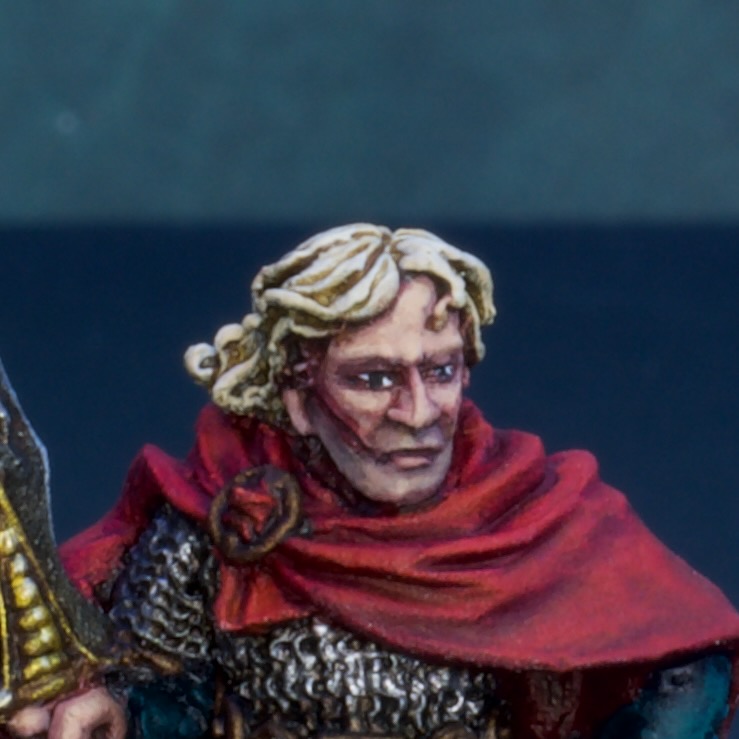
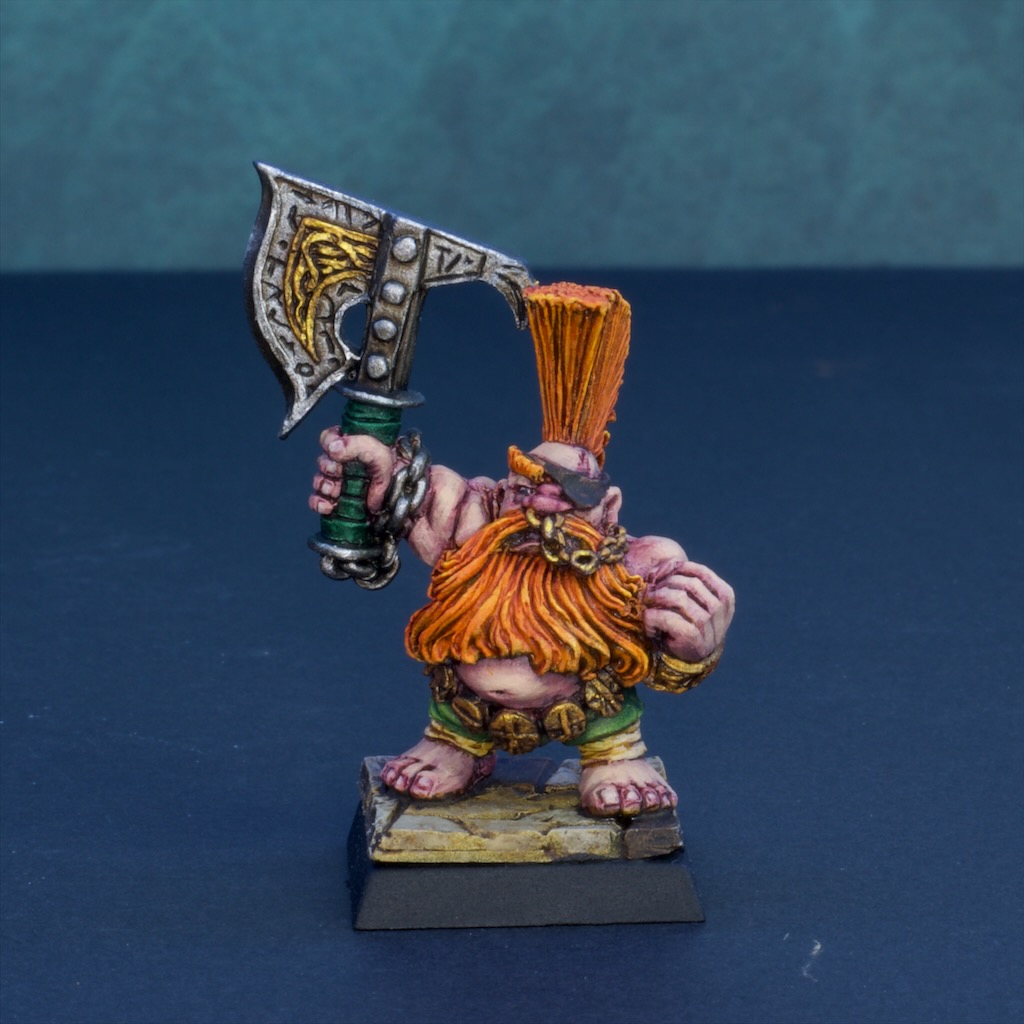
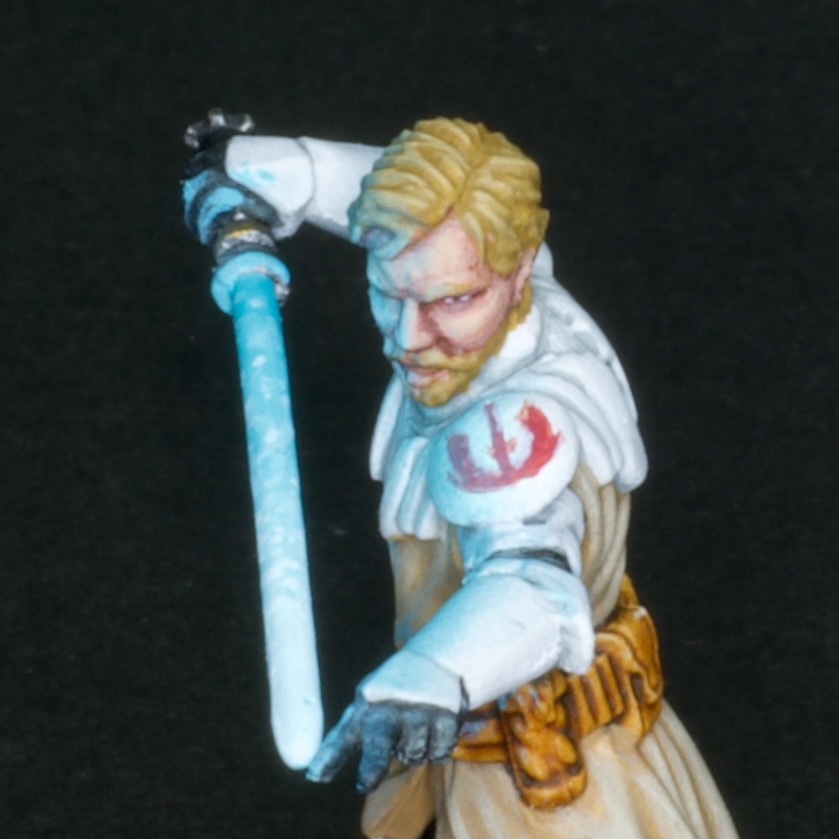
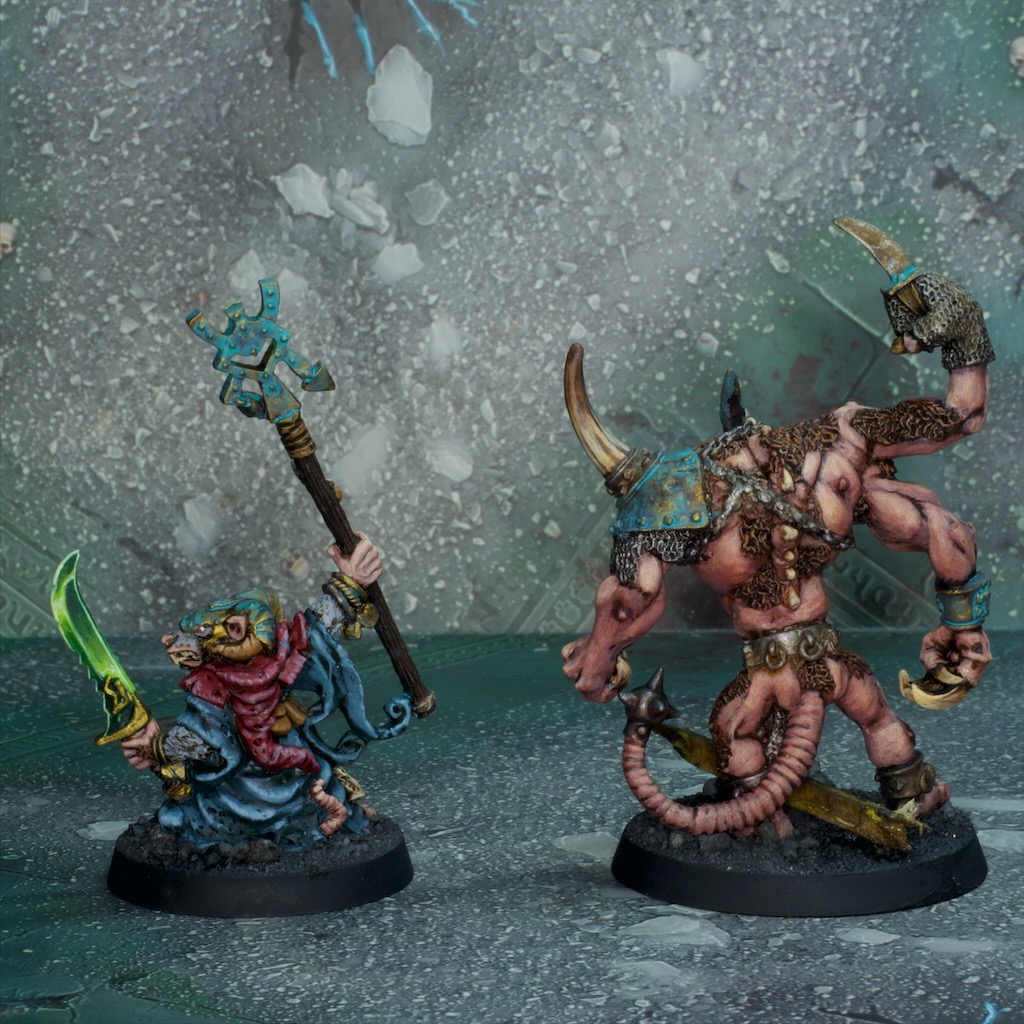
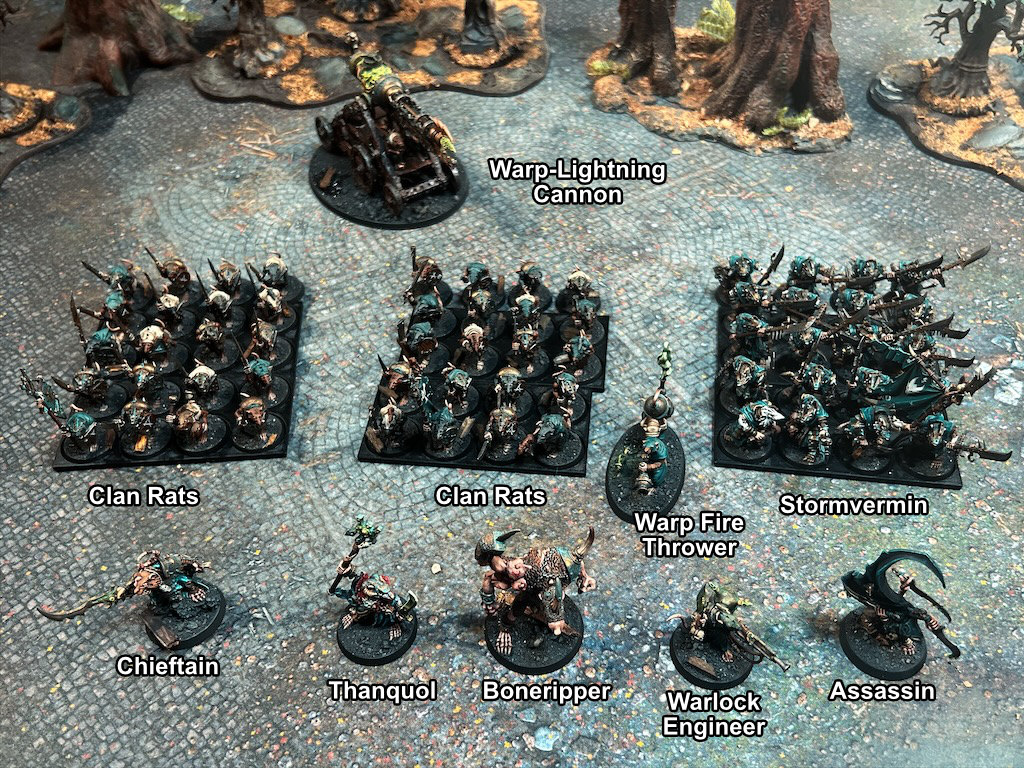
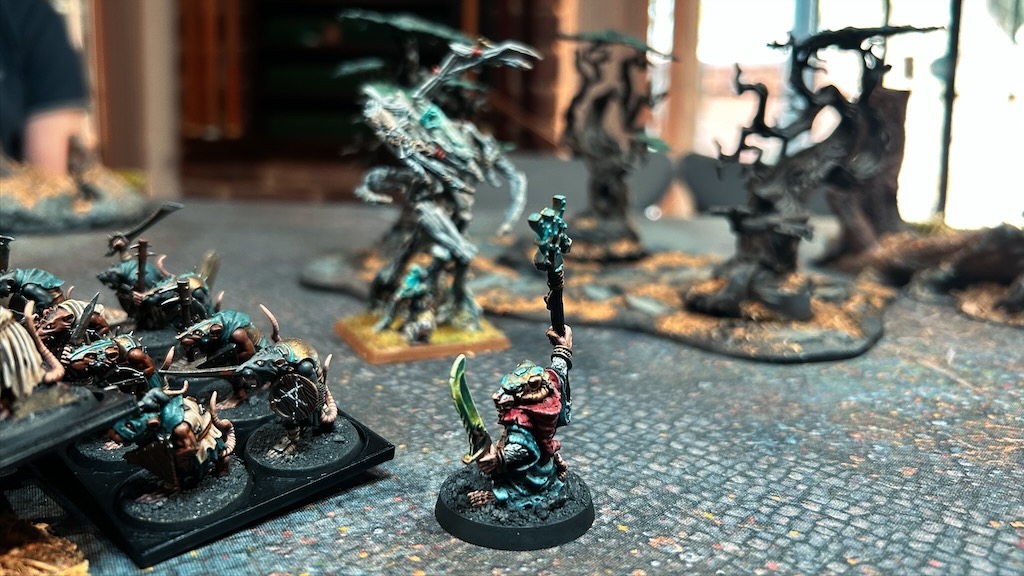
Here are the armies, first up the Skaven:
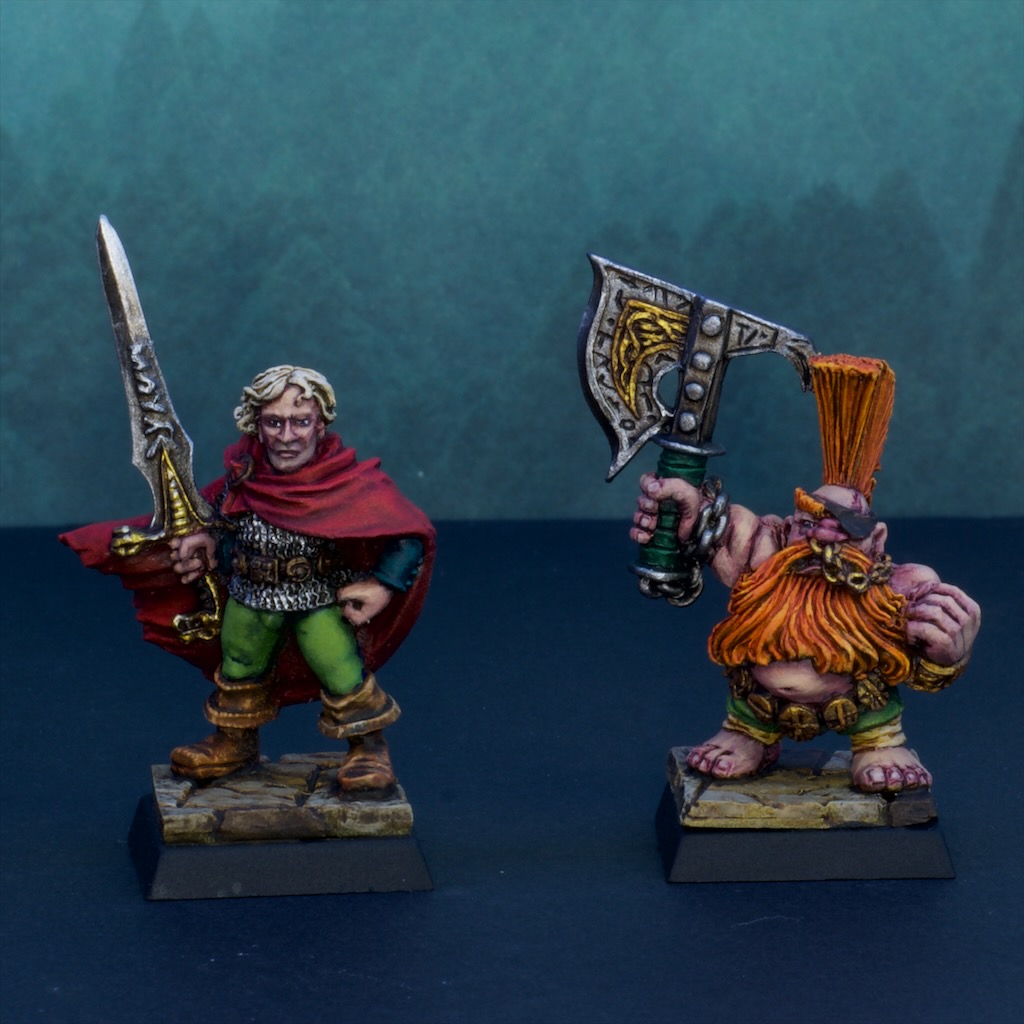
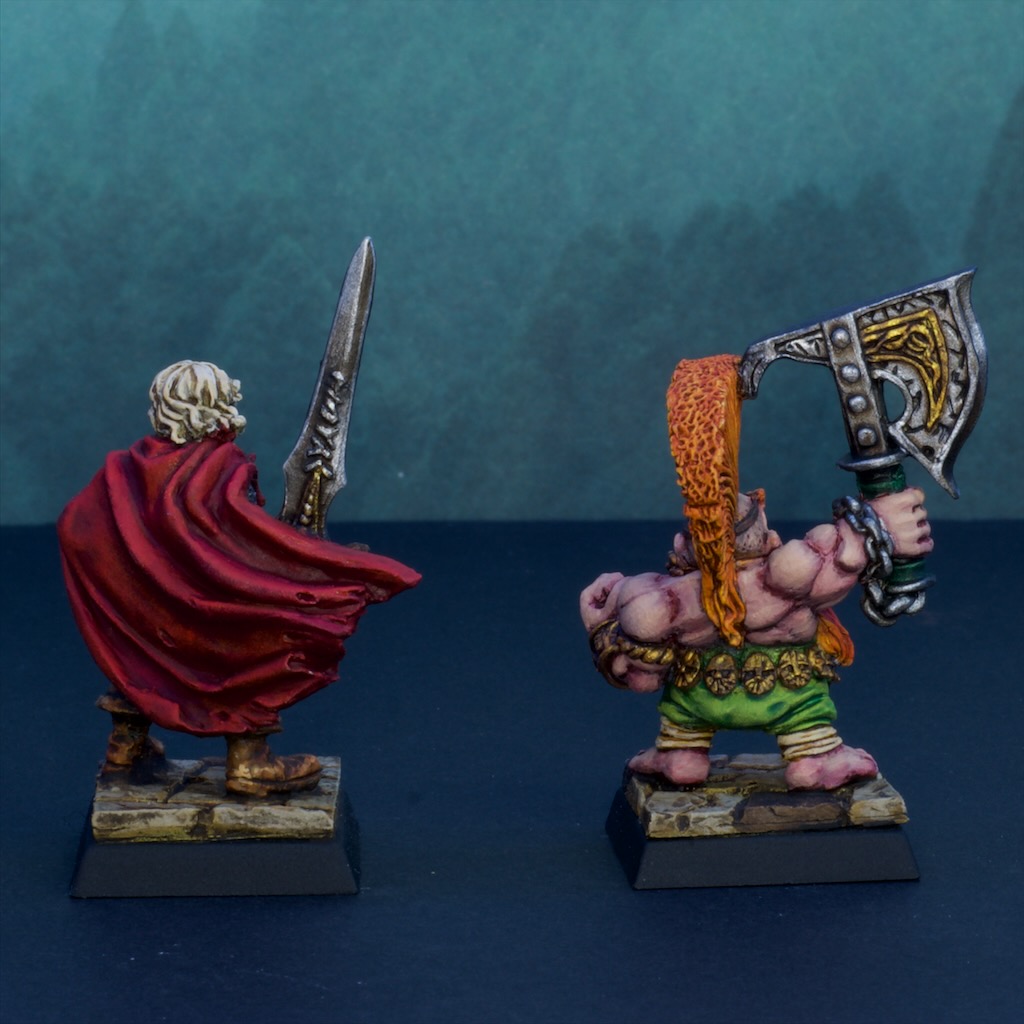
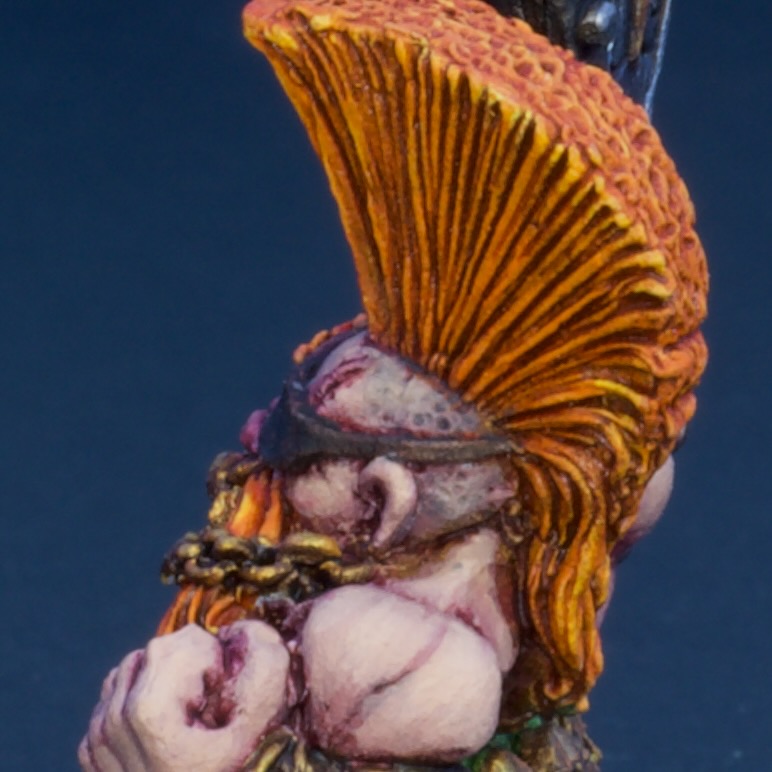
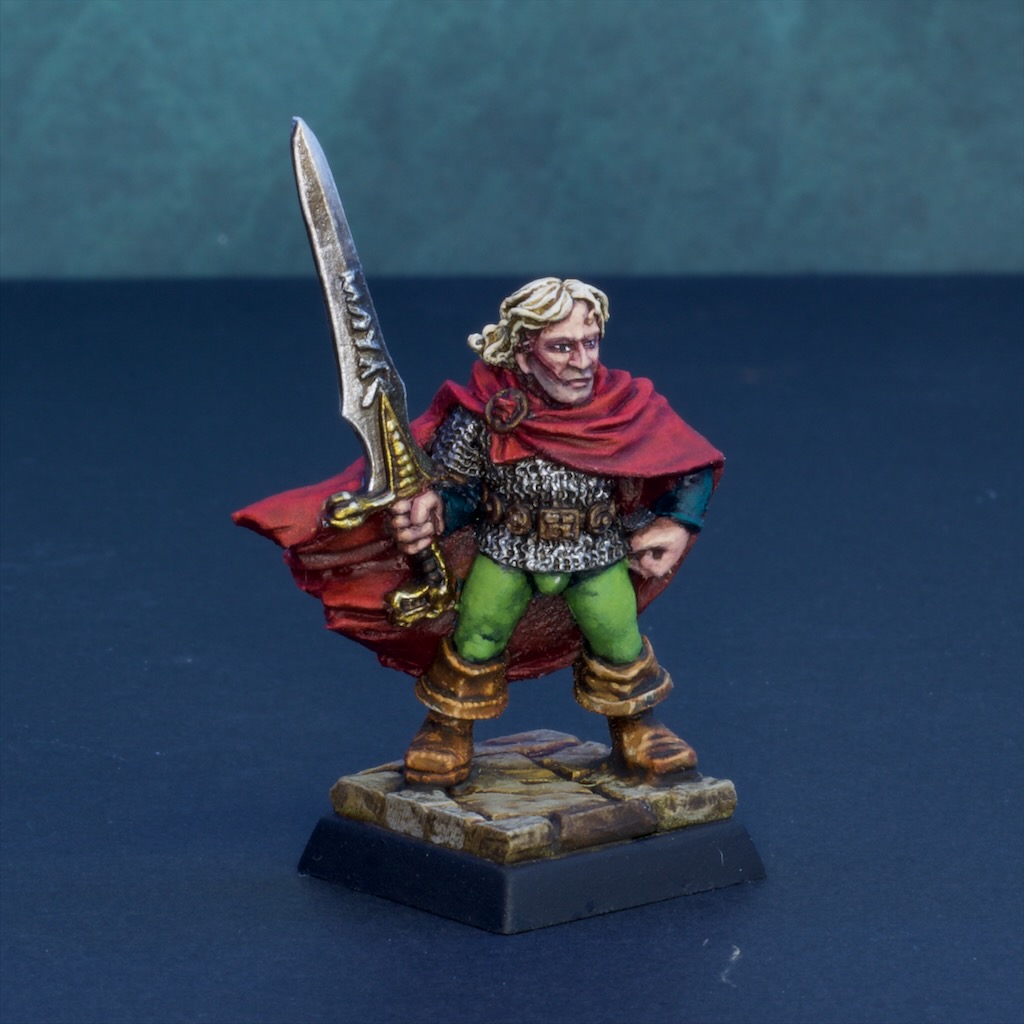
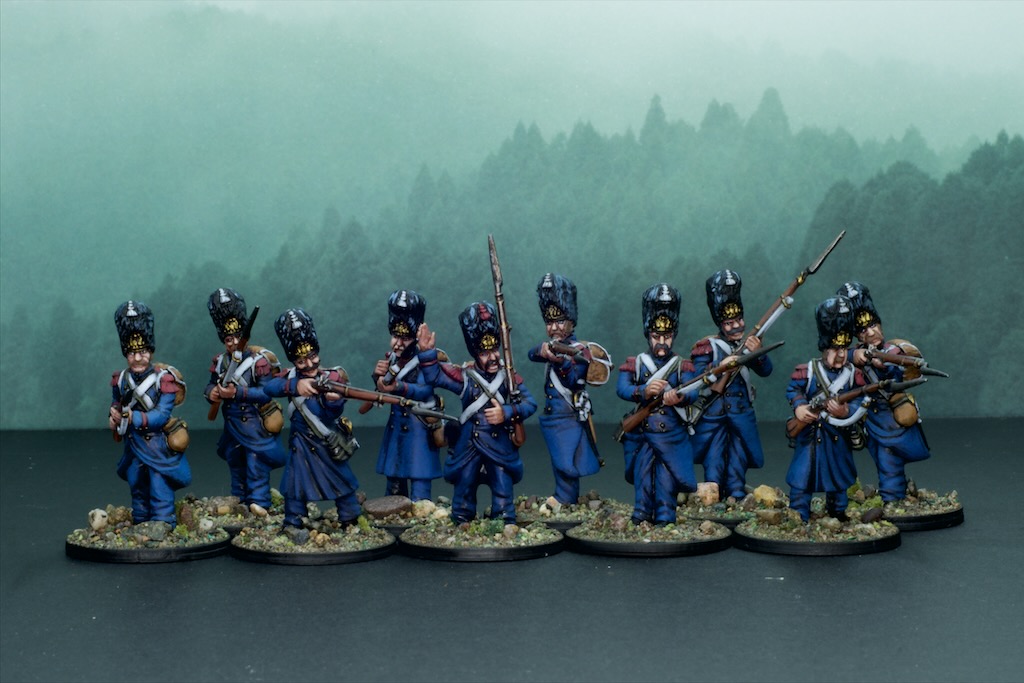
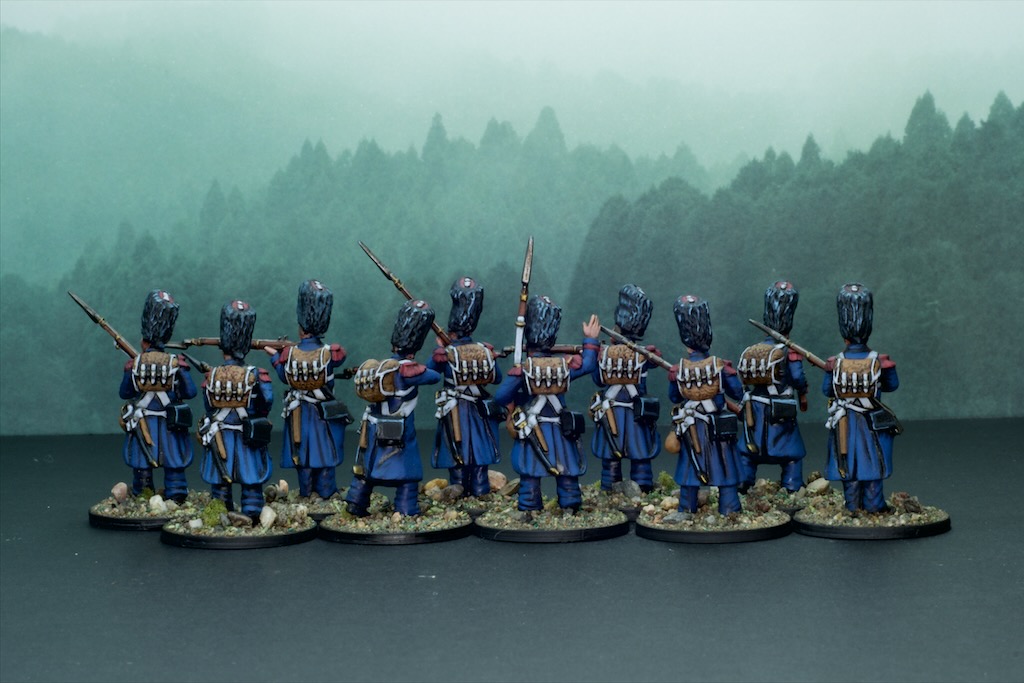
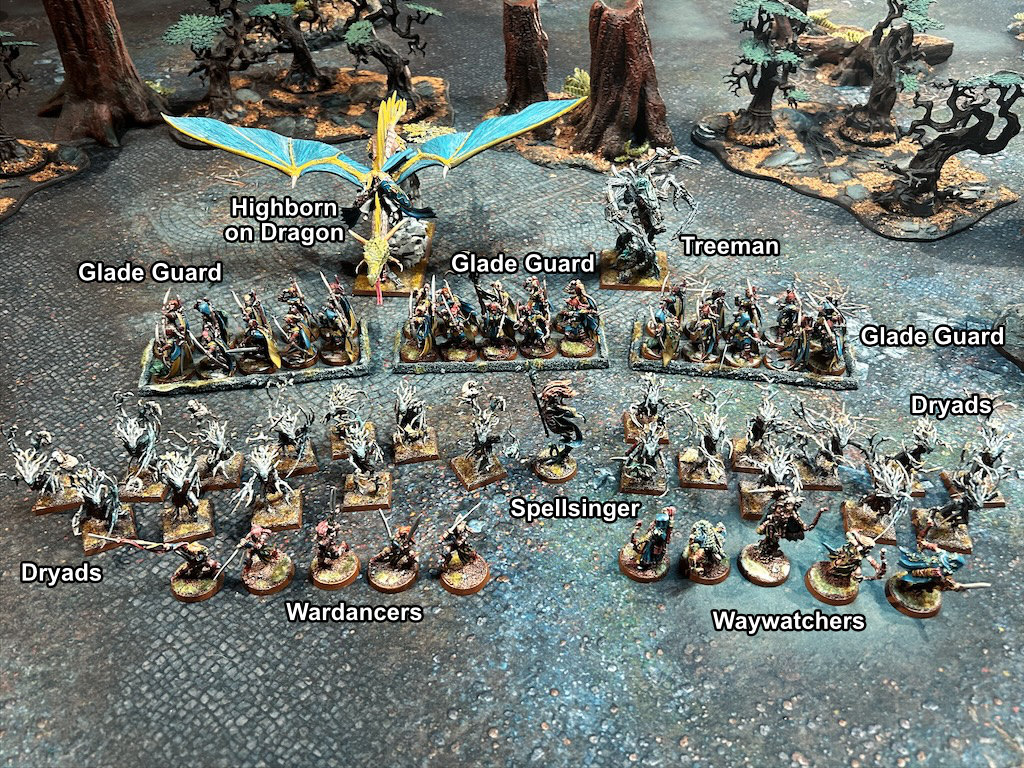
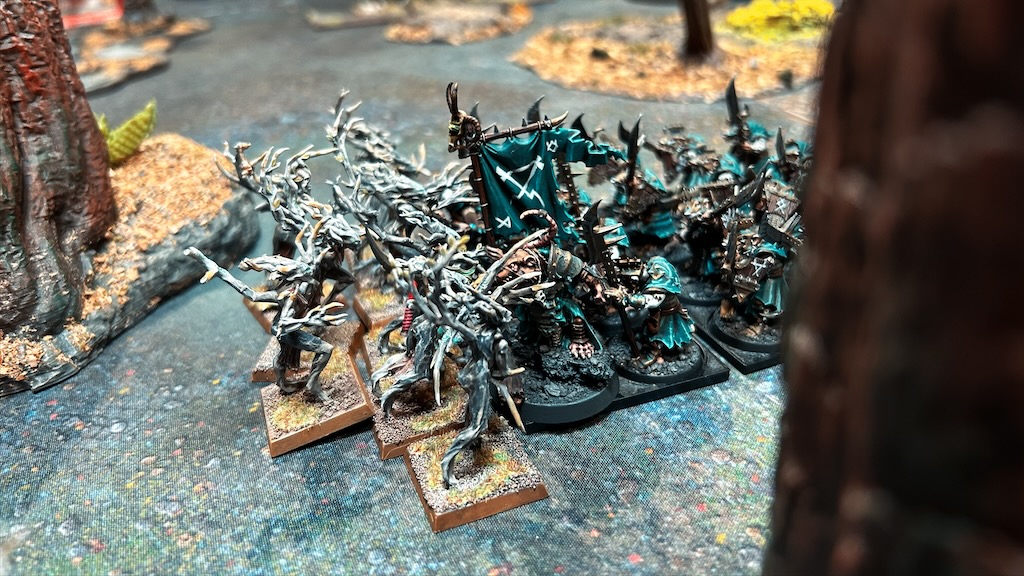
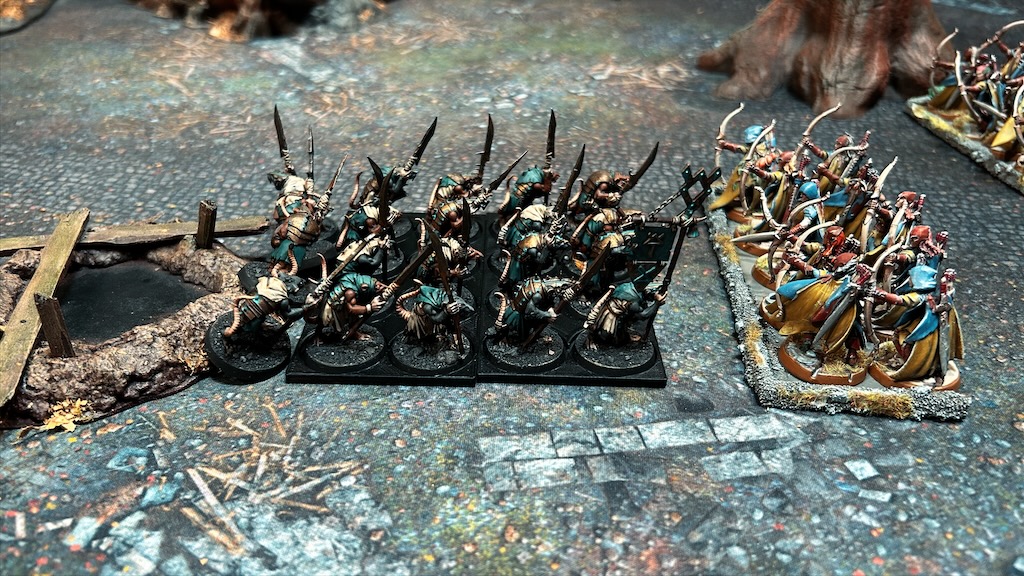
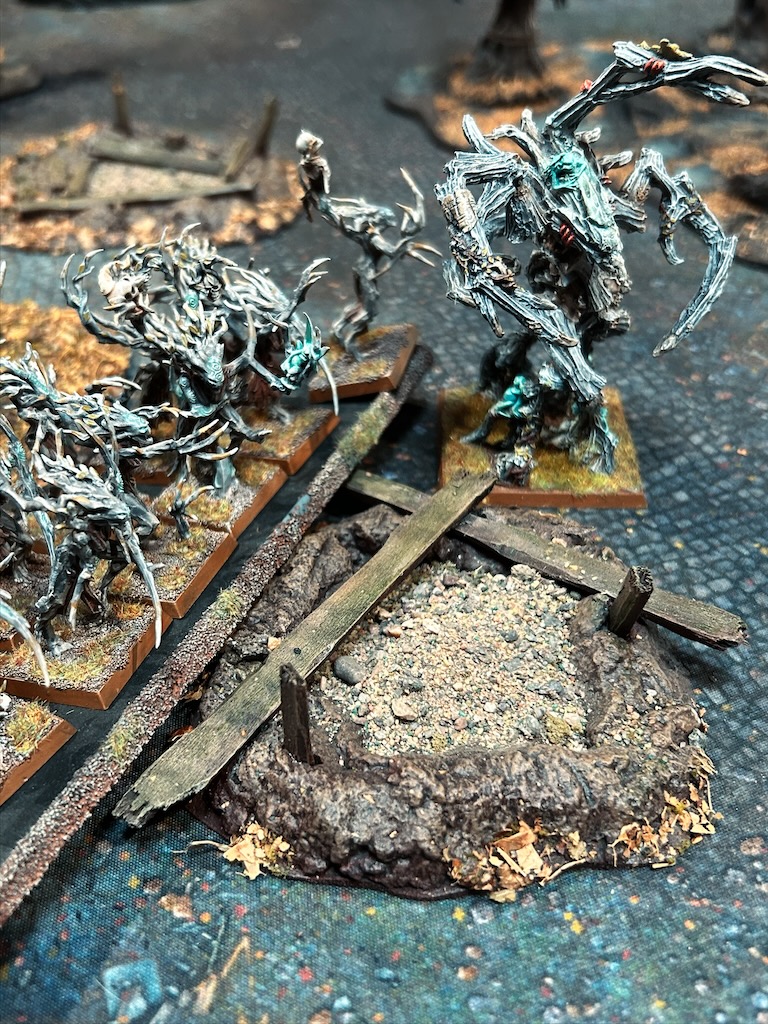
And the Wood Elves:

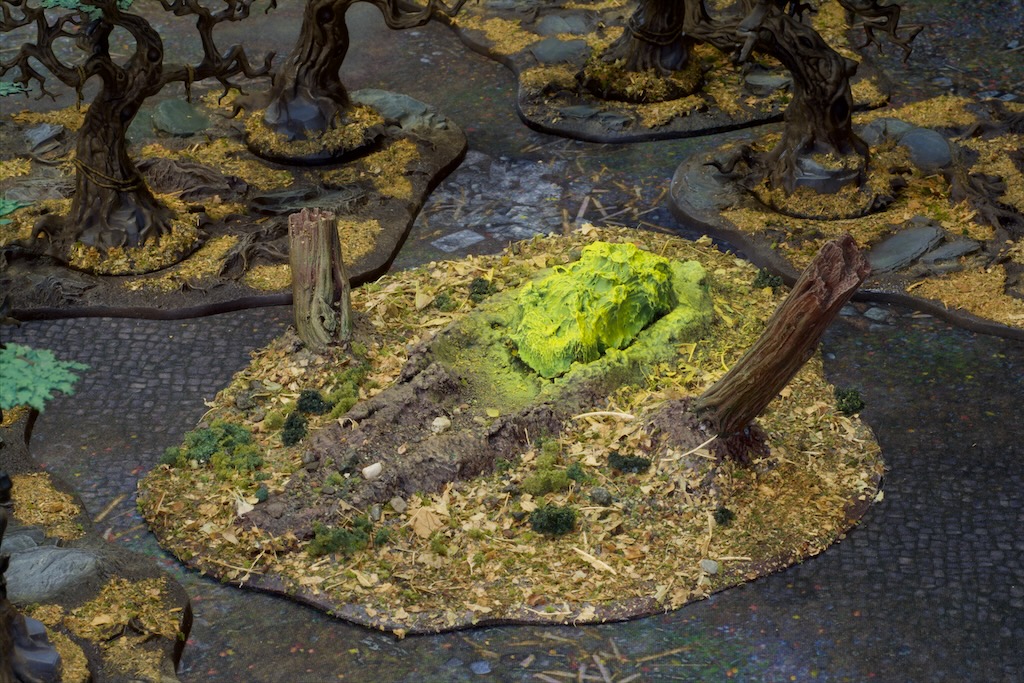
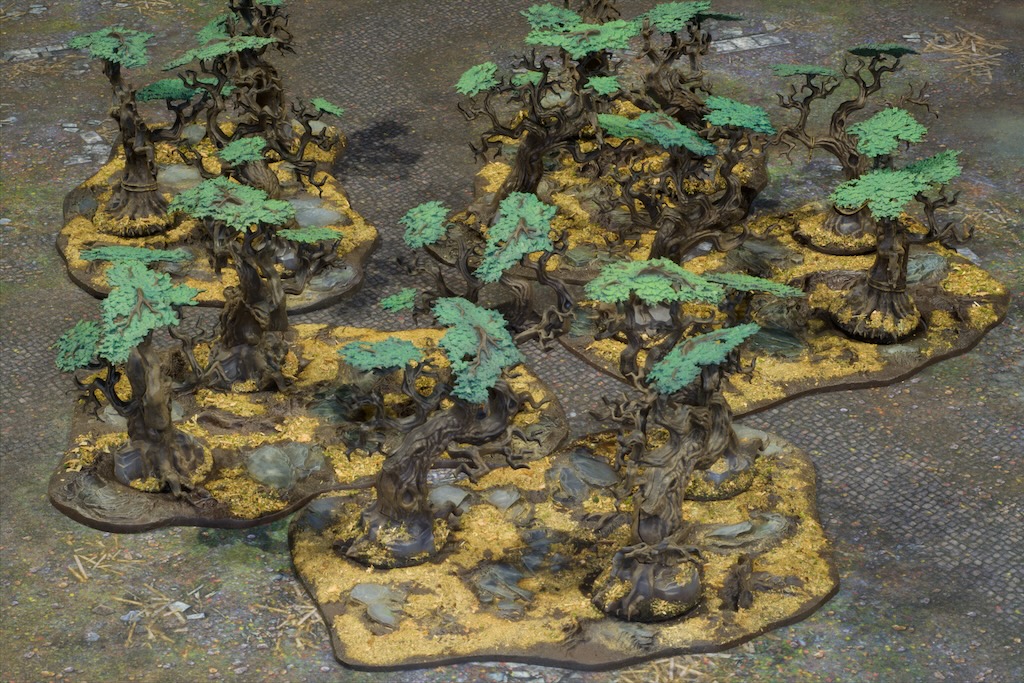
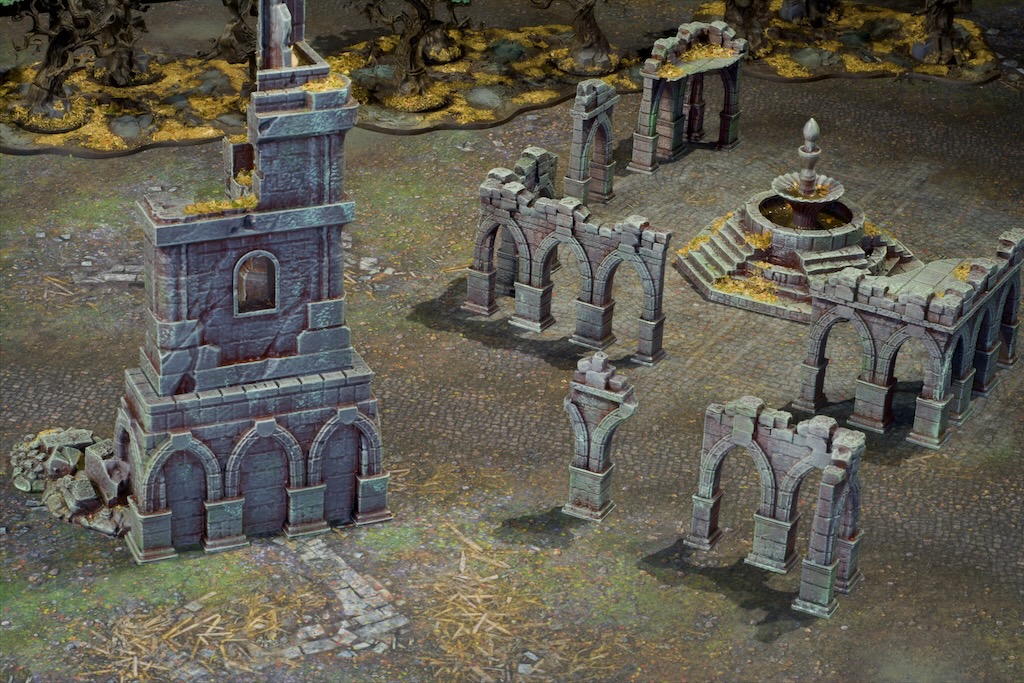
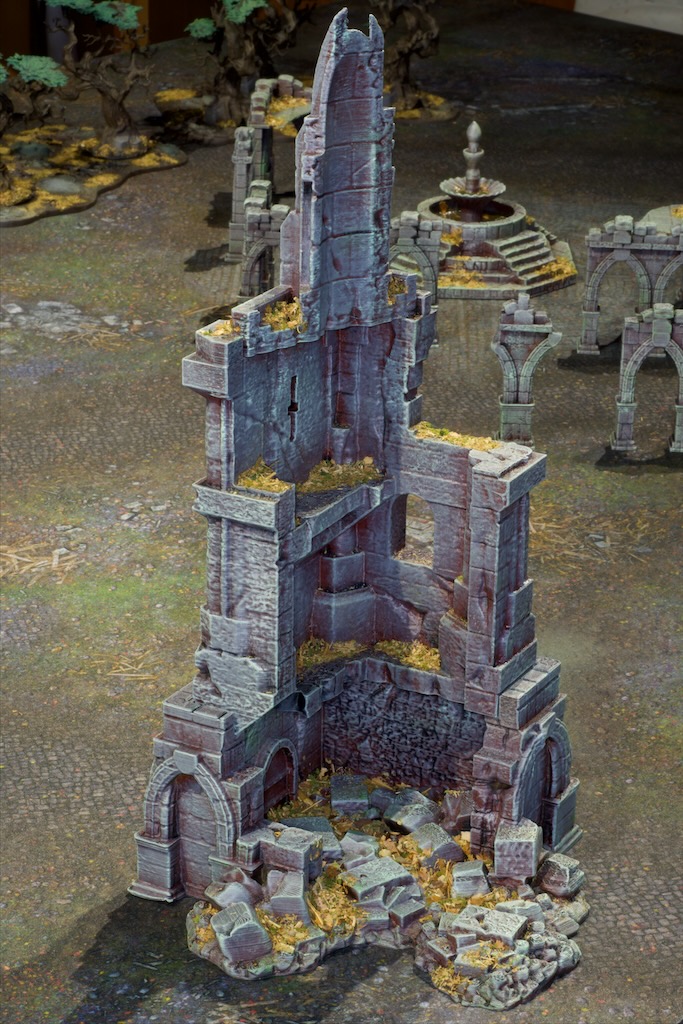
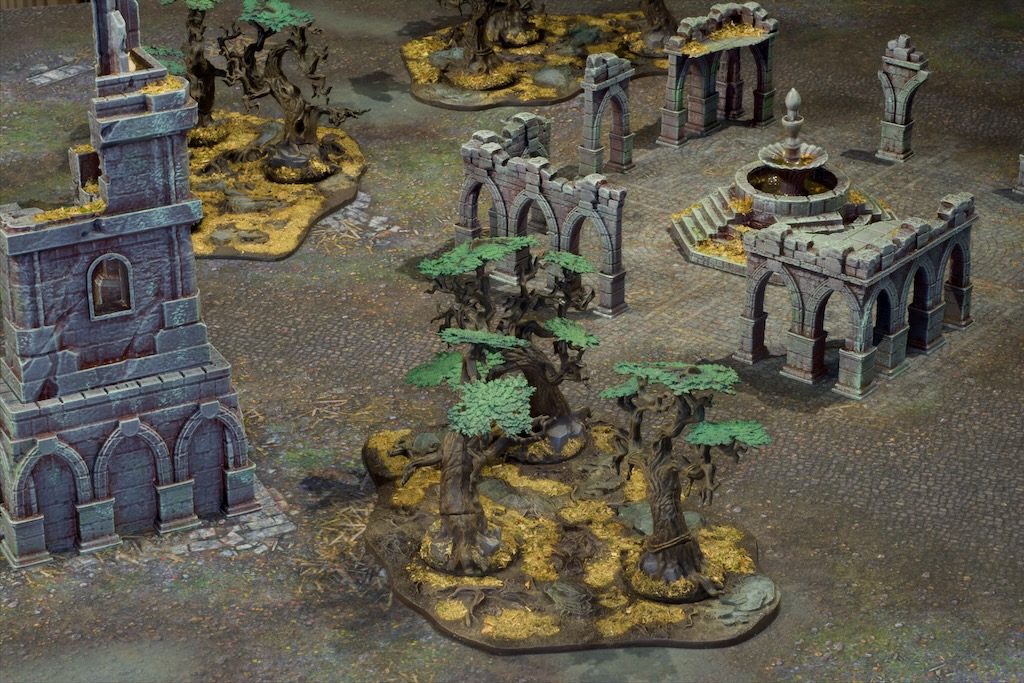
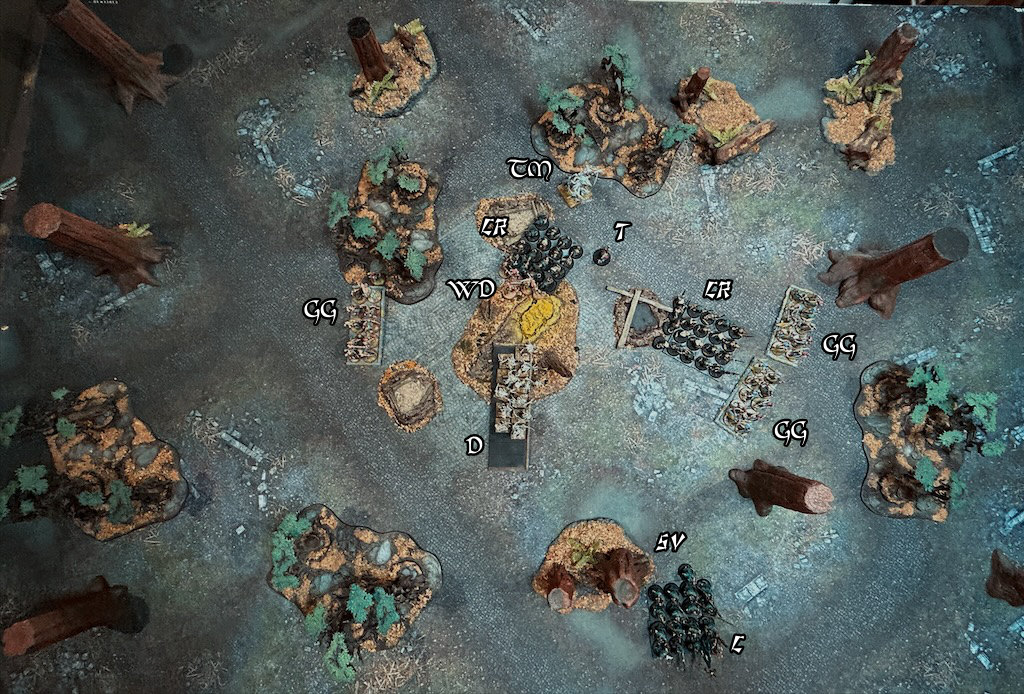
The board was set up according to the instructions in the scenario:

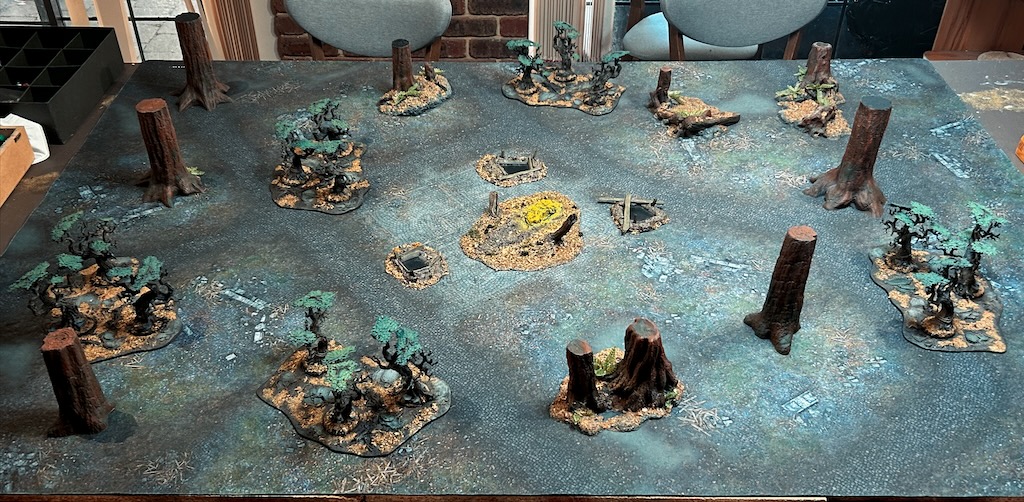
If you’re familiar with Warhammer Fantasy you’ll note that is quite a dense table, but as the Wood Elves would do most of the moving around that shouldn’t cause too many issues.
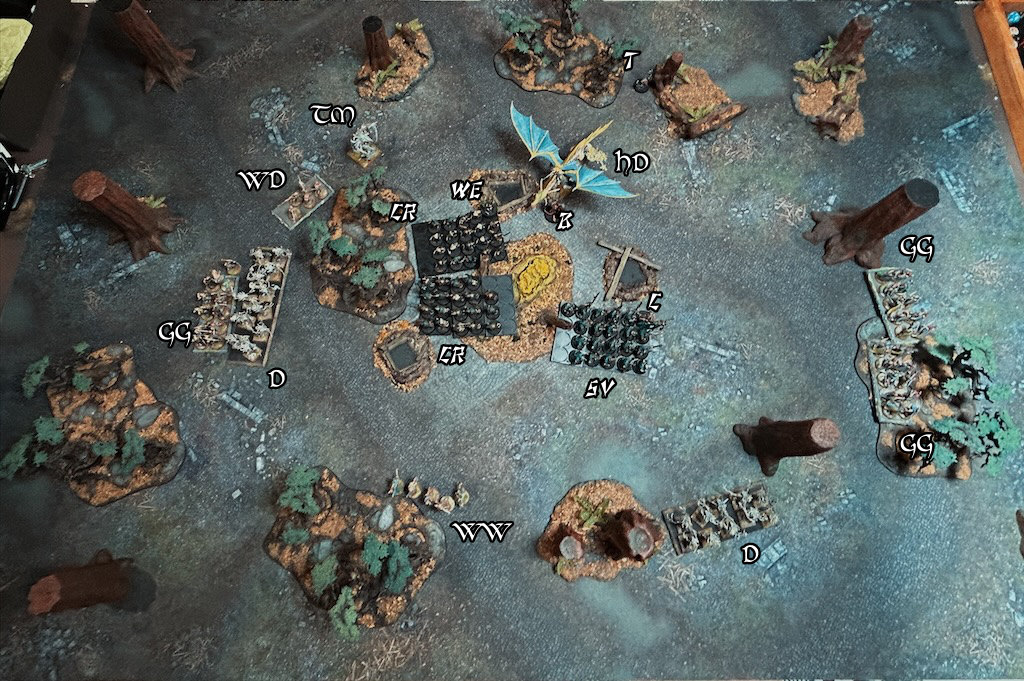
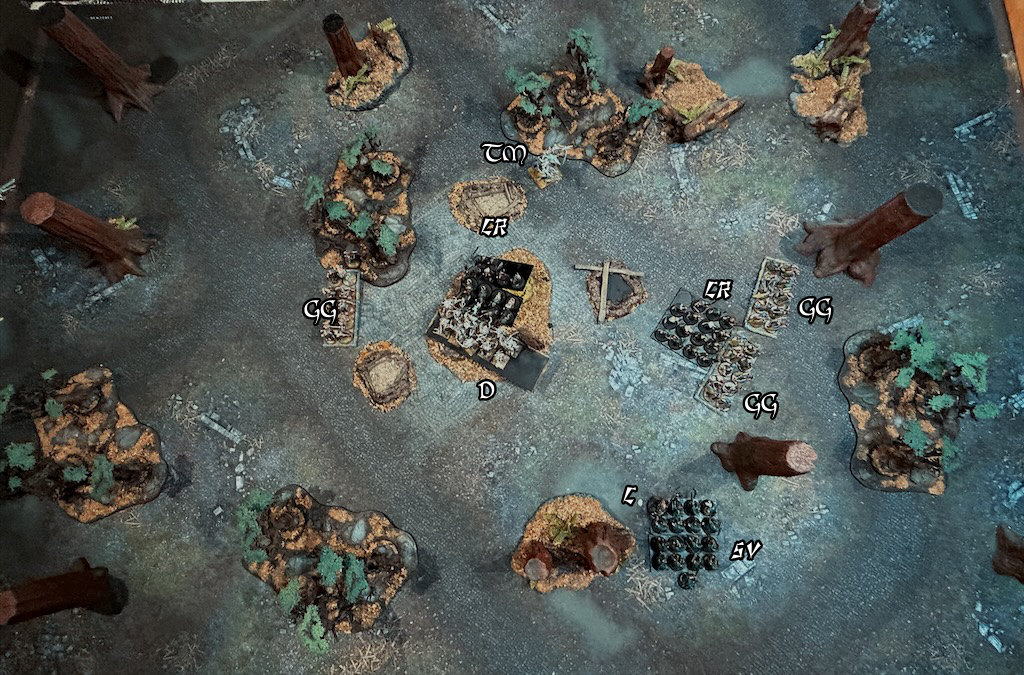
Deployment

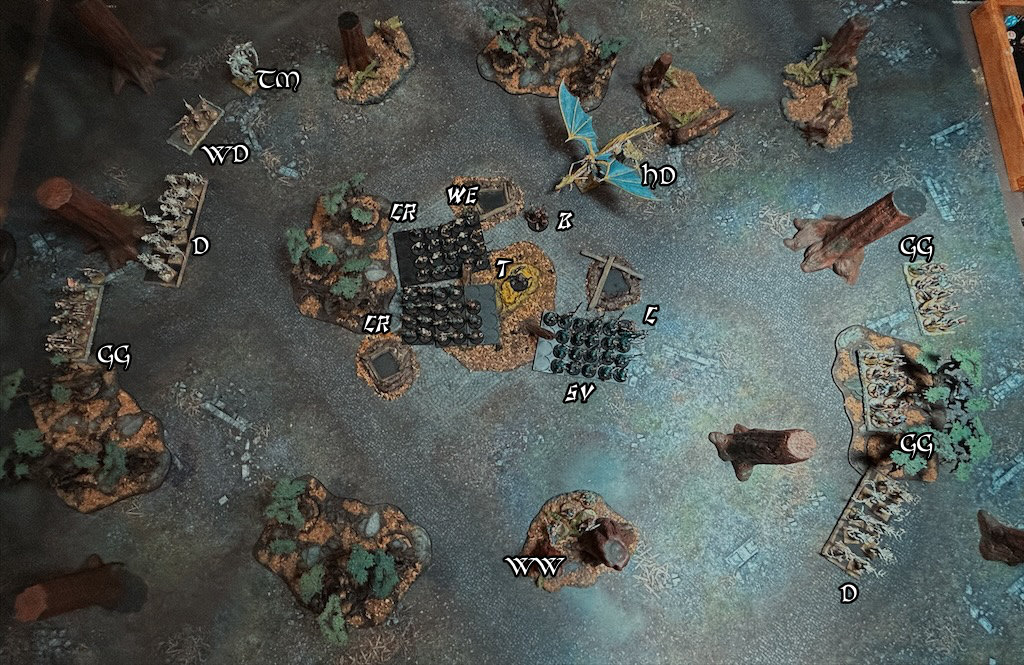
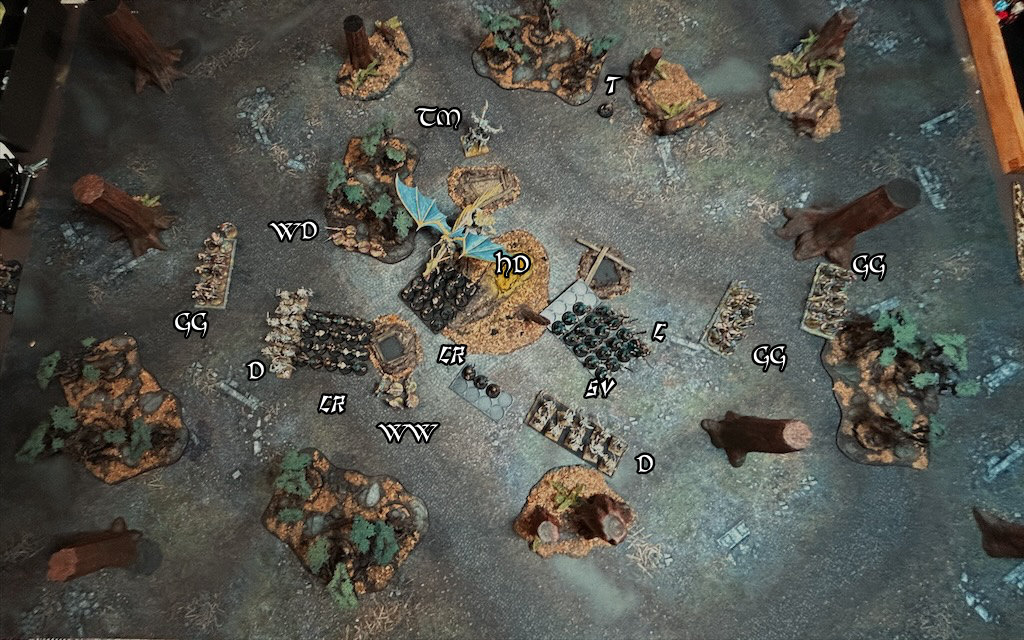
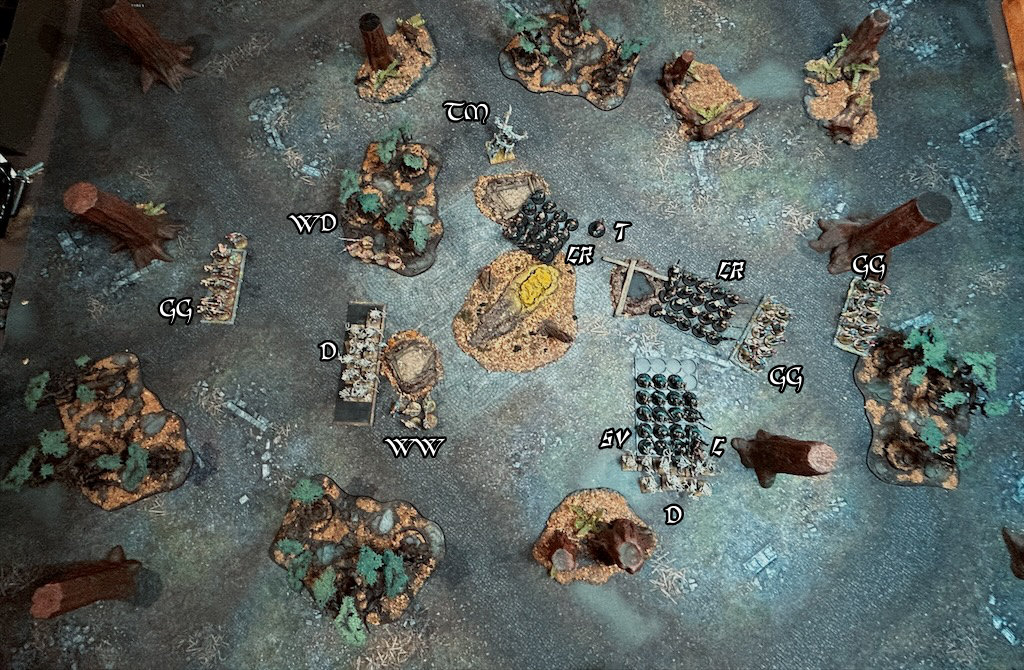
Here was the state of things after the deployment of both armies:

I’ve initialised the units as it’s a bit hard to see what everything is in those top down photos!

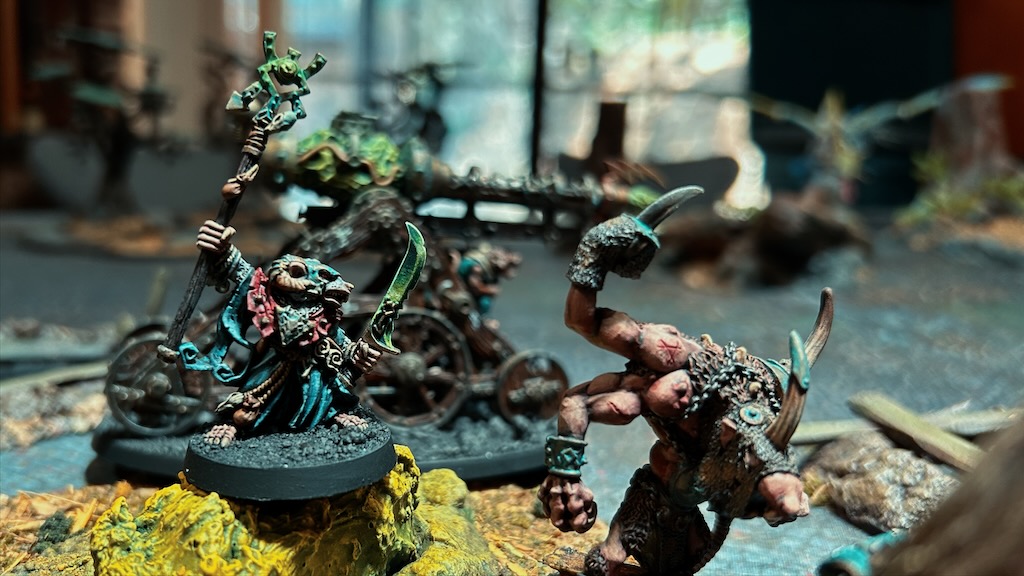
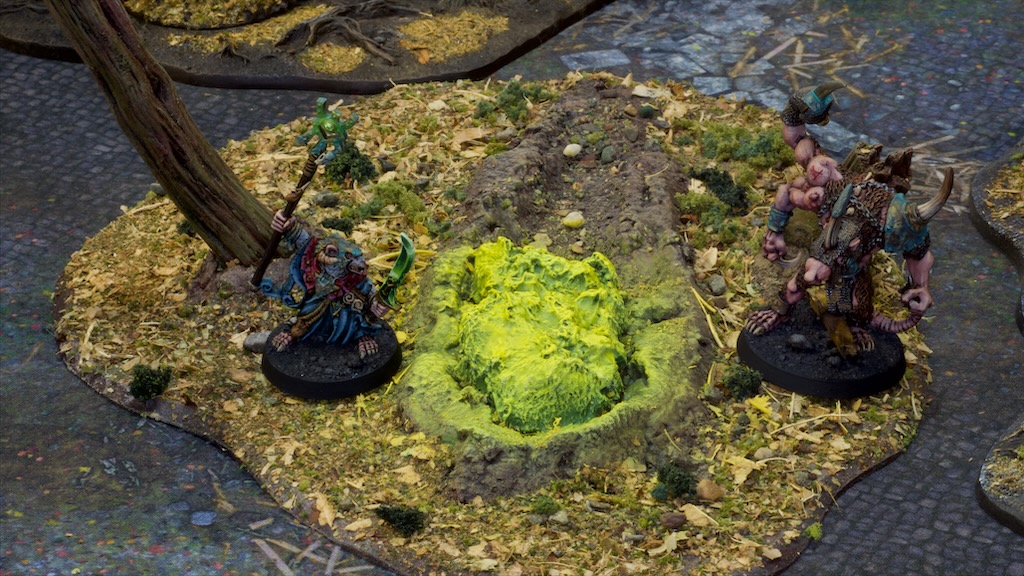
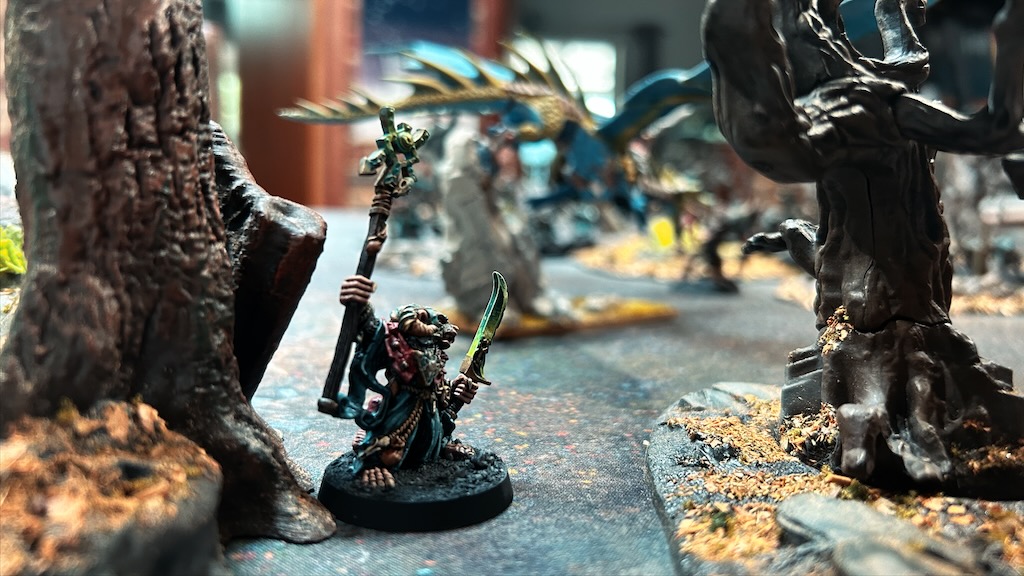
Thanquol started the game perched atop the warpstone, ready to use its power to blast away any elves straying too close.

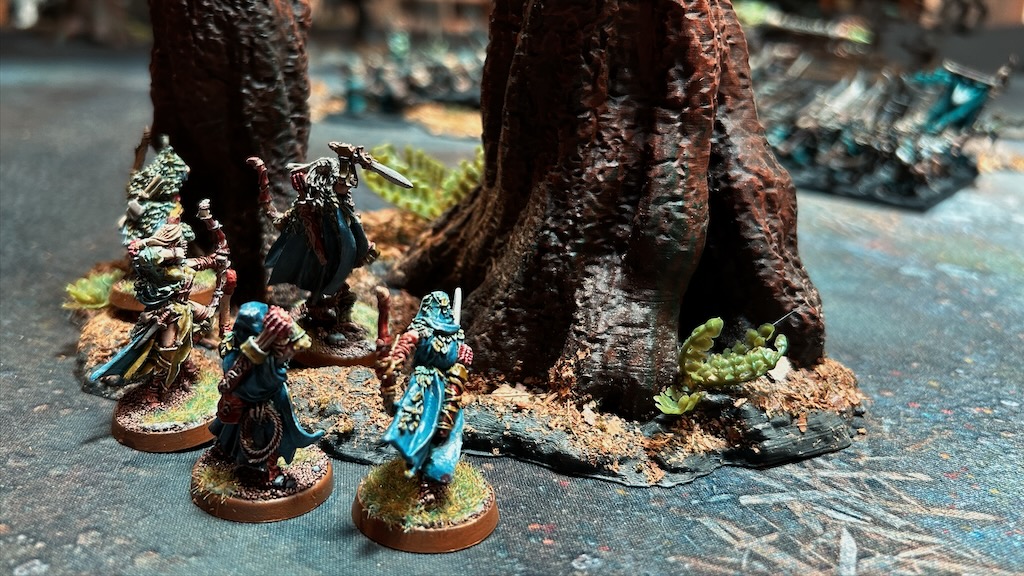
While the rest of the Wood Elves were confined to the board edges, the Waywatchers scouted ahead and found a good position to start raining arrows down on unsuspecting Skaven from.

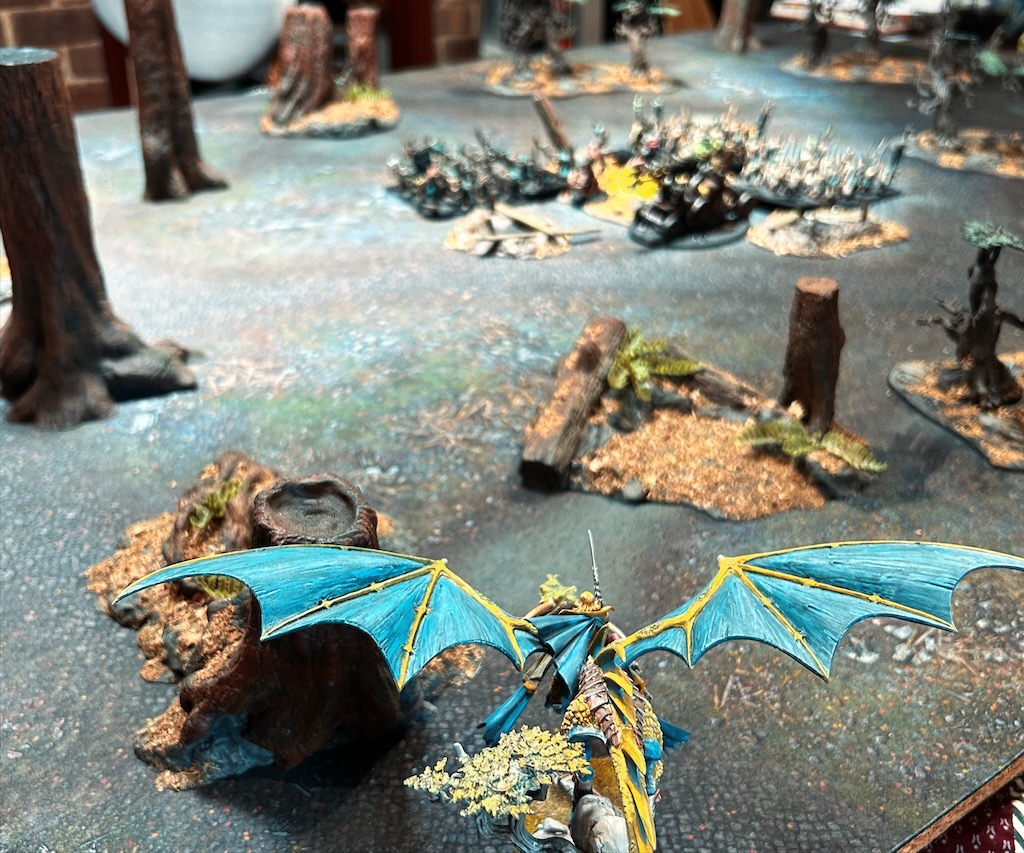
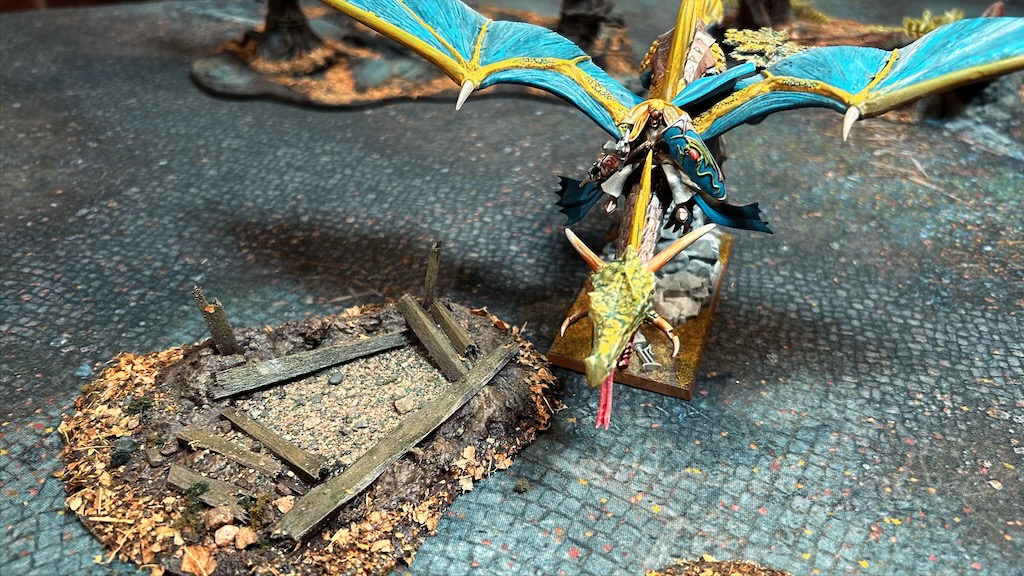
The Highborn knew that taking out the Warp-Lightning Cannon was critical and positioned himself and his dragon as close to it as possible.
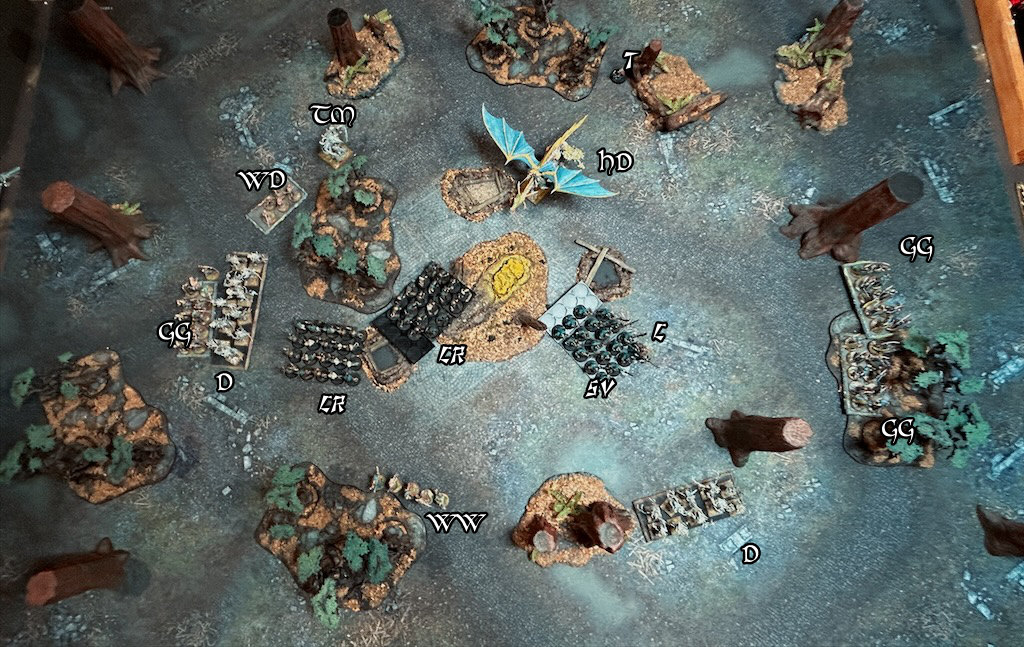
Wood Elf Turn 1

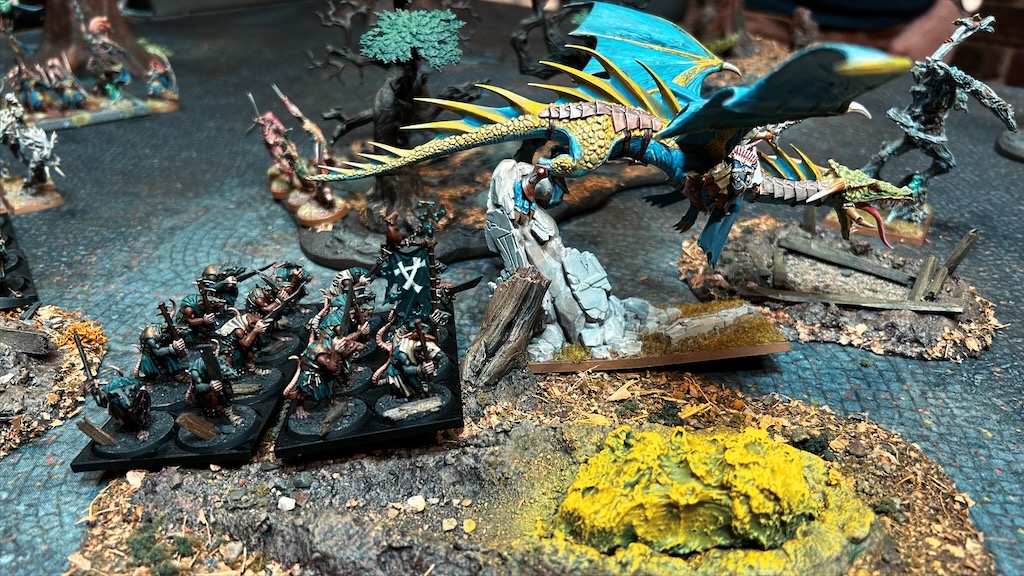
The wood elves spent their first turn approaching the Skaven, with most notably the dragon swooping down next to the Warp-Lightning Cannon ready to unleash it’s poison breath on the unsuspecting ratmen. You’ll also notice some of the woods moving around, the result of the Wood Elves making good use of their tree singing magic.

Those missile troops that hadn’t marched fired arrows, with the Waywatchers making short work of the Warpfire Thrower. The dragon breathed poison gas at the war machine to no effect, but some Skaven from the neighbouring regiment collapsed.

Skaven Turn 1

The start of this turn was rather horrid for the Skaven, with the presence of the dragon terrifying the crew of the Warp-Lightning Cannon to such an extent that they cut and ran straight down one of the burrow holes! I had great hopes for the cannon and it never even got to fire!

The clan rat regiment closest to the dragon turned to face it, and the Warlock Engineer and Thanquol blasted all they had at the dragon in the hopes of preventing it from rampaging through the tightly clustered Skaven army. The barrage of magic grievously wounded the highborn leaving him on a single wound, but the dragon was miraculously untouched, its tough hide impervious to the warp lightning. Deciding that discretion was the better part of valour, Thanquol used the Skitterleap spell to teleport behind the dragon, where it could not charge him in the next turn!

Thanquol also commanded Boneripper to move to intercept the dragon in the hopes that it could at least provide a bit of a road bump!

Wood Elf Turn 2

The dragon charged Boneripper and the closest tunnel entrance in the hopes of collapsing it and crushing the rat ogre, while the rest of the army closed in further. The Glade Guard on the right of the table discovered the hard way that the Storm Vermin were equipped with a banner that magically shielded them from shooting and the rain of arrows fired at them failed to achieve anything.

During the ensuing close combat, Boneripper was torn apart by the dragon, and the tunnel collapsed.

Skaven Turn 2

Once again the terror caused by the proximity of the dragon took its toll, with the clan rat regiment closest to it also turning tail and fleeing down one of the passages. Unfortunately for me that regiment was sheltering the Warlock Engineer and unbeknownst to my opponent was also hiding the Assassin! In one fell swoop I’d just lost a regiment and two heroes, ouch!

It did mean I got to use one of the scenario special rules and bring back on a fresh regiment of clan rats from the leftmost tunnel to block the dryads that were threatening it. Thanquol was more successful this time, finally killing the Highborn with magic, but still failing to wound the dragon.

Wood Elf Turn 3

The new riderless dragon charged the clan rats facing it, while the dryads charged the newly emerged clan rats below. The Waywathers rushed forwards to collapse the leftmost tunnel. On the right side of the battlefield the Wood Elves were much more weary, staying well clear of the Stormvermin. At the top, the Treeman turned to face Thanquol, ready to deal with him.

In what turned out to be a very eventful combat phase, the dryads defeated the clan rats and sent them running down the tunnel just in time for the Waywatchers to collapse that tunnel on top of them.

In the other combat however, clearly disturbed by the loss of its rider the dragon failed to do much damage to the clan rats and was forced to flee from the horde that faced it. As it turned to run, the rats saw their opportunity and dragged it down by sheer weight of numbers! Finally the dragon that had done so much damage was gone!

Skaven Turn 3

The Stormvermin finally managed to find a target, and rushed to meet the dryads that were trying to get around them.

Meanwhile another fresh unit of clan rats emerged from the last tunnel remaining open to close the way to the glade guard that were threatening it.

Thanquol moved back close to the meteor to be able to draw on its power, and using it managed to destroy the Waywatcher unit. In the combat phase, the Stormvermin broke and ran down the Dryads, ensuring they could no longer try to collapse tunnels but unfortunately that pursuit moved them very far from the tunnel, making it very unlikely they could get back in time to protect it from the other approaching Wood Elf units!

Wood Elf Turn 4

The Wardancers charged the clan rats closest to them, while the remaining dryads advanced towards the last tunnel entrance. The Glade Guard were checked by the clan rats that had just appeared in front of them and resolved to just stand and shoot them. The tree man came towards Thanquol, ready to unleash its roots on the unsuspecting Skaven.

Unfortunately for Thanquol, the Treeman’s strangle-root attack was successful and inflicted enough wounds on Thanquol to kill him outright! Gone was the chance of a Major Victory for the Skaven!

As consolation however the clan rats in combat with the Wardancers beat them and run them down after forcing them to flee! That clan rat unit had now slain a mighty dragon and a troupe of elite fighters!

Skaven Turn 4

At this stage of the game I realised that I had no way of stopping the Treeman from reaching the last tunnel entrance on its next turn. My units were either too far away or facing the wrong way! I therefore decided to risk a few charges and take the noble way out, which with hindsight was clearly not very Skaven of me!

The unit of clan rats facing the Glade Guard made short work of them, but the other clan rats after the attrition of fighting the dragon and the Wardancers succumbed to the Dryads. With that, the game was well and truly over!

Wood Elves Turn 5

In their turn 5, the Treeman and the Dryads advanced on the last tunnel and collapsed it, achieving a major victory for the Wood Elves with a turn to spare!

Conclusion

This game was a ton of fun to play. It was the culmination many months of planning and work from the two of us to prepare the scenario, the terrain, and of course painting the armies! Getting to finally play it after all of that was extremely rewarding. While the Wood Elves ended up with a convincing victory over the Skaven, it was pretty close for most of the game, with the requirement to close all three tunnels and kill Thanquol looking far out of reach for a fair few turns. The scenario then seemed to work quite well which was uncertain going in as we’d done no play testing.

We enjoyed ourselves so much that we’ve already started planning the next one! If you made it this far I hope you enjoyed reading this, and by all means send me suggestions on how I could improve this format. I’d like to make more of these in the future and do them as well as I can.

Mines and Meteors

It’s been a little while since I’ve posted anything, almost a month! A few local events in the card gaming sphere have gotten my interest lately and regular painting sessions have been replaced with card gaming and deck building! This is all mostly over now and the paintbrushes have been dipped in paint once more.

A few months ago I planned a narrative game with a friend pitting my Skaven against his Wood Elves. The game would be centered around a chunk of warpstone falling into Athel Loren (the forest the wood elves mostly live in for you non-warhammer fans!), and the Skaven tunnelling up into the forest to seize it!

The scenario requires me to make some terrain to represent the meteor and the tunnel holes dug by the Skaven, and the date for the game being set to mid next week it was about time I got to it!

This was a relatively quick project, and like most terrain a lot of fun to put together! The meteor was made from polystyrene that I roughly shaped with a knife and then sprayed with a spray can right up close. Aerosols melt polystyrene when blasted up close which is really undesirable usually, but I thought it might give some interesting texture here, and I think it worked out nicely!

The tree stumps are just interesting looking sticks from the garden, and the whole thing was brought together with some sculptamold for modelling of the crater and give some form to the ground areas.

The tunnel holes were also done using sculptamold, with some planks made from balsa wood added to show that lovely Skaven craftsmanship!

I’m now all ready for the game next week, and will try to remember to take photos to post up!

Gotrek and Felix

The latest Gotrek and Felix novel to be released as an audiobook, Giantslayer, came out late last month and I was pretty excited to listen to it as I’ve been thoroughly enjoying them so far. The stories are fun and the voice actor does an incredible job. This felt like a good time to paint up the titular characters!

These models are almost 30 years old now (released in 1993!), and sculpted by Michael Perry (one half of Perry Miniatures, and sculptor of many great GW models). They have the classic flat pose of the era, but are really nicely detailed and were tremendous fun to paint.

While not trying to do anything like paint to a display standard, I wanted to spend a bit of time on these and do some detailing I might not in my usual army standard. This included some attempt at forcing light and shadows on the metallic paints (TMM for the initiated!), and toning the faces with some reddish hues and stubble.

Here’s a close up of Felix’s face to show the extra work I put in the face

Stubble on Gotrek’s shaved sections of head

For the basing on these I used some old GW resin basing bits, designed to fit on the old standard 20mm square bases from the Warhammer pre Age of Sigmar era.

I thoroughly enjoyed painting these models, and am really pleased with how they turned out considering they were painted on and off over the course of a week. I still haven’t finished the audiobook, but so far so good and I look forward to them releasing the rest of the series! In the mean time I hope to have these hit the tabletop at some stage in the future. I went on a collecting spree a few months ago for 6th edition Warhammer books and found one of the old annual collection of articles that contained the rules for Gotrek and Felix to be taken as Dogs of War (effectively Mercenaries/Allies). I now have the models painted up and the rules to field them!

Queen of the Desert

Back with a Western Desert post this week, with some more progress on the Allied side after dabbling in some Axis infantry last time around. This time with some armoured support for the commonwealth infantry I’ve painted so far, the famed Queen of the Desert: the Matilda Infantry Tank or rather three of them!

These are the Warlord Games plastic Matilda kits, more specifically their “Tank Troop” set for the Matilda which has three included for some tank heavy games. Usually a good way to get a bit of savings over buying three of the individual kit which is no bad thing. I painted these in the colours of the 42nd Royal Tank Regiment, probably the most famous desert Matildas, with model kits usually coming with the decals for “Phantom”. This kit came with enough decals for three named Matildas, Phantom included. I’m not sure if the other two are made up or historical names, I couldn’t find much (any!) info on them.

The 42nd RTR colours speak to me for a multitude of reasons, not least of which being that it’s just a nice scheme! There is some nostalgia there for me too, as the three bands (white/red/white) present on the 42nd’s tanks seem to be the inspiration (I’m guessing here, could be very wrong!) for a lot of the similarly banded markings that were made for Imperial Guard tanks in early editions of Warhammer 40,000 which I gazed at for many hours in the pages of White Dwarf magazine.

Some of you may be familiar with the rather eccentric camouflage scheme visible on tanks early (circa 1941) in the desert war, the infamous Caunter scheme! I say infamous because it clearly has started a vigorous debate on the colours used in its application, the most famous of which is the sky blue middle section visible in so many books/museums/model kit box arts. Reading up on the scheme was a rollercoaster ride to say the least! It seems that the ever-present blue paint is in fact not accurate and rather the result of a museum painting their Matilda incorrectly followed by a great number of copies of said mistake! More recent research seems to point towards the Caunter scheme making use of much more subtle colours indeed, and model paint companies have created sets that match the latest information. I elected to buy Vallejo’s attempt at this more “correct” Caunter colours, but I believe AK Interactive also make a set that’s supposed to be accurate.

With the problem of the colours to use solved (or solved enough for my standards! I’m sure there are some strong opinions on which of AK or Vallejo (or neither!) are accurate), now came the issue of application. As you can see from the photo above, the scheme makes use of some rather strange geometric shapes, with long straight lines right across some rather intense details. My first thought was to try to mask these and apply the colours with the airbrush.

I got as far as masking all of the dark green sections on the bodies of all three tanks before throwing in the towel, there were so many gaps under the tape, there would have been overspray all over the place! I’m sure masking is a solid option at larger scales, but for 1/56 (28mm) I’m not sure the effort is worth it. Clearly then, I was going to have to hand paint the scheme…

I did this by carefully sketching out the shapes using dilute paint, before filling them in and repeating the process 3-4times to ensure good coverage. The Vallejo Caunter set is made up of airbrush paints so quite dilute already, which made the process longer but did mean even with 3-4 coats I had a nice smooth finish at the end. Understanding where the patterns go was a battle in itself, and I used a mix of references: photos from the era, the Warlord Games painted Matildas on the box cover, and other modeller’s attempts at Caunter on Matildas.

You can see the dark green done on all three tanks in the photo above.

I followed the same process for the silver grey sections.

This was followed by a pass of chipping, first by sponging on the base coat colour of Portland Stone back over the dark green and silver grey sections, followed by painted on chips with Vallejo German Grey. This gave me two levels of chipping for a bit more realism.

I then basecoated in the rest of the kit around the tank, tracks etc.

This was followed by an all over gloss varnish, then decal application, then chipping of said decals to blend them in. The models were then re-glossed all over and hit with some simple oil washes for some shading and some dusty streaks and rust spots for added interest. I then added dry pigments to the tracks and bottom and sides of the tanks, followed by a pass of matt varnish and they were ready for photos! This is all pretty standard historical modelling, but I don’t think I’ve shown process shots for it on the blog before, so hopefully it’s interesting to look at!

I really enjoyed painting these models, and glad I’ve gotten them painted after putting them off for a long time as I was dreading painting the Caunter scheme. Sometimes you just have to jump in and go for it! As is currently planned I only have two more vehicles to paint in the scheme: two universal carriers, but who knows, models are constantly adding themselves to this project! Regardless, I now know how I paint Caunter, which means no more worrying about how I might go about it.

The Afrika Korps Disembarks!

Having painted enough infantry for my first platoon of 8th Army, it was time to paint some of their antagonists: the Afrika Korps! Just like for the 8th Army models I’ve painted so far, these are Warlord Games models and being some of their relatively new plastics are quite nice to build and paint.

It took me a couple of attempts to get the colour I wanted for their fatigues, having at first started with a much yellower green that ended up not looking very good. I’m not sure how accurate this green has ended up being, and I should probably have highlighted them further to simulate the sun-faded look that would have been prevalent, but these look nice to me and were a nice balance of looks to effort! Additionally they stand well apart from the 8th Army models in their almost cream uniforms this way.

Plenty of fun details to paint on these models, with the face coverings offering the opportunity to add a bit of colour to this sea of olives and khakis! The goggles were a fun detail too, I wasn’t to sure how to paint them, but the references I found seemed to be tinted so I painted them in the silver and filled the lenses with GW Contrast Wildwood which turned out ok I think.

The kit comes with heads sporting the pith helmet the AK wore early in the campaign, and considering the time I’m roughly painting these for (1941) they maybe should be wearing them, but I do like the look of the steel helmet and apparently they were available also early on so this lets me build these in a more generic manner (i.e. if I want to play scenarios in 42-43 as well).

As always when painting the first unit for a new army I made myself a painting guide, very useful for me as I like to jump between projects all the time and need a refresher when I get back to something. Let me know if you find it useful yourself!

Anyway that was a fun project and will keep progressing this over the long term, to hopefully get two sizeable forces that can do battle with each other!

Something Big This Way Comes

Last post I mentioned I was working on a bigger model than usual and was expecting wanting to take breaks from it and paint smaller things as I went. In the end I surprised myself and kept at it with relatively few distractions along the way!

So here we have it, probably one of the largest models I’ve painted, a Knight titan! He’s nominally from the Warhammer 40,000 universe, but I’ve done him up to support a new project: Iron Warriors for the Age of Darkness/Horus Heresy game (Warhammer 30,000?). I’ll go more in depth about Iron Warriors next time I post something about them, but they are useful context for this model so here’s the short version.

I hadn’t been very interested in the 1st edition of the Horus Heresy rules as they came out when I had a bit of a hobby slump (and moved overseas for a bit, which required more portable hobbies!), but the latest starter set for the 2nd edition that came out a few months ago has me really interested.

Iron Warriors Chaos Space Marines were my main army during the 4th to 6th edition Warhammer 40,000 period, and I have a relatively large amount of them done up (Which I think I’ll document for the blog when I start painting actual Iron Warriors for this project!). When I decided to paint up some marines for Age of Darkness, I was split between a few legions, but Iron Warriors won out. One thing I wanted to do however was make them distinct from their Warhammer 40,000 counterparts I’d painted up in the past and make them relatively clean looking (my old army is quite rusty!).

Now on to this model! I’ve had this knight kit in a box for a fair few years now (since it came out I think) waiting for an army to attach it to. I wanted it to make sense alongside the army so that meant a couple of things: it needed to fit in with the army colour-wise (or at least not clash horribly!) and make sense in the background. I did some reading on the knight houses that fought alongside the Iron Warriors during the period, and came across House Caesarean who were alongside the Iron Warriors on Tallarn (More on that later!). The house fit the bill rather nicely colour-wise too, being black and yellow! A quick google later and I’d found a reference image of what a knight from the house is supposed to look like and I was off to the races.

The colour scheme is rather straightforward, split black and yellow right down the middle. The reference had the weapons coloured the opposite of whatever side they were on but I decided to make both yellow to make them stand out. The painting process tested my masking abilities, both to delineate the colours in a nice straight line (I used tamiya thin (5mm across) masking tape), and to mask the armour plates to spray the rest of the model silver (there I tried out masking putty). It all worked rather well, and I’m pretty happy with the order I did things in.

The yellow started with an all over coat of Vallejo Air Beasty Brown, followed by a spray of white ink in areas I wanted lighter, with a final all over spray of GW Nazdreg Yellow Contrast. That was a bit of an experiment, but I really like the results and I’ll definitely use the recipe in other places. The black was simply an all over coat of Vallejo Black, with a highlight of Vallejo Dark Sea Blue placed in a similar manner to the white for the yellow. The metallic areas were all painted with Vallejo Metal Colour Magnesium, a really nice dark metal colour. I picked out a few details in black, red, white, and bronze to break up the mass of metal. The model then got an all over coat of diluted oil paint (a mix of dark brown and dark grey) that was then cleaned off of the raised areas using a makeup sponge. That did a bit of work on the coloured areas, but really makes a big difference on the metallic areas, adds a bit colour and a lot of nice transitions from light to shadow. I did a few highlights on the metallics using Scale 75 Black Metal and some chipping on the “painted” areas using Vallejo Air Silver.

I added some transfers here and there, but GW only do House Caesarean transfers for the Adeptus Titanicus game, and therefore are way out of scale for this. That meant hand painting the insignia, which was a bit scary, but worked out ok in the end I think.

The banner hanging between the legs is done using a mix of transfers and freehand painting elements.

This leads us to the basing of the model, which some of those more familiar with Warhammer 40,000 may have recognised as being the whole left side of a Baneblade kit. Rest easy, I didn’t sacrifice a whole kit just to make a base, I’ve had this Baneblade side section on sprue for many many years, the result of some giveaway/raffle my local GW store ran back then, presumably the good parts of a returned kit that had issues. Needless to say I had a lot of fun making it looked wrecked, although getting those long straight track sections to look believably hinged took a bit of messing around. I also spent a significant amount of time getting the side skirts looking like they were hanging loose rather than awkwardly straight, which required a fair amount of cutting and re-sculpting of hinges. I wouldn’t want to do that too often, but it was a lot of fun as a one off! If you look properly into the exposed cavity of the tracks it looks very much like a chopped up plastic kit rather than a believable set of wrecked tracks, but I’m hoping the effect is sold well enough from other angles!

Painting wise there is nothing really special about the base, I used the old military modelling hairspray technique to get the chipped metal look, then mashed on some rust coloured paint on all the exposed metal sections. Topped off with a large amount of pigment powders to get a suitably dusty desert look.

I made this base to look like what I assume the battle on Tallarn looks like, hence the desert setting and the wrecked tank (for those not in the know, Tallarn is effectively a planet-wide giant tank battle during the period). While I was building/painting this model I listened to the Tallarn audiobook as inspiration and one of the details that stood out to me was the descriptions of the effects of the air on vehicles (The Iron Warriors did some rather nasty things to Tallarn’s atmosphere, effectively rendering the surface of the planet inhabitable). In the book the paint on every tank that fights on the surface is effectively stripped/discoloured by the toxic air. This makes the relatively pristine paint job on the knight and my want to paint the accompanying Iron Warriors as relatively cleanly not really fit the setting too well. I’ll have a think about what I want to do there, luckily wrecked tanks and desert settings abound and it should be relatively easy to re-host the army lore-wise!

Anyway, quite a bit longer post than usual! I had a lot of fun painting this model as you might be able to tell from my enthusiasm, and am jumping right into another project when I already have countless others on the go, clearly everything is going along as might be expected!

Hello There!

I’ve been working on a few larger projects over the last few weeks and wanted a break from building so decided to look around for model I could paint in a couple of evenings. I had built and primed the Obi-Wan Kenobi model from the Clone Wars starter set for the Star Wars Legions game alongside the Clone Troopers from the set but never got around to painting him. He seemed like an ideal candidate for a little change of pace!

Like the other models in the starter set, he’s made of that soft boardgame plastic which is honestly not super fun to build or paint, especially when compared to the newer hard plastic models in the game’s range. I struggled to get the lightsaber to stay straight, and it definitely looks a bit wonky from some angles.

Just like the Anakin model, he’s holding his lightsaber quite close to his face (seems dangerous!), which means an opportunity for some dramatic lighting there! As with all my lightsaber glows, the main glow effect was achieved using the airbrush, with some spot highlights done with the brush to enhance the effect. The low highlights on the tunic and the belt are just painted on with the brush. This glow is painted on top of what is effectively a finished paintjob and is always a scary step!

Unlike the clones I’ve done up for the army I’ve kept his armour clean and unchipped, as I presume a person of his stature would be able to get fresh armour rather regularly while the clones would have to make do with what they had. No idea if that’s how things are described in the stories, but it made sense to me.

I made an attempt to replicate the Jedi symbol on his shoulder pad and I think it turned out ok, not as smooth as I see other painters get their freehand work, but close enough for me!

I’ve not made a habit of showing off work in progress on the blog so far, so won’t go over what I’m working on in the background, but I expect it to take a little while so you might see a few one off models like this over the next few weeks as I paint things up as small breaks from the bigger stuff!

Overgrown Ruins

I’ve done a bit of terrain painting over the last week, tackling a bunch of forest bases I’ve accumulated over the years. These are all the same kit, Citadel Woods which I believe are not sold anymore unfortunately. I’ve somehow amassed a bit of a collection of them and it felt like time to finally get them painted!

Taking pictures of these gave me the opportunity to take pictures of some more terrain I did up a little while back, this time not old kits, but pieces I 3D printed. The files are from RM Printable Terrain from their Stormguard collection. I was waiting to receive the mat you see the pieces on before I took photos.

I didn’t necessarily plan on painting these trees to match, but I think the ruins and the trees work nicely together and I’ll definitely have them both on the table at the same time for games going forward.

Look forward to getting some games in amongst these!

Thanquol and Boneripper

I previously mentioned that I’d been reading the Gotrek and Felix novels while painting my Skaven, and as a result had an eye out on eBay for the models of the protagonists and of their nemesis: Grey Seer Thanquol! I managed to get a pretty good deal on the models and have had them for a few months now, ready for a coat of paint. A few public holidays lined up nicely over here and I decided to get the Skaven side of that equation painted.

I had a lot of fun painting these models, they’re classic metal Games Workshop models with their exaggerated features, and are really satisfying to paint. While the rest of my Skaven have some blue greens on them, I wanted Thanquol to stand apart so I painted him to match some of the art that graces the book covers. The basing was done to match the army however, and I find that usually does a good enough job of making a model belong.

I decided to go for a classic Warhammer green crystal sword on Thanquol. It could have come out a little smoother but I’m happy enough for an army model.

I’ll have to paint up Gotrek and Felix themselves at some stage, but for now at least my Skaven are bolstered by the most infamous Skaven of them all!

Chosen Men

I’ve been a fan of Bernard Cornwell books for a long time, and I believe I’ve read every one of his book series apart from his most famous: Sharpe. It’s been on the to read list for a while, but I always held off as I was well aware of the consequences of starting the series. I would get interested in the period, and therefore in wargaming the period, and therefore adding to my ever growing backlog!

As you might have guessed, I finally got around to starting the series and here I am, painting some Napoleonic miniatures. I’m four books in at this stage and tremendously enjoying myself. They’re great adventure novels with a decent amount of historical detail, keeping my attention and prompting me to read more about the elements that stand out to me.

As soon as I realised my fears were realised and there was no turning back from painting musket wielding miniatures I turned to finding a system and scale to play the era in. My first thought was Warlord Games’ Epic Waterloo system, with its large scale battles and mass ranks of 13.5mm scale miniatures. After eyeing off the starter sets for a while I decided to aim for something a bit smaller in scale (miniature count wise) and larger in scale (miniature size wise!). I have enough large model count projects underway for now!

I started looking for skirmish systems set in the era and rapidly settled on two: Sharp Practice by Too Fat Lardies and Chosen Men by Mark Latham and Osprey. Sharp Practice turned out to be a bit hard to get a hold of locally, and seemed quite a bit more complex in rules so I decided to go with Chosen Men (which has rules for bouncing cannonballs! I couldn’t pass that up). I like to have a game system as a framework for my painting as even though I have no plans to play games in the short term, this lets me decide how to build my models and how many to paint.

I wrote two small forces for the game, one French and one English, and the unit you see above is the first for the French side: Napoleon’s fiercest, Old Guard Grenadiers. These models are from Victrix, and quite nice plastics. The set comes with most of the models marching with their muskets upright, but has some firing and reloading poses, and I concentrated on these for this unit as I felt they were more sensible in a skirmish scale. To give you an idea of the size of the game, the French force is 21 models strong and the British 31 models strong, so really that’s half of the French painted!

Painting-wise there’s not too much to write about, the main feature of these models are their blue coats and trousers, which were painted all sorts of shades of blue in paintings and reference materials. I settled on a darkish blue, lighter than a navy blue and slightly desaturated. This was done using a base coat of Vallejo Dark Prussian Blue and a highlight of 50/50 Vallejo Dark Prussian Blue and Vallejo Prussian Blue. The rest of the models were painted much as I paint materials of the same colour. As these are effectively a one-off I wasn’t too careful about writing my steps down.

Anyway these were good fun to paint, and I’ve just received the eclectic mix of models I want to build the British side out of which I’ll assemble and paint the next time the urge hits. Given my so far unbroken Sharpe novel streak this might be sooner rather than later!