

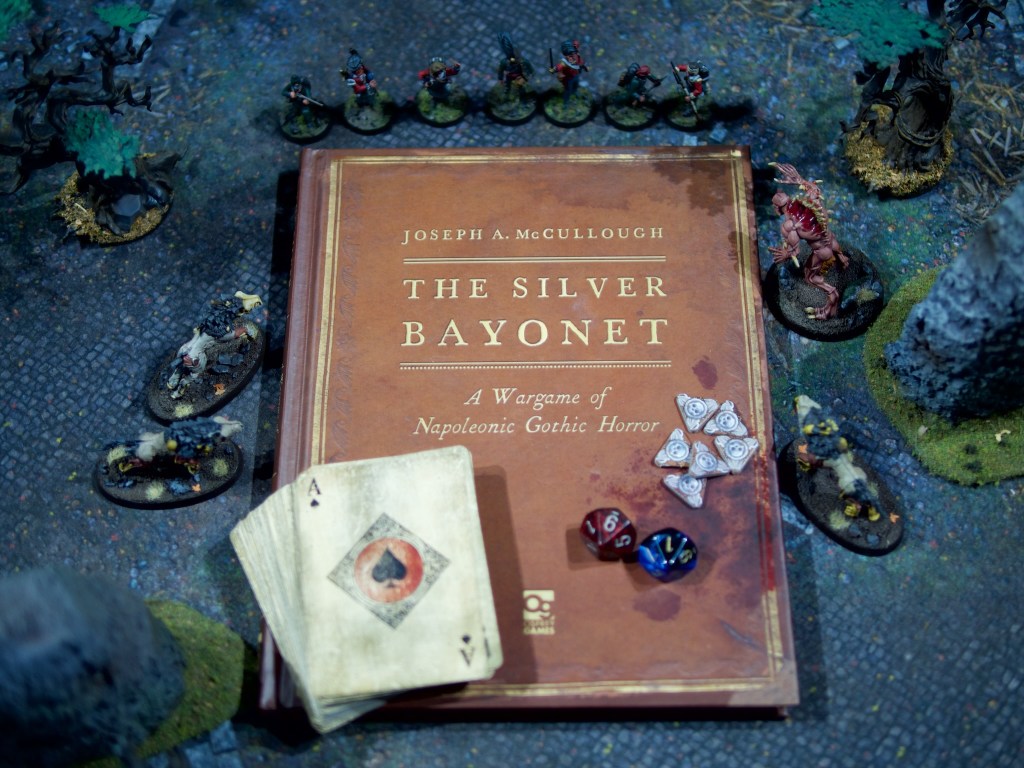
I wasn’t expecting to be working on this this week, but when inspiration strikes, seize it! I’ve been looking at running Rangers of Shadowdeep for my usual roleplaying games group, and while reading the books and doing some research I remembered one of Joseph McCullough’s other games that interested me while back: The Silver Bayonet. The Silver Bayonet is a skirmish game pitting Napoleonic era units against each other as well as against monsters brought about by the horrors of the constant wars of the era. This renewed interest in the game coincided with my reading of a book on the founding of “New France” (Canada/Quebec), so I was primed for some musket-based action. The game is really easy to pick up so I quickly threw together a unit roster (which can be up to 8 models), and started kitbashing!
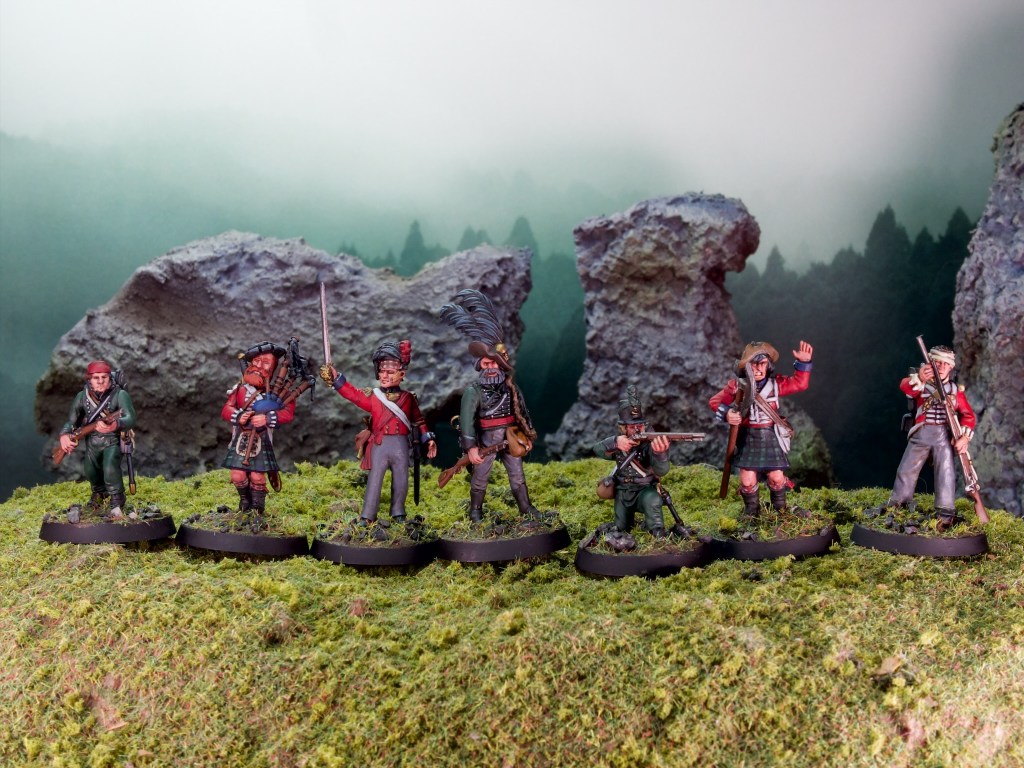
I bought a bunch of different Napoleonic sprues a while back to use for Chosen Men so I had plenty of models to turn into a Silver Bayonet unit. As you can see above I ended up with 7 models rather than the max 8, so a slightly elite unit composed of my officer, a junior officer, two highlanders, two riflemen, and an infantryman. This eclectic mix is pretty standard for these units, which are made of soldiers (and others!) that have survived encounters with the supernatural rather than any particular regimental affiliations. The officer and the riflemen are based on the Wargames Atlantic Riflemen kit, the highlanders and junior officer on the Victrix highlanders kit, and the infantryman is from a Perry Miniatures kit. I decided early on I wanted to minimise the amount of shakos in the models, I see these units as being on the road a lot and being in full battle-dress for these skirmish fights doesn’t seem very appropriate (plus I could see losing your hat very easily when running away from a Werewolf!).
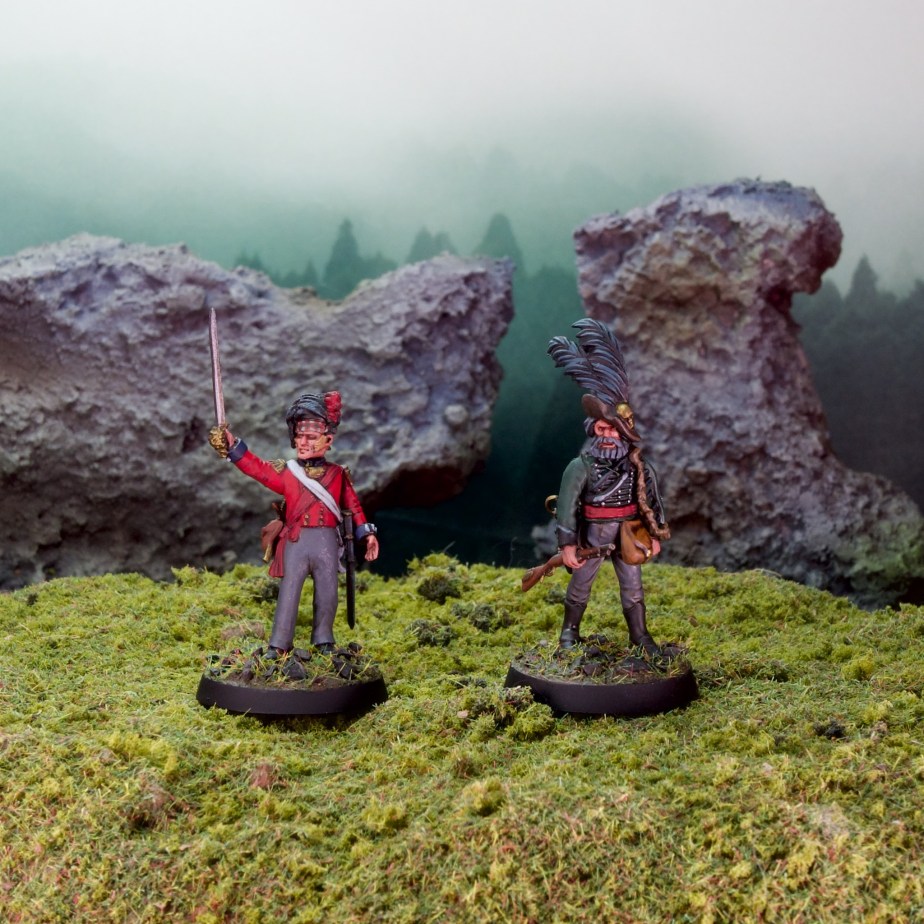
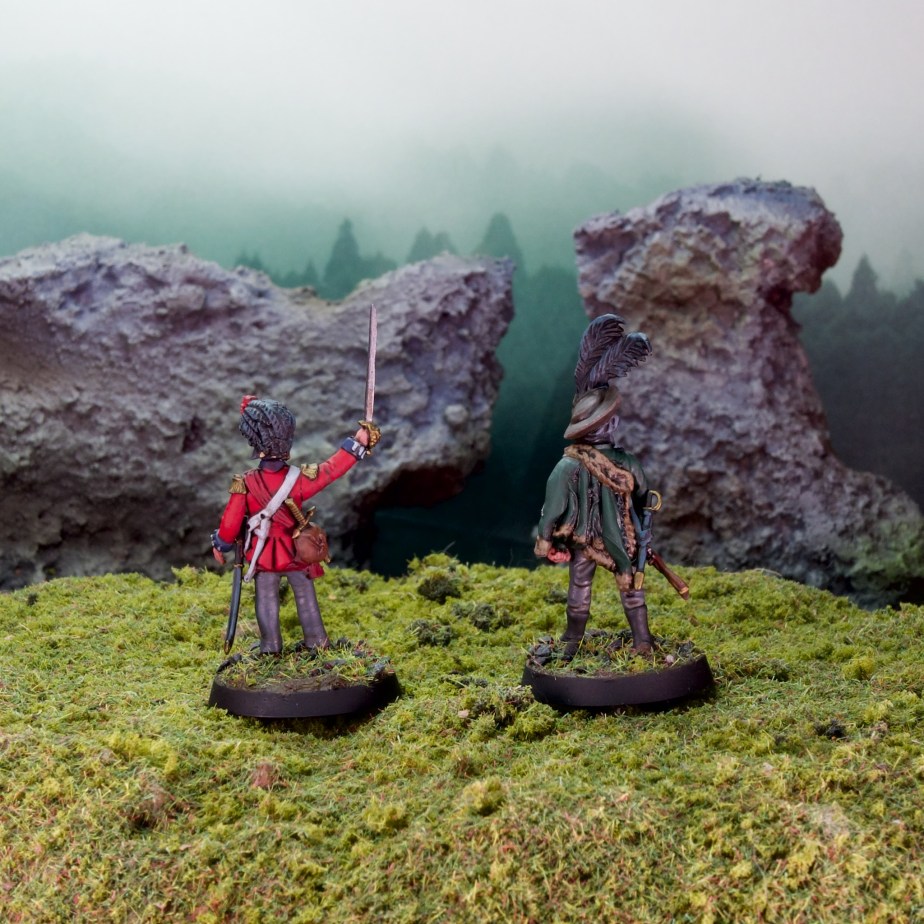
First let’s look at the officers:
My unit leader is Major Horatio Bellgrave, a 95th rifles officer reassigned to lead a Silver Bayonet unit and with a long history of hunting monsters. I selected the Supernatural Veteran attribute for him, which lets him pack extra supplies, which I used to cover all the super natural bases giving him silver shot, cold iron shot, and a salt bag for those pesky demons! Alongside that he has the quick reload attribute which lets him shoot every turn with a penalty rather than having to spend a turn reloading between shots. Modelling wise he’s mostly from the WA kit, with a head from a Warhammer Empire kit (with a ludicrous set of feathers!) and a bag from some other Warhammer kit to represent all the projectiles he’s hoarding!
The junior officer is Lieutenant Iain MacRae, from the Black Watch. I wanted a more traditional officer in the unit, as a counterpart to the probably slightly mad monster hunting Major. I selected the great faith attribute for the Lieutenant, and gave him a silver sword. The model is straight from the Victrix kit, barring the pouch and the crucifix which are from a Warhammer Empire kit (the crucifix is a cut down dagger). He has his official headgear on as it matters a lot to Iain to be properly uniformed, even when fighting the supernatural.

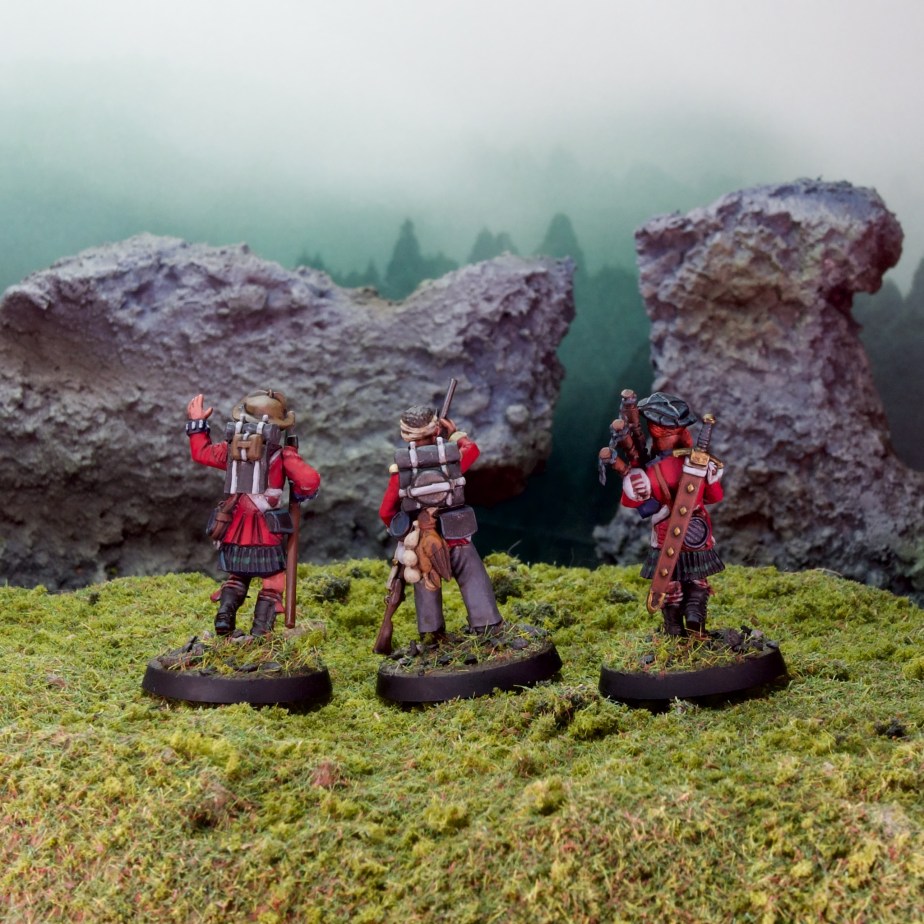
Next up the red coats! From left to right:
Private Ruairidh MacInnes, a highlander of the Black Watch, wielding a huge silver Lochaber Axe. The eagle-eyed amongst you will notice he’s wearing red epaulettes, which are not correct for a private! This is a modelling constraints, as I used the officer banner arms to create the axe. I rationalised this by painting them red like French Imperial Guard epaulettes, clearly MacInnes bested a guard and took them as a trophy! For the rest of the model the head of the axe is from a Perry Agincourt set, while the head is again from a Warhammer Empire kit (some great grizzled heads in these Warhammer sets!).
Private Jack Fenner of the Buffs. As mentioned above, this one is from a Perry kit, with these great reloading arms. The bandaged head is from Warlord WW2 British paratroopers, and his dinner is from the Bretonnian Men-at-arms kit. I picked the Buffs for the regiment from a family connection, one of my Great-grandfathers on my English side was in the Buffs in North Africa and Italy during WW2. On top of his musket he’s equipped with a salt bag to pepper unholy creatures with.
Private Callum MacPherson, also a highlander of the Black Watch, with a classic claymore and bagpipes combo. We have once again a Warhammer Empire head, albeit an older one, and the sword is from the Warhammer Empire Knights kit. The body and pipes are from the Victrix set. I’m treating the pipes as a holy item in the game, clearly bagpipes have some effect on monsters!
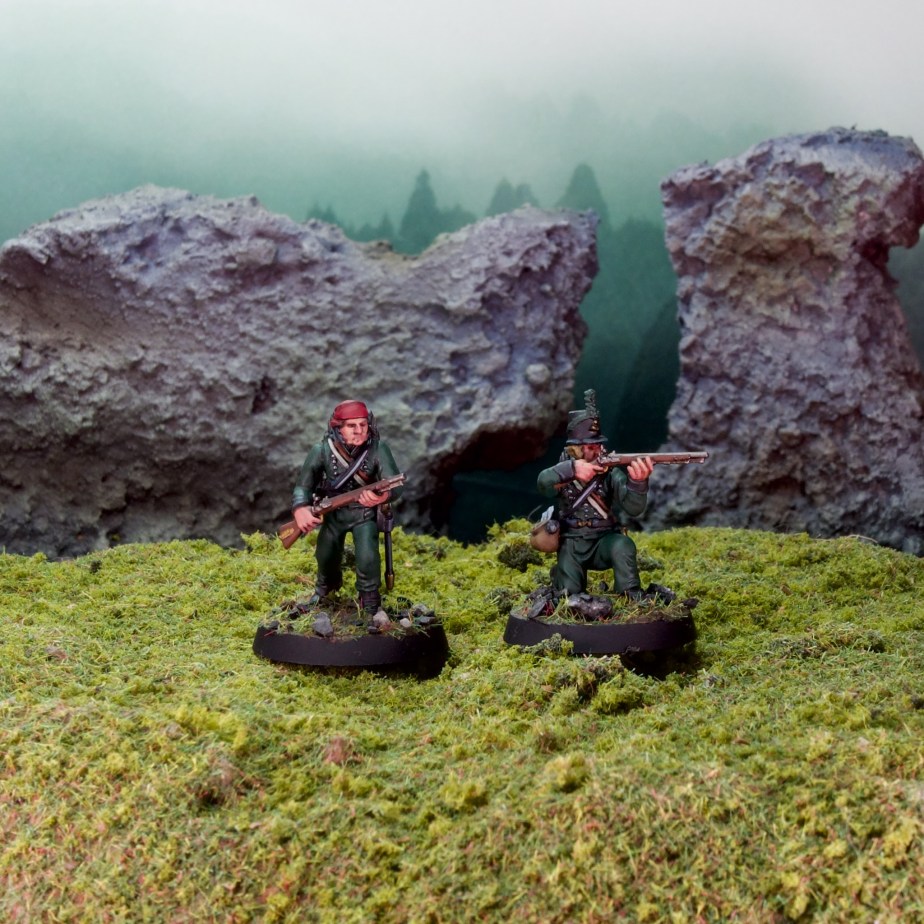
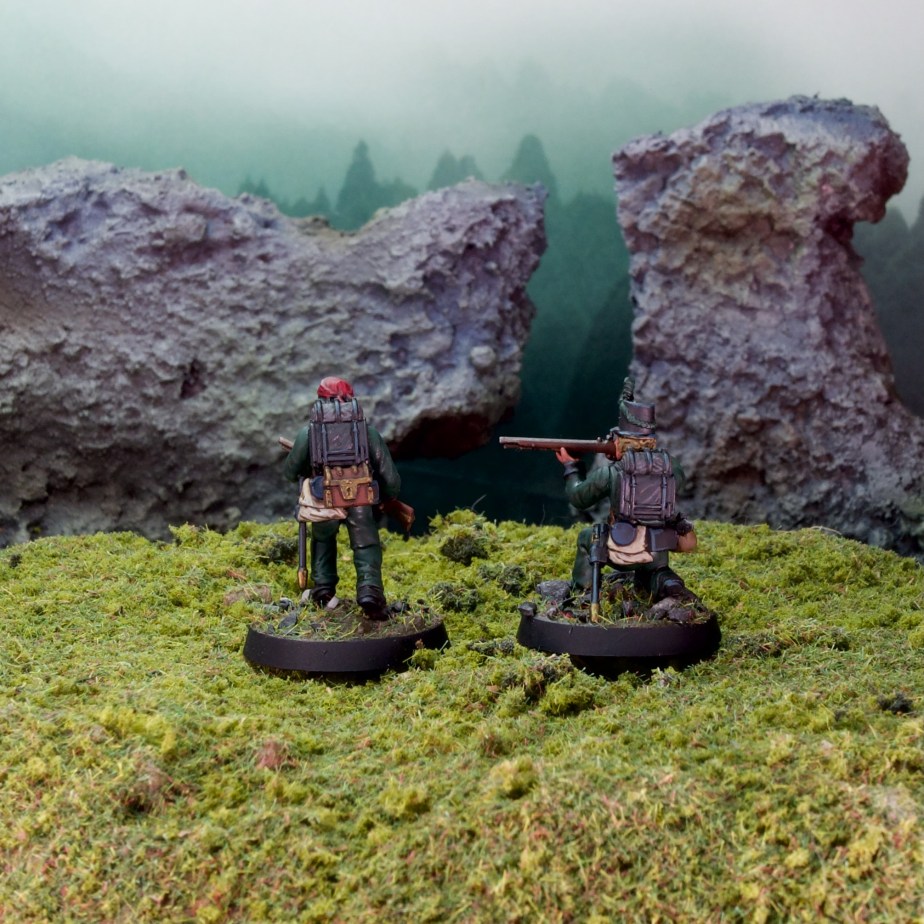
Last but not least we have the pair of riflemen:
Private Isaac Crowe, follows in the steps of his major and on his way to becoming a great monster hunter. The model is almost wholly from the WA riflemen kit, the only exception the small chest hung under his backpack, from the Bretonnian Men-at-arms kit. Clearly some precious loot! He’s carrying cold-iron shot.
Rifleman Benedict Pryor, more junior (hasn’t lost his hat yet!), more proper, and likely feels closer to MacRae than to his Major. Also almost entirely from the riflemen kit, he just has a small pouch with a bird in it from the same Men-at-arms kit (slightly hard to see in the photos). He’s carrying silver shot.
There you have it! These were very fun to put together, and very quick to paint, I finished them in a couple of sessions. It scratched the Napoleonic itch nicely, with a bit of research on the uniforms, and my first ever attempt at painting tartan.
At the risk of making this post very long, Silver Bayonet also comes with a set of solo gaming rules, and I couldn’t resist trying the unit out so here’s a quick skirmish report for the first solo mission in the game: Wolf Hunt.
The premise behind the mission is my unit is looking for traces of another unit which has not reported in a while. While tracking them, my unit finds signs of a scuffle and starts looking around for clues as to what might have happened. The search is interrupted by wolf howls…
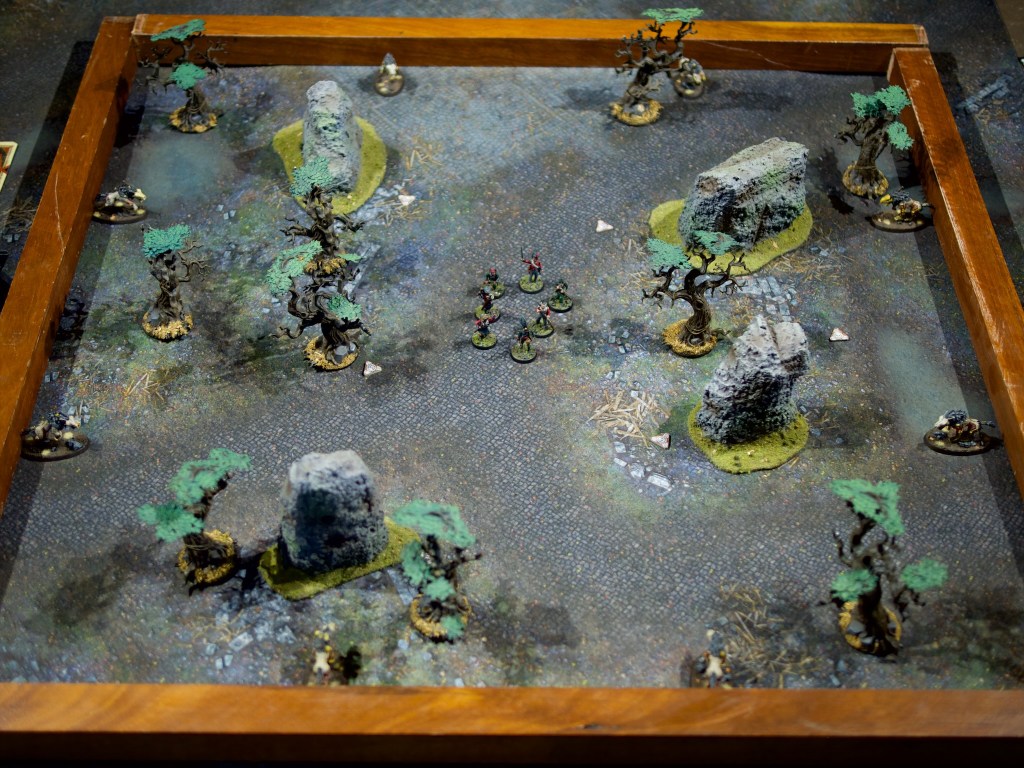
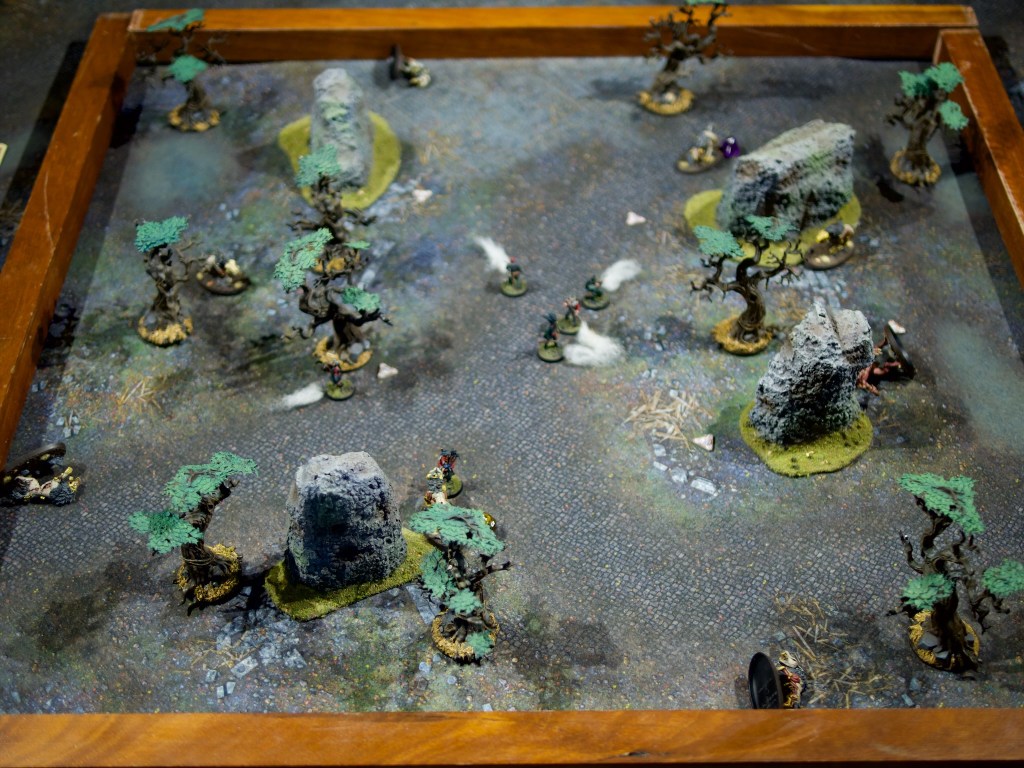
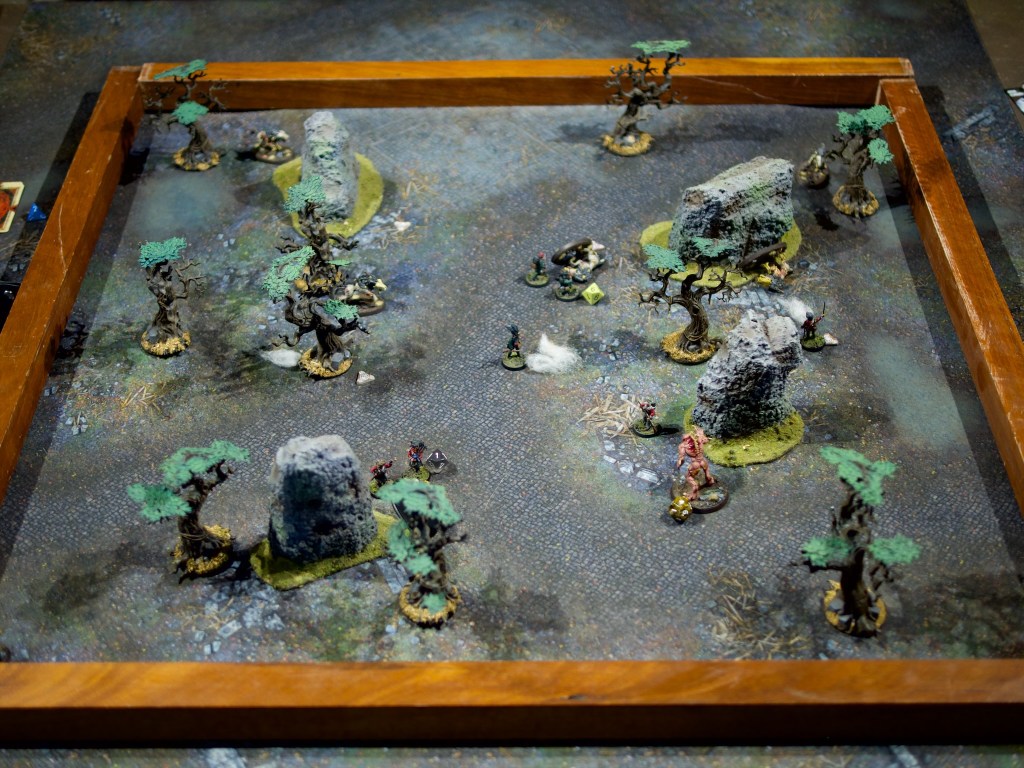
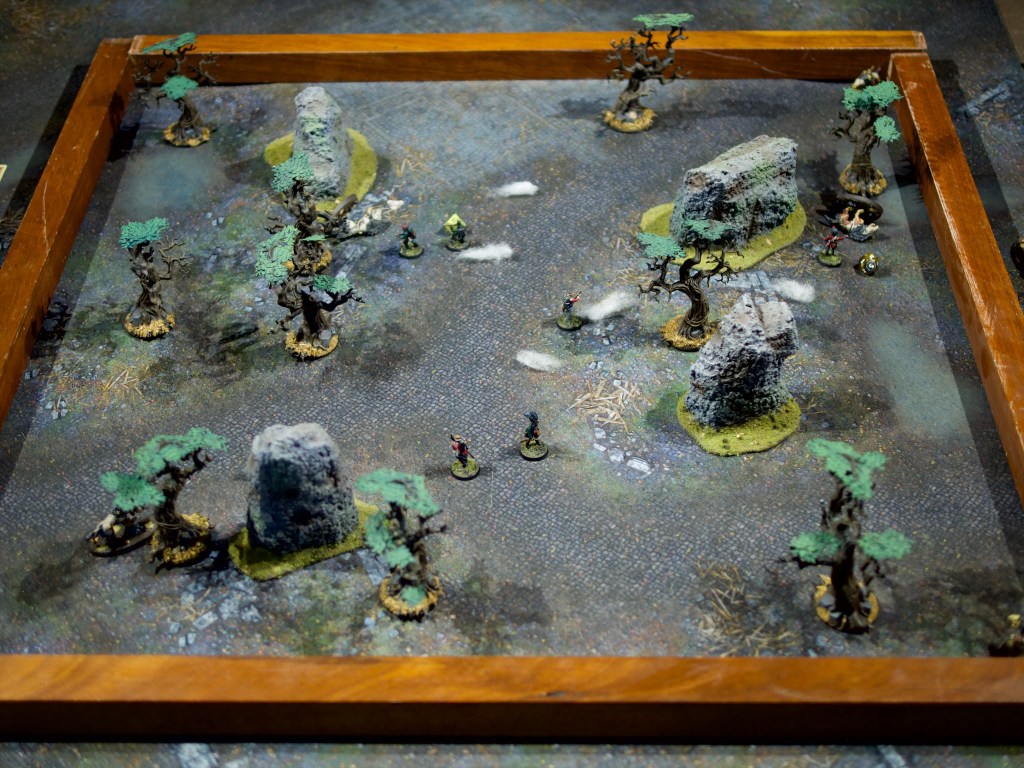
The game is played on a small board compared to what I’m used to (2.5×2.5ft), so I marked off the area with some spare wood I had lying around (the marked off area is closer to 3x3ft but I did what I could with what I had!). The unit starts in the middle of the board and 8 wolves evenly spaced out 2 per edge. The clues I need to investigate are marked by the triangular tokens, there are 6 all up. My goal is to find a clue as to what happened to the missing unit(and recover their orders if possible to avoid them falling into enemy hands) and get off the board, the game ending when I have no models on the board. At the end of each turn I have to roll on a table that indicates what happens (usually more wolves arrive!). Unlimited turns with wolves arriving every turn means I need to get a move on investigating those clues! Behind each of the clues is something that will help or hinder the unit, as determined by a small number of playing cards shuffled into a clue deck. As a model investigates a clue, a card is drawn from the deck and a table consulted for what the model found.
The game uses 2 D10 for all its rolls, one blue (skill), one red (power). The dice are rolled together and added up to see if an action is successful. The colours are used to indicate damage in the case of attack rolls, with more skillful weapons using the roll of the blue dice for damage and more brutal weapons using the red die. This is a really simple mechanic, but quite engaging especially when combined with the fate dice described below. As an example, assume MacInness attacks a wolf with his axe (uses power die for damage), he rolls 2d10 (7 Blue, 6 Red), adds them up (13), and compares to a wolf’s defense (12). He equaled or beat the defense, so he deals the damage, which is 6 as per the power die (+1 for the weapon being heavy!). A wolf has 8 wounds, so we mark off 7 of those and the wolf gets to strike back!
In solo missions, players get two fate dice, one of each colour which allow for one re-roll per dice type. This can be quite important as a re-roll may not only allow a model to hit, but also to deal more damage!
Turn 1
The turns are split into a first player phase (P1), where I can act with half my models, then a monster phase (MP), followed by a second player phase (P2) where I can act with the rest of my unit.
- P1
- MacInnes moves towards the closest wolf and fires his pistol, killing it instantly (lucky!)
- Fenner fires his musket at another killing it (after I used a fate die to re-roll the 1 on the skill die!)
- Crowe fires his rifle at another and kills it too (3 shots – 3 kills so far! that has to be a record)
- Pryor fires his rifle, hits but only deals 4 damage.
- MP
- The wolves all close in on the unit, all moving towards the closest member they can see.
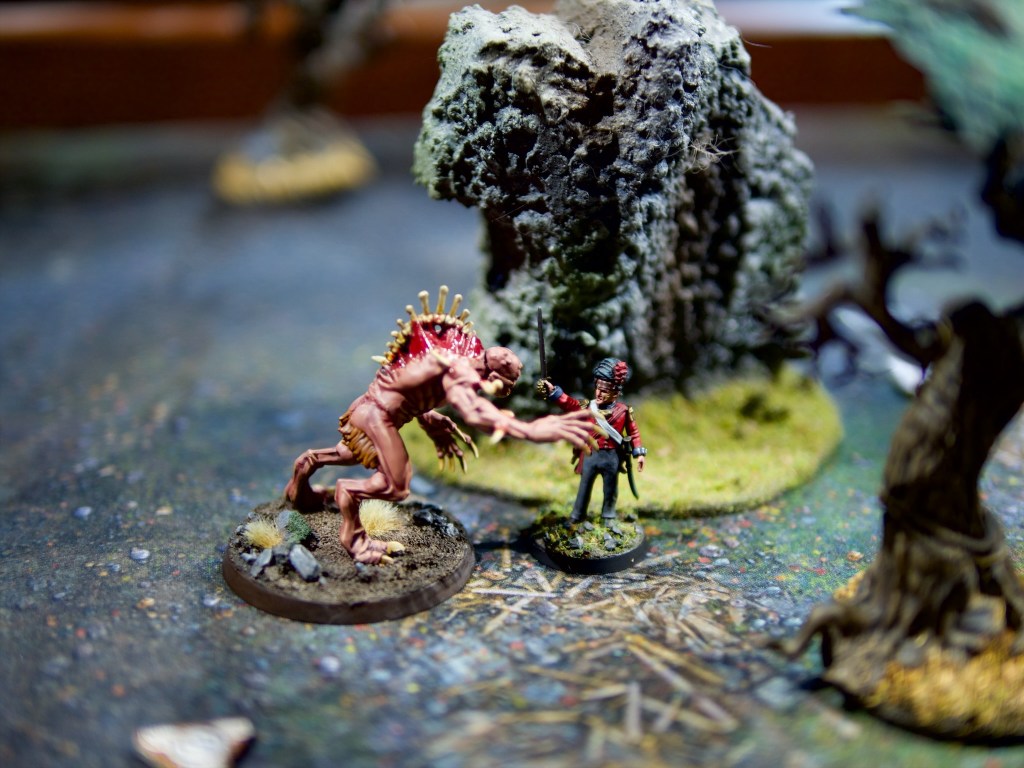
- One of the wolves is revealed to be a werewolf!
- P2
- Major Bellgrave fires a silver bullet at the werewolf, scoring a solid hit (7 damage)
- Lieutenant MacRae bravely charges the werewolf and skewers it with his silver sword!
- MacPherson charges the wolf closest to him, hits it for 6, the wolf bites back but misses.
- End of round, two more wolves arrive.
Turn 2
- P1
- MacPherson attacks the same wolf, misses. The wolf does not miss back however and hits hom for a massive 10 damage! Luckily highlanders have 11 health unlike most of my other troops so he clings on, but things are looking dicey!
- MacInnes comes to his rescue and swings his axe at the wolf, killing it.
- Lieutenant McRae pulls his sword out of the werewolf and continues his rampage, killing a wolf with a pistol shot, then moving to the clue closest to him.
- Fenner moves onto his closest clue and investigates. Unfortunately, I draw the ace of spaces from the clue deck which means what drew Fenner’s attention was a lurking werewolf! Right before the monster phase too…
- MP
- The werewolf swings its massive claws at Fenner … and rolls snake eyes! Critical failure. Normally this would cause the model to lose its weapons, but luckily for the werewolf those claws are well attached. Fenner keeps his head together and bayonets the werewolf, unfortunately his bayonet is made of regular old steel and only deals two damage to the werewolf.
- The remainder of the wolves close in further.
- P2
- Major Bellgrave uses his quick reload ability and fires at the werewolf, hits after I burn my power dice fate re-roll (no more re-rolls now!) and deals 6 damage with a silver bullet.
- Pryor reloads his rifle and charges a wolf with his bayonet, but misses. The wolf bites back and inflicts 4 damage.
- Crowe also reloads and charges the same wolf, he is luckier though and finishes the wolf off.
- End of round, one more wolf arrives.
Turn 3
- P1
- Major Bellgrave quick reloads again and fires a silver bullet into the werewolf, killing it.
- MacPherson investigates the clue next to him, discovers an ornate silver ramrod, which gives me an extra Skill die in my fate pool.
- Crowe fires his rifle into the closest wolf, and scores a critical, killing the wolf instantly!
- MacInnes investigates another clue and finds a bag of silver shot, meaning he can shoot effectively at werewolves if any others arrive!
- MP
- The wolves close in.
- P2
- Fenner reloads his musket.
- Lieutenant MacRae investigates the clue he moved to last turn, and finds a silver knife (clearly whoever left all this stuff was prepared for werewolves!). He then charges the closest wolf, and deals 6 damage with his sword . The wolf bites back and deals 4.
- Pryor investigates another clue and finds a silver medallion, giving me an extra power die in my fate pool (back up to one of each!).
- End of round, one wolf arrives.
Turn 4
- P1
- Fenner fires his musket at the wolf Lieutenant MacRae attacked but misses
- MacRae then charges back into the wolf, rolls horrendously on both dice and I decide to re-roll both with my freshly obtained re-rolls. The new rolls are excellent and the wolf is killed.
- MacInnes moves closer to MacPherson and reloads his pistol (with his new silver shot!).
- Major Bellgrave quick reloads and fires at the closest wolf, but misses. He moves towards the board edge, time to think about finishing this skirmish!
- MP
- The wolves close in.
- P2
- MacPherson decides to leave the board, his wounds are rather bad.
- Pryor fires at the wolf close to him, misses, charges in with his bayonet and scores a hit for 5 damage. The wolf misses when trying to bite back.
- Crowe charges in too, and bayonets the last wounds off the wolf.
- End of round two more wolves arrive
Turn 5
- P1
- Crowe investigates the last clue, finds the missing unit’s orders! I need to get these off the table if possible.
- Lieutenant MacRae reloads his pistol and moves right to the edge of the board. He;s looking to draw the wolves there towards him, away from Crowe, to give him a better chance to get away with the orders.
- MacInnes fires his pistol at the closest wolf, misses, and moves towards the closest board edge.
- MP
- The wolves close in.
- P2
- Major Bellgrave quick reloads, fires at the same wolf, misses, then moves closer to the board edge.
- Fenner reloads his musket and moves towards the board edge.
- Pryor also reloads and moves towards a board edge.
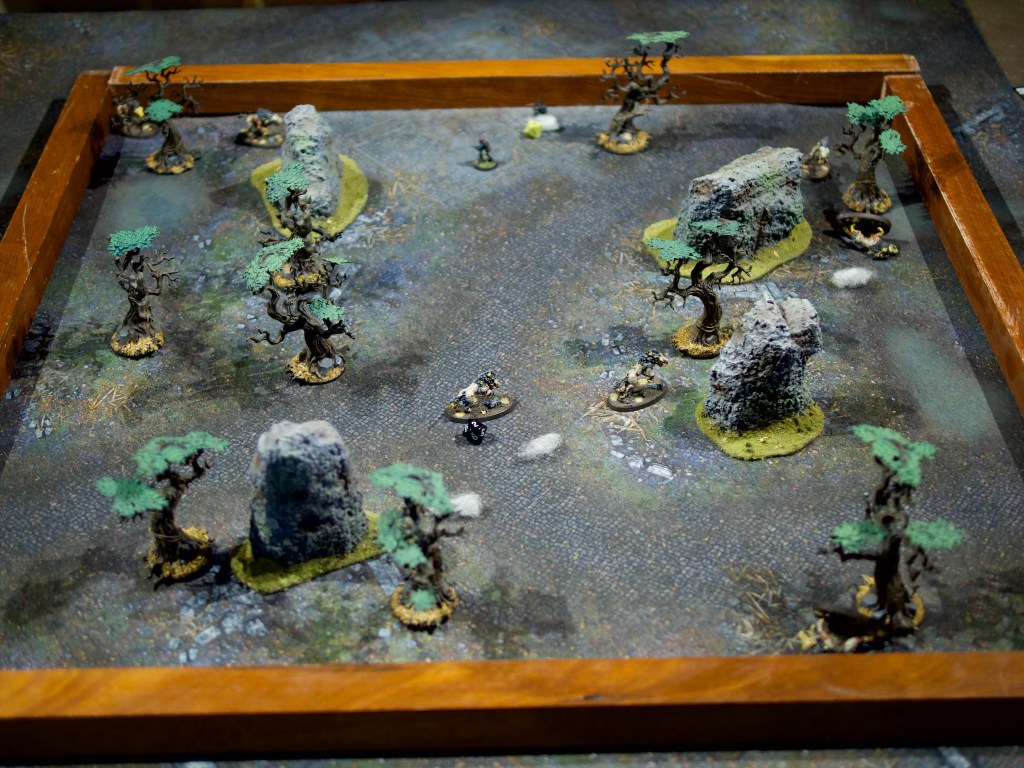
Turns 6 & 7
Those two turns are rather uneventful, the unit simply retreats off the board and fires at any wolves getting too close.
Wrap-up
The unit achieved all the objectives and got maximum experience out of the scenario, not bad!
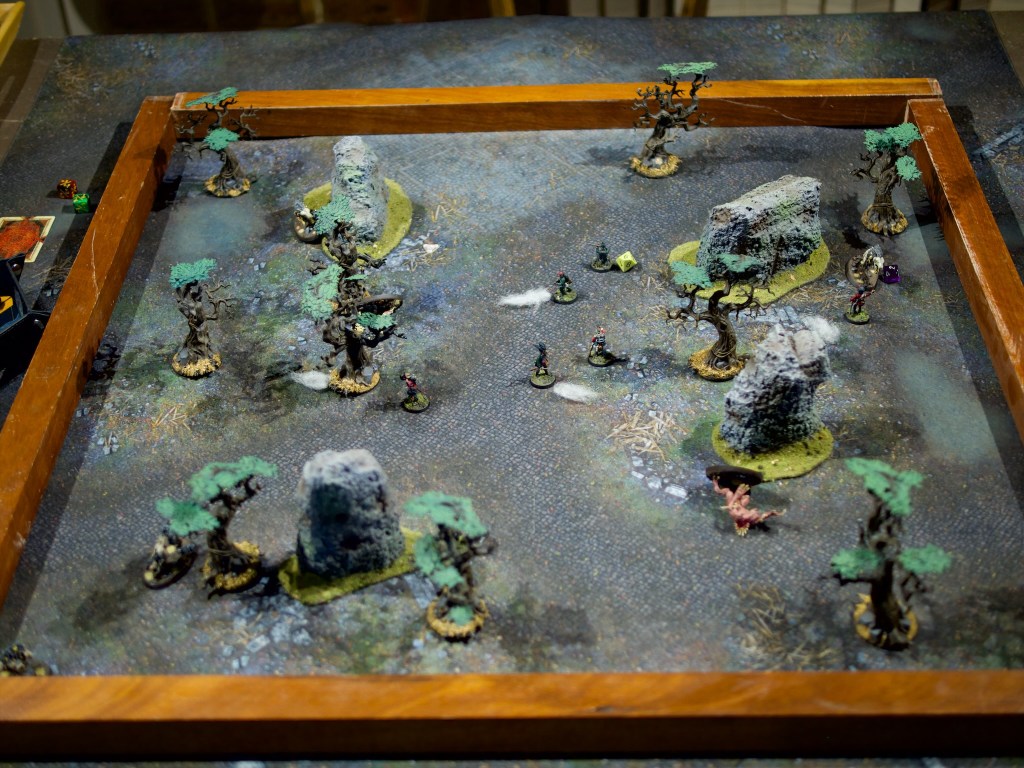
The game was very fun, I’ve never really tried playing a solo wargame before. The rules were very straightforward, and the scenario interesting and engaging to play. I think I got very lucky in the early rounds killing so many wolves in one hit, this would have been much harder with a few more wolves running around. There are 3 more solo scenarios in the the rulebook and I will be definitely playing through them. I’m not sure the top down photos are particularly great for these small skirmish battle reports, it’s a bit hard to follow what’s going on I think. I may try some other way of recording the action for future ones, open to suggestions if anyone has some!

Brilliant stuff, Nic! 🙂 I like the figures with all their little tweaks and the game sounded like good fun!
LikeLiked by 1 person
Thanks John! I really enjoyed it, enough so that I’m preparing what I need for the next scenario in the book!
LikeLiked by 1 person
I’m late to the party on this update so my apologies for that! I can’t say I would have predicted you’d be partaking in some solo gaming or Silver Bayonet for that matter! I don’t know a lot about it but it looks like it’d be a fairly easy game to jump into. In the past, I’ve thought about playing Rangers of Shadow Deep but it requires a bit too many specific terrain pieces for my taste. That was one thing that eventually put me off MESBG, truthfully. This scenario looks much simpler in that regard which is great to see.
I really like your new squad and the tartan looks really great. I got curious and learned just now that tartan is spelled the same in English and French. Go figure! I need to try painting a bit of that myself one day. It looks great when done well like on these lads!
In terms of battle reports, I kind of liked the zoomed out pictures, especially the wood framing because its something different. I need to get a frame like you have for when I play Fallout as I think it would make gaming a little easier and more fun. With that said, it seems like the close up, “action” shots seem to be the most interesting/exciting to see in battle reports (except for army games like The Old World, I think then seeing more zoomed out images there can be pretty awe inspiring). Every time I play, I take zoomed out photos and almost never end up using them in the battle report so that is partially why I tend to favor zoomed in photos. I do end up using some medium range photos that help show terrain or even how far away approaching miniatures might be to one another so you might consider giving that a shot next time you play. One other strategy I use is to try to take photos of anything “interesting” that happens like close combat, miniatures being killed, an objective being claimed, etc. That seems to help bring the action to life pretty well too. Hopefully some of those ideas are helpful and inspire you to play again soon! 🙂
LikeLike
Thanks for the advice Jeff! I hadn’t really thought about solo wargaming before, but I can really see the appeal with the (low) amount of time I have to get together with others to play games these days. The opportunity cost was low too, I wanted to paint a unit for the game as a hobby project, and I had what I needed to play the first solo mission already (with some slight tweaks – the wolves aren’t supposed to be undead and the crypt horrors aren’t really werewolves!). Your fallout reports were definitely an influence on my trying this kind of gaming out, so thanks!
The frame was a bit of luck really, I wanted to mark off the “board edge” as I only have 6×4 mats for big wargames, and these pieces of wood mark off an area that’s pretty close to what the game recommends and look kinda neat.
I agree with you on the close up shots, I’ll aim to include more in the next one, but glad you liked the zoomed out shots. What I might try and do on the zoomed out shots is annotate the photos to point out where the models are with names etc, which might make it easier to follow.
LikeLiked by 1 person
I’m glad to hear I was a positive influence and even happier that you enjoyed the experience. Solo wargaming isn’t for everyone and having regular opponents is best for most games as well.
My mats are all 4 x 4 and Fallout uses 3 x 3 mostly so that is why I really want something like that. It would be really useful when you have models that need to reach or will be fleeing at the board edge. Having that clearly marked really helps!
I like the annotation idea. That could work well in future reports. I don’t know why I didn’t think of it, but picking up a White Dwarf (new or old) could provide some ideas as well. I haven’t looked at one in too long but I’m sure they still have great photos like they used to have twenty years ago when I read them avidly!
LikeLiked by 1 person
Checking out white dwarfs is a great idea, there’s quite a few skirmish games these days, so should be able to find some battle report inspiration!
LikeLiked by 1 person
I think I will do the same when I can. I’ve been pondering a Warhammer Plus subscription myself for that reason. I just need to make sure that I have enough time to actually use it!
LikeLiked by 1 person
A nother Great Battle report. Nice new unit, just in time for “Bones of Albion”
LikeLiked by 1 person
Yes really keen to see what that looks like! I found a Druid model when I was putting the band together and looks like that will come in very handy given what I’ve heard so far.
LikeLike