Beehive Hut

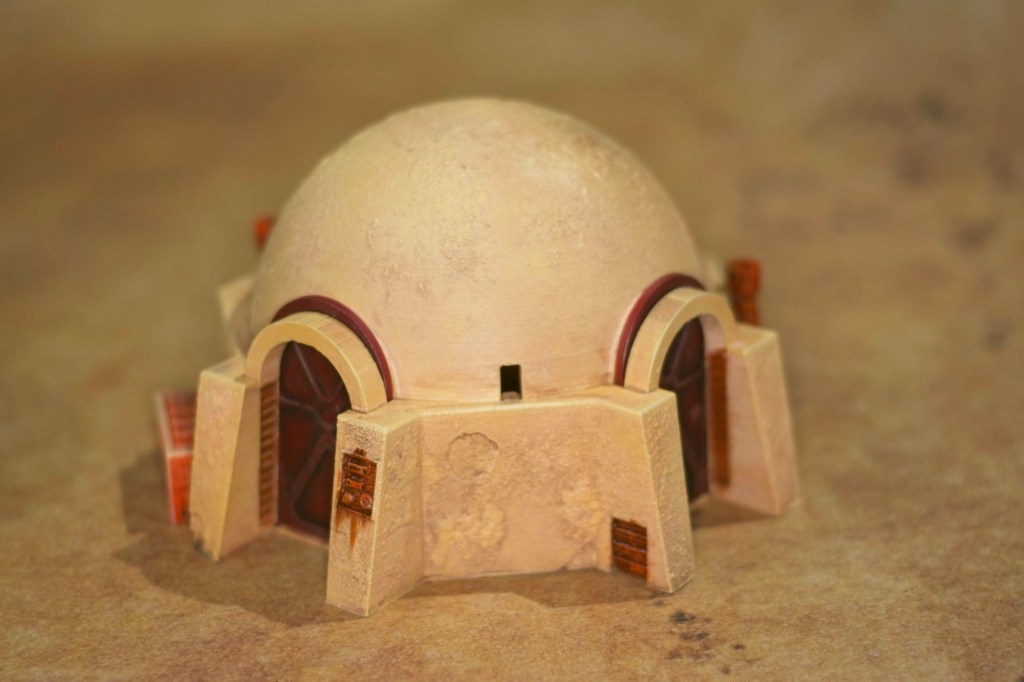
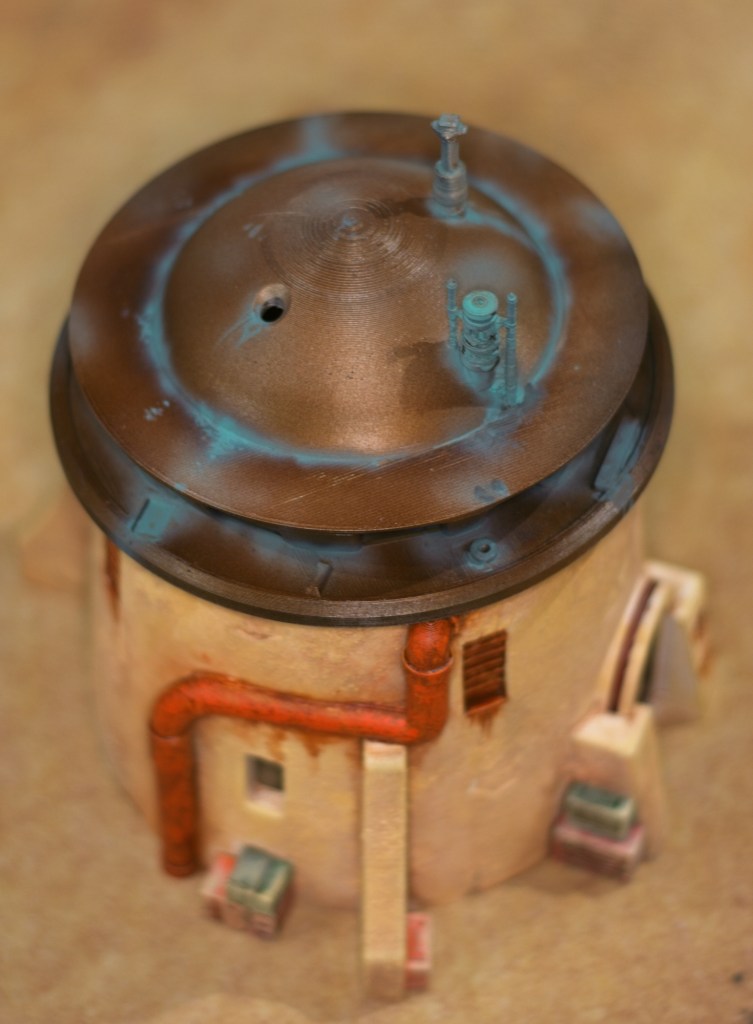
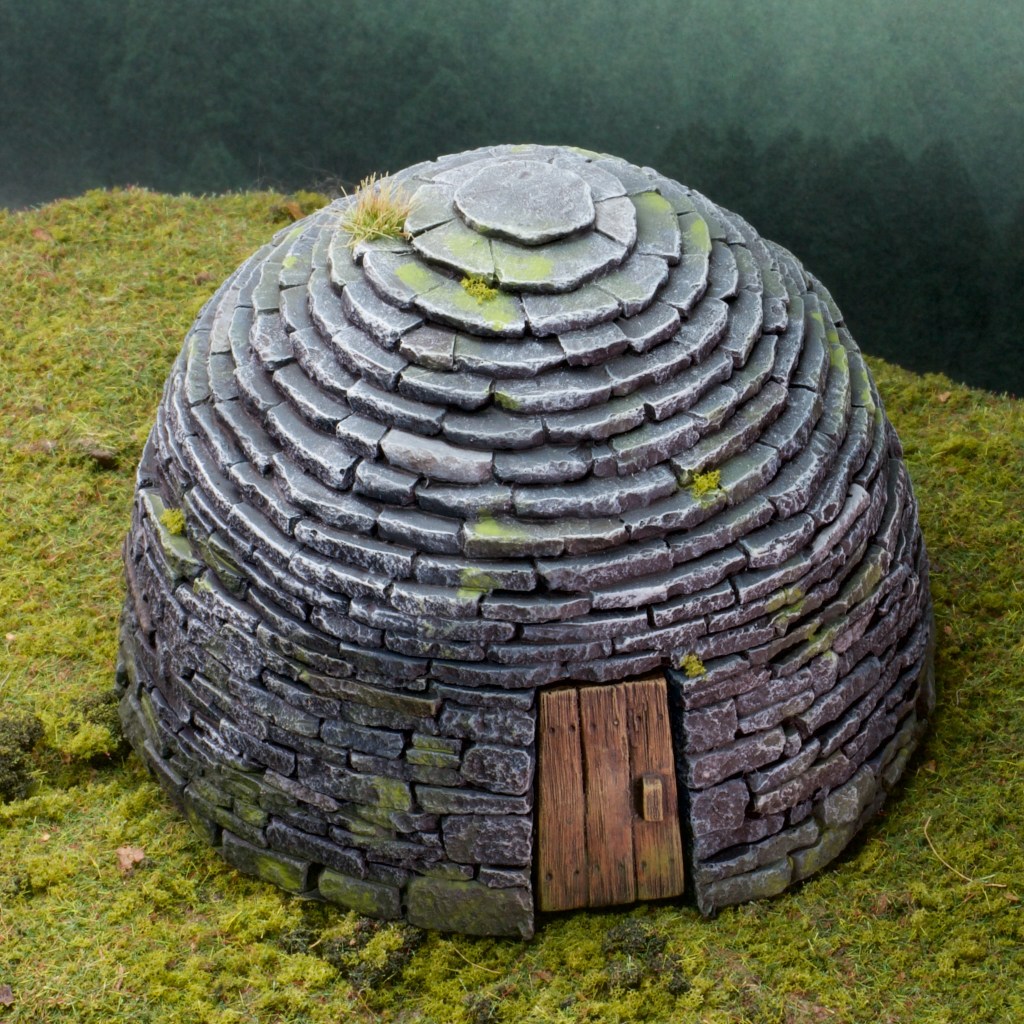
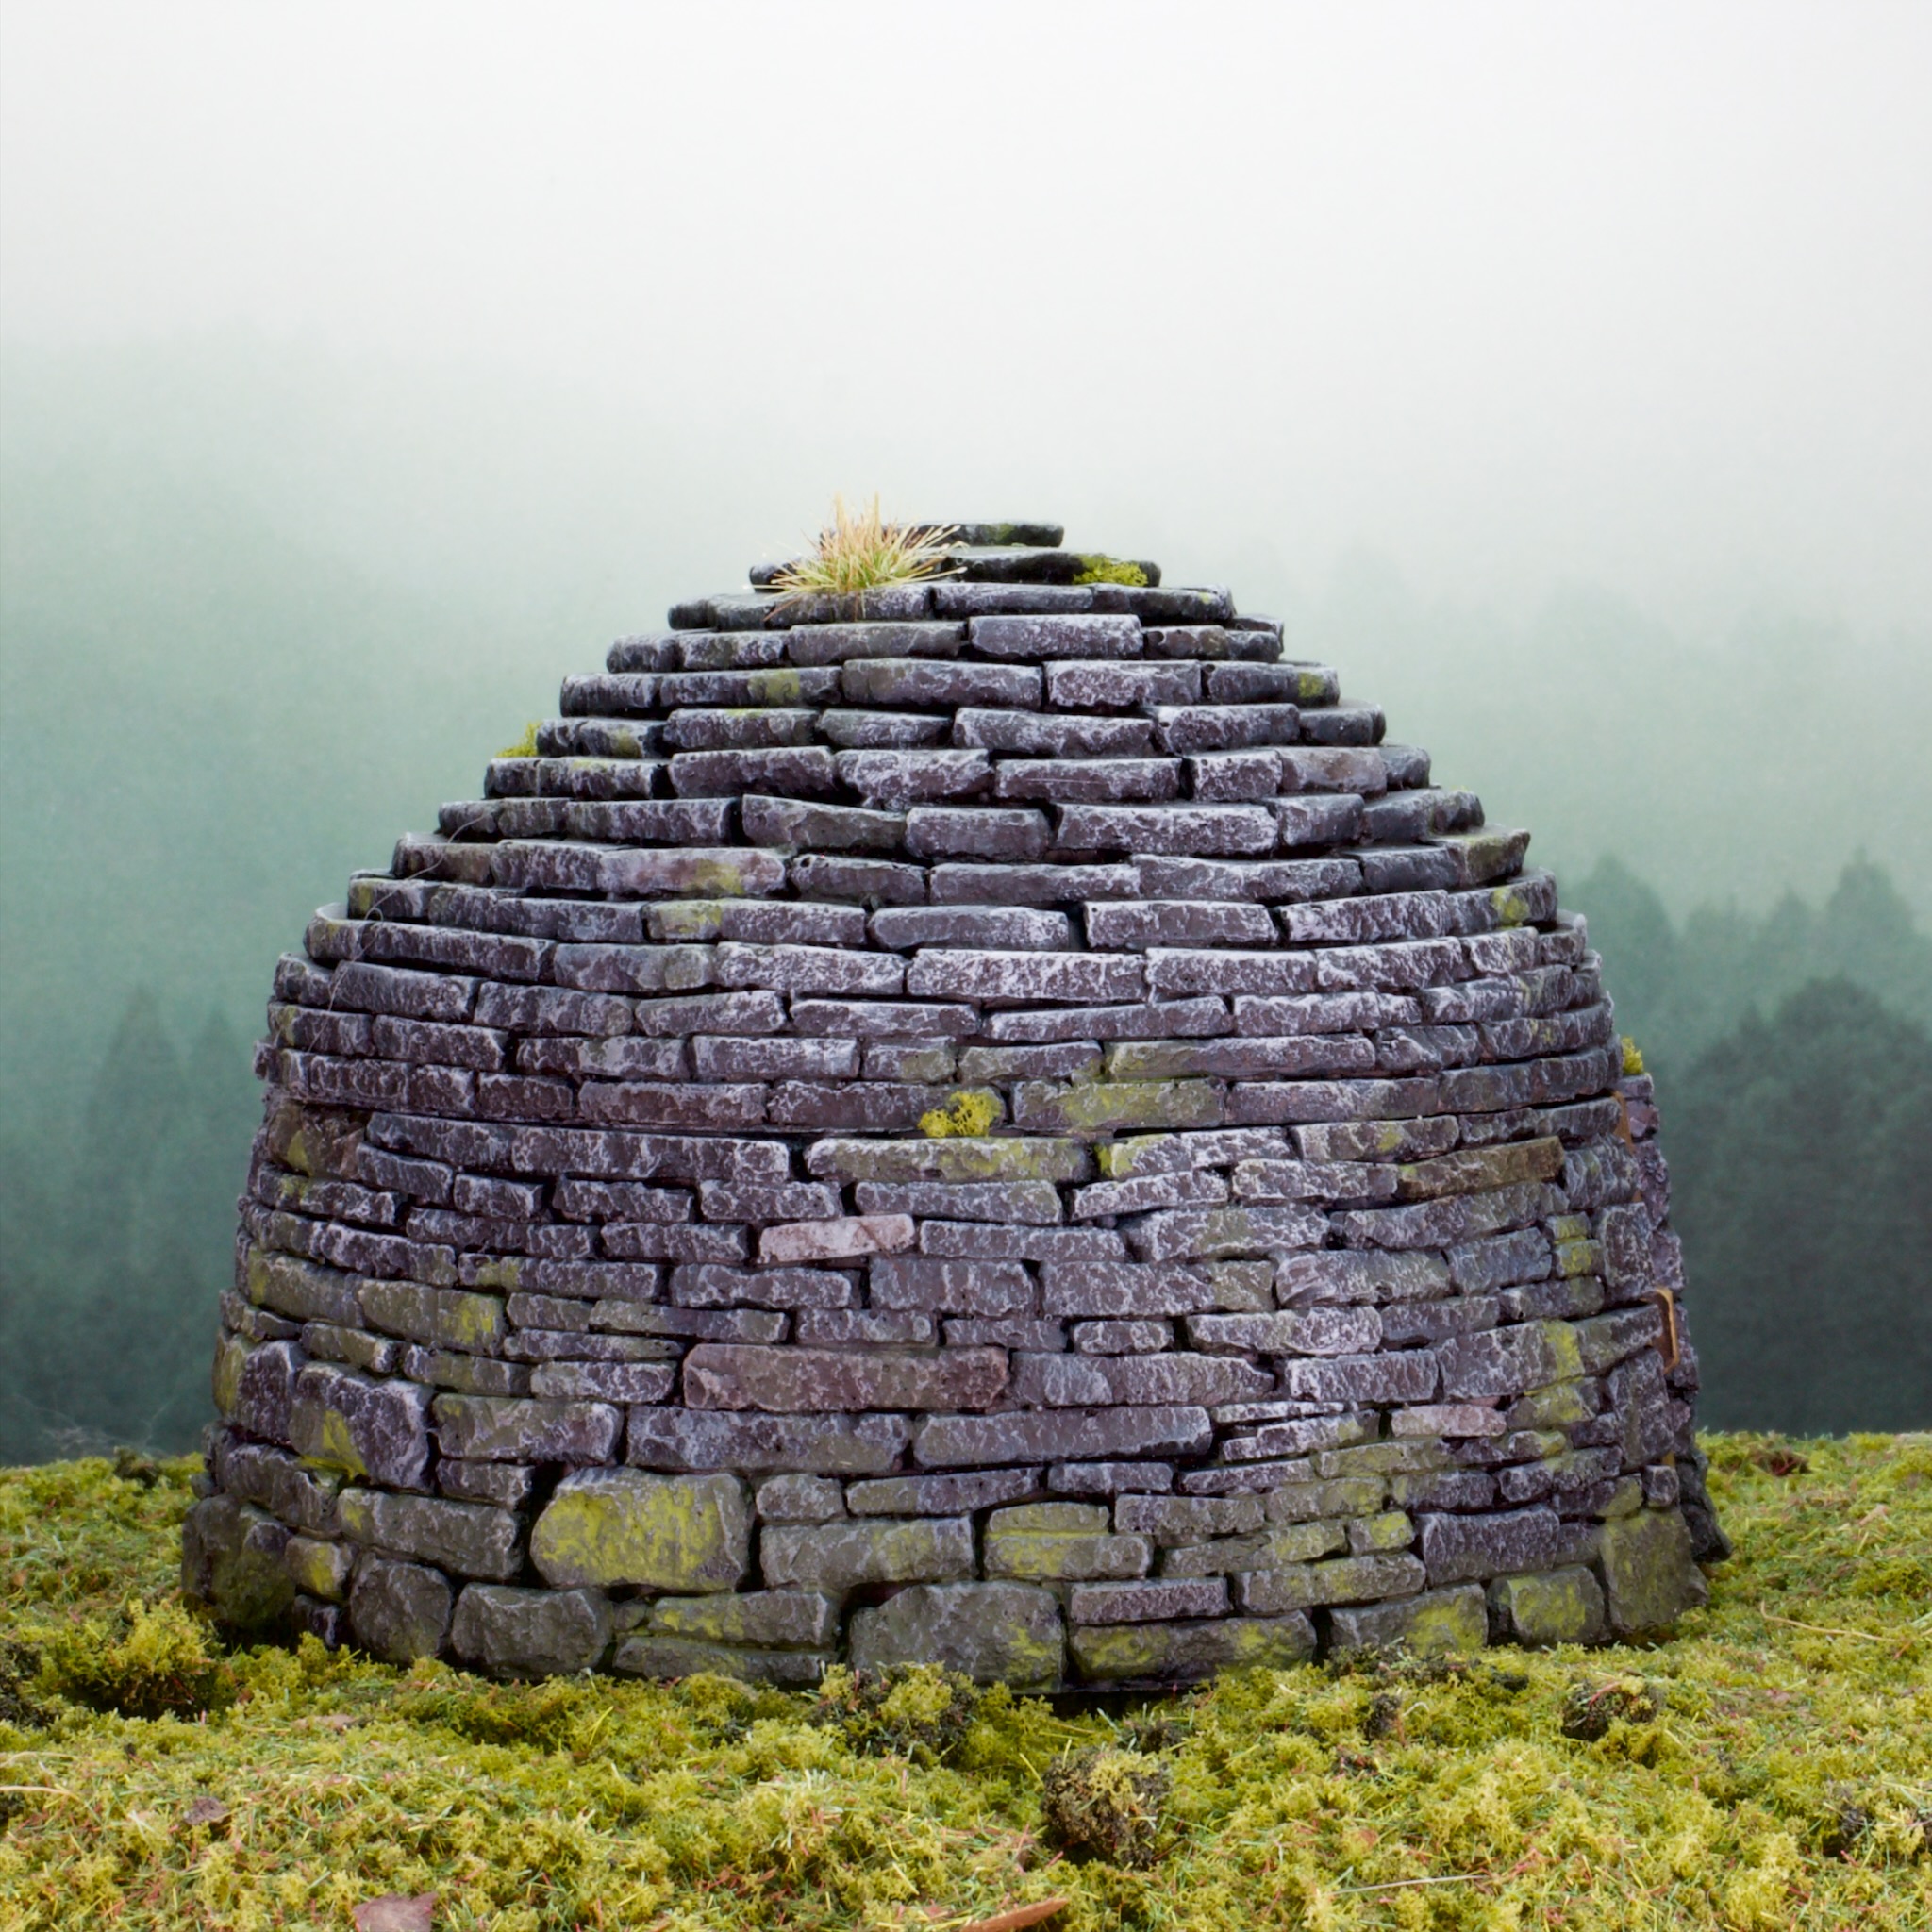
I’ve been off traveling for work so haven’t had much painting time in the last few weeks, but I felt like getting something done so turned to some terrain painting. I’ve had this beehive hut for a little while, it arrived alongside my barrow pieces from Fogou models and like everything I’ve gotten from there is a really cool model.

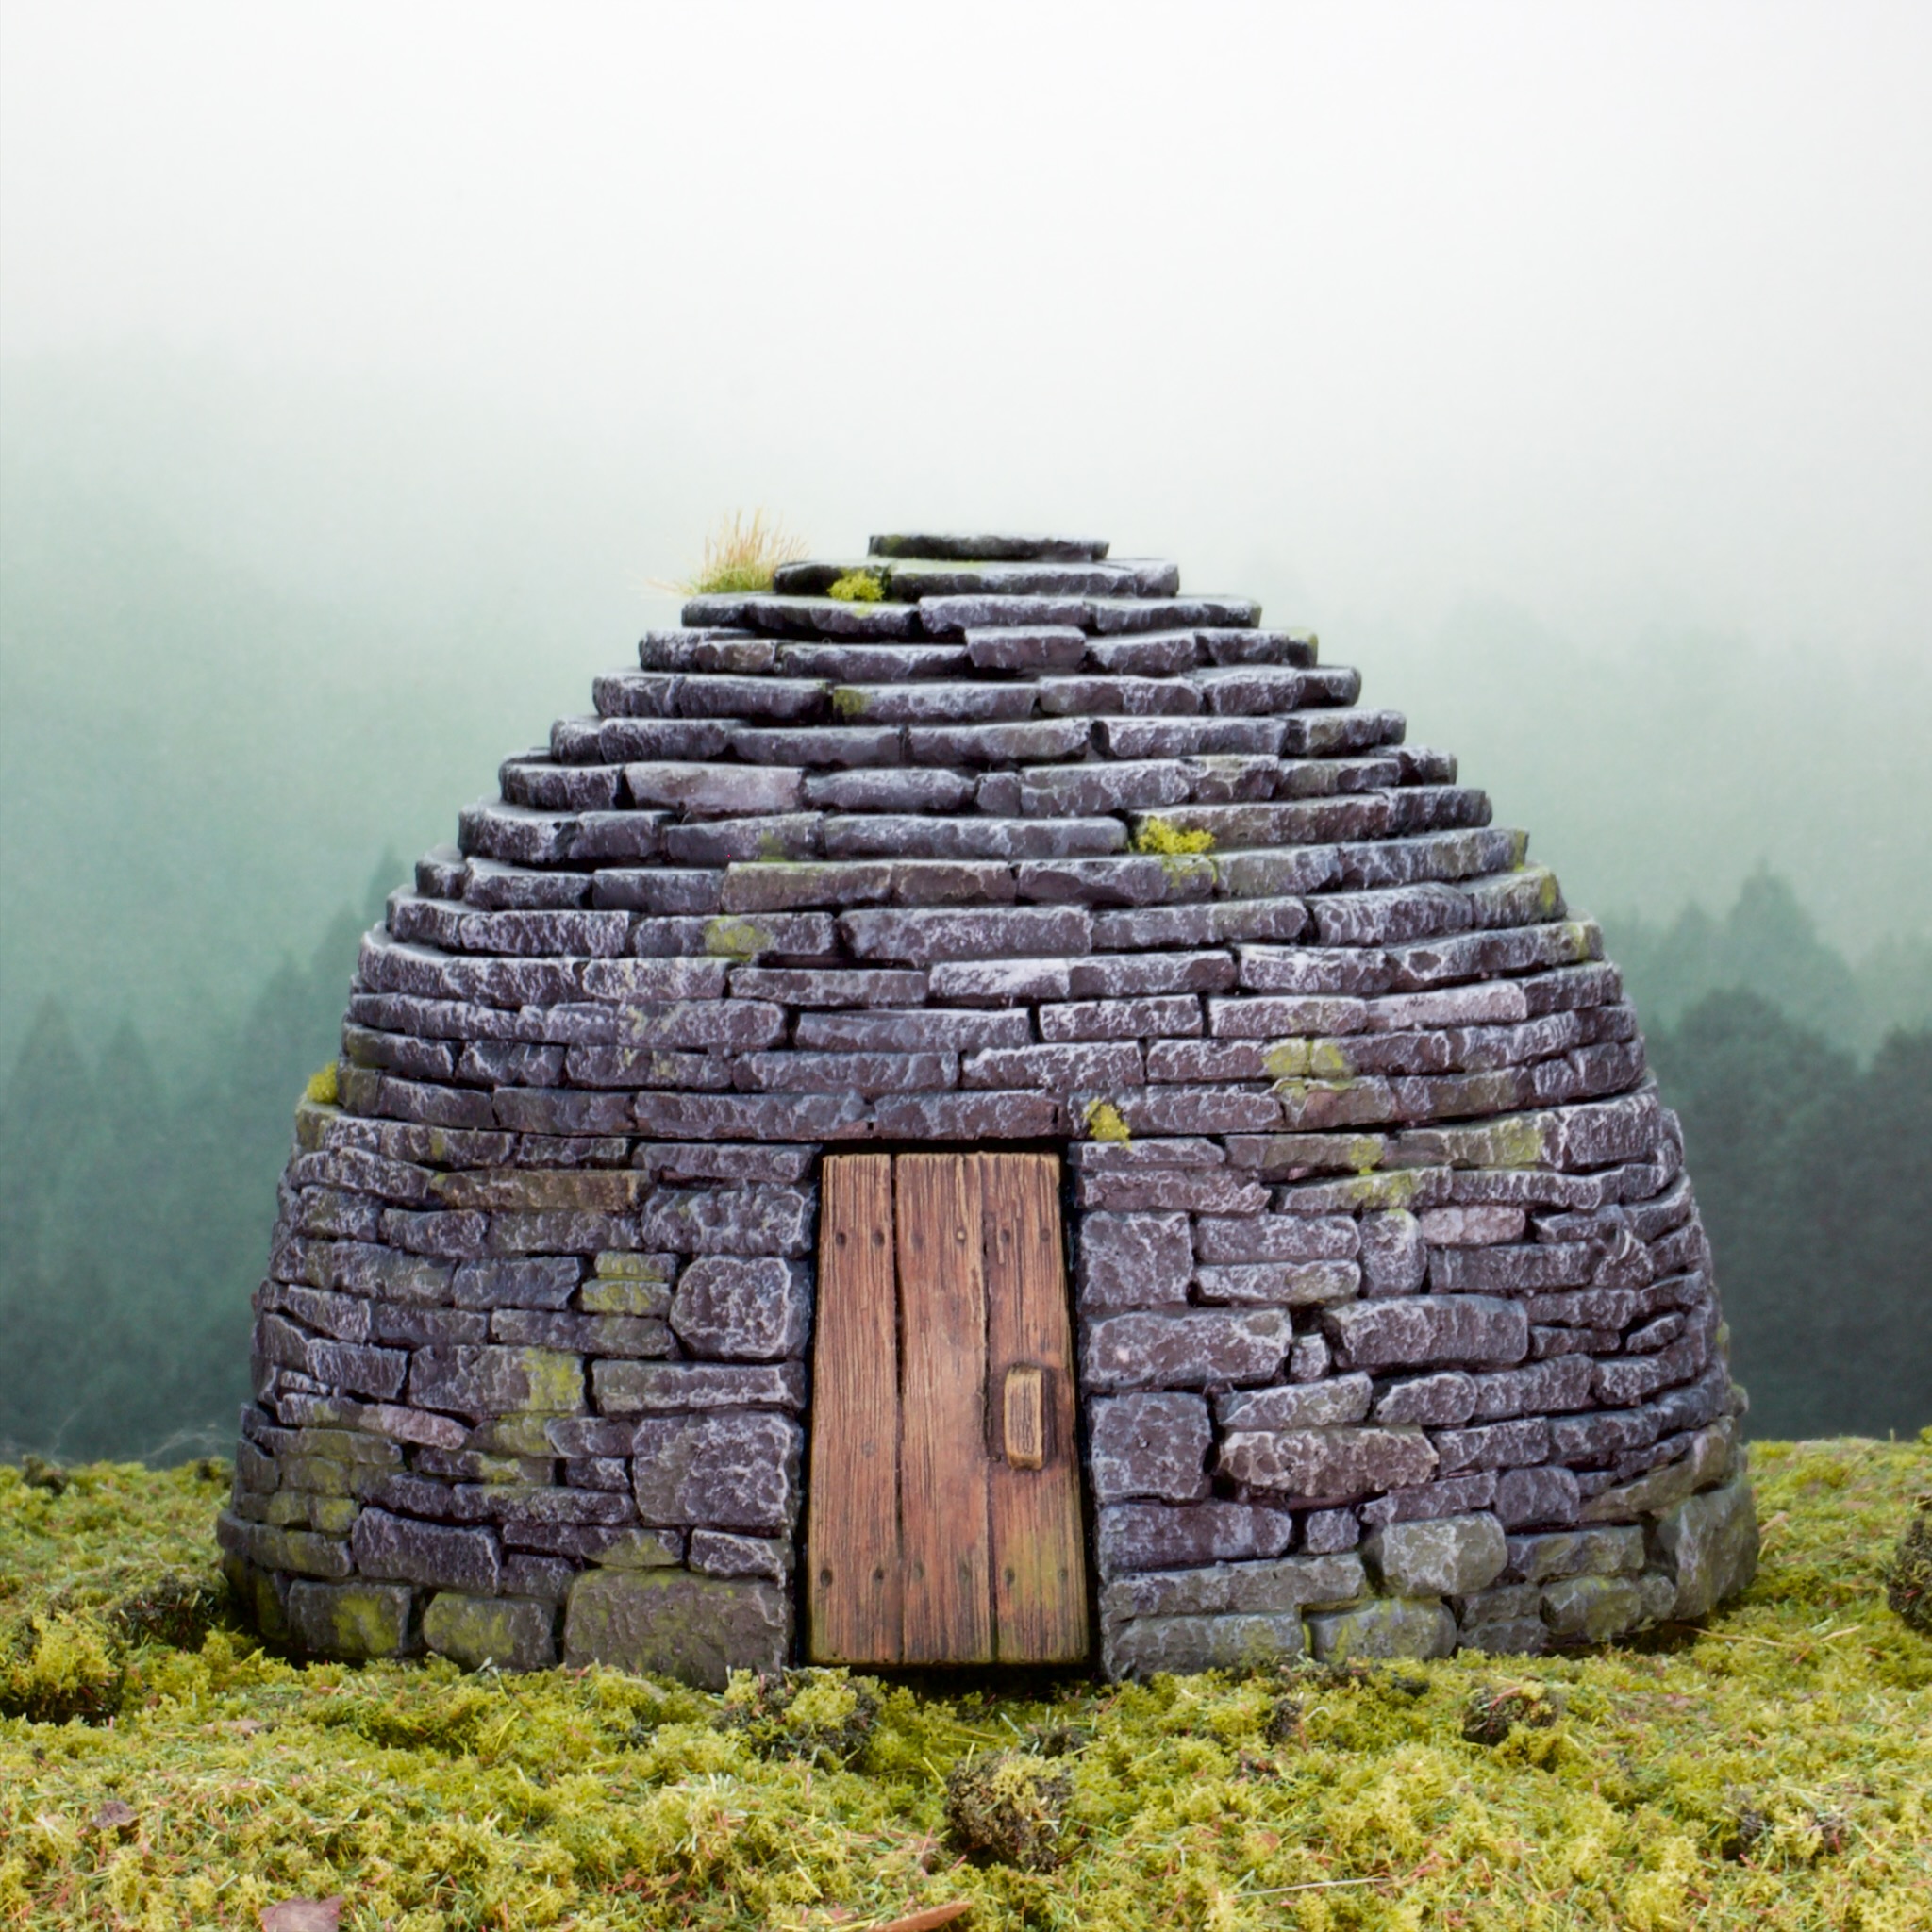
It was pretty fun and fast to paint, I followed my usual stone building paintjob, which is inspired by an old White Dwarf article.

I generally start with a basecoat of Vallejo Codel Color Dark Sea Grey, followed by successive drybrushes of Dark Sea Grey mixed with more and more of a light grey (Vallejo Game Color Heavy Bluegrey in this case). I then picked out some random stones with the Heavy Bluegrey, and tinted some random other with Citadel Fyreslayer Flesh Contrast and Citadel Aggaroth Dunes to add a bit of variety to the stones.

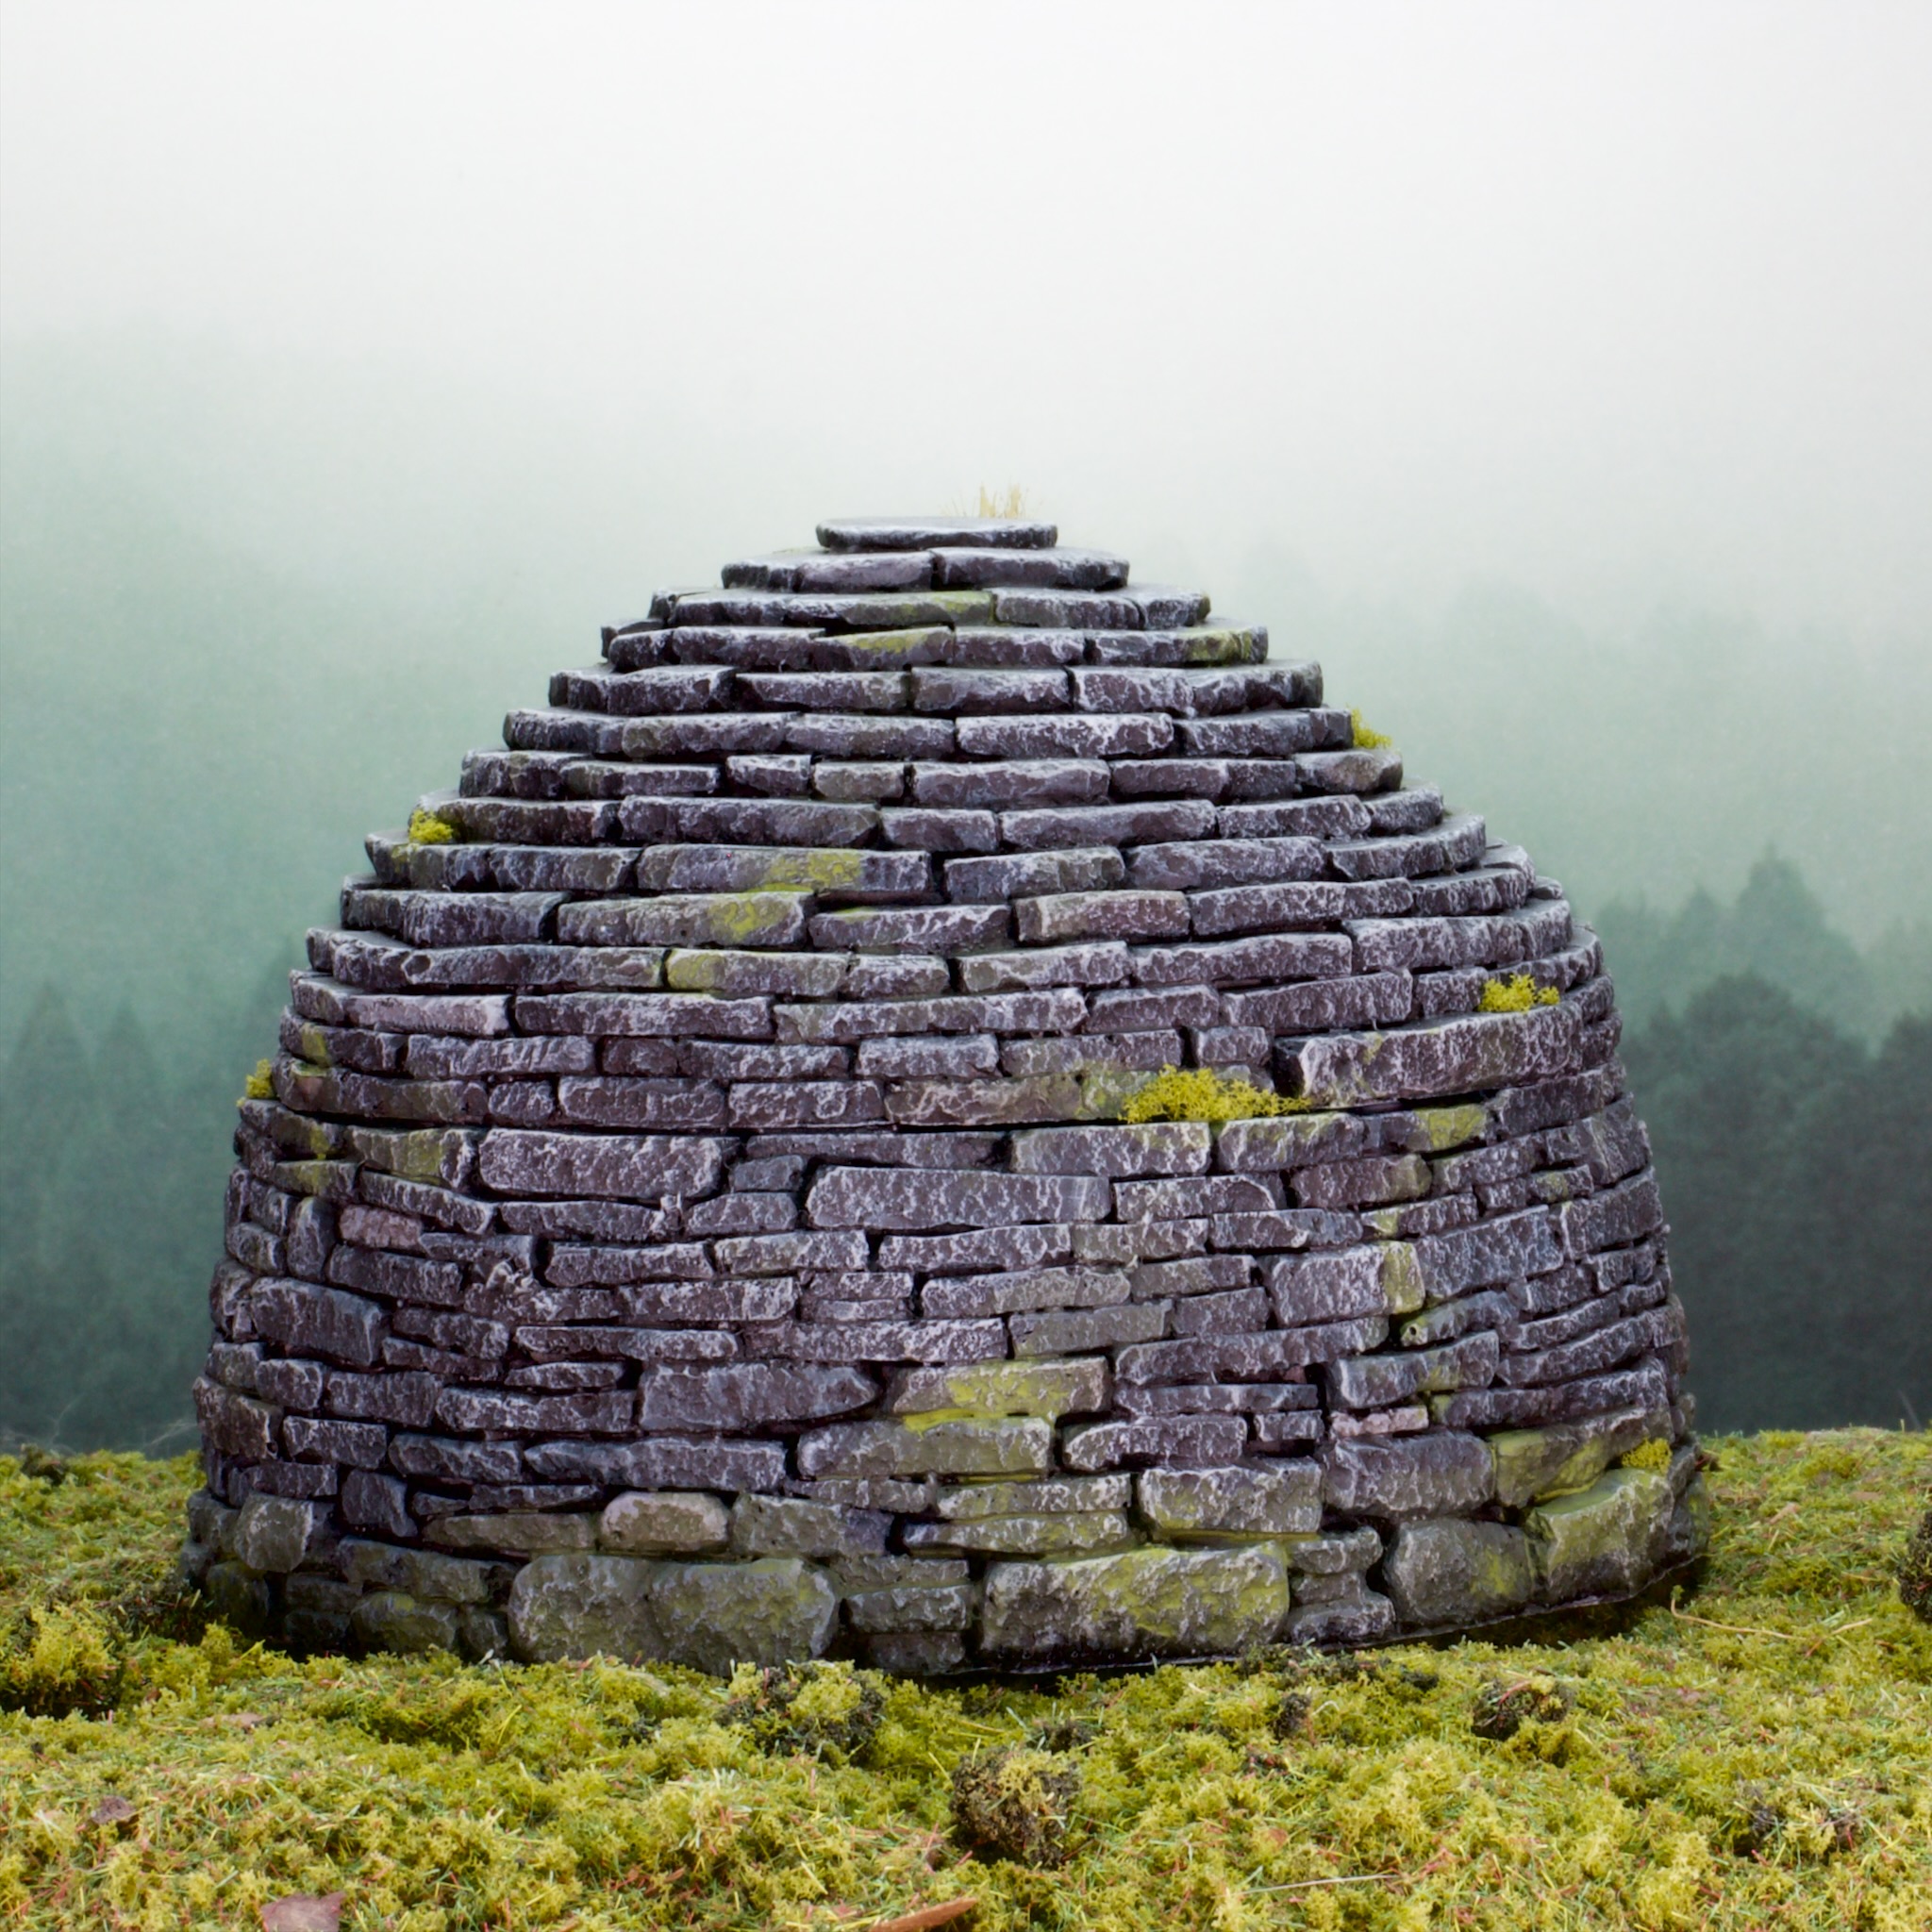
I then apply my homemade terrain wash (50/25/25 black ink, green ink, red ink, with water, flow aid, matte medium to taste) all over. The flow aid could be dish soap, I find that bubbles up a bit when I mix the wash up and apply it so I tend to avoid it, but it does the same thing at the end of the day! After that dries I hit the building with another drybrush of the light grey, followed by a more patchy drybrush of an off-white (AK Ivory White here). That finishes up the stone and I move on to the mossy areas. Those are done with enamel washes: AK Slimy Grime Dark and AK Slimy Grime Light. I generally start with the dark grime and apply it quite liberally to the lower areas, and in smaller patches to higher areas. The light grime is then plopped on top of areas of dark grime while those are still wet to get them to bleed into each other.

The painting stage is then followed by some foam moss to get a 3D effect in there and I decided to add a grass tuft to add to the overgrown look.

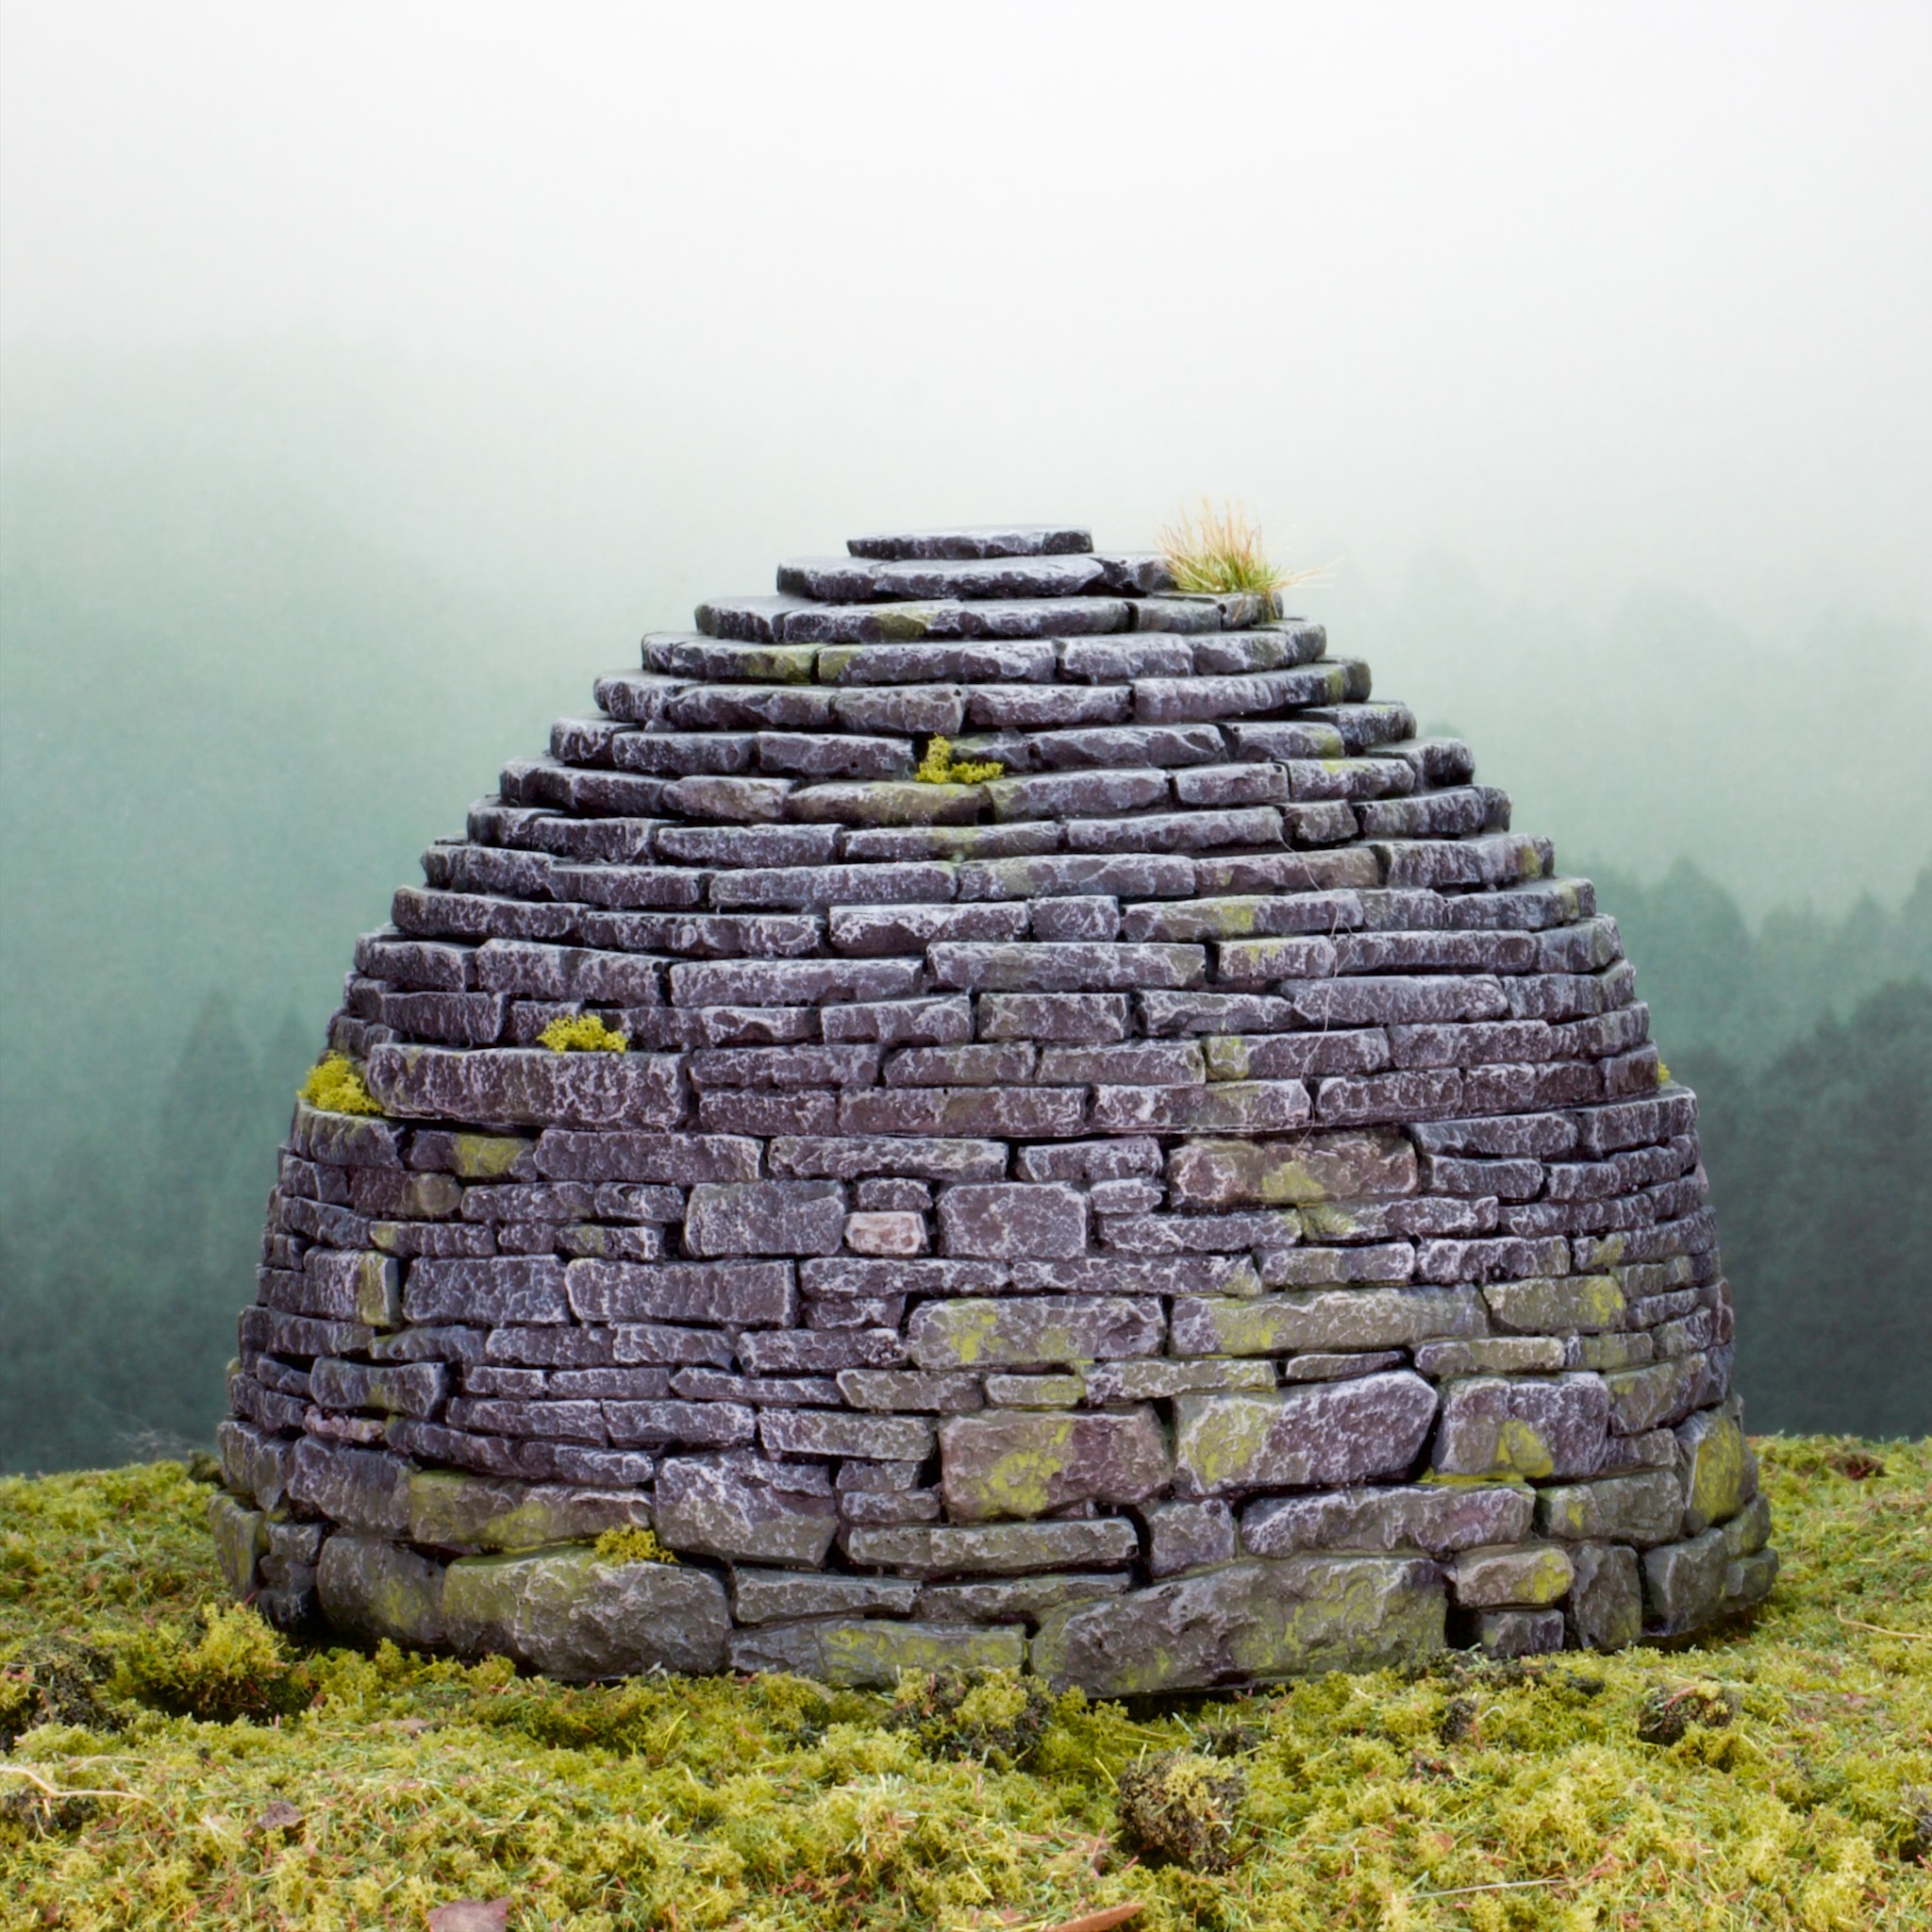
I have a few more pieces from Fogou I need to paint up and I’m sure they’ll be this fun to paint as well. The details on these models are really nice and they take paint very well.

In other news I got a notification from WordPress that the blog is now 4 years old, which is a nice little achievement. I started the blog as I missed the hobby blogging community, a lot of that content having moved to social media over the years (understandably, for those that want to try to make a living out of this social media is where the large audiences are). I’d enjoyed reading hobby blogs back in the early/mid 2000s, and gotten a lot out of them as the blog format in my opinion is very well suited for teaching. Funnily enough making this blog has led me to discover some phenomenal blogs which has been fantastic. Here’s to many more years!

Hello There!

I’ve been working on a few larger projects over the last few weeks and wanted a break from building so decided to look around for model I could paint in a couple of evenings. I had built and primed the Obi-Wan Kenobi model from the Clone Wars starter set for the Star Wars Legions game alongside the Clone Troopers from the set but never got around to painting him. He seemed like an ideal candidate for a little change of pace!

Like the other models in the starter set, he’s made of that soft boardgame plastic which is honestly not super fun to build or paint, especially when compared to the newer hard plastic models in the game’s range. I struggled to get the lightsaber to stay straight, and it definitely looks a bit wonky from some angles.

Just like the Anakin model, he’s holding his lightsaber quite close to his face (seems dangerous!), which means an opportunity for some dramatic lighting there! As with all my lightsaber glows, the main glow effect was achieved using the airbrush, with some spot highlights done with the brush to enhance the effect. The low highlights on the tunic and the belt are just painted on with the brush. This glow is painted on top of what is effectively a finished paintjob and is always a scary step!

Unlike the clones I’ve done up for the army I’ve kept his armour clean and unchipped, as I presume a person of his stature would be able to get fresh armour rather regularly while the clones would have to make do with what they had. No idea if that’s how things are described in the stories, but it made sense to me.

I made an attempt to replicate the Jedi symbol on his shoulder pad and I think it turned out ok, not as smooth as I see other painters get their freehand work, but close enough for me!

I’ve not made a habit of showing off work in progress on the blog so far, so won’t go over what I’m working on in the background, but I expect it to take a little while so you might see a few one off models like this over the next few weeks as I paint things up as small breaks from the bigger stuff!

Return of the Clones!

It’s been a few weeks since I posted anything as I’ve been on a brief hiatus caused by me getting into some card gaming with some friends, but the painting itch has been strong and I was excited to get back to finishing models!

This week I painted up these clone troopers for Star Wars Legion, to add to my 501st Legion Clones. As you may have noticed, these have yellow* markings rather than blue, to mark them as part of the 7th Sky Corps, Obi Wan Kenobi’s troops. I wanted to do this because I plan on fielding Kenobi in addition to Anakin Skywalker in the army, and I fancied them having a squad each from their respective commands.

* Interestingly, the wiki article says the markings should be orange, but they always looked yellow in the tv show to me, probably a trick of the lighting!

These were painted in exactly the same way as the first batch of clones, and I kept the marking positions the same on both, just changing the colour.

These were nice and quick to paint, a good project to get back in the painting flow!

Phase 1 Clones

After a few weeks of little to no painting due to the excellent reason of getting a wedding ready, I sat down at the painting table over the last few nights and decided to tackle some more Star Wars Legion models, this time some clone troopers to go with The Chosen One!

After the large amounts of storm troopers I painted for my Galactic Republic army, the last thing I wanted to do was paint more plain white armoured troopers, so I decided to paint some markings on them as well as battle damage, loosely based on how they appear in the movies/shows. The blue marks them out as part of the 501st, the legion commanded by Anakin.

These models are made from the soft plastic found in Star Wars Legion starter sets and as per my previous encounters with the material, I did not enjoy the building or painting process very much. It’s sad because the newer hard plastics produced for the game are some of the best examples of plastic kits, I wish they’d started with that from the get go!

The battle damage did a lot of work to cover up some of the imperfections in the casting, and generally the poor quality of the casts guided my painting towards the faster end of the scale. Overall though I’m happy with how they look for the effort put in, and they were a great way to get back into the groove of painting!

If you follow the blog some, you may have noticed I’ve been experimenting with backgrounds to my model photos for a little while, and this is the latest experiment. I printed out a photo I took in Japan back in 2015 of these wooded hills in the mist, and I think they’re suitably abstract to work well as backdrops.

The Chosen One!

I don’t know if this happens to everyone, but when I come home from a tournament my mind goes directly to wondering about my next project in that game system. As I mentioned last week I played in my first Star Wars Legions tournament, and of course had the urge to paint more models for the game. A quick chat to a friend with unused Legion models later and I’m apparently starting a Galactic Republic army!

First up on the painting table is Anakin Skywalker! I’ve already painted his future self so it only seemed fitting! The model is one of the newer Legion offering and was very nice to put together and a beautiful cast all around. Far cry from the early models which were made from that terrible boardgames model plastic.

As I’d done the glow effect on Vader’s lightsaber I felt I should do it here too, although I was very apprehensive about putting blue all over the face I’d just finished painting. Luckily I think it turned out ok.

I used the airbrush to sketch in the glow itself, and went back over and picked some highlights with a brush to accentuate the effect.

The lightsaber I painted after having done the airbrush work, as it was very much in the line of fire! I just did a somewhat textured gradient from blue to white using a brush.

When it came to basing him I wasn’t too sure what to do, but settled on a swampy look. This was nice and quick to do and should look nice over a whole army.

I also painted some terrain this week, but I’ll wait till I’ve received the new mat that goes with it before showing it off!

Endor-ish

I painted some terrain over the weekend, finally getting around to the Endor bits I’d printed quite a while back now. Rather than just posting pictures of an empty board I figured I may as well use the occasion to take pictures of my Star Wars Legion army while I was at it!

This terrain is all from imperialterrain.com, and printed on my Ender 3 Pro 3D printer. This was a fair bit of printing, I think it took around a couple of weeks of almost full time running the printer.

I painted the trees to look like the redwoods used as the Endor backdrop in the Return of the Jedi, but decided against matching the basing the army has (see Endor bases) for the forest litter. For the army I used Jarrah (A local Western Australian wood) sawdust, I which I reckon matches dried pine needles pretty well. To collect the amount of sawdust needed to cover these pieces would have taken me quite a while, and Jarrah sawdust can be an irritant for some people so I decided against having large amounts of it flying around. Instead I used the method I described in my Wood Elf post, blended dried leaves mixed with foam flocks. This has the advantage of being easy to make in large quantities, and down the track allows me to paint up some fantasy ruins to match the tree bases to re-use them for MESBG and other fantasy games.

The ferns you see in the photos were made by cutting up a cheap fake fern I found in a shop around here. I have plenty of it left for future terrain pieces!

This was a nice Sunday project, I started mid-morning and finished in the evening, drying times incuded (helped along by the heat we’ve been having here!). I look forward to playing some games with it and using the pieces as backdrops for forest miniatures!

Imperial Specialists

This has wound up being a nice and quiet weekend, so that means more painted models! These three models are the remainder of the Imperial Specialists set (I painted the officer from the set back in Febuary), and also the last three models in need of painting in my current imperial collection (I have some spare storm trooper models but I have more than I need already painted).

From left to right, we have an R4 astromech droid, a comms specialist, and an FX-9 medical droid. That medical droid is rather sinister looking I must say, not sure I’d be very excited to have that hovering over me if I was injured!

I ended up using the same recipe on the trooper as for the Grenadiers I painted last week, it looks about right for Imperial uniforms which isn’t surprising, the influences for the designs of the costumes are pretty clear!

With these three done, I probably have enough for two standard games’ worth of models (i.e. way more than I need 😉 ) but I’ve thoroughly enjoyed painting Star Wars models and I’m sure there will be more coming my way in the future.

Inferno Squad

My friends have been talking about playing Star Wars legion again, and that motivated me to finish up some models that have been built and primed for probably close to a year: the three members of Inferno Squad, a commando unit of the Empire.

Gideon Hask, ID10 Droid, Iden Versio, and Del Meeko

Inferno Squad made up some of the protagonists of the single player campaign of the Battlefront II video game that I enjoyed a lot when I played through it last year some time. I got excited when I saw that there were models of them for the Star Wars Legion game, and doubly so when I found them under the tree last Xmas! The kit for Iden Versio comes with a selection of weapons that match what she can use in the game, so I kitted her out they way I enjoyed playing the most, which I thought was a neat thing to let players do.

Painting-wise there is not much new here, they were painted with the same black recipe I’ve used for all the black models in the army (i.e. build up highlights using Vallejo Dark Sea Blue and Vallejo Ghost Grey, with shiny materials – the armour, boots, and gloves – highlighted brighter than the cloth elements).

This was a nice break from larger projects, a quick two-session paintjob (one this morning and one tonight!). It’s nice to be able to have these done, they made up most of my remaining Legion models needing to be painted. Left now are a couple of droids and a comms trooper!

Star Wars Legion Desert Terrain

I played a Middle-Earth SBG tournament yesterday (more on this at the end), and was inspired by some of the tables I saw there to paint some terrain of my own. I’d done all the preparation for these buildings while recovering from my eye injury a few weeks back, but never got around to painting them as I got too excited by being able to see well enough to paint models again! My 15-month old had a three hour nap this afternoon that provided a window of opportunity to put my new found motivation to good use.

The buildings in question I 3D printed on my filament printer from models by Imperial Terrain who produce great Star Wars Legion terrain. To add to the look of them, I textured all of the walls with tile grout, which provided a great surface for drybrushing as well as hiding some of the layer lines from the printing process. I really love the look of this technique and will keep applying it to printed terrain where it makes sense.

For the walls of the structures, I started with an all over coat from a cream spray can, followed by a reddish-brown wash I made using a mixture of craft paints, water, and some window cleaner to break the surface tension. Once that was dry, I drybrushed a mix of ochre and white craft paint, followed by another drybrush of the same mixture with more white added.

The crates were painted in a variety of flat colours and hit with the wash and drybrush steps of the walls.

The rusted elements were done with a burnt sienna craft paint, followed by a mixture of burnt umber, red, and yellow inks all over. The same ink mix was used to do the rust streaks. The pipes were then hit with sponged on orange paint to add a bit more variety.

The roof of the tall building was done in a brassy-coppery look, which is something I’d seen on the painted examples on Imperial Terrain’s website and really like the look of.

I’m not sure how they did theirs, but mine was done using the airbrush, with an all over coat of Vallejo Metal Colour Copper, followed by a shading step done using Burnt Umber Ink. The verdigris was done using GW’s Nihilak Oxide through the airbrush (to avoid the wash running in the print lines), followed by some stippling of the same paint to add a bit of texture to the effect.

Overall very happy with the outcome, and the little guy woke up just as I was putting the finishing touches on the buildings so thanks a lot to him for giving me the time to get these done! I have a fair few more pieces to tackle before the table will be done, so expect some more Star Wars terrain posts in the future!

Radagast goes to war!

As I mentioned above, I played a one day tournament yesterday with the models I showcased in the last post. I ended up with two wins and two losses, finishing up somewhere in the middle of the field which I was happy with. For the tournament I put together the small display board you can see above and the effort paid off as I took home the best painted army award which I was very happy with. All in all a good fun day, and as always has motivated me to paint even more Middle-Earth armies!

Imperial Special Forces

I had some spare time today so I decided to tackle one of my “built and ready for paint” units that has been sitting on the shelf of shame for a while now: the Star Wars Legion Imperial Special Forces Unit. These are the first hard plastic Legion models I’ve built and painted and they are much nicer than the soft plastic part of the range. They go together really well and provide nice crisp details for painting.

These were painted much like my Darth Vader, i.e. highlighted from black using Vallejo Dark Sea Blue and progressively mixing in more Vallejo Ghost Grey until pure Ghost Grey was used. The red is Kimera’s “The Red” which has insane coverage (These are all one coat over black).

From the box these came in I still have the two characters from Inferno Squad as well as Iden Versio herself. I’ll paint those up next time inspiration strikes!