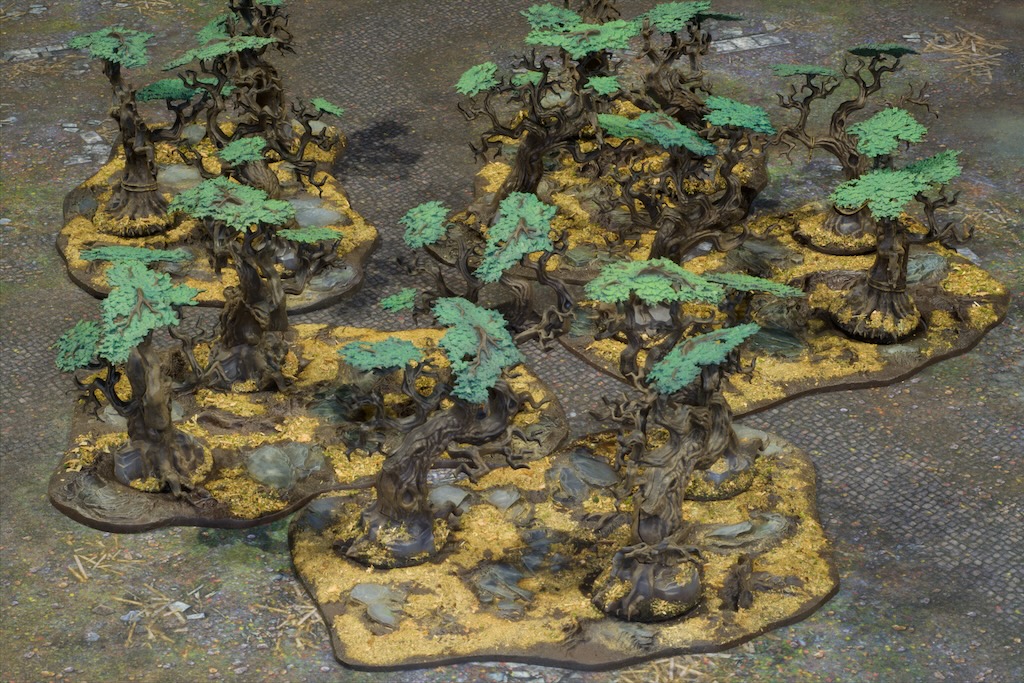
I’ve done a bit of terrain painting over the last week, tackling a bunch of forest bases I’ve accumulated over the years. These are all the same kit, Citadel Woods which I believe are not sold anymore unfortunately. I’ve somehow amassed a bit of a collection of them and it felt like time to finally get them painted!
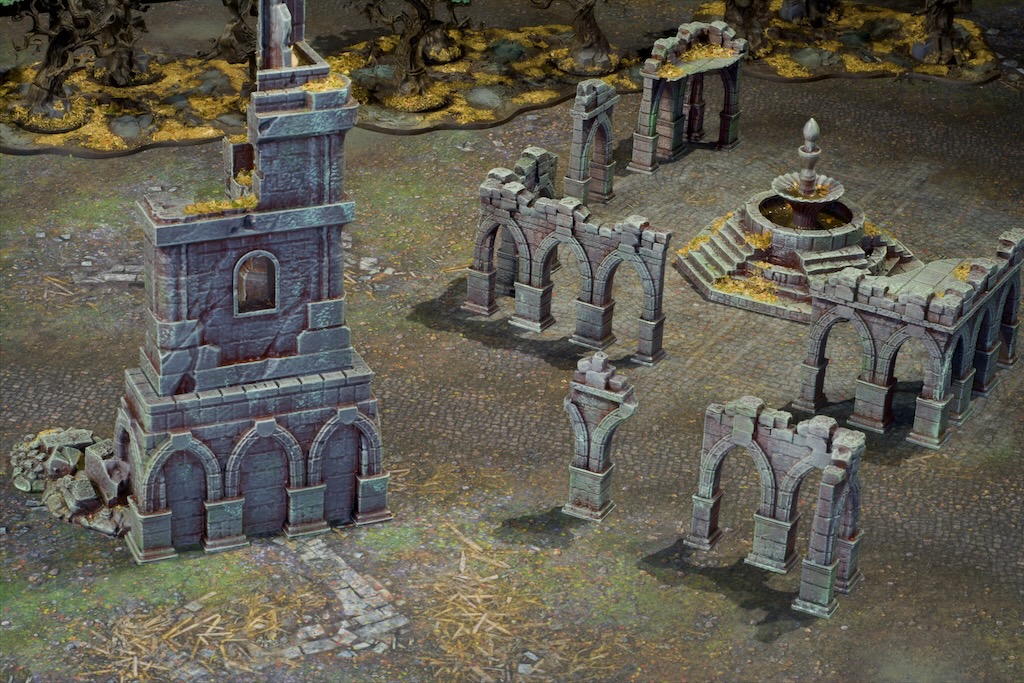
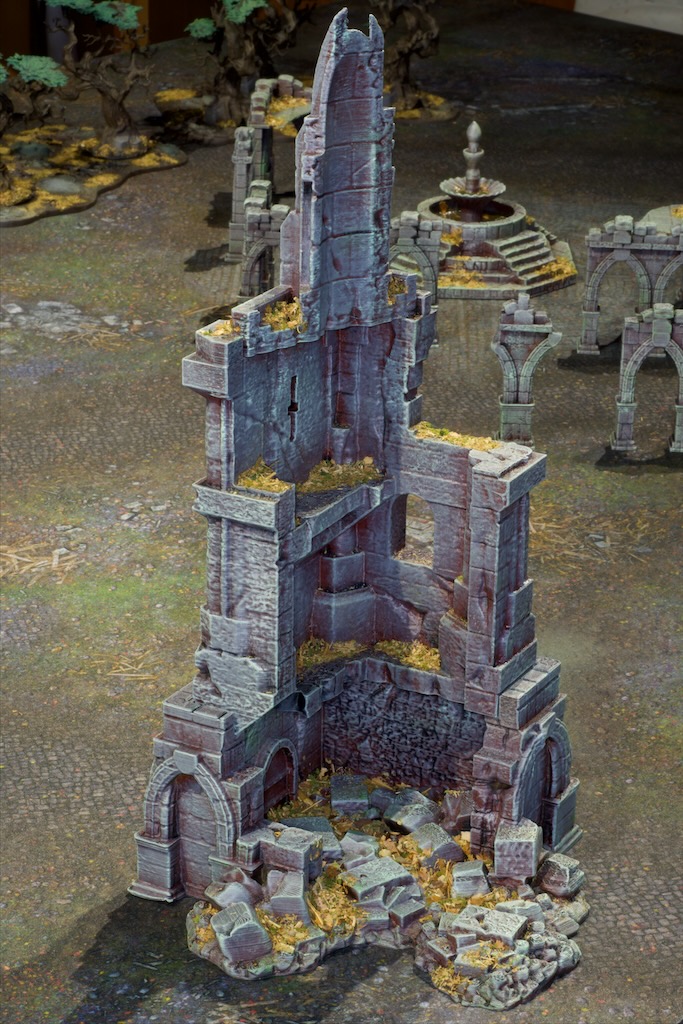
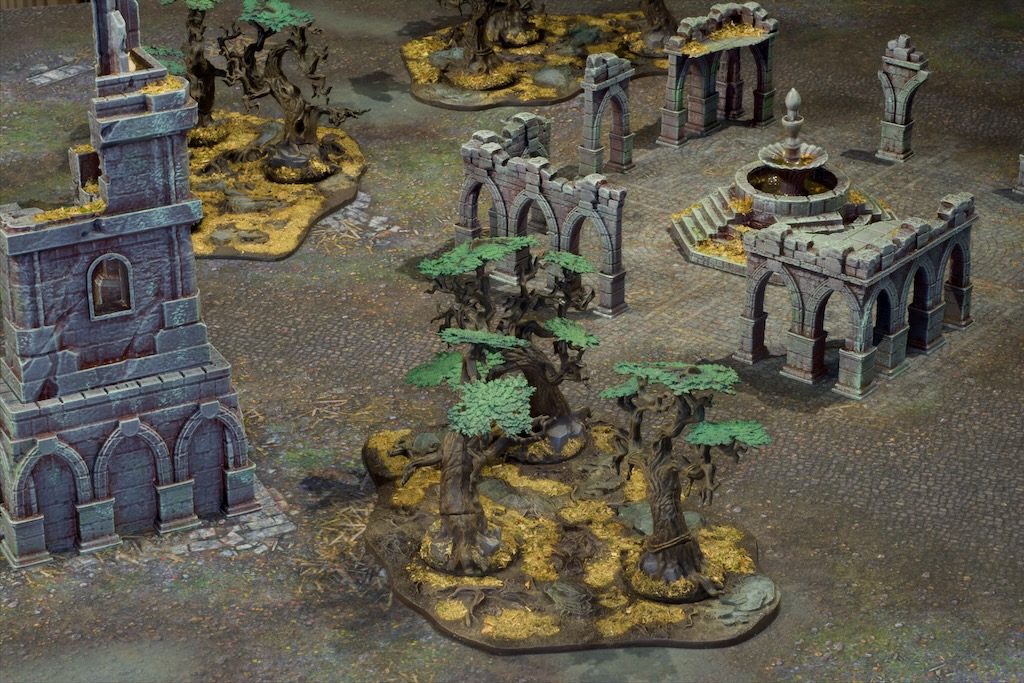
Taking pictures of these gave me the opportunity to take pictures of some more terrain I did up a little while back, this time not old kits, but pieces I 3D printed. The files are from RM Printable Terrain from their Stormguard collection. I was waiting to receive the mat you see the pieces on before I took photos.
I didn’t necessarily plan on painting these trees to match, but I think the ruins and the trees work nicely together and I’ll definitely have them both on the table at the same time for games going forward.
Look forward to getting some games in amongst these!
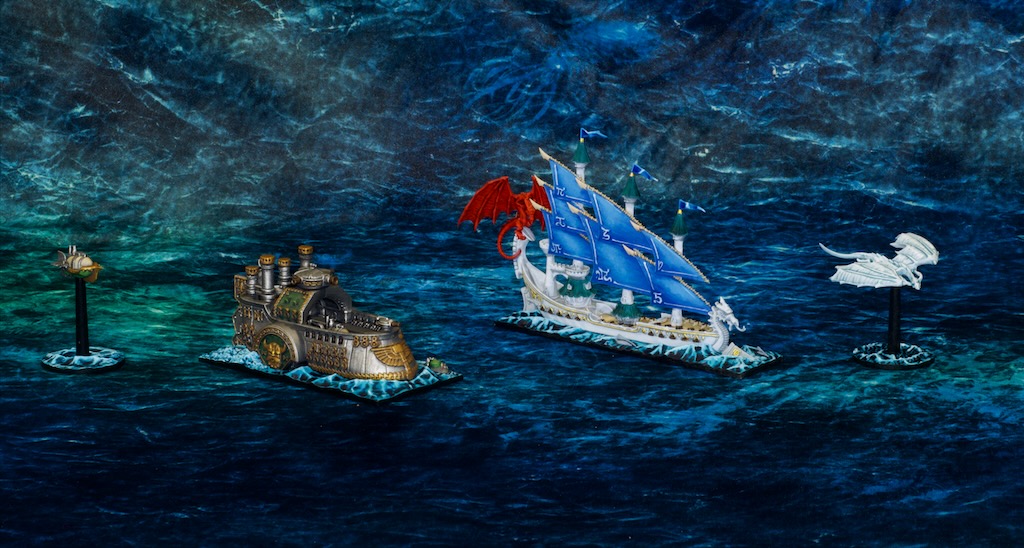
This week saw me paint a few odd things, starting with a sudden urge to paint models from Dreadfleet, a 10 and a bit year old standalone naval game from Games Workshop, set in the old Warhammer universe. I bought my set upon release, built all the models and then never painted any. Never too late to get to that though, just had to wait for inspiration to strike! There are quite a few ships and its of terrain in the game, so plenty more to paint before I can call it done, hopefully I won’t wait 10 years to paint the next batch!
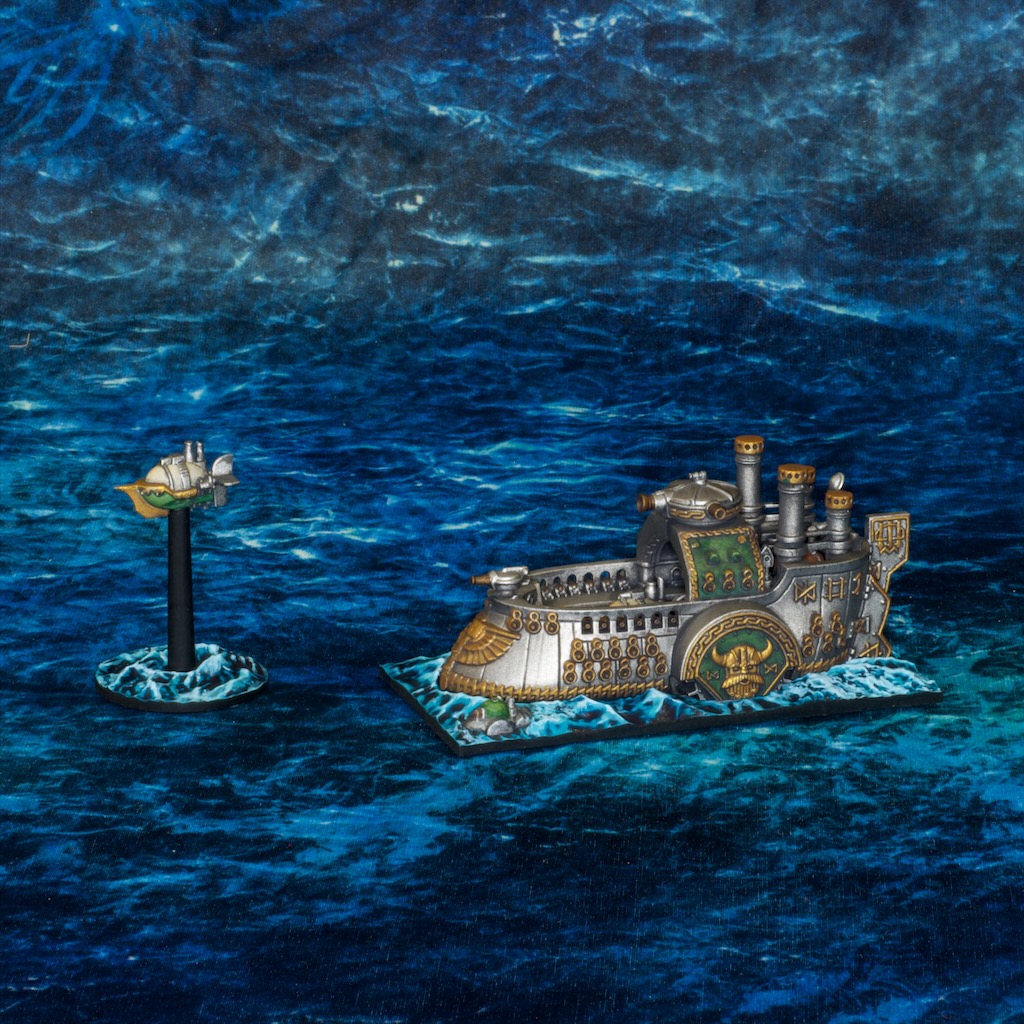
Grimnir’s Thunder
First up we have Grimnir’s Thunder, the dwarven ship. Some ships in the game have small pieces they can send out, and in this case this is a dirigeable. You can barely see another ready to launch peeking out of the deck.
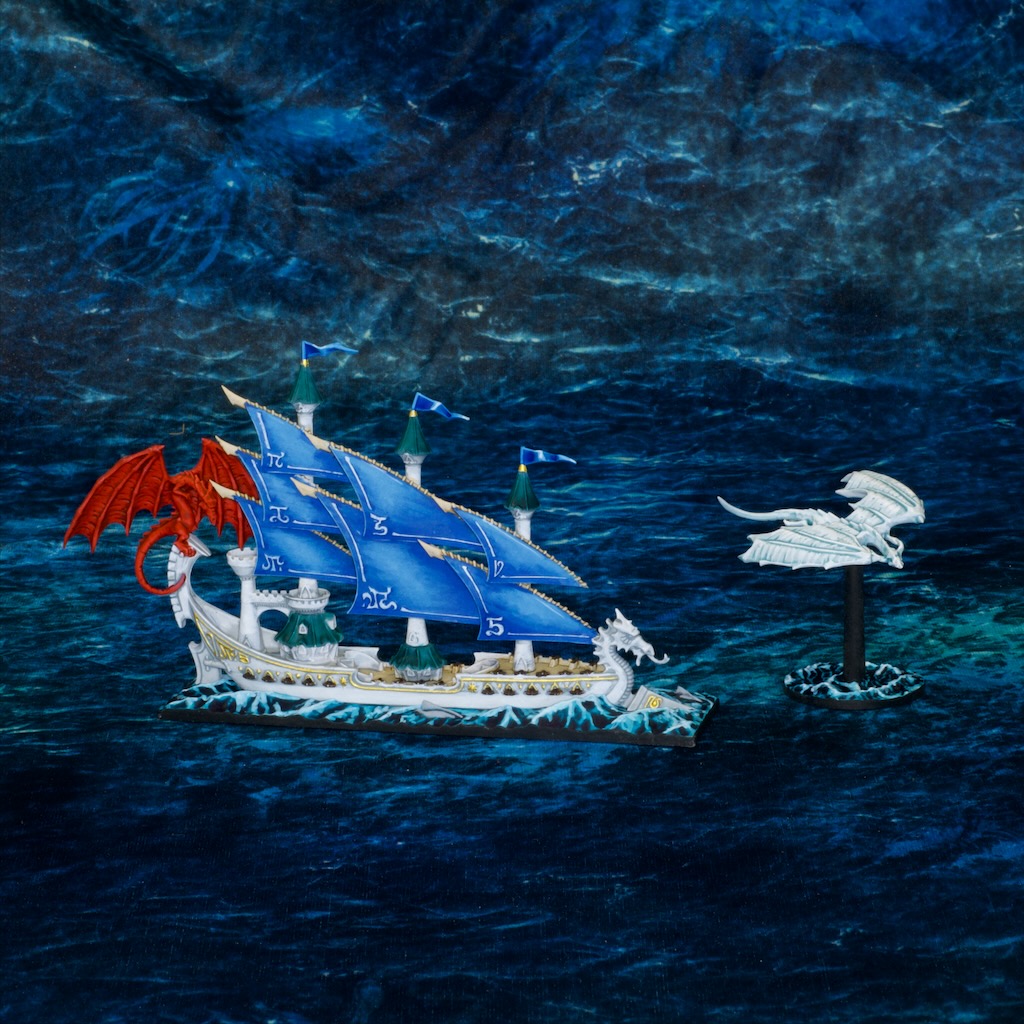
Seadrake
The second one I tackled was Seadrake, the high elf ship. This one has dragons!
These are very cool models, if a bit challenging to paint as they have a lot of overlapping pieces and are a smaller scale than I’m used to painting. They have however been quite enjoyable to paint! The mat that comes with the game also provides a really nice backdrop for photos!
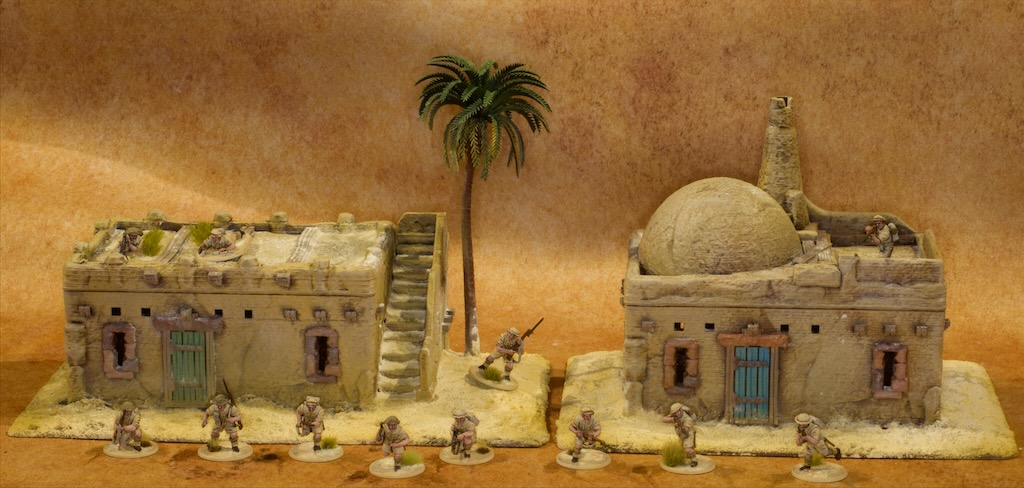
This week also marked my first foray into painting terrain for my North Africa WW2 project, with these two houses. I printed these on my 3d printer (you can find the files I used here) and based them on pieces of MDF. The palm tree is a cheap plastic model I found on eBay. I have a whole batch of these so expect to see them on other terrain pieces in the future!
I painted them with craft paints using a series of progressively brighter dry brushes, nothing fancy but it looks ok.
I used a lot of cream grout to make the sand on the base. This ended up being far too bright for my desert mat so I airbrushed some warmer tones to get it closer to where it needed to be. It’s quite a bit brighter but looks reasonable to me now.
As a parting note I played in a Star Wars Legion tournament over the weekend with my Galactic Empire army. This was my first attempt at playing the game (nothing quite like diving in head first!), and I really enjoyed myself. I didn’t do particularly well (won one of my three games so not all bad!), but I did manage to leave with the best painted army award so am happy with that!
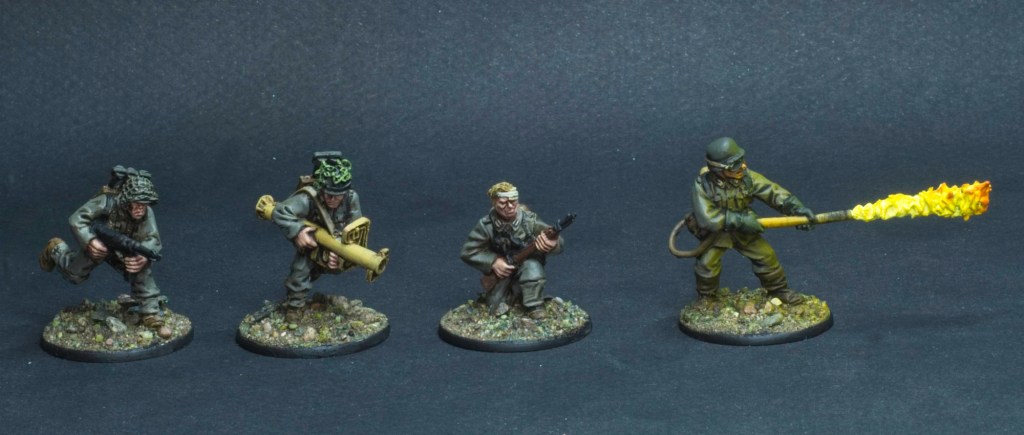
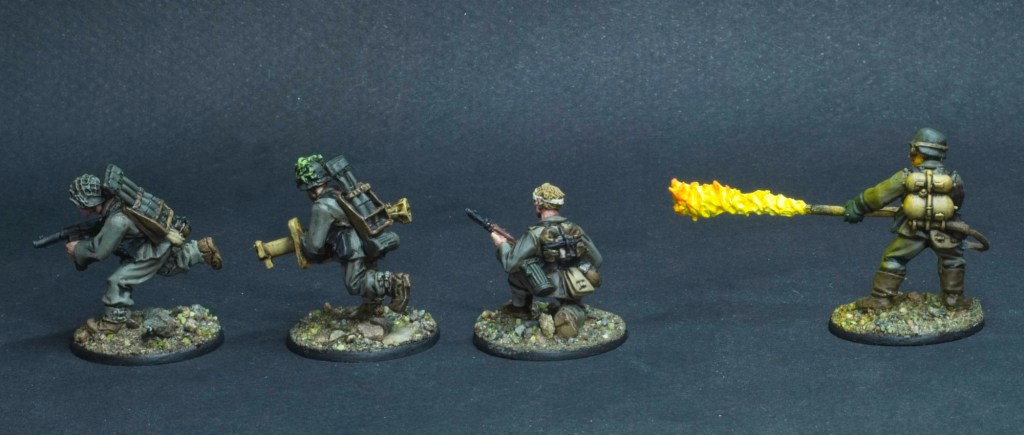
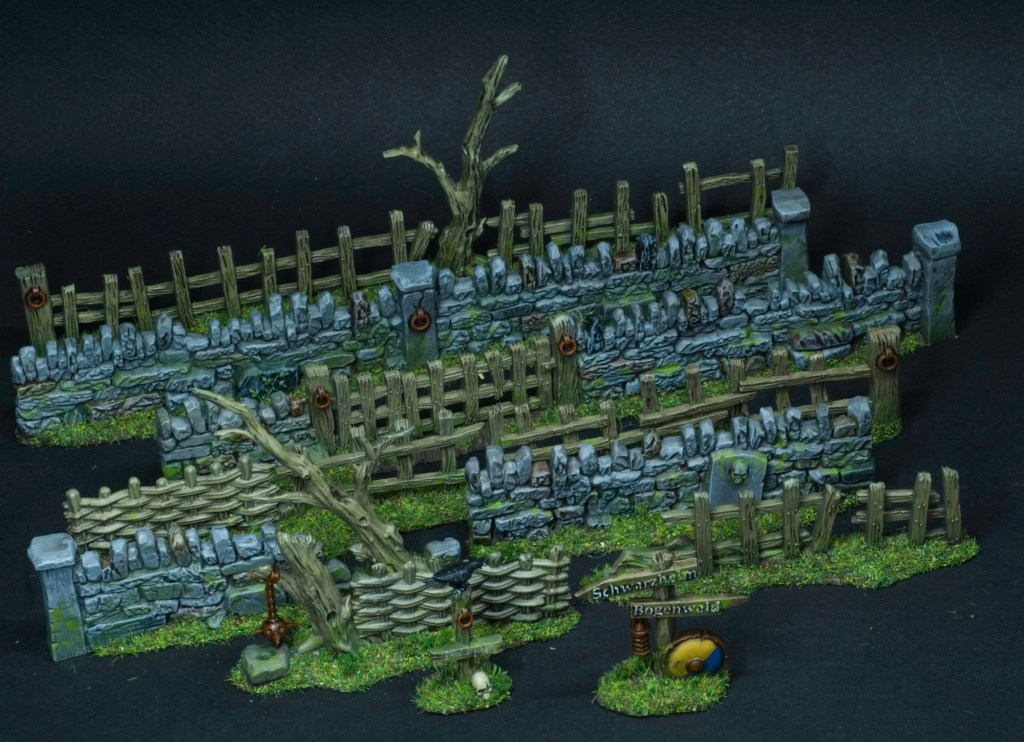
A bit of a mix of things this post! After working on a few of my bigger projects these last few weeks I felt like a small palette cleanser (can’t remember where I first saw that pun, but it’s excellent at expressing what I mean!). This resulted in me putting together and painting a blister pack of german weapon teams and an old set of Warhammer fences.
The weapon teams as you can see are made up of a Panzershrek team and a flame-thrower team. Not much to write about in terms of painting as these are done in exactly the same way as my other Grenadiers, except the fire!
I had a bit of fun with that flame, trying to make sure to keep it as bright as possible. To that end I started with a pure white, that I slowly covered in yellows then oranges at the very tips. The glow effect on the soldier is done with a very light pass of orange through the airbrush, to tint the underlying colours rather than cover them entirely. I think the effect is pretty convincing, and looks pretty good even when not lit up properly (i.e. anywhere not under painting lights!) which I’m happy with.
While I was painting these I also tackled an older set of plastic terrain I’ve had for years, the old fences set for Warhammer (back in the square base era!). I spent way more time n these than I usually do on terrain, but they’re great models and were very fun to paint. The green mossy parts on the walls are done with AK enamel washes (Slimy Grime Light and Slimy Grime Dark). I’ve been wanting to try these for a while and this seemed like a great project for them. Really like the result so will definitely use them on other projects.
Anyway, those were two fun short projects that served as a nice filler while I impatiently wait for my next project to be delivered!
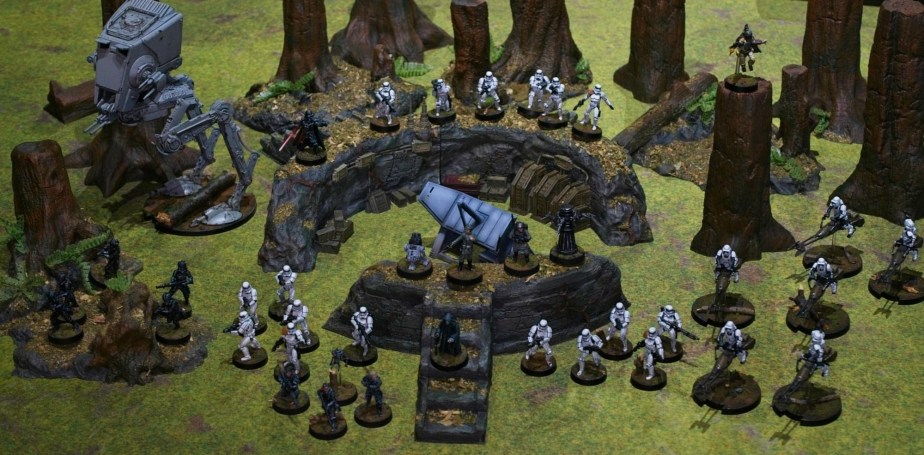
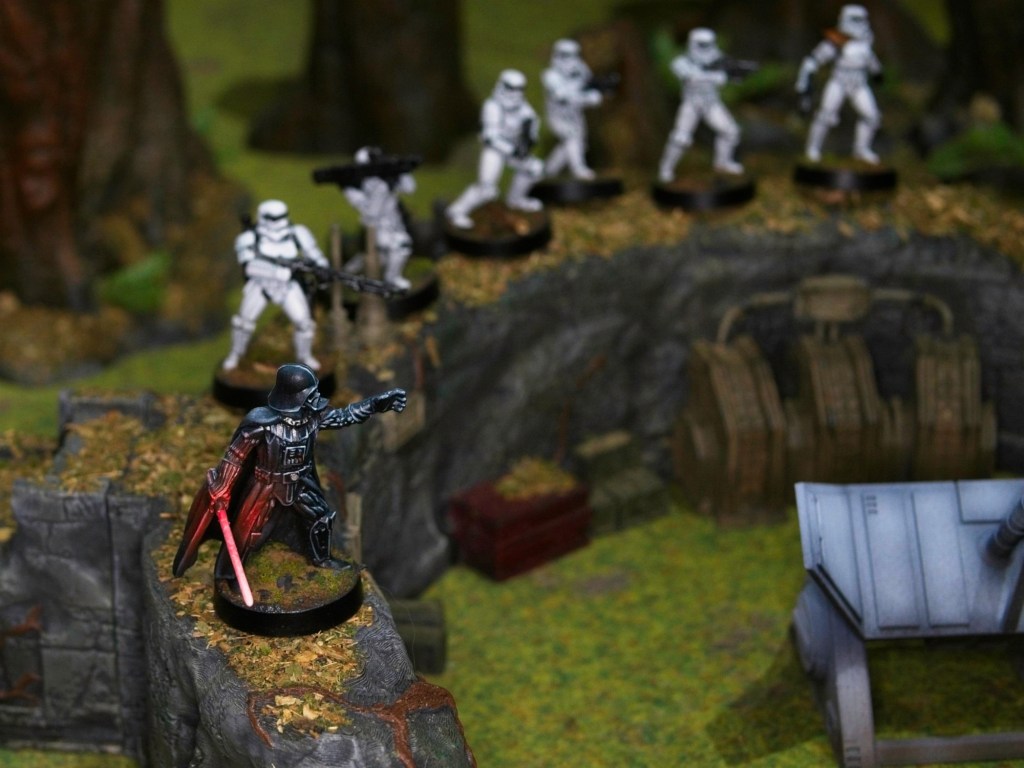
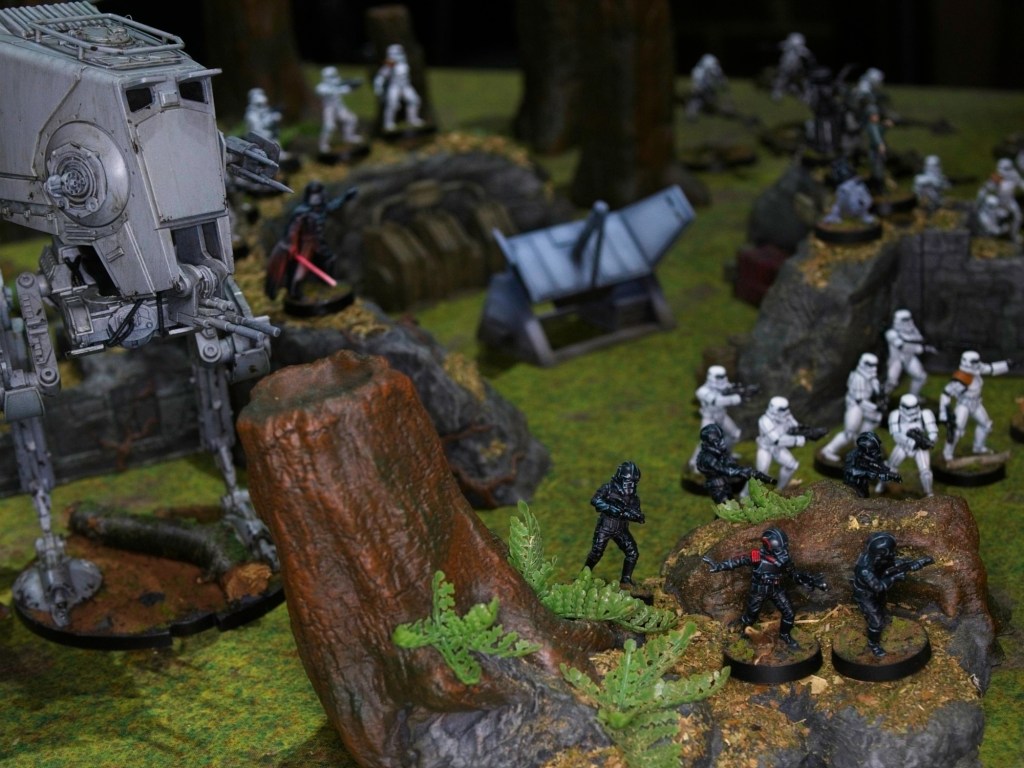
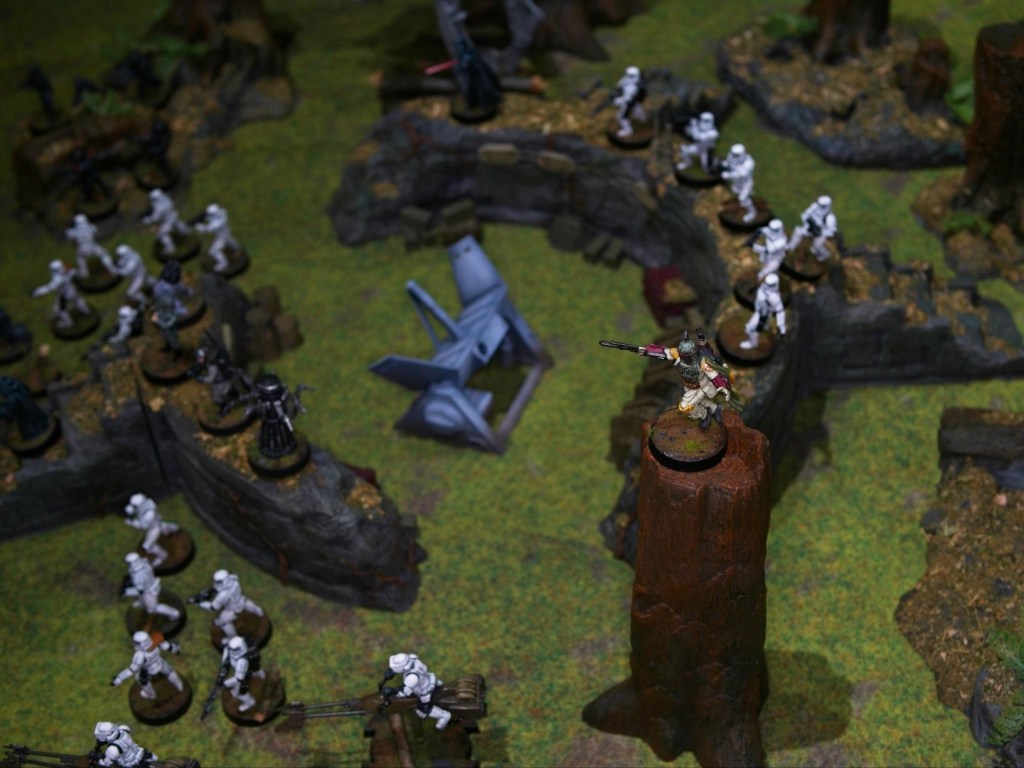
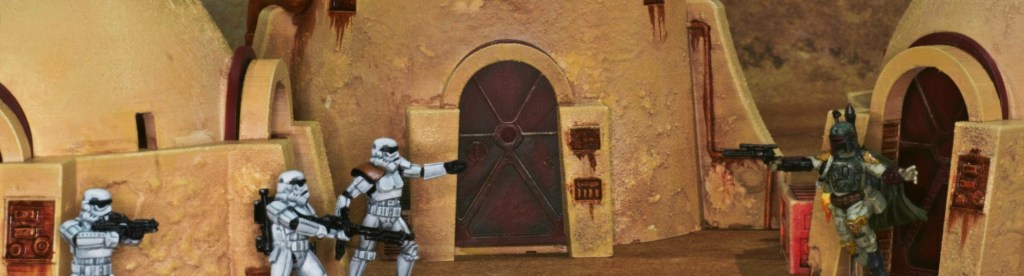
I painted some terrain over the weekend, finally getting around to the Endor bits I’d printed quite a while back now. Rather than just posting pictures of an empty board I figured I may as well use the occasion to take pictures of my Star Wars Legion army while I was at it!
This terrain is all from imperialterrain.com, and printed on my Ender 3 Pro 3D printer. This was a fair bit of printing, I think it took around a couple of weeks of almost full time running the printer.
I painted the trees to look like the redwoods used as the Endor backdrop in the Return of the Jedi, but decided against matching the basing the army has (see Endor bases) for the forest litter. For the army I used Jarrah (A local Western Australian wood) sawdust, I which I reckon matches dried pine needles pretty well. To collect the amount of sawdust needed to cover these pieces would have taken me quite a while, and Jarrah sawdust can be an irritant for some people so I decided against having large amounts of it flying around. Instead I used the method I described in my Wood Elf post, blended dried leaves mixed with foam flocks. This has the advantage of being easy to make in large quantities, and down the track allows me to paint up some fantasy ruins to match the tree bases to re-use them for MESBG and other fantasy games.
The ferns you see in the photos were made by cutting up a cheap fake fern I found in a shop around here. I have plenty of it left for future terrain pieces!
This was a nice Sunday project, I started mid-morning and finished in the evening, drying times incuded (helped along by the heat we’ve been having here!). I look forward to playing some games with it and using the pieces as backdrops for forest miniatures!
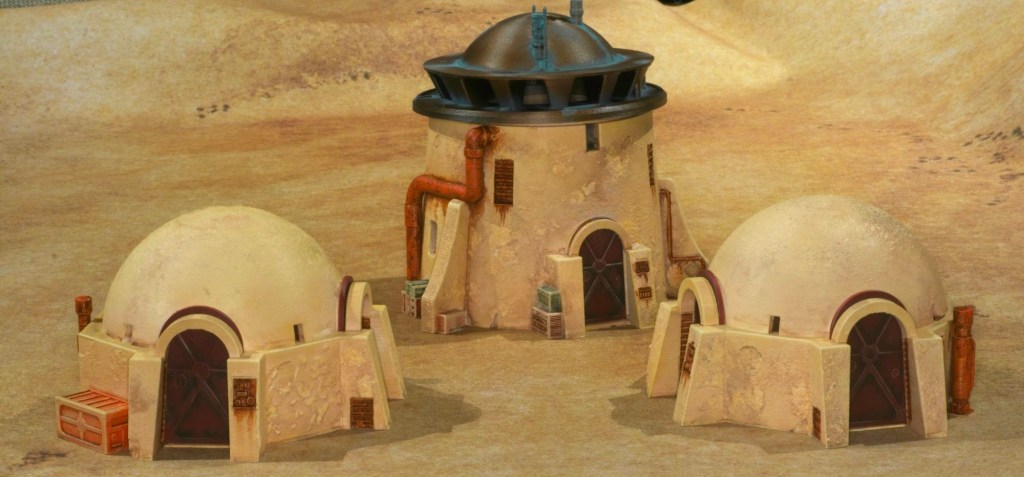
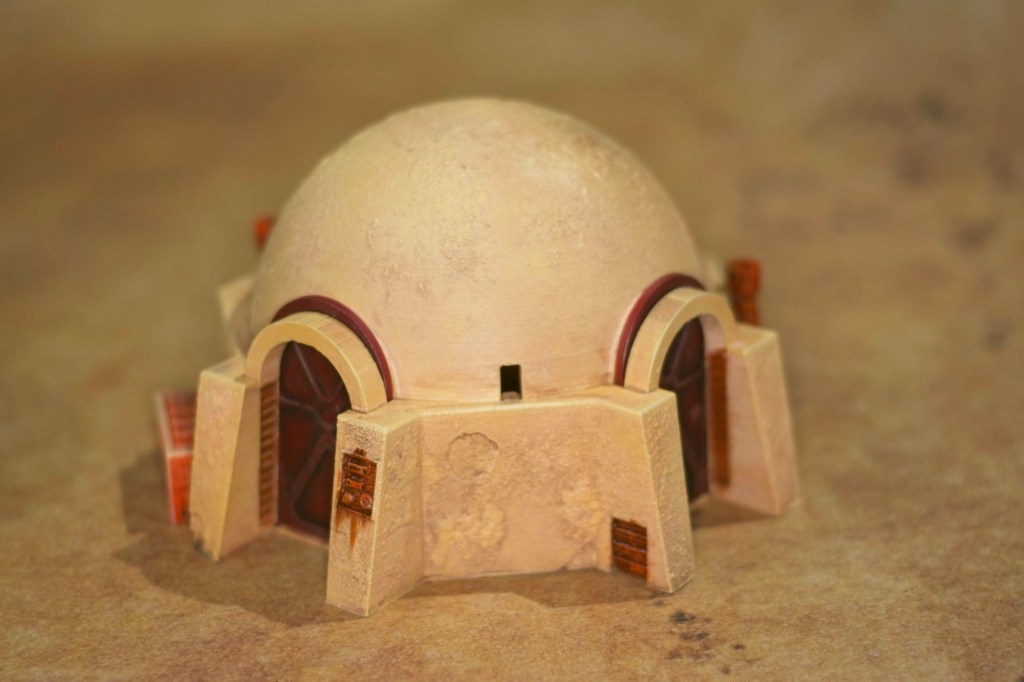
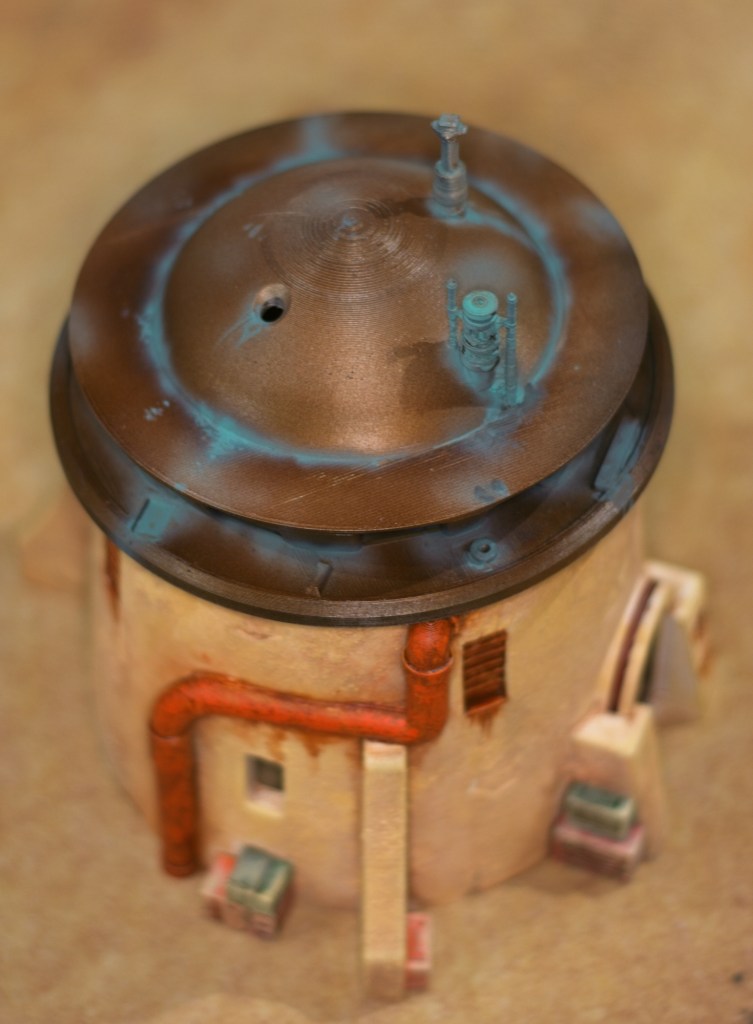
I played a Middle-Earth SBG tournament yesterday (more on this at the end), and was inspired by some of the tables I saw there to paint some terrain of my own. I’d done all the preparation for these buildings while recovering from my eye injury a few weeks back, but never got around to painting them as I got too excited by being able to see well enough to paint models again! My 15-month old had a three hour nap this afternoon that provided a window of opportunity to put my new found motivation to good use.
The buildings in question I 3D printed on my filament printer from models by Imperial Terrain who produce great Star Wars Legion terrain. To add to the look of them, I textured all of the walls with tile grout, which provided a great surface for drybrushing as well as hiding some of the layer lines from the printing process. I really love the look of this technique and will keep applying it to printed terrain where it makes sense.
For the walls of the structures, I started with an all over coat from a cream spray can, followed by a reddish-brown wash I made using a mixture of craft paints, water, and some window cleaner to break the surface tension. Once that was dry, I drybrushed a mix of ochre and white craft paint, followed by another drybrush of the same mixture with more white added.
The crates were painted in a variety of flat colours and hit with the wash and drybrush steps of the walls.
The rusted elements were done with a burnt sienna craft paint, followed by a mixture of burnt umber, red, and yellow inks all over. The same ink mix was used to do the rust streaks. The pipes were then hit with sponged on orange paint to add a bit more variety.
The roof of the tall building was done in a brassy-coppery look, which is something I’d seen on the painted examples on Imperial Terrain’s website and really like the look of.
I’m not sure how they did theirs, but mine was done using the airbrush, with an all over coat of Vallejo Metal Colour Copper, followed by a shading step done using Burnt Umber Ink. The verdigris was done using GW’s Nihilak Oxide through the airbrush (to avoid the wash running in the print lines), followed by some stippling of the same paint to add a bit of texture to the effect.
Overall very happy with the outcome, and the little guy woke up just as I was putting the finishing touches on the buildings so thanks a lot to him for giving me the time to get these done! I have a fair few more pieces to tackle before the table will be done, so expect some more Star Wars terrain posts in the future!
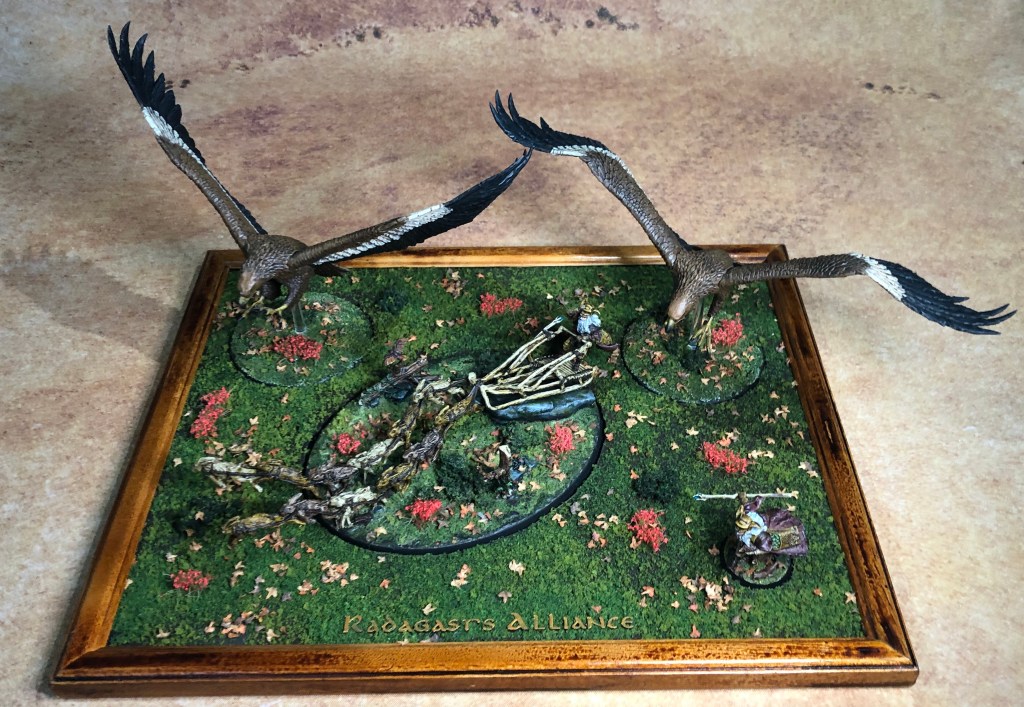
Radagast goes to war!
As I mentioned above, I played a one day tournament yesterday with the models I showcased in the last post. I ended up with two wins and two losses, finishing up somewhere in the middle of the field which I was happy with. For the tournament I put together the small display board you can see above and the effort paid off as I took home the best painted army award which I was very happy with. All in all a good fun day, and as always has motivated me to paint even more Middle-Earth armies!
I’ve had a bit of a setback with my painting: a week ago I tripped and fell face first onto a wooden barrel and fractured my eye socket which has had quite the impact on my ability to see properly as you might imagine. Time will tell if I need surgery to fix any lingering issues, but in the meantime precision painting is right out, which means the army challenge I’ve been doing is on pause until I can regain the ability to see properly. I’ve found myself with a week off work so I thought I’d focus on a less demanding painting project: terrain!
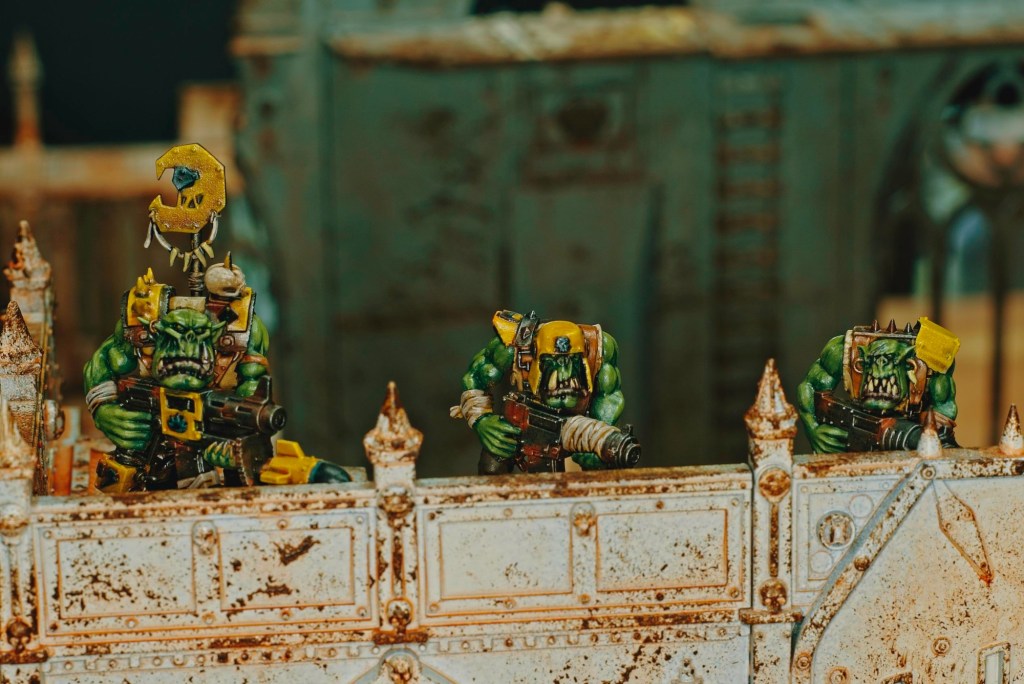
Bad Moon orks survey the battlefield atop imperial ruins
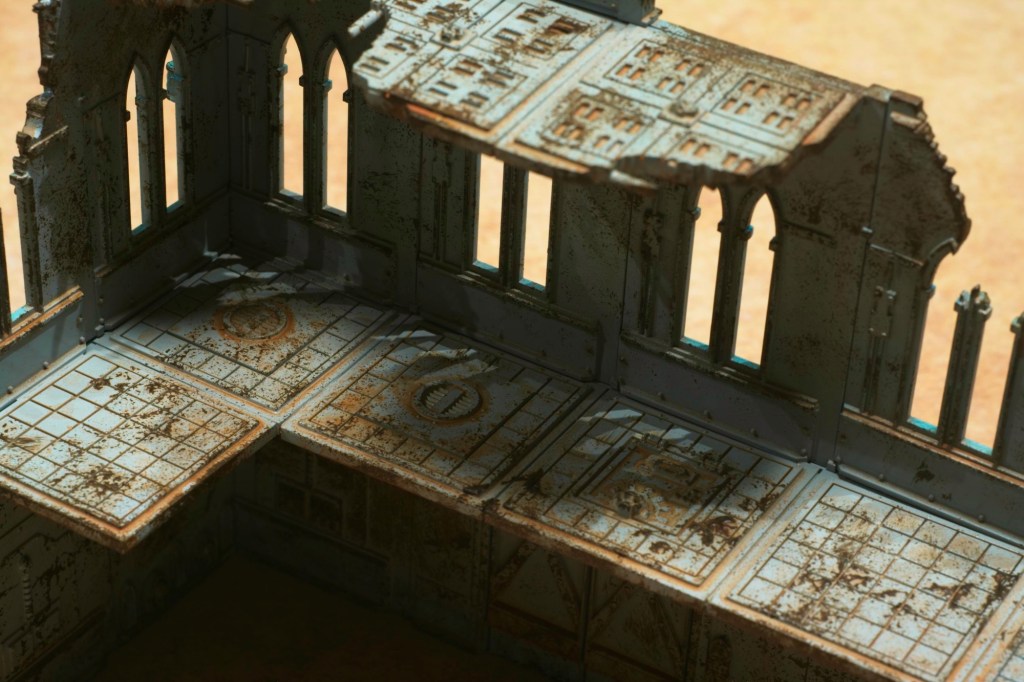
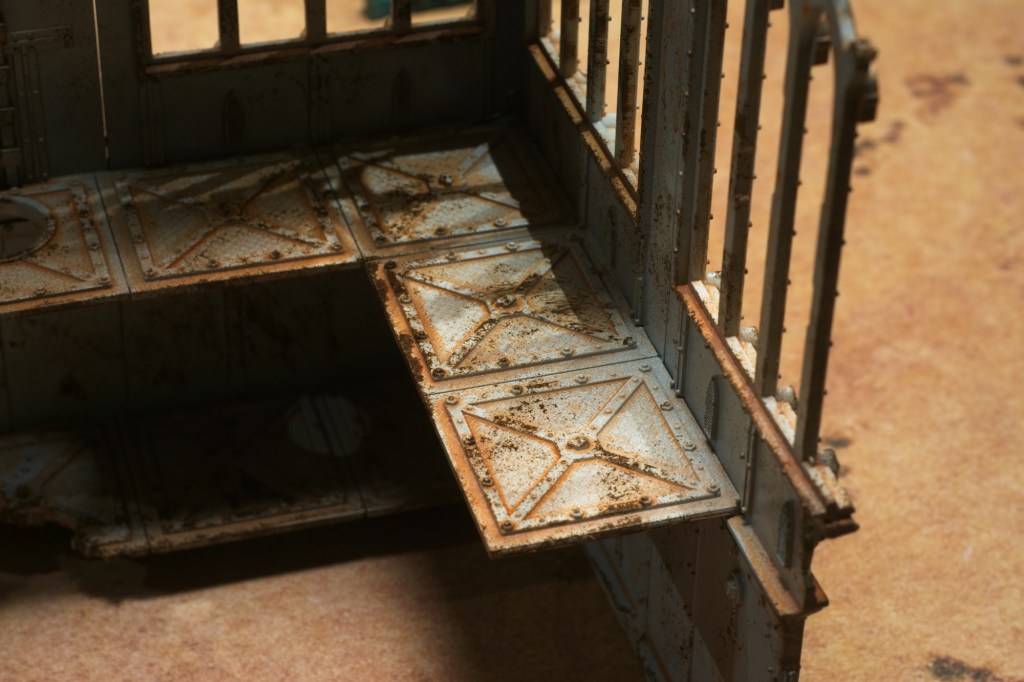
I had a fair amount of the previous generation of warhammer 40,000 terrain sets, the ruined imperial buildings that came out in the Cities of Death era, in my pile of long-neglected kits and this seemed to be a good time to put them together. No precision building required! I had in mind the following requirements: 1) the terrain needs to be playable (i.e. no crazy complex buildings with overhangs that make it hard to reach for models), 2) should support competitive play (most of my 40k playing friends are very into competitive play), 3) should be nice to look at!
Requirement 2 is the most demanding, but thankfully the current body behind the World Team Championships has a very clear document on how their tables are to be set up (check http://worldteamchampionship.com/wp-content/uploads/2020/09/WTC-2021-Terrain-Maps-9.31-Low-Res.pdf if you’re interested), and that seems to be the standard followed by events (locally anyway). I’m not a fan of the cardboard cutout-type terrain they use for these events, but I felt that the older 40k terrain kits would lend themselves pretty well to creating nice looking alternatives with close enough gameplay.
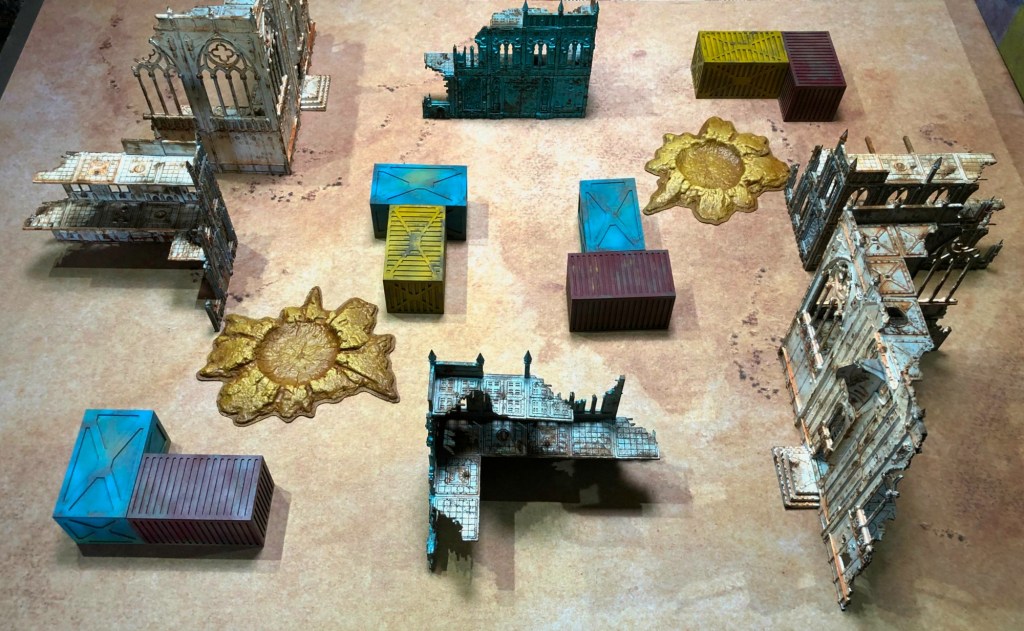
I picked one of the tables in the WTC PDF and went about recreating the pieces I would need:
2 Large Buildings
4 Smaller Buildings
12 Containers
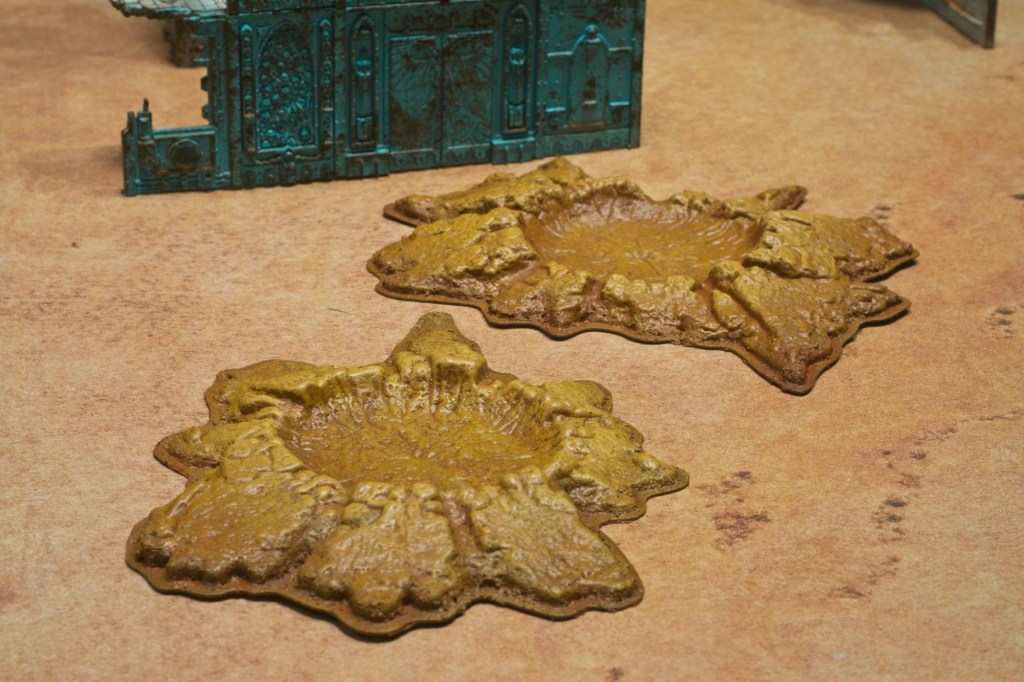
2 Craters
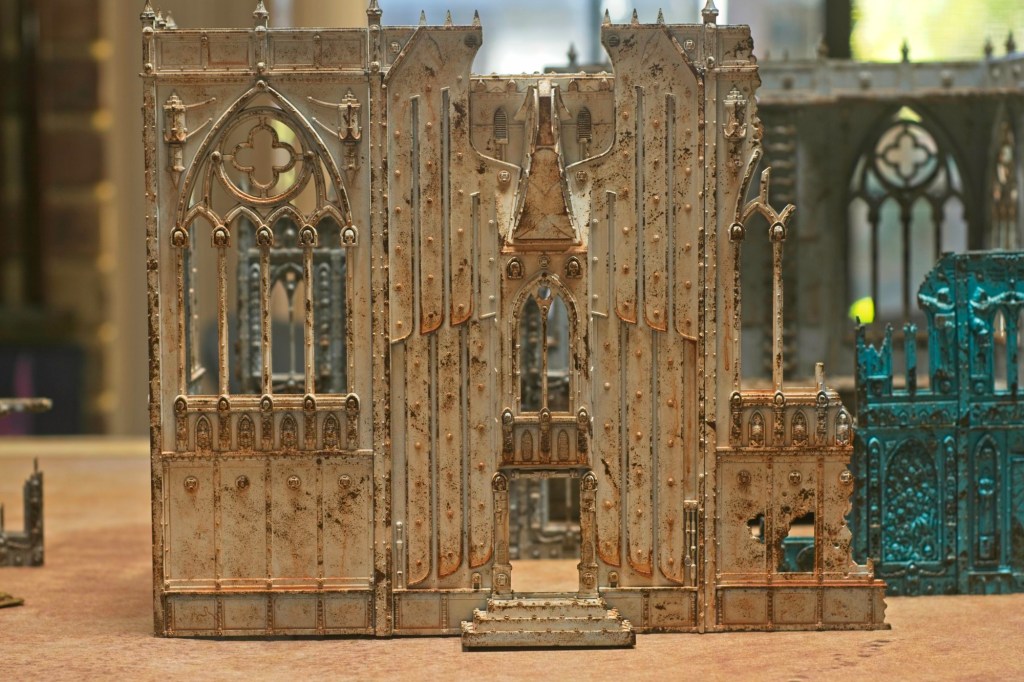
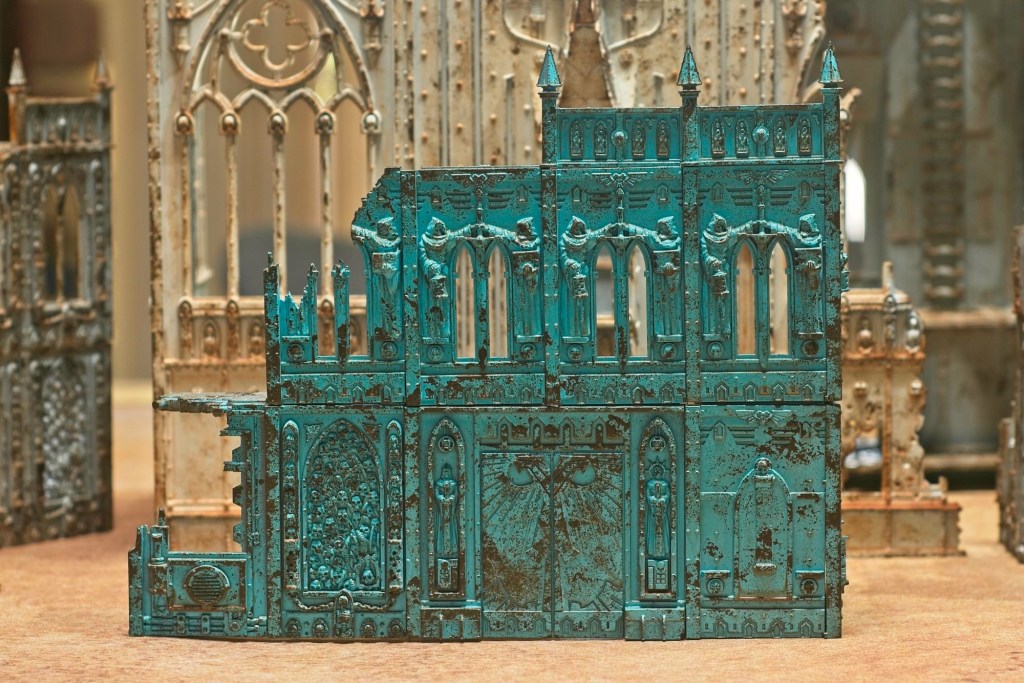
For the large buildings I used the Shrine of the Aquila kit, and for the smaller buildings I used the old Imperial Sector kits. For the containers I used the containers I’d painted for This is Not a Test (https://lairofthelagomorph.wordpress.com/2021/02/04/containers/). For the craters, I used the old GW craters.
Example Layout
I wanted to be able to use the terrain for less codified play too so I made sure to build and paint the 6 building sections in pairs so they could be combined into a bigger single building.
Large BuildingSmaller Building 1Smaller Building 2
The buildings were painted very simply in three steps:
Undercoat with coloured spray can (I chose three light colours at the hardware store, each building got a different colour inside and out)
Sponge some rusted chips (I used some acrylic burnt umber and old case foam)
Rust wash (I diluted some acrylic raw umber with water and dish soap, then covered all the buildings in it)
I’m very happy with how that rust wash settled and dried, that was a bit of an experiment but came out very good I think.
I want to go back over these at some stage in the future and paint in some of the more detailed areas (a lot of skulls for example!) but this will have to wait for the old eyesight to come back. For now they have a nice industrial or ship-like look to them that I don’t mind
Craters
The craters were simply done with a series of successively lighter drybrushes using Raw and Burnt Umber, Yellow Ocher, and White.
Overall a nice project to keep me busy this week, I think my eyesight is getting better (I’ve been able to type this post with not too much difficulty!) but it’s slow going so I may not be painting regular miniatures for a little bit. On the plus side I have a lot of terrain in dire need of paint, so that may just be my focus over the coming weeks.
It’s been a little while since the last post, but I’ve been busy, this time not only painting but also building. Over the last few weeks I’ve been playing Warhammer Vermintide 2 with some friends, and the game’s environments have tapped right into my nostalgia for the first wargame I ever played, Mordheim. Playing the game made me want to build some Mordheim terrain even though I have no real plans to play Mordheim any time soon, but when I get inspired I like to act on that inspiration!
There were a few directions that this specific inspiration pushed me into:
I wanted to build a house
It needed to be half-timbered
It needed to have elements that pushed it from historical looking into the warhammer universe, i.e. skulls, weird motifs etc.
I wanted to build it from scratch rather than use my 3D printer
That last post is interesting, I’ve had a filament 3D printer and I’ve printed a ton of terrain with it over that time, enough for a full table for Bolt Action, Star Wars Legion, Middle-Earth Strategy Battle Game, and a lot of pieces of post-apocalyptic scatter terrain for This Is Not A Test. It’s been really nice to have, there are a ton of great free and paid models online done by amazing artists, and it’s produced some very nice looking tables.
Building tables for Mordheim was my first serious foray into terrain-making, and back then I mostly used cardboard as the material of choice, cutting out shapes and assembling them into the ruined streets of Mordheim. I think playing Vermintide triggered 1) a want to build something in the world of Mordheim, and 2) a nostalgia for building terrain from raw materials.
I built the main structure out of foam board, which is nice and easy to work with. I then cut a balsa wood plank I had into 7mm strips to build all the timber frames, and into sections to represent the floors. I carved board shapes into the floors with a knife. The tiles were traced onto a sheet of foam board with one of the cardboard sides peeled off, while the cobbles outside were cut individually from XPS foam. To texture the outside walls I used tile grout, for the inside walls I used plaster filler. The stone details in the walls were lifted from a variety of bits, the sun face for example is from the old Warhammer 8th edition templates, using thermo plastic molds.
Overall I’m happy with the results, and really enjoyed the process, so I can see myself building more when the inspiration strikes again. Maybe one day I’ll again have a full table of Mordheim terrain!
I quite enjoy painting terrain as a break from regular miniatures, I find it quite a different experience, and a nice way to relax between big projects. I’ve painted a fair bit of terrain this year and I’ll likely make some posts about that at some stage because I’ve never really shared any of it directly, they usually end up as backdrops for miniature photos.
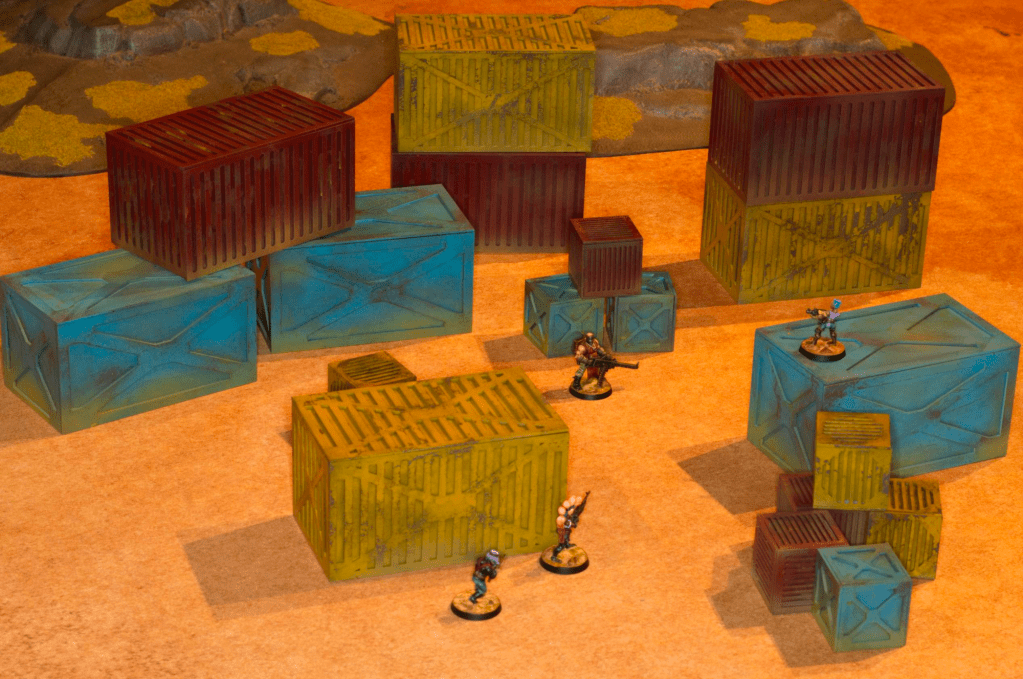
I’ve had these containers and crates for quite a while now, they’ve been sitting mostly built for almost a year, and I finally made time to finish building them and get them painted. They’re an MDF kit from Krommlech/Tabletop Scenics (3 of that kit in fact), and I bought them for our This is not a test games, although I plan on also using them for other games (40k for example).
With my terrain painting I tend to go for speed as my primary driver, focusing on the overall feel of the pieces rather than the detail. Here as I was targeting a post-apocalyptic feel I knew I wanted the containers to be pretty beat up and covered in sand/dust. To get a nice chipped feel to the container paint I decided early on that I wanted to do the hairspray chipping technique, which produces very realistic results.
If you don’t know the technique, I’m sure you can find plenty of tutorials on youtube and the like, but for a quick summary here’s how it goes: 1) base coat the model in the colour you want you chips to be (here I used a grey-brown spray can from the hardware store), 2) liberally spray hairspray over the whole model, 3) spray the main colour of the model over the top (good to use an airbrush for this), 4) using a wet brush/toothbrush rub away at the paint. The layer of paint over the hairspray will reactivate and scratch away quite easily. It’s very important to varnish the model afterwards or you will continue rubbing the paint away as you handle the model.
I find it quite hard to control the amount of chipping you get (i.e. it’s really easy to get massive amounts of chipping), so I only tend to use this technique when I want to get something looking really beat up, which makes it perfect for a post-apocalyptic setting.
To weather the containers further, after the chipping was done I did a few washes of oil paints (payne’s grey for some darker staining, and yellow ochre to do dust marks), and sprayed some Vallejo Air Desert Yellow through the airbrush to get the dusty look you can see at the bottom of the containers and in splotches all over them.
Overall painting all of these took a coupe of hours of effort (not including drying time!), which is nice and quick for the result I think.