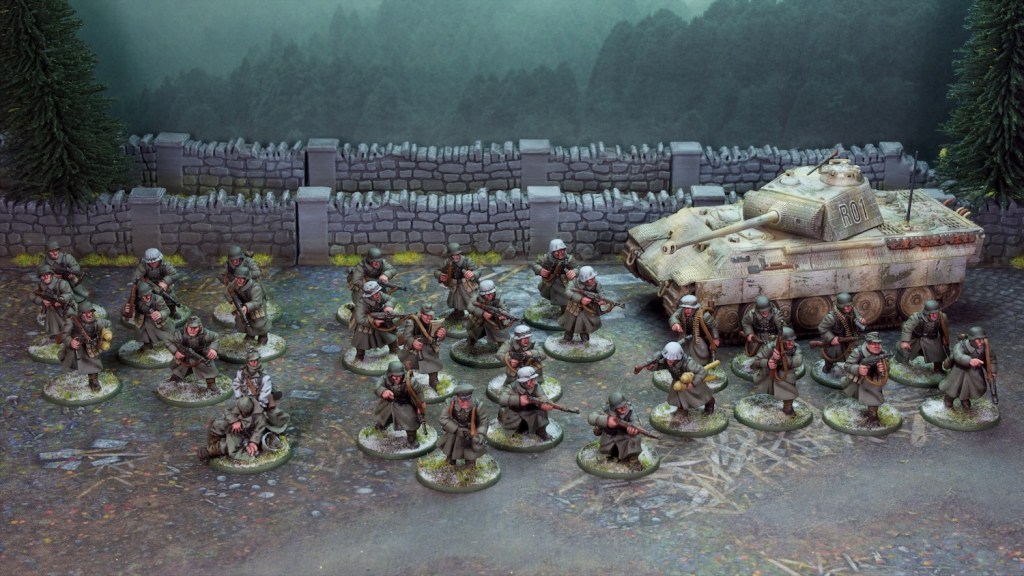
I’ve had some leave this week and have put it to good use by painting lots of models! I’ve now finished painting my Volksgrenadier platoon for Chain of Command (you saw the first section last post), as well as some extra firepower in the form of a Panther tank.
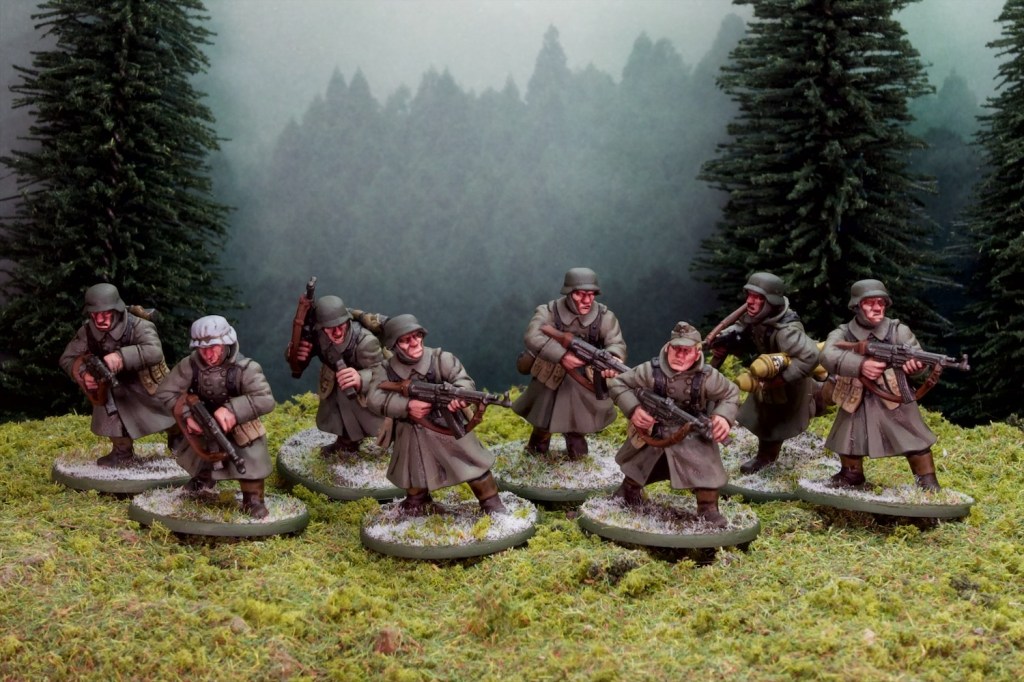
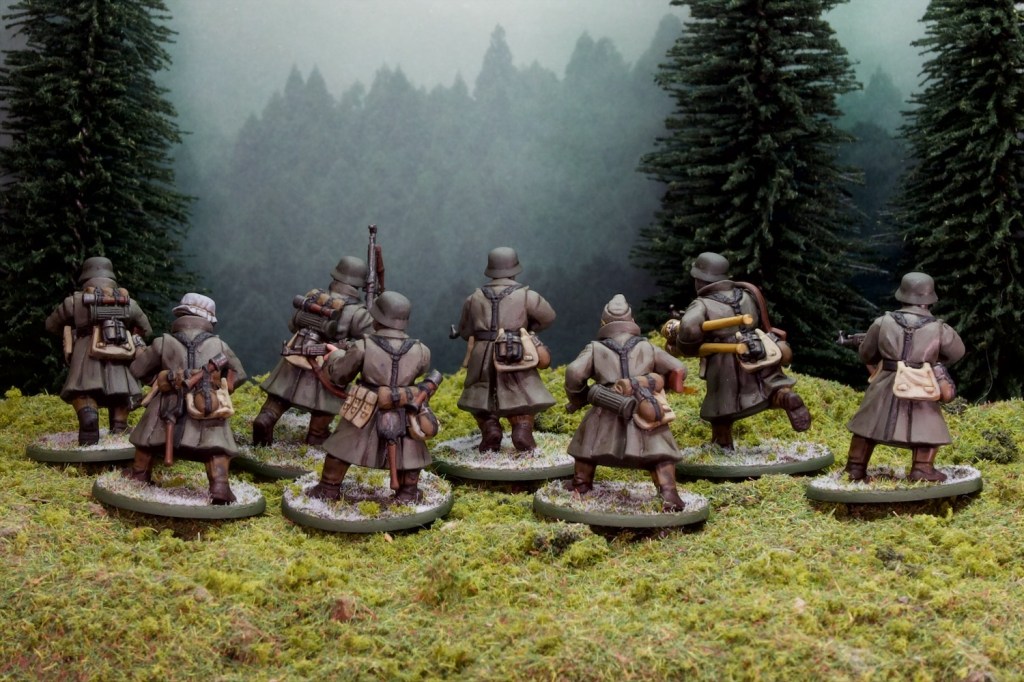
The platoon is made up of a command section, two assault sections (armed with STG44 assault rifles), and an LMG section (split into two LMG teams).
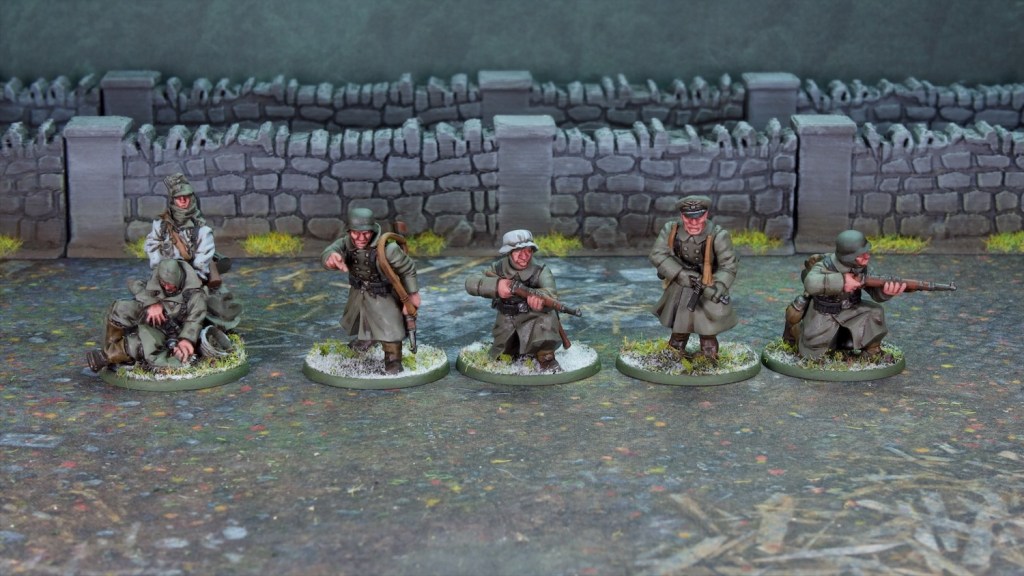
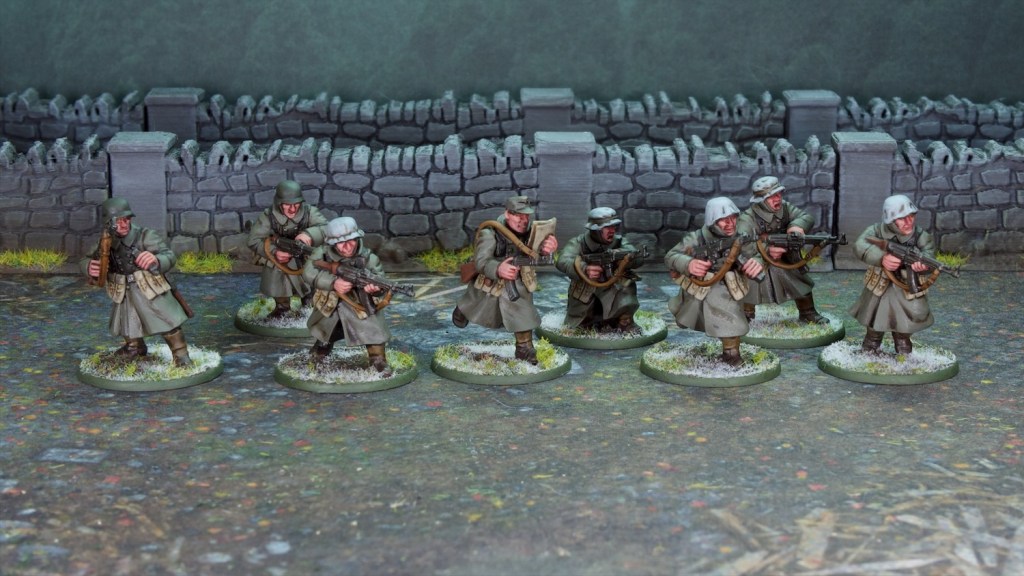
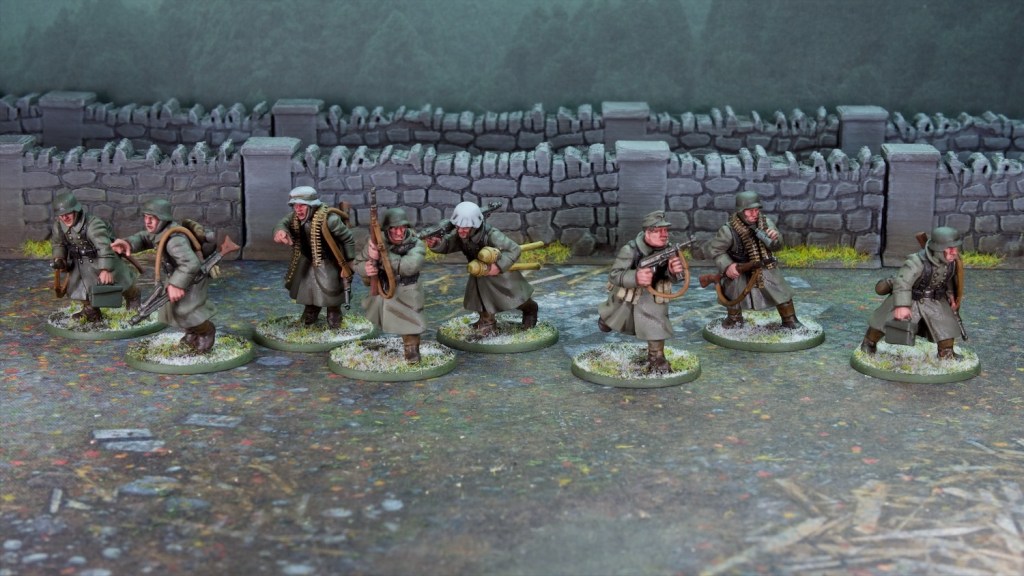
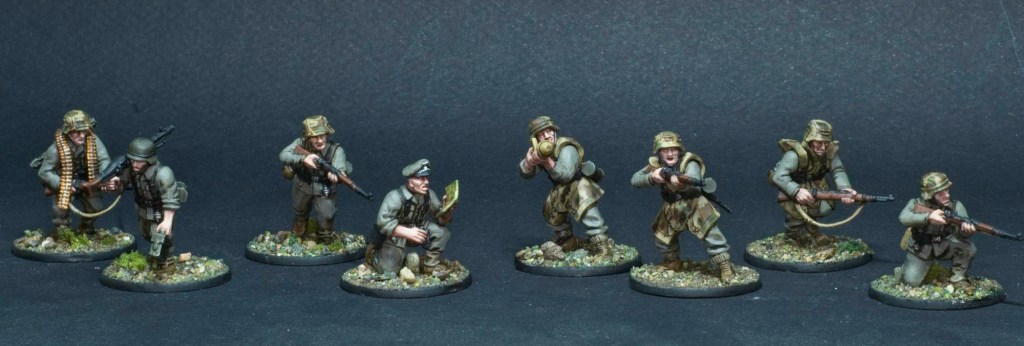
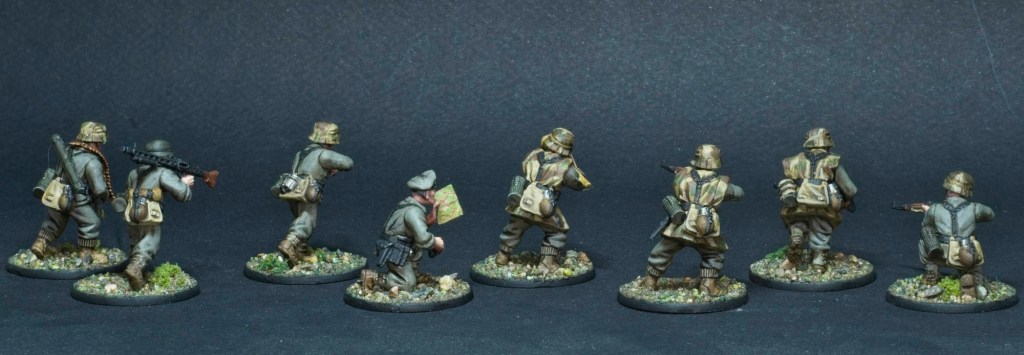
The command section, with an officer and four riflemen. I also painted up a medic model I had in cold weather gear, he’s not part of the command section but can be selected as a support in game.The second assault section. You might have seen the first one last post.The LMG section. In game this operates as two teams, one for each LMG.
I described the painting method for the infantry last post so I won’t repeat it here. The process is very quick, and this was a good test for it. I batch painted all three new sections (and the medic) at once (21 models all up), painting each colour on each model in a row. I got them to the wash stage in a few hours on Sunday, and did all the highlights on Monday. Not a bad rate I think! They’re certainly not my finest work, but they look effective on the table which is always the primary purpose for army models.
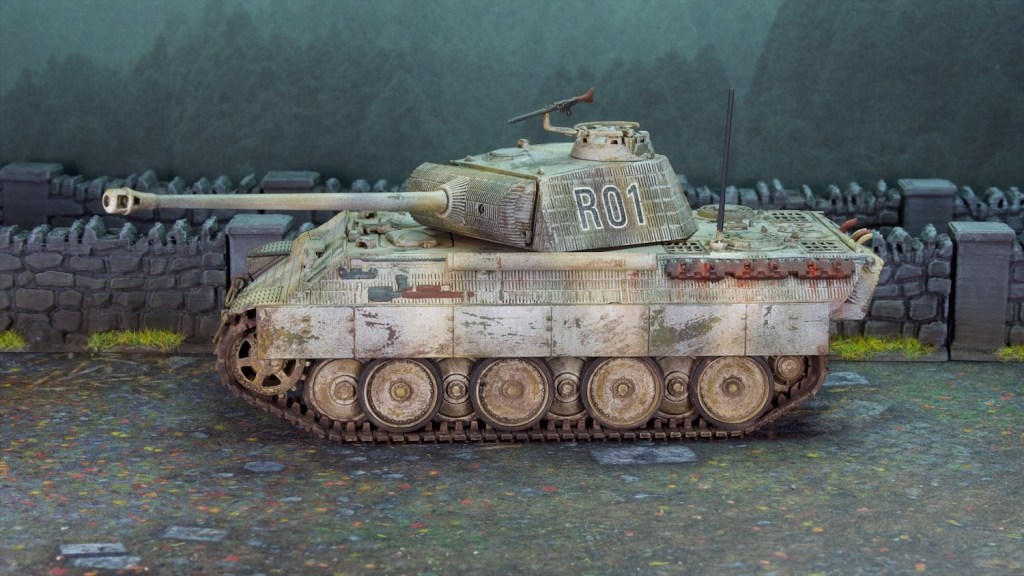
Onto the tank! This is a Warlord Games/Italeri plastic kit, and as with all the ones of these I have put together over the years it is a relatively simple build, if a bit light on detail (for example the tools on the side are basically flat). These are meant to be gaming pieces over display models however, and they paint up nicely.
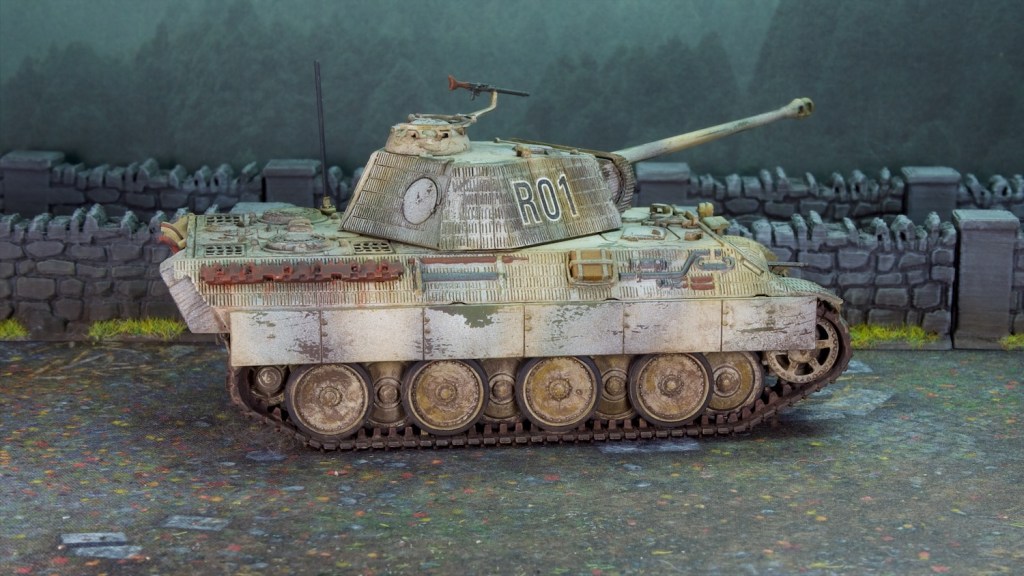
I decided to go for a winter scheme on the tank, and tried my hand at a white wash look. To achieve this I painted the normal late war German camo pattern (yellow base with dark red/brown and dark green patterns – you can see it under the somewhat transparent white), then followed that up with a coat of hairspray on which I lightly airbrushed some white.
If you’re not familiar with the old hairspray method you may be wondering what that’s all about. Effectively, the hairspray allows for some great chipping patterns by providing a water soluble layer under the coat of paint in need of chipping (the white paint in my case). This paint can then be rubbed away by using a wet brush (ideally with somewhat stiff bristles, a drybrush is great for this). The water disolves the hairspray under the paint, which causes the paint to drop off in nice patterns. The tank needs a good coat of varnish after that so that the unstable layer gets locked away an no more paint rubs off.
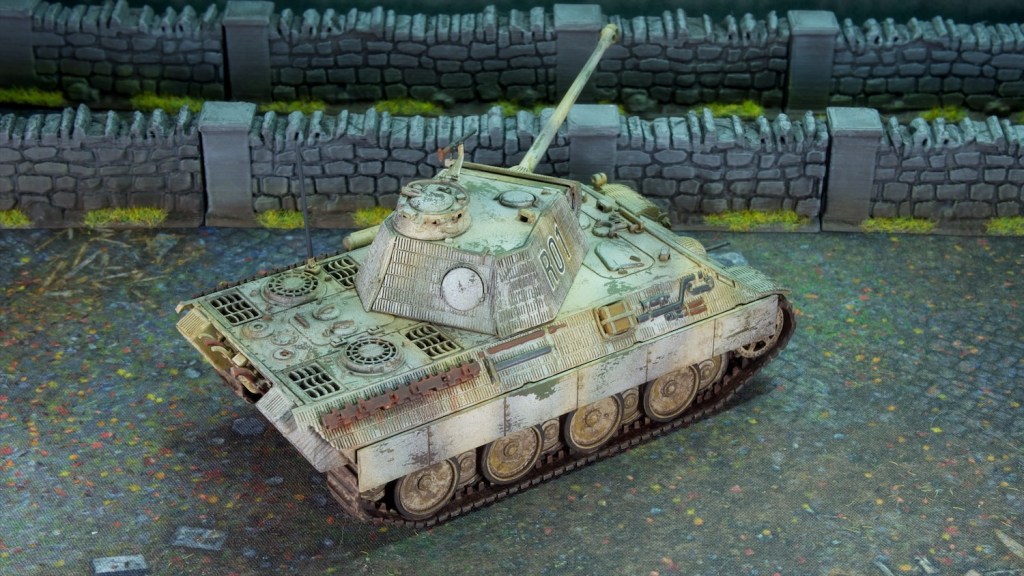
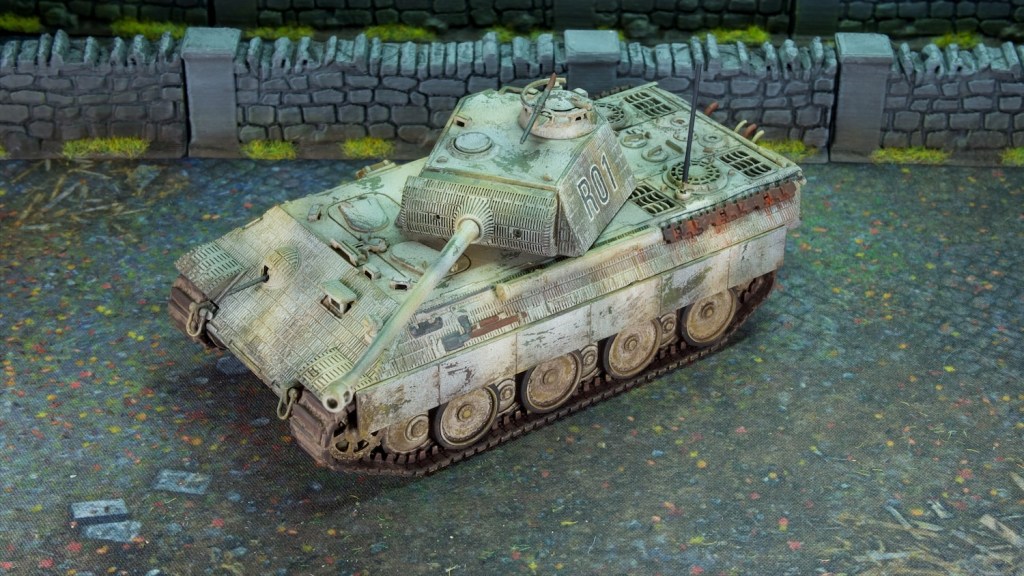
I then finished the model with the usual oil washes, with a mix of browns and dark grey colours. I also added spots of rust (also using oils) which I streaked downwards, mostly from the spare tracks. I then finished the tracks using pigments. This is a new thing for me, I usually douse tracks in mud but in this case I figured if the ground is frozen there would not be any mud around!
I now have all the models I need for a game of Chain of Command I’m planning on running for some friends soon. What’s missing now (and you may have noticed from the photos!) is some appropriate cold weather terrain. Next up on the painting table will be said terrain, I have most of what I need now, it’s just a matter of painting it.
As the title suggested, I’ve been busy the last couple of weeks, with some painting and some gaming to discuss in this latest post.
The Gaming!
I have a regular games night with some friends which is usually spent playing role-playing games or board games. The last few of these we had to change the program as a couple of us couldn’t make it, and we decided to get some wargaming in.
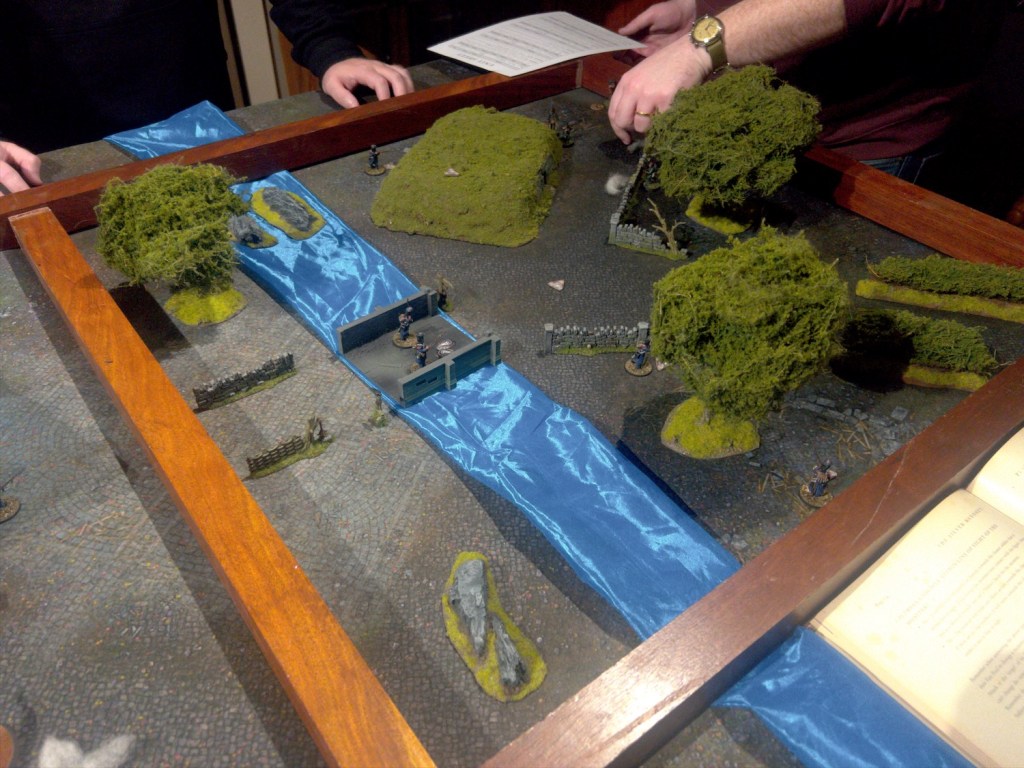
For the first one of these I introduced the group to Silver Bayonet and we played through the fourth solo mission of the main rulebook with my British warband.
The scenario had the unit attempt to leave the wilderness after its encounters there in the past few missions, but finding their way home cut off by some bandits (role played by the French Imperial Guard unit I painted a few years back). I didn’t take very many photos as I was too busy running the game unfortunately, so no battle report for this mission. Playing the game was very last minute so I had to improvise some of the terrain as you can see in the photo above, with the river being represented by some shiny blue cloth, and the bridge is a section of a ruined church I used for WW2 games!
The game went very well, the two players were running the unit together while I was telling them the rules and taking the monster actions. They were much more aggressive than I usually play, but it paid off and they cleared the mission relatively easily. Both of them really enjoyed the game so that’s always a plus!
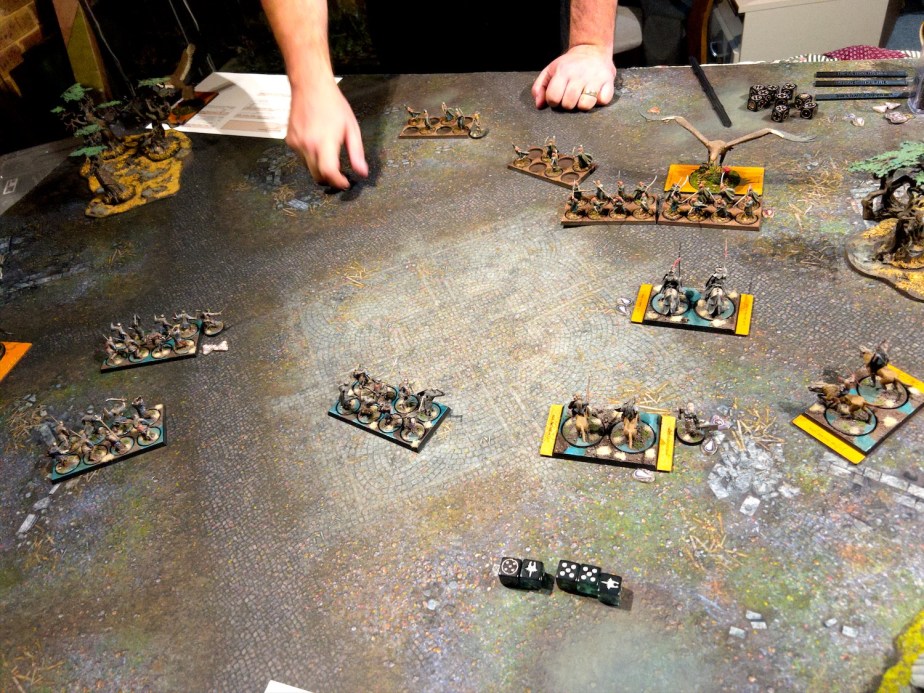
On the second week we decided to try out a new (to us!) ruleset for fantasy/historical battles: Midgard. Midgard is a game by James Morris (check out his blog, it’s very cool https://mogsymakes.net/blog/) which came out last year and covers quite a lot of ground. At its core, it’s a system for covering historical (and fantastical) battles where the heroic actions of army leaders can carry the day. This is suitable for covering periods all the way from antiquity to mid to late middle ages when commanders started running battles from a bit further back than the front lines. Midgard also caters for more mythological/fantastical battles, with rule for monsters and magic thrown in. I’ll be talking a lot more about Midgard in the future as it ticks a lot of boxes for me.
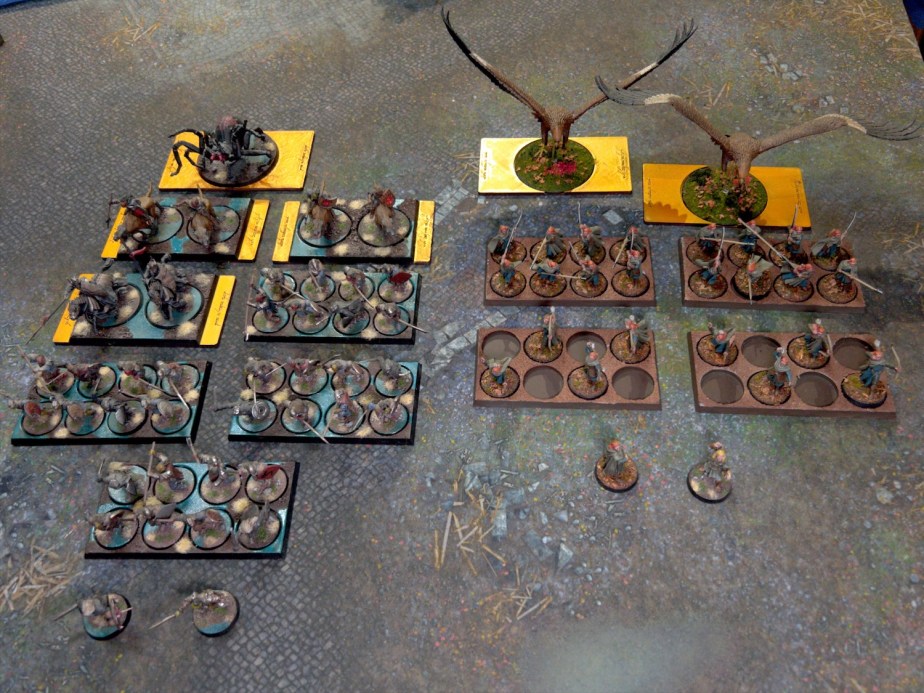
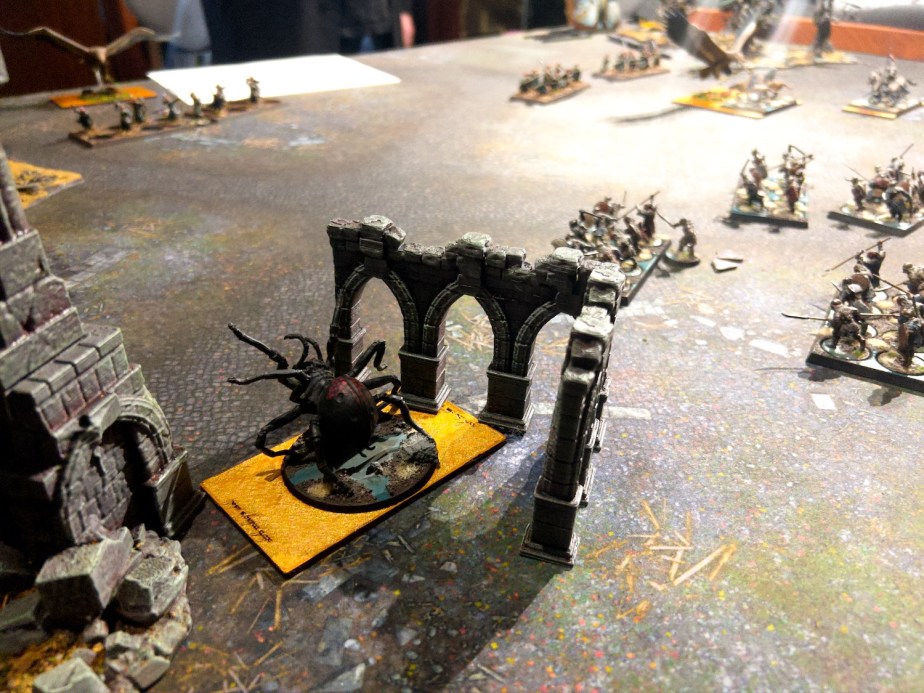
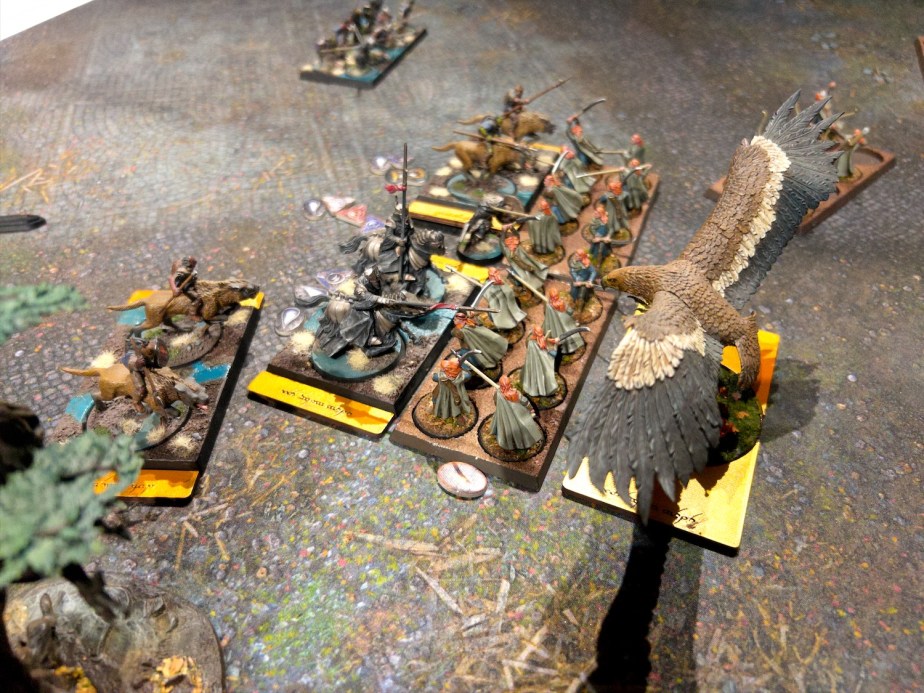
We decided to play the game with some Lord of the Rings armies, and I dusted off two of mine: my Cirith Ungol force, led by Shagrat and Gorbag to rival orc captains, and an amalgamation of Elves led by Legolas and Gildor Inglorion.
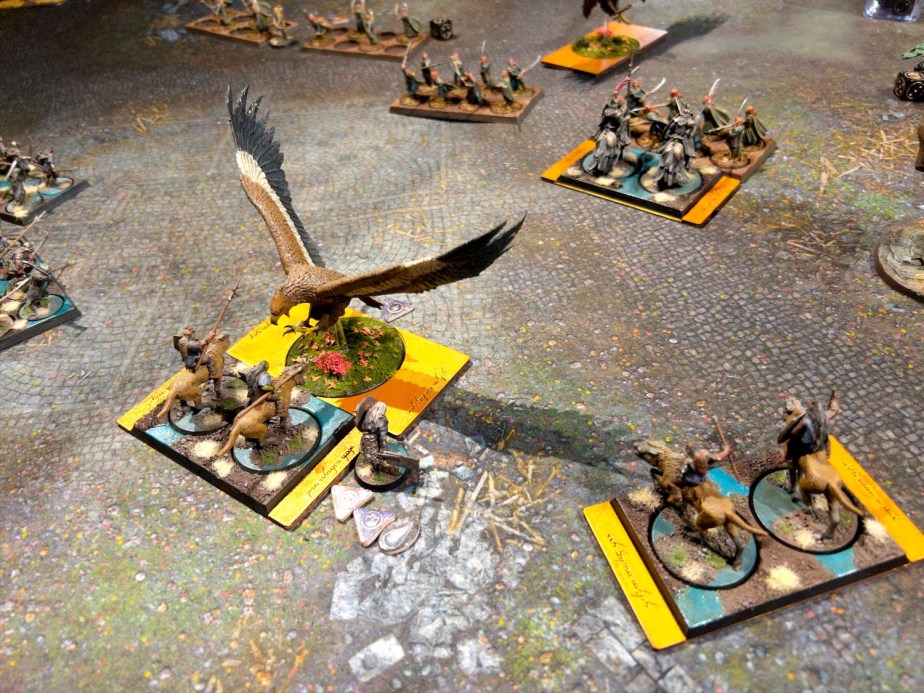
If you’re familiar with Games Workshop’s efforts in the Lord of the Rings space, you might recognise the trays they produced for the War of the Ring mass battle version of the game. As Midgard also uses trays they seemed like a great starting point. Midgard however requires all the unit base sizes to have the same frontage so I 3D designed and printed some adapters for the cavalry trays (which are narrower than the infantry trays) and for the monsters (who never had trays in the first place). As I did these adapters the day of the game I needed to go fast and decided to make them simple and to include a little joke – the elven script reads “One tray to adapt them all“.
The game was great fun even for a learning game, and everyone was very impressed with the rules. They are easy to pick up and the system puts pressure on heroes to go out and perform heroic acts in a way that leads to some excellent moments. I look forward to playing much more of the game.
The Painting
My painting table has had some form of WW2 models on it for quite a while now, as the build up of forces to get ready to play games of Chain of Command continues.
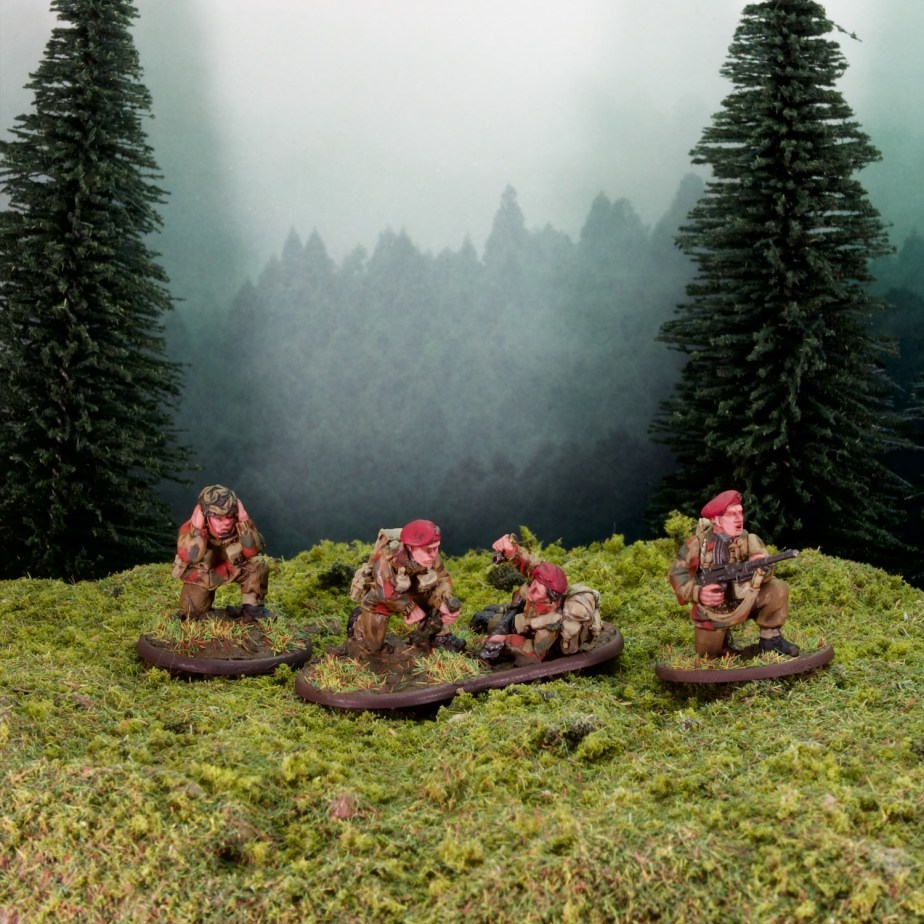
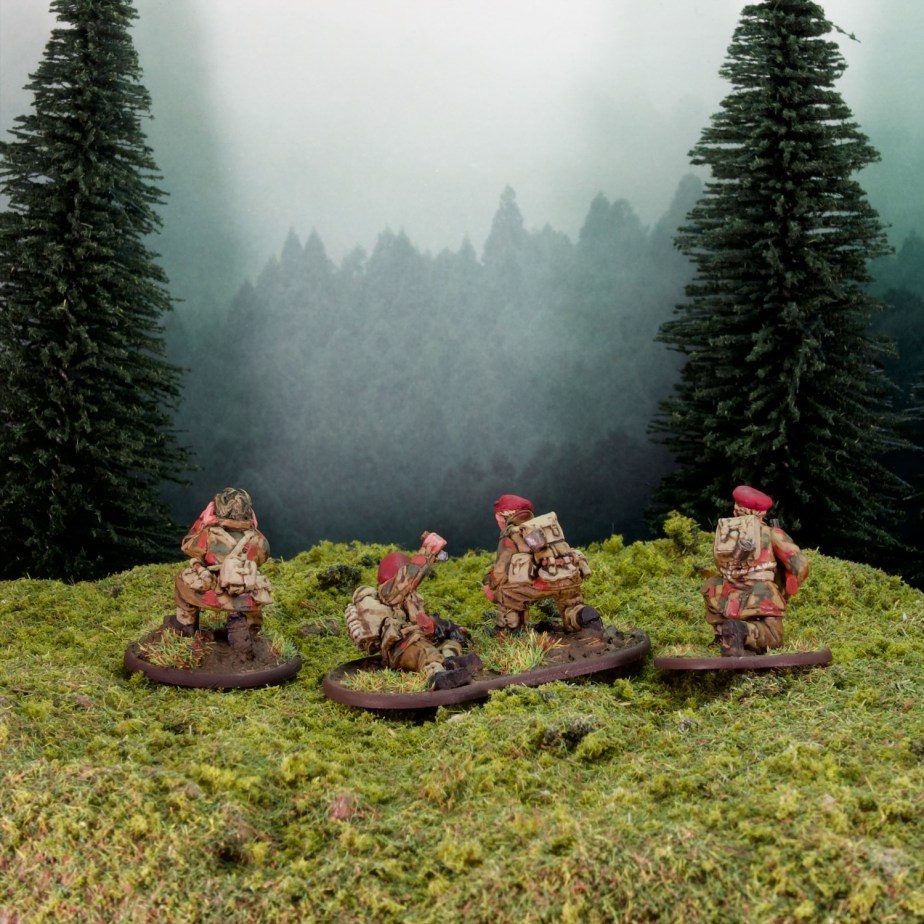
First up some British Paratroopers, with a Bren gunner and a 2-inch mortar team to bring my 6th Airborne up to strength.
Secondly we have the first unit of a new army (don’t I already have too many WW2 projects on the go? Yes, probably).
The models are from Warlord Games’ German Infantry (Winter) set, that I’ve built up as Volksgrenadiers for use in late war games on the Eastern Front or the Ardennes. I have a full platoon of these to paint for a game I’m planning soon, so this is just the tip of the iceberg.
Painting-wise, these were quite straightforward as the greatcoats really simplify the models. I started with an all over airbrush of Fieldgrey, then got painting in the details. The process is my usual easy army painting one, with basecoat, wash, then highlight back up with the basecoat colour. The exception is the skin which uses a second highlight colour.
The colours are as follows:
Washed with Citadel Agrax Earthshade and highlighted with basecolour
Coats/uniforms – VMC German Fieldgrey WWII
Wood/leather – VMC Flat Brown
Waterbottle/blankets – VMC German Camo Medium Brown
Bags/Pouches – VMC German Camo Beige WWII
Helmets/Gas Mask Boxes – VMC German Camo Dark Green
Panzerfausts – Vallejo Surface Primer German Dark Yellow
Cloth Helmet Cover – VGC Heavy Bluegrey
Washed with Citadel Agrax Earthshade – no highlights
Guns – VGA Gunmetal
Other metallic objects – S75 Black Metal
Webbing – VMC Black
Boots bottom – VMC Dark Rust
Boots top – VMC German Camo Medium Brown
Skin
Basecoat – Pro Acryl Shadow Flesh
Wash – Citadel Reikland Fleshshade
Highlight 1 – Pro Acryl Shadow Flesh
Highlight 2 – 50/50 Pro Acryl Shadow Flesh/AK Beige Red
Pick out the nose – Citadel Carroburg Crimson
Bases
Texture paint – AK Muddy Ground
Flock – some mix of foams and static grass I made ages ago
Snow flock – Citadel Snow
Rim – S75 Ardennes Green (Seemed appropriate!)
This scheme is very quick, I just lay down the basecoats (including the skin), then wash the whole model (Agrax for everything apart from the skin, Reikland Fleshade for the skin – doesn’t matter if they bleed a bit into each other), then highlight.
I’m happy with the way they look, the basing works well for me as I didn’t want to go full snow but rather light snow/frost. I’m also happy with the speed at which I can paint them, these were done in an afternoon/evening with some distractions.
Anyhow this was a rather long post, but I hope it was enjoyable!
I’ve had a rather unplanned dip back into WW2 wargaming these last few weeks, and it’s resulted in quite a bit of model painting and building. This all started when I read Cryptonomicon by Neal Stephenson, one of those books I’d always meant to read, which sets half of its action in the WW2 years. This made me look into the new edition of Bolt Action which had been released since I last dipped my toes in the period, and also look into the other much talked about game for the era which is Chain of Command. Turns out Chain of Command had also just released its second edition, and having seen the game played on youtube in the past I was sufficiently interested to pick up a PDF of the rules from the publisher and start reading.
After reading the rules, I decided I really liked the look of Chain of Command (CoC) and I wanted to play it. Now CoC bases its armies on historical formations rather than the more Warhammer-like unit customisation Bolt Action offers. In Bolt Action, squads/sections have a minimum size, and extra models and special weapons are purchased to fill them out. The job of the list builder is to build a army that is functional and fits into the points limit. This often means under strength sections, as extra models get shaved off to upgrade another section to get an extra LMG etc. In CoC the platoon you select is as per historical records and there is little to no customisation available, so sections are full-strength, special weapons are as per historical kit out etc. This meant my Bolt Action armies were not quite playable in CoC and required a few more models to be painted to get there.
I started working on getting two of my armies up to scratch: my 2ème DB (i.e. my Free French Armoured Division), which needed (and still needs I’m not quite done!) quite a few more models to bring it up to a full strength Armoured Infantry Platoon, and my late war Germans who only needed a handful of models to make them into a Panzergrenadier platoon. I’m planning on making my North Africa forces CoC compliant but that requires a fair bit more work as they’re much smaller for now.
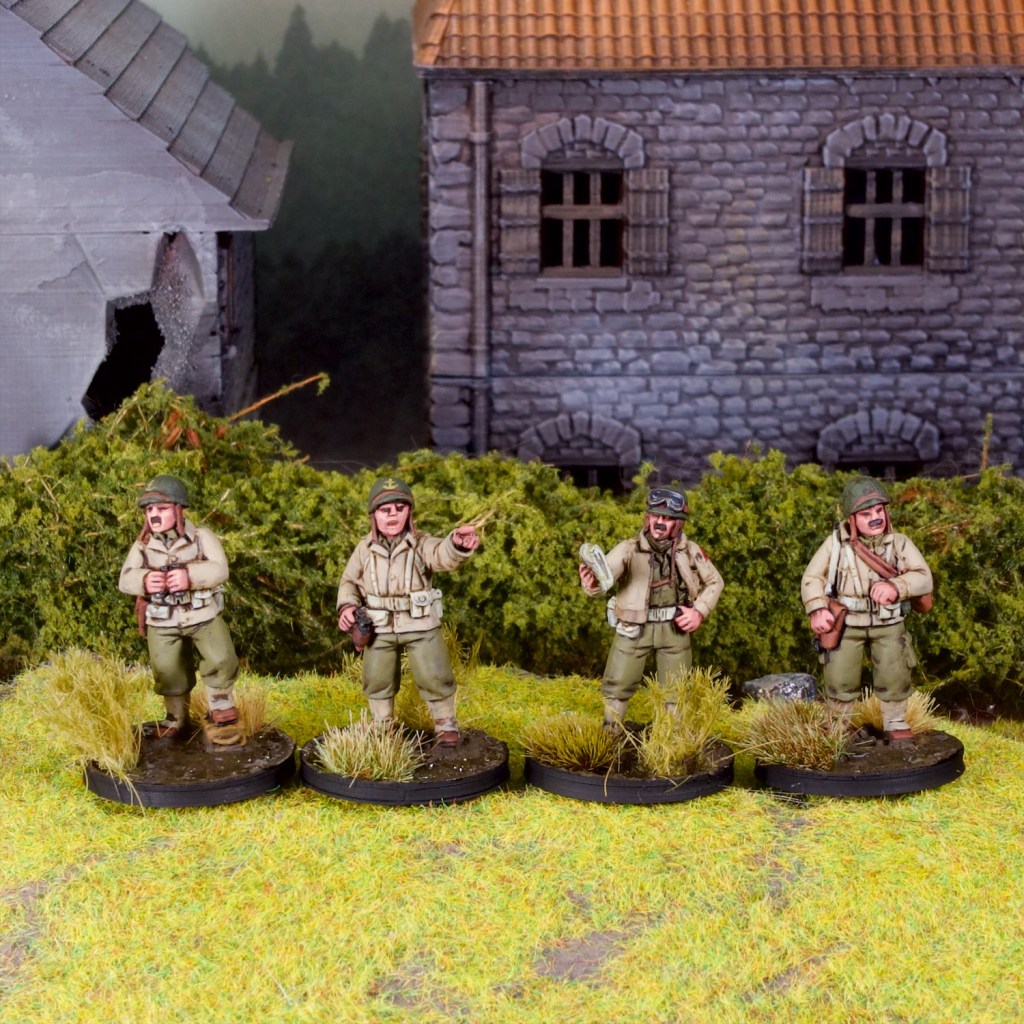
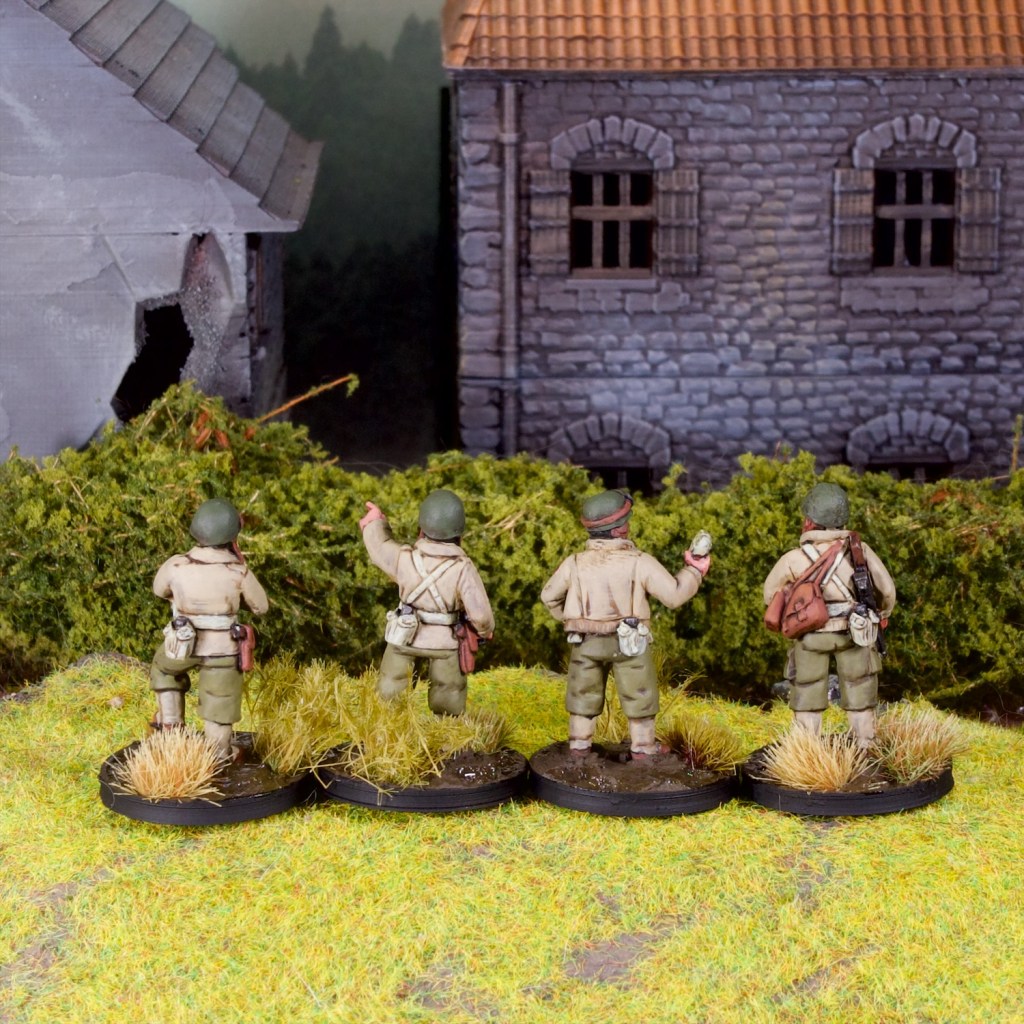
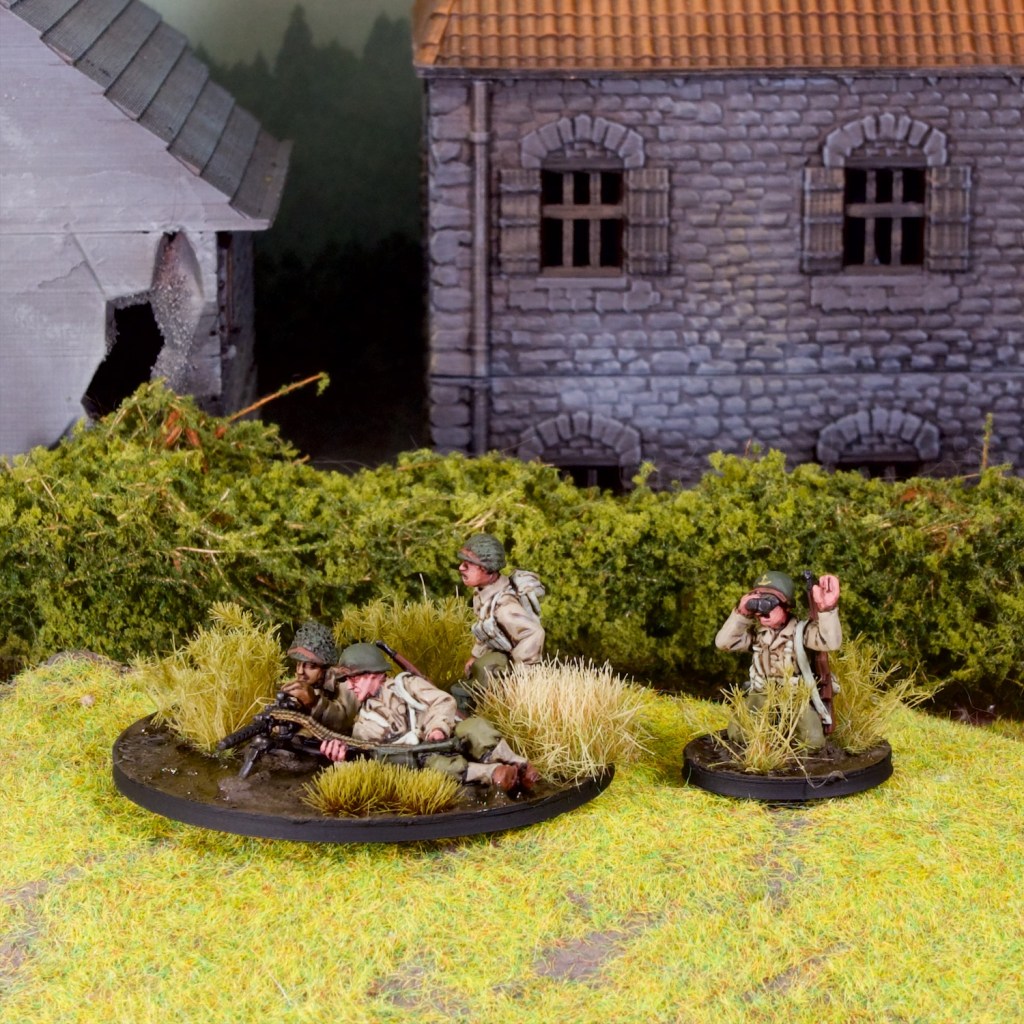
First up, my Free French needed a lot more officers (very important in CoC), so I picked up the Warlord Games US Army Platoon Commanders set which has the four models you see above, cast in their “Warlord Resin”. The models were all one piece and quite easy to clean up. The detail on them was quite nice and they were easy to paint (in my usual slightly speedy manner employed for historical models).
I also added a Browning .30cal team, also from Warlord (this one a metal set), and I also painted the remaining crew member of the Perry Miniatures mortar team I painted as part of my first batch of models for the army all the way back in 2022! Bolt Action tends to default to 3 crew for a lot of weapons (presumably for game balance), while CoC sticks to historical numbers, so the mortar should have 5 crew all up – which means I still need to make another crew at some stage!
I still need a few more models to get the army game ready, namely some regular infantry as well as a second Browning team. I’ll work on them soon so I can play a game!
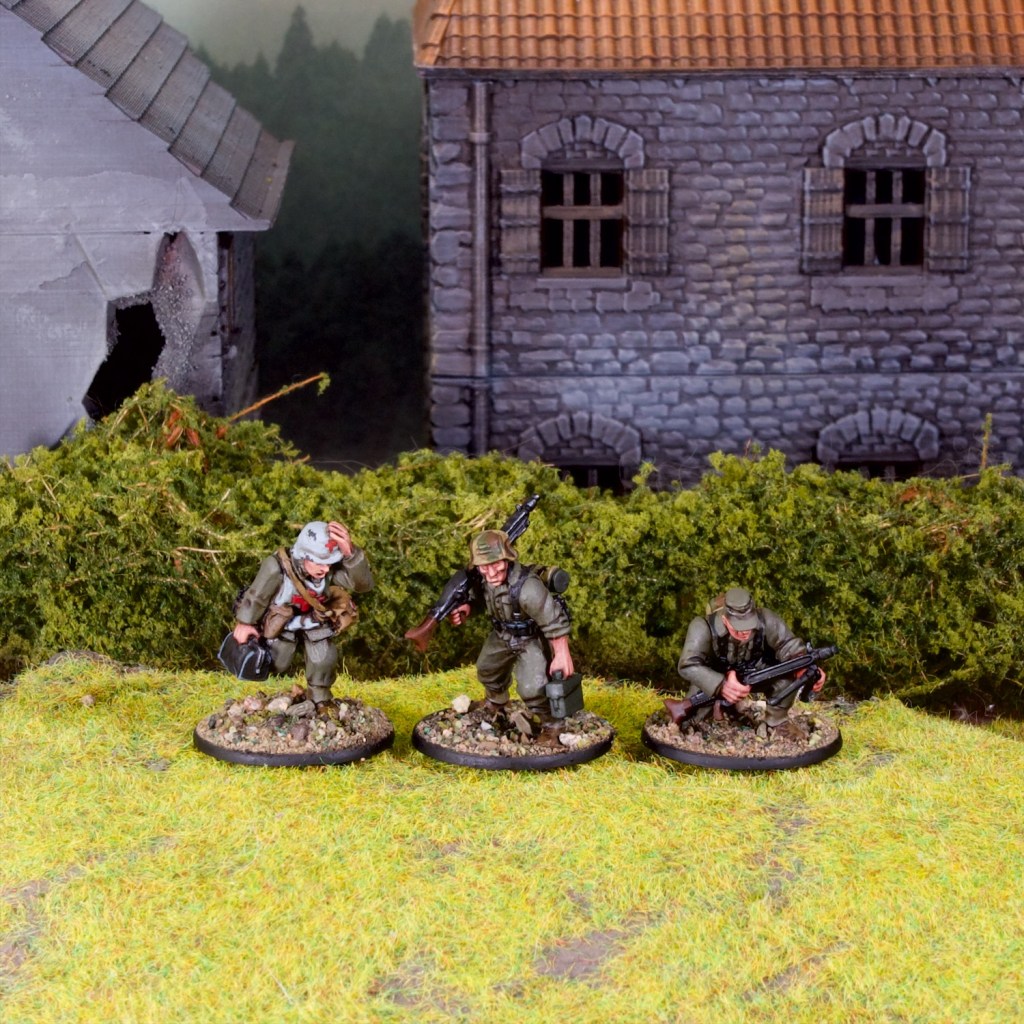
As mentioned above I also painted a few more Germans to make that army ready to play, which meant painting two more MG42 gunners. I also painted up a medic model I had, this one not required by the game but is an available support option and I liked the model!
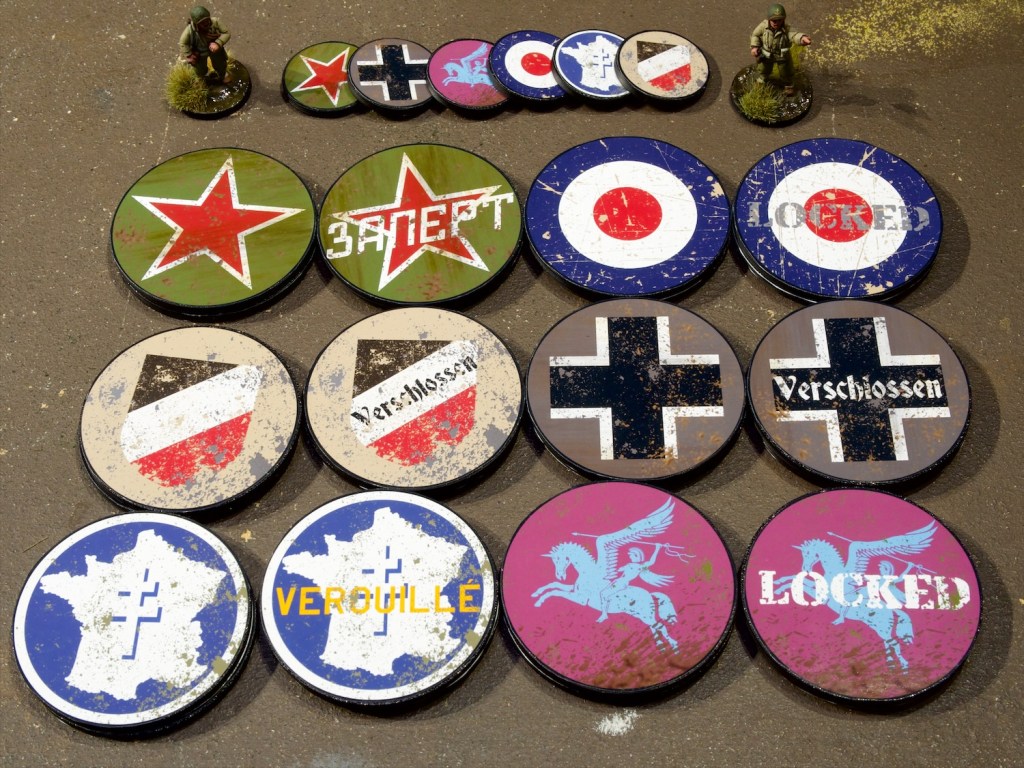
Finally, CoC is a pretty token intensive game, and I’ve been in a token-making mood recently (I made a whole batch of custom tokens for Netrunner recently and that kicked off something in me!) so I started making tokens for the game. Most of those aren’t ready to show so I’ll leave them for another post, but what I do have ready is what are called Patrol Markers and Jump-off Points in the game. These are used for a pre-game mini-game that determines the starting positions of both armies.
The patrol markers tend to be bigger (I went for 60mm diameter) and the jump-off points smaller (I went for 30mm). The patrol markers need to be able to be marked as locked so I made them double-sided with a locked side and an unlocked side. The translations are all mine so hopefully they’re right (I’m confident about the French one at least!).
These are made by 3D printing simple discs and (2D!) printing the designs on some self-adhesive photo paper. I made the designs in Affinity Designer (an Adobe Illustrator alternative that I heartily recommend). The only parts I didn’t make are the map of France (SVG from https://simplemaps.com/svg/country/fr) and the Airborne (From Wikimedia commons https://commons.wikimedia.org/wiki/File:British_Airborne_Units.svg). I made a set for all of my armies as I was enjoying myself quite a bit making these. Left to to right, top to bottom: Soviets (I don’t have any of these but my regular opponent does!), 8th Army, Afrika Korps, Germany, 2ème DB, British Airborne.
I look forward to giving the game a go, it looks like a really nice way to play the period. I’ve organised to have my interested in WW2 friends to come over for a game in the next month or so, so I’ll be doing some preparations for that until then. I’ll most likely be playing a practice game by myself beforehand to get across the rules properly so might turn that into a battle report for the blog.
With the wrist on the mend and itching to get back into some painting I decided to tackle something with limited amounts of brushwork: tanks!
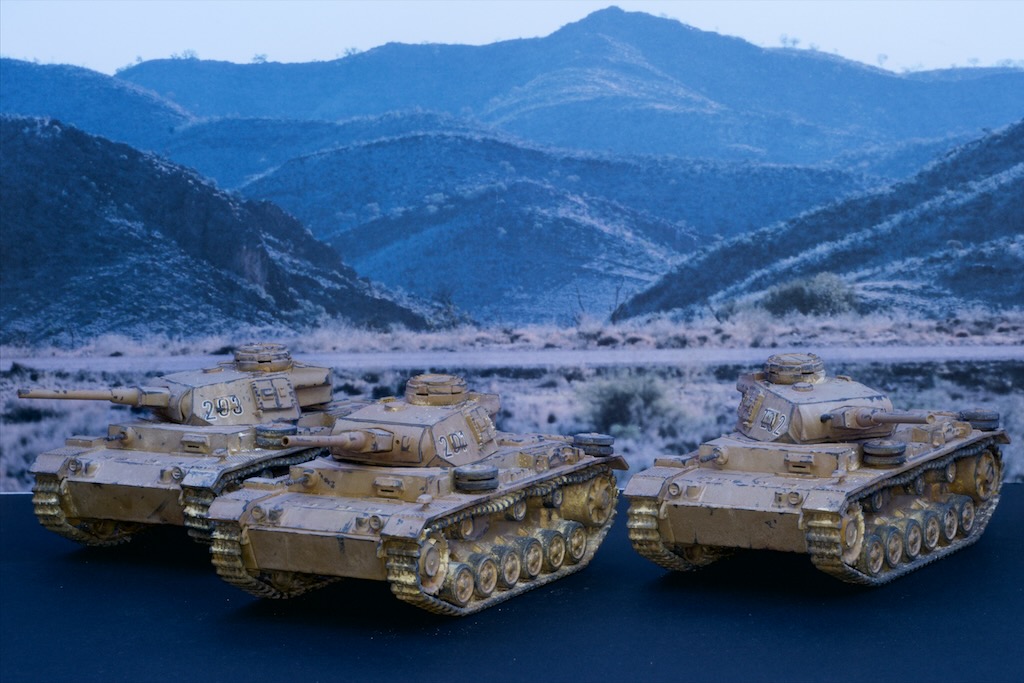
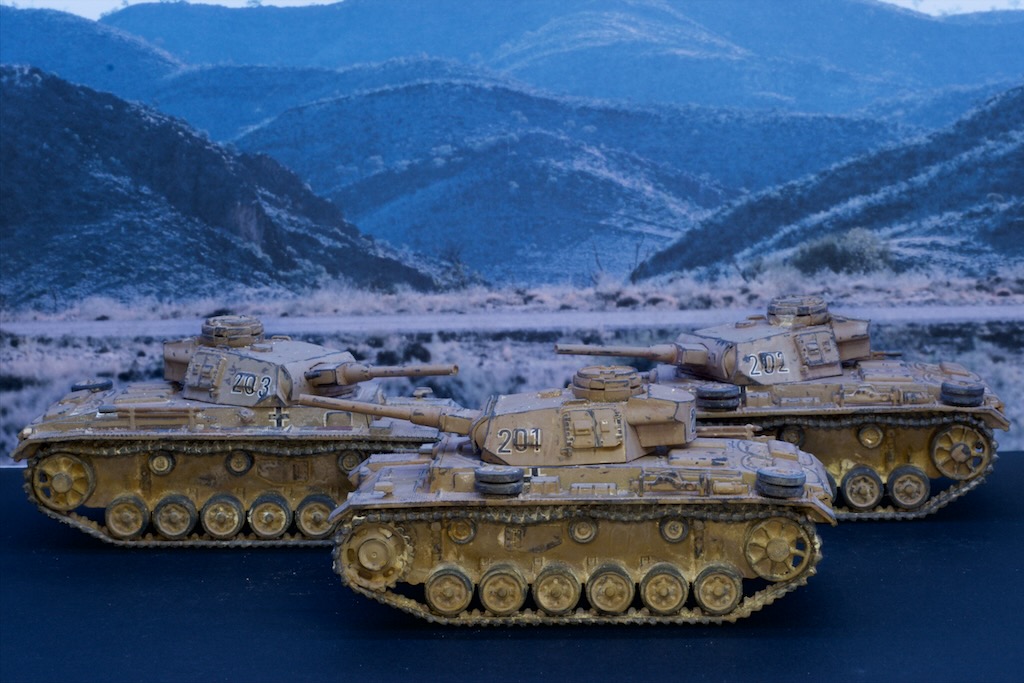
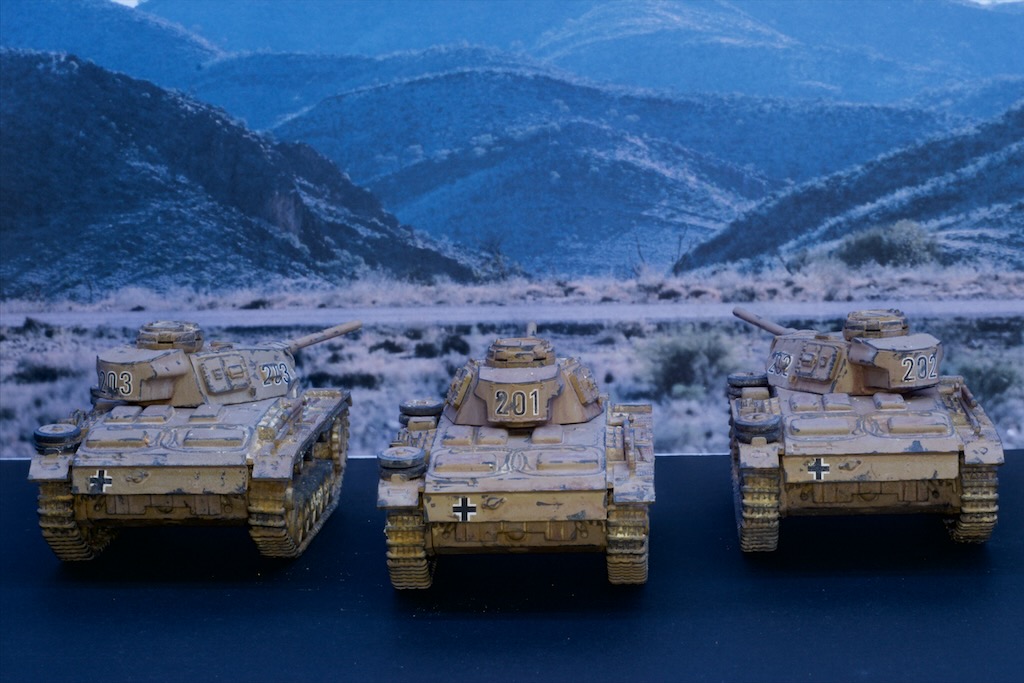
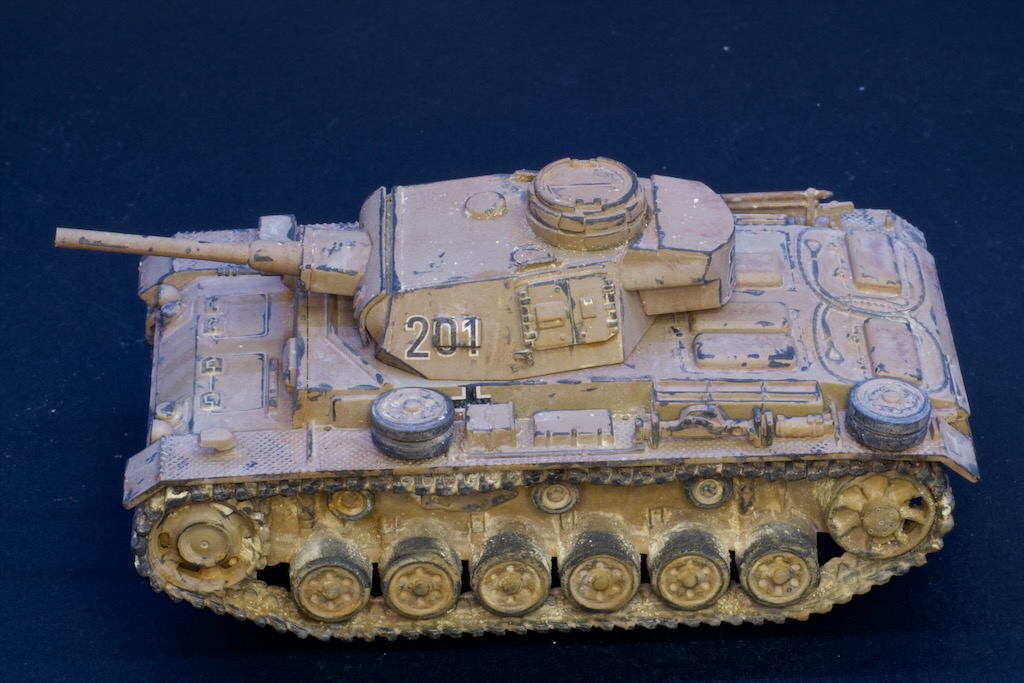
I’ve had a Panzer 3 half built for my North Africa Germans sitting in a box for a while and this seemed like a good occasion to finish it up. I then decided that the two P3s I painted for my late war Germans would make much more sense as reinforcements for North Africa, so decided to repaint them as well.
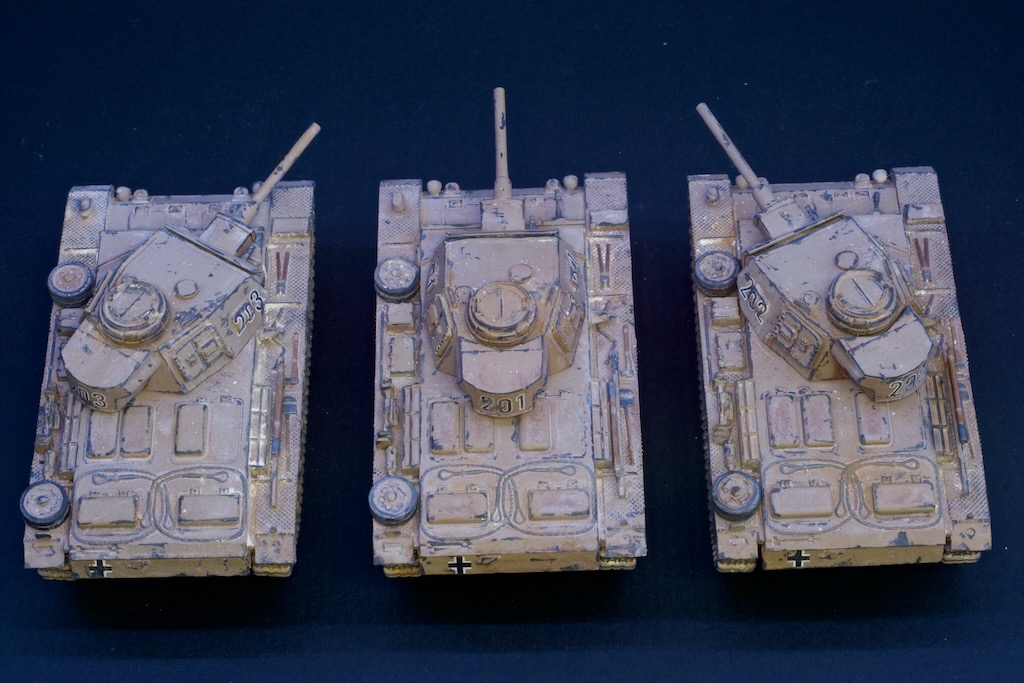
The two already painted had the longer later barrels, so step one was a bit of surgery to shorten them down to match the new one. I think it turned out pretty well, can you tell which are the cut down ones*?
Painting-wise these were pretty straightforward, just an all-over coat of Vallejo Model Air Sand Yellow, followed by painting the tools attached to the outside of the tanks, and a lot of chipping and the rubber wheels with Vallejo German Grey. The fun came from the oils and the pigments, I wanted these to be very dusty so I went much heavier than I have on tanks in the past. These are covered in a variety of sandy/cream oils, and covered all over with pigments in the same kind of colours.
I did not enjoy putting on the turret decals last time, and was dreading it again this time! Things went much the same: a lot of repositioning and dousing on decal setter and crossing my fingers in hope! Overall though, I can’t complain with the outcome, I think they turned out pretty good.
Good to be back at the painting table, and I hope to be able to keep going!
* 201 is the new tank, and 202 and 203 are the repaints.
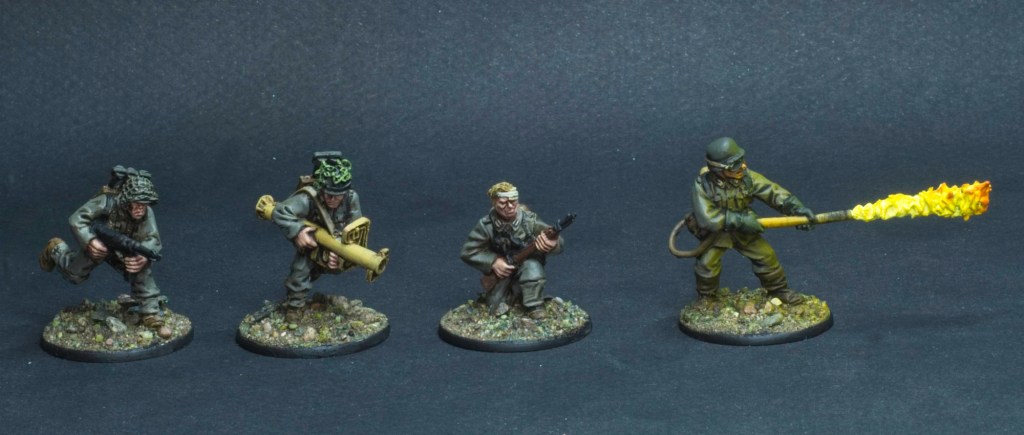
A bit of a mix of things this post! After working on a few of my bigger projects these last few weeks I felt like a small palette cleanser (can’t remember where I first saw that pun, but it’s excellent at expressing what I mean!). This resulted in me putting together and painting a blister pack of german weapon teams and an old set of Warhammer fences.
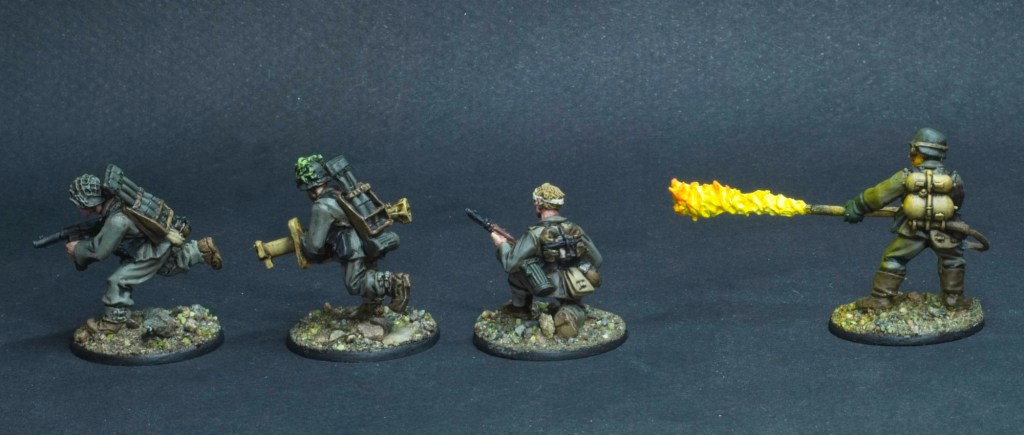
The weapon teams as you can see are made up of a Panzershrek team and a flame-thrower team. Not much to write about in terms of painting as these are done in exactly the same way as my other Grenadiers, except the fire!
I had a bit of fun with that flame, trying to make sure to keep it as bright as possible. To that end I started with a pure white, that I slowly covered in yellows then oranges at the very tips. The glow effect on the soldier is done with a very light pass of orange through the airbrush, to tint the underlying colours rather than cover them entirely. I think the effect is pretty convincing, and looks pretty good even when not lit up properly (i.e. anywhere not under painting lights!) which I’m happy with.
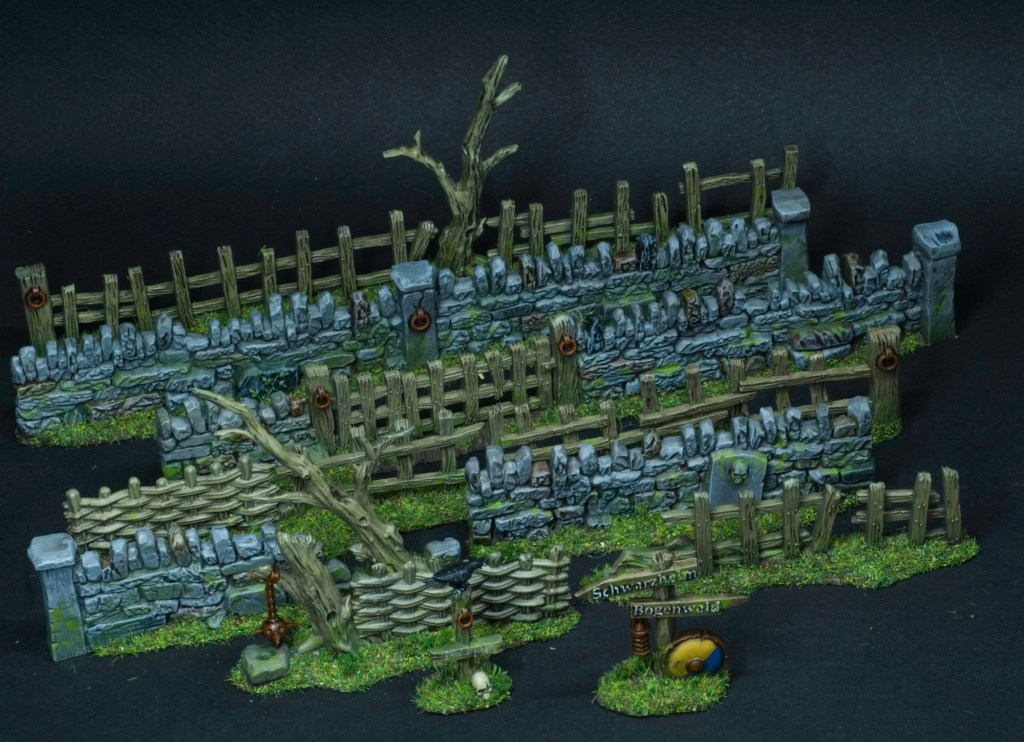
While I was painting these I also tackled an older set of plastic terrain I’ve had for years, the old fences set for Warhammer (back in the square base era!). I spent way more time n these than I usually do on terrain, but they’re great models and were very fun to paint. The green mossy parts on the walls are done with AK enamel washes (Slimy Grime Light and Slimy Grime Dark). I’ve been wanting to try these for a while and this seemed like a great project for them. Really like the result so will definitely use them on other projects.
Anyway, those were two fun short projects that served as a nice filler while I impatiently wait for my next project to be delivered!
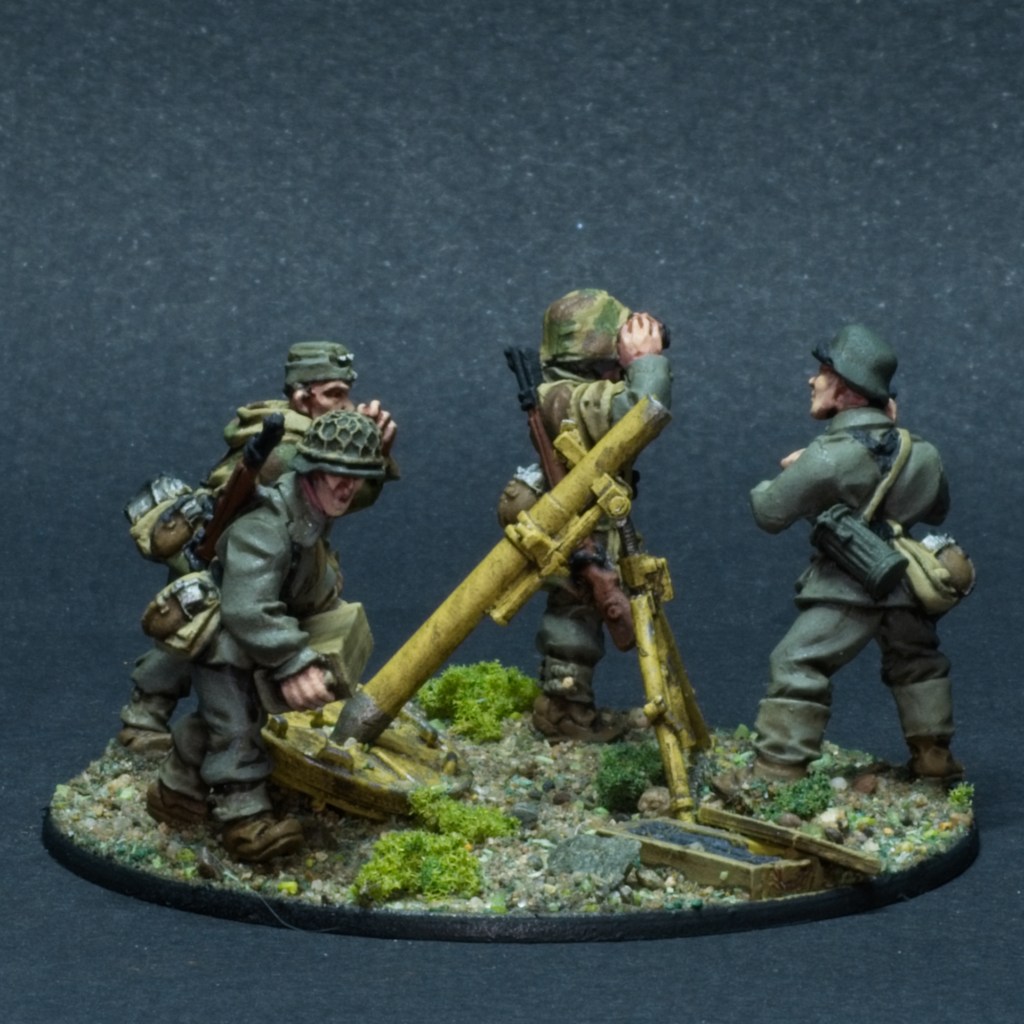
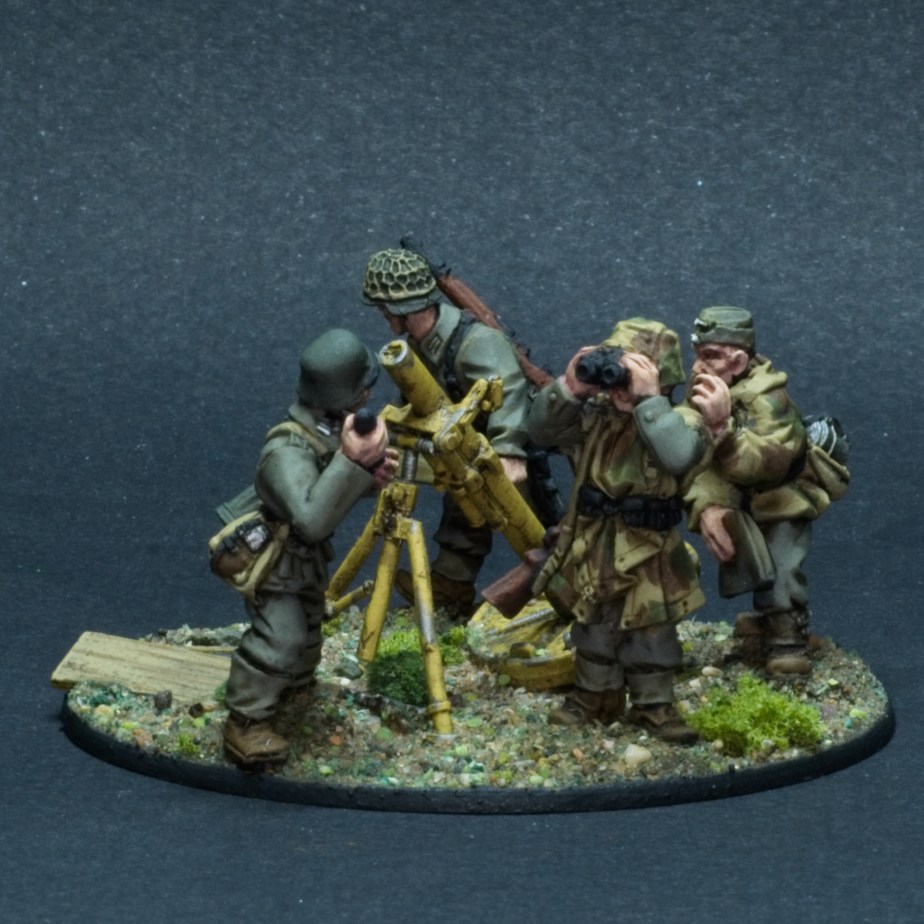
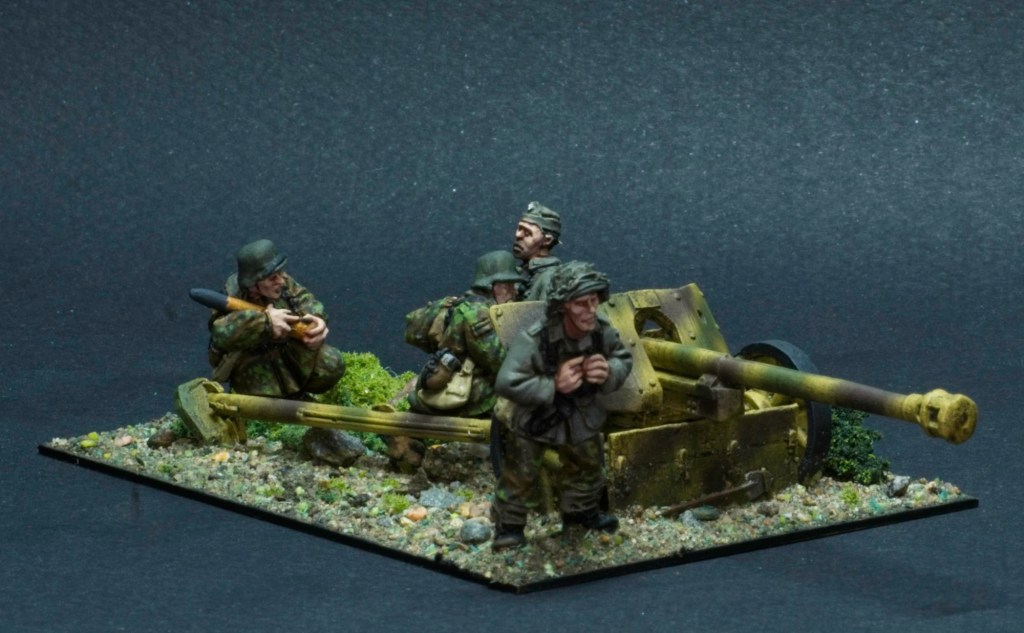
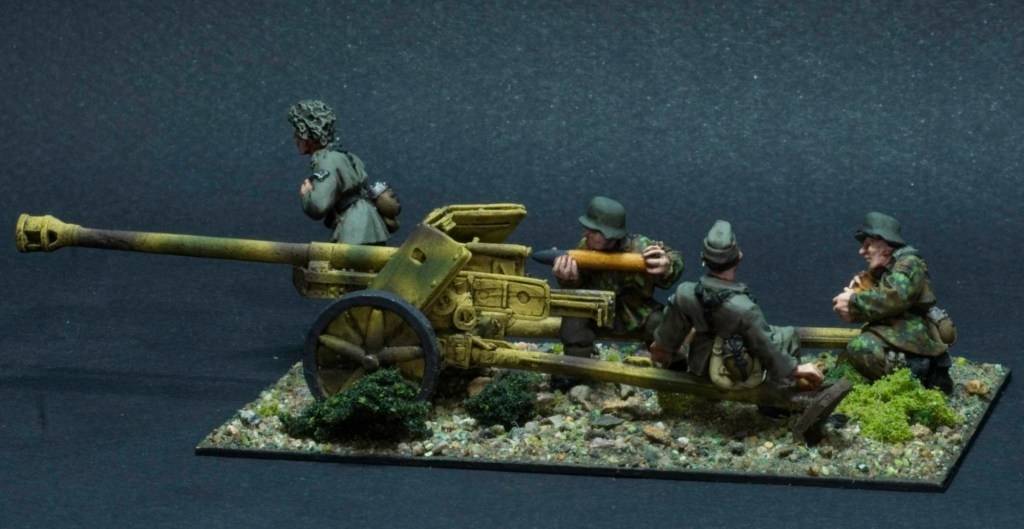
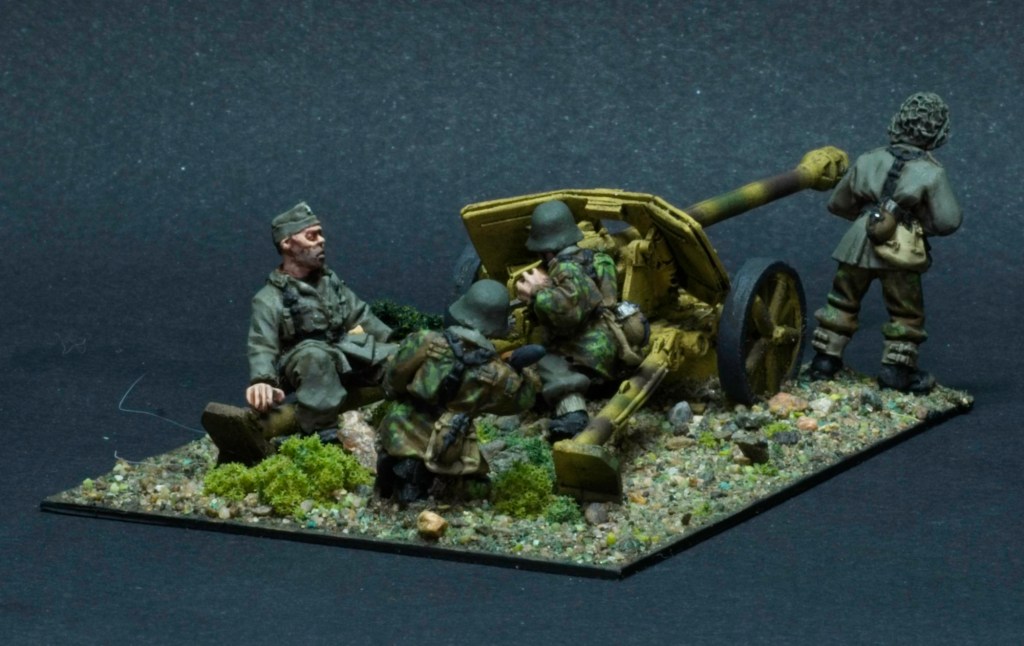
After typing up the last post, I did a quick tally of the points I’d painted for my Bolt Action army and found that I was pretty close to finishing 1000 points. All I needed was to paint up the Pak 40 and 120mm mortar teams. With that milestone so close, I decided to just go for it!
I really enjoyed painting both of these, the models are quite characterful and form this nice little vignette. The base for the Pak 40 was cut out of plasticard, as the round base provided was really too small.
Here’s the army in the current configuration I’m thinking of for 1000 pt games
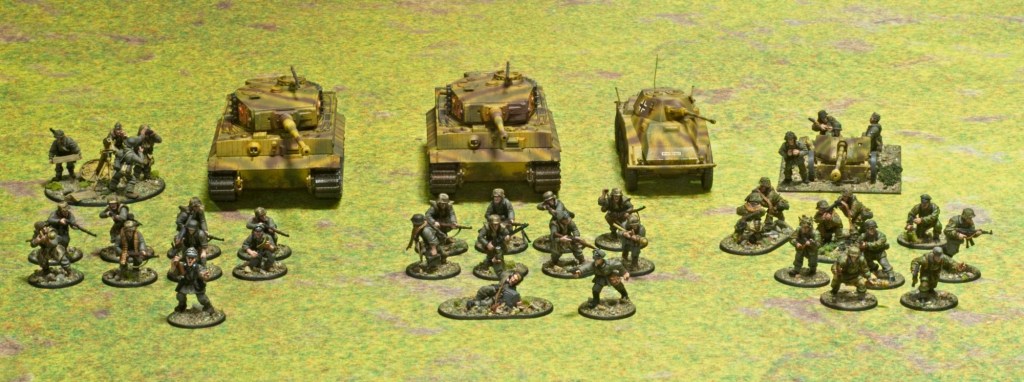
After finishing these models, I realised that painting up another lieutenant model would let me fit in more of the tanks I’d painted a while back (In regular games of Bolt Action, you can add 1 tank per reinforced platoon, adding another lieutenant would let me split the infantry sections from my base list into two of these, giving me one more tank allowed). If I made these two tanks Tiger Is, the list would come really close to 2000pts (Tigers are veeery expensive, especially if crewed by veterans). I floated the idea of playing a game with these to some friends and they came back asking to play tomorrow! So I quickly painted up the second lieutenant this morning, ready for the game! He’s a little rough around the edges, but needs must!
Here’s the army at 2000pts:
As you can see, it’s not much bigger, just has larger cats!
I’m looking forward to this game, which will see this german army facing my 1000pts of 6th Airborne allied with 1000pts of late war russians! Might have to think a bit to make up a plausible explanation for how that scenario occurred!
I love listening to audiobooks while I paint, and have mostly listened to books about WW2 recently, which always pushes me to paint more models from the period. Recenty I listened to “Killing the Bismark” by Ian Ballantyne, which was a fantastic account of the hunt for Bismark by the Royal Navy, mostly old from the perspective of that navy through accounts of those who were there. That definitely has me considering naval wargaming!
Following on from that, I’ve been listening to James Holland’s “Brothers in Arms”, an account of the Sherwood Rangers’ participation in the later years of the war, again told from a very personal level through accounts of men of the regiment. I’m not all the way through it yet (so far it has been excellent!), but the early chapters cover Normandy on and after D-Day which has motivated me to paint more of my Normandy armies (and also consider buying Shermans…).
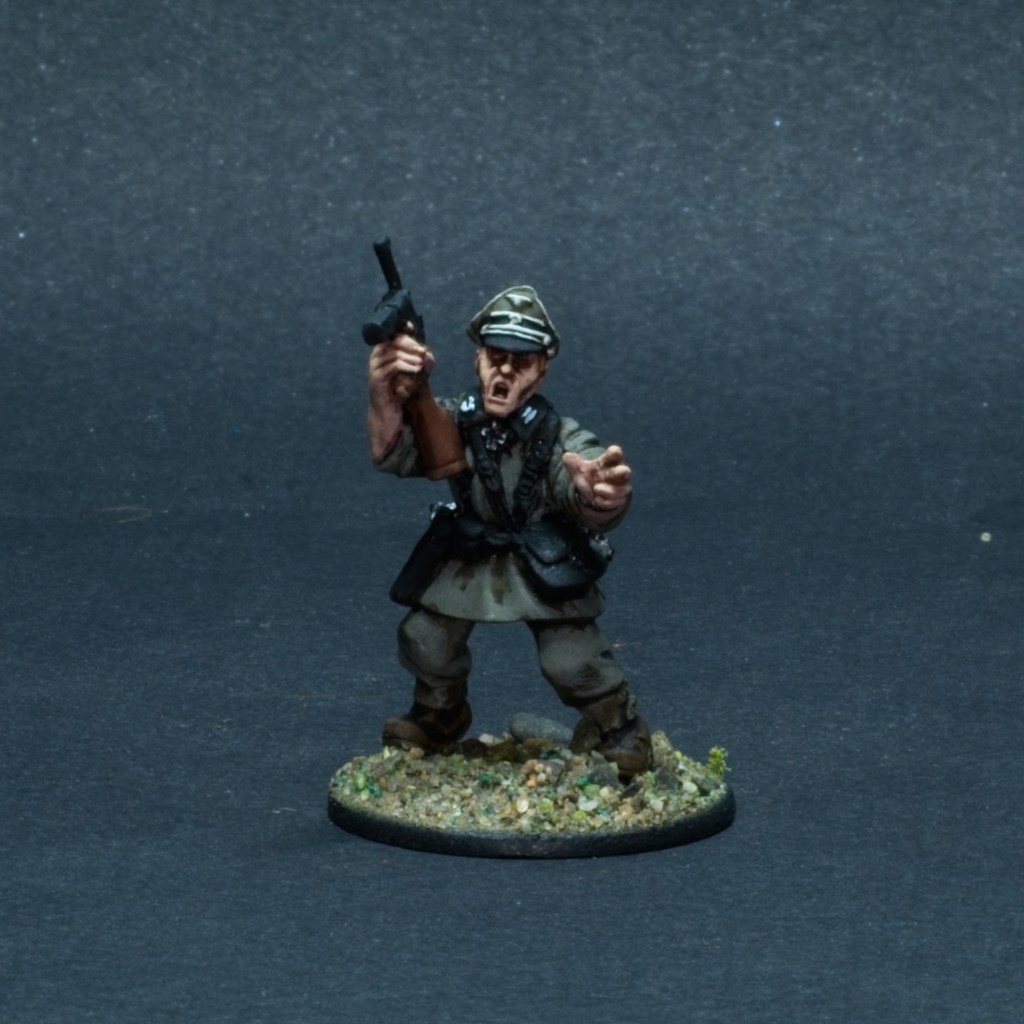
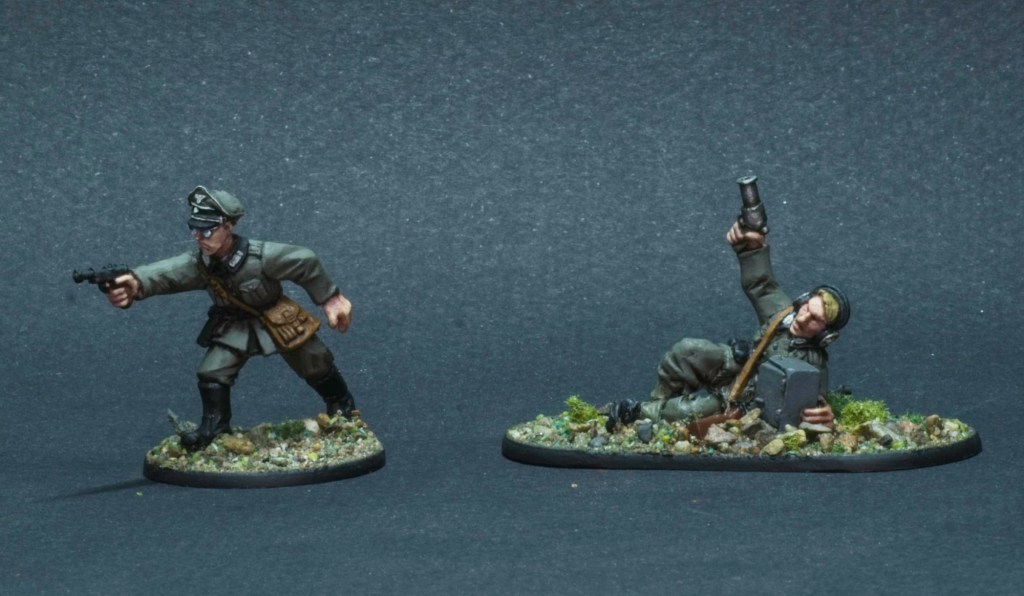
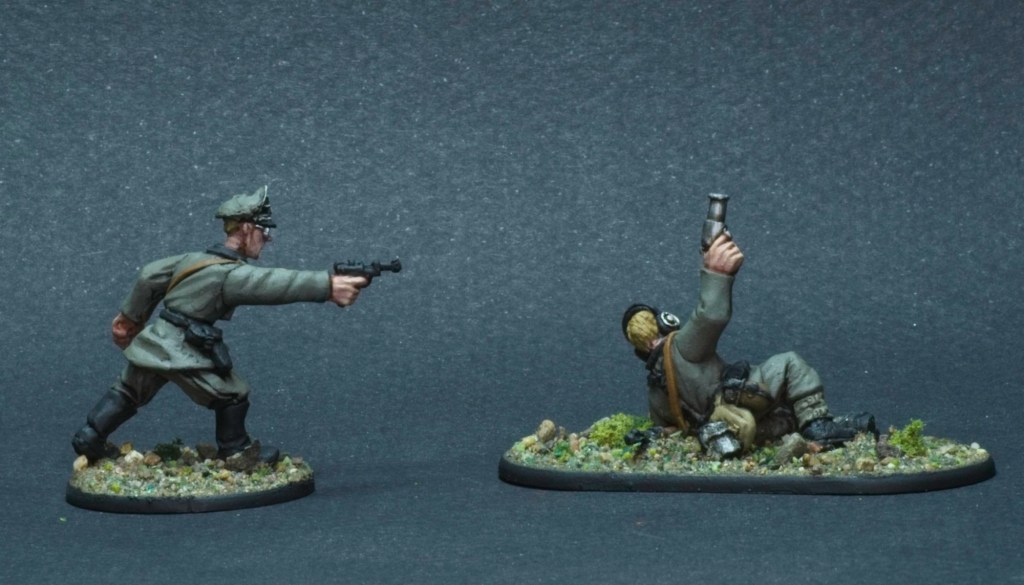
So here is the next batch of Germans for the late war army I’ve been putting together, with first up an officer and forward observation officer
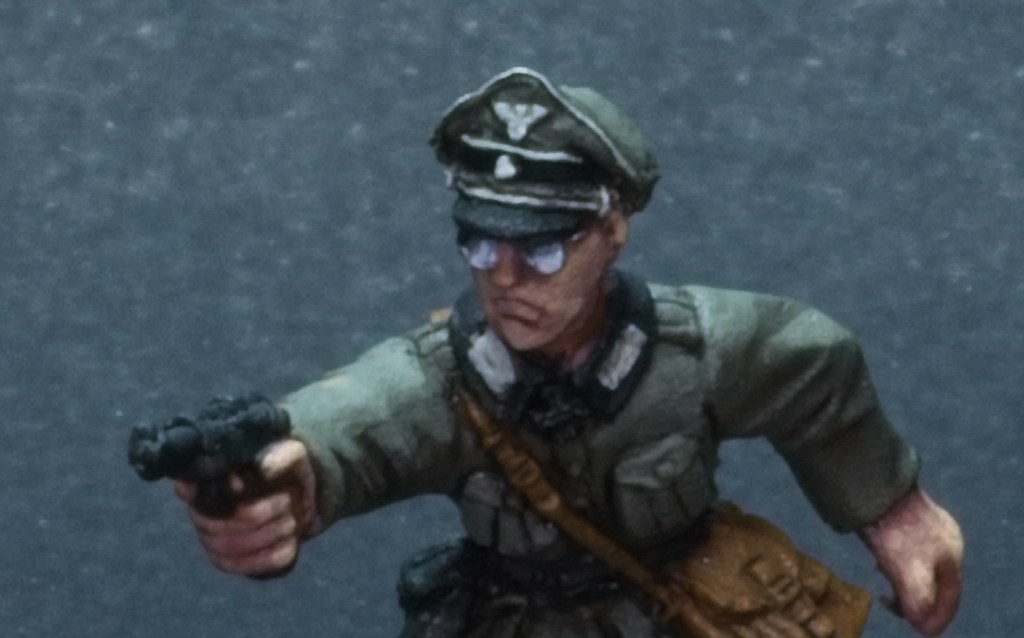
The officer model I found really fun, he looks right out of Indiana Jones or another pulpy movie with the round glasses and the luger.
The observer I’ll either use as an artillery/air observer, or as a spotter for the mortar I still have to build and paint.I had fun painting the reflection in the glasses so here’s a close-up!
Both models are from Warlord Games.
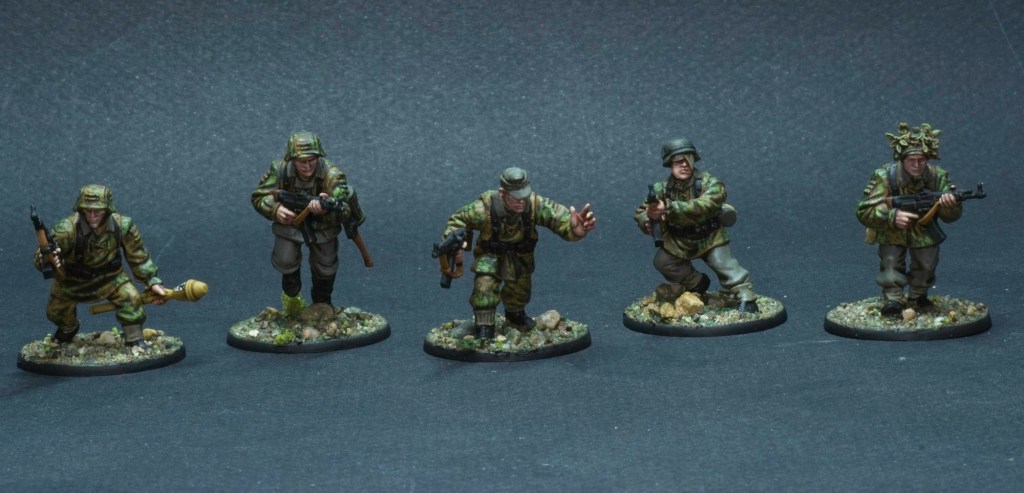
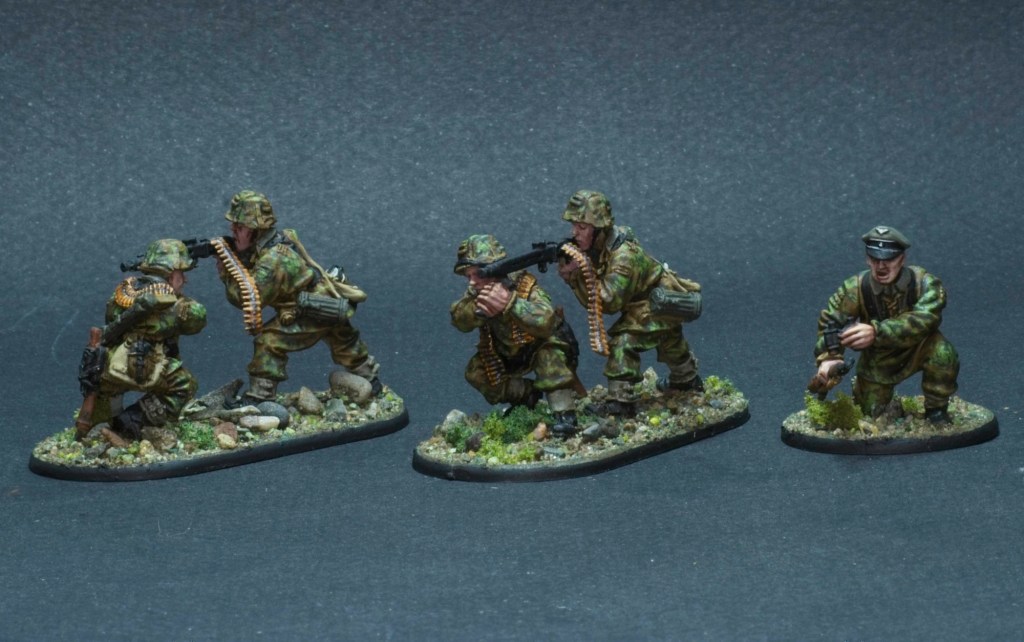
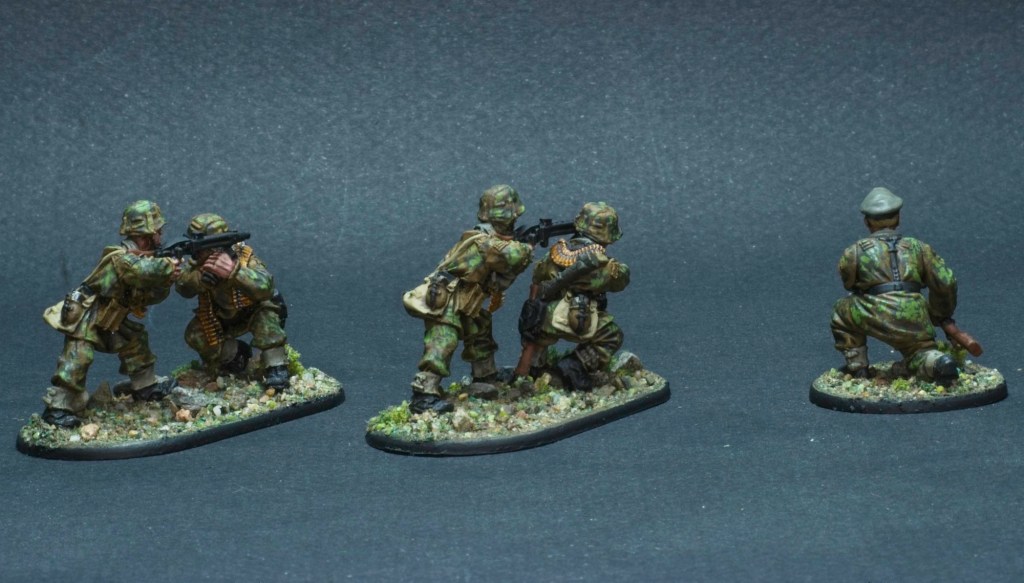
Next up are opponents that regularly show up in “Brothers in Arms”: the SS.
Last post on the army I made the comment about how I felt conflicted with painting an army of real world villains (thanks to everyone who commented by the way, I feel like some really positive and constructive discussions were had on the topic). If there was any unit to have misgivings about painting, here they are.
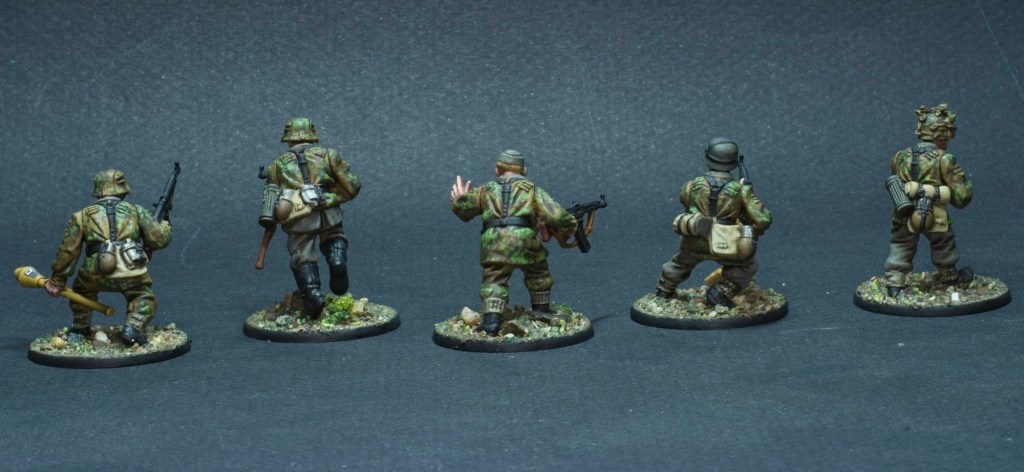
This camouflage pattern was a lot of work! I can see why display painters are drawn to it, and army painters dread it! My hands were cramping up after repeatedly dotting these 10 models. I used Vallejo German Camo Medium Brown, Vallejo German Camo Dark Green, and Vallejo Gobin Green for the pattern. As a reference I used an illustration in a very useful book I have on WW2 uniforms.
I plan on running these models in one of three ways: as a 10-man section, as two 5-man sections with an MG each, or two 5-man sections with MGs and assault rifles split up.
The MG models are some older Warlord Games metal models, which have one of the team members acting as a mobile tripod. I saw photos where this tripod-man was facing either way so I built the teams to have that man face both directions to add a bit of variation in what are otherwise identical poses. The rest of the models are from Warlord’s fairly new SS set.
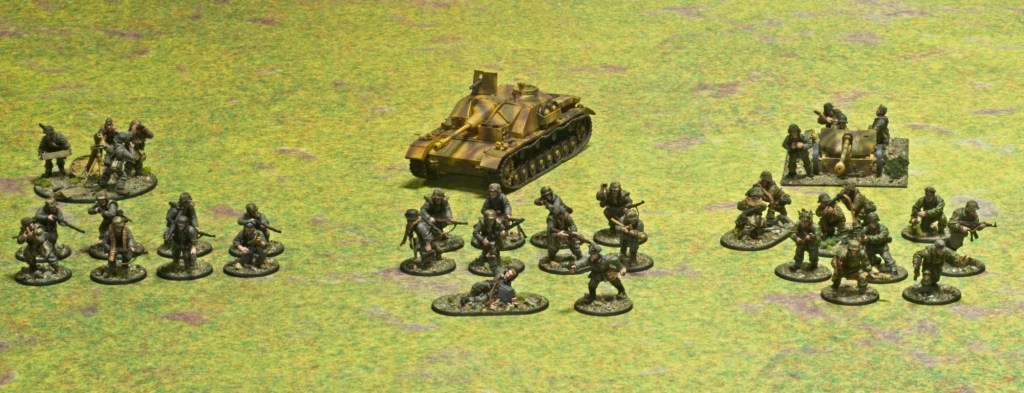
This mostly leaves weapons teams to fill out the rest of the army as I currently plan on fielding it. Something like a couple of MG teams (with real tripods this time), an anti-tank gun, and a mortar team. I have quite a few more models in the collection, so most likely these plans will change, we will see!
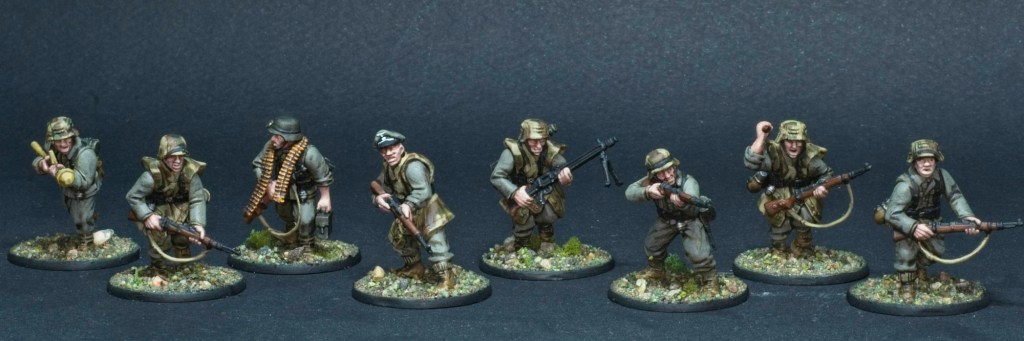
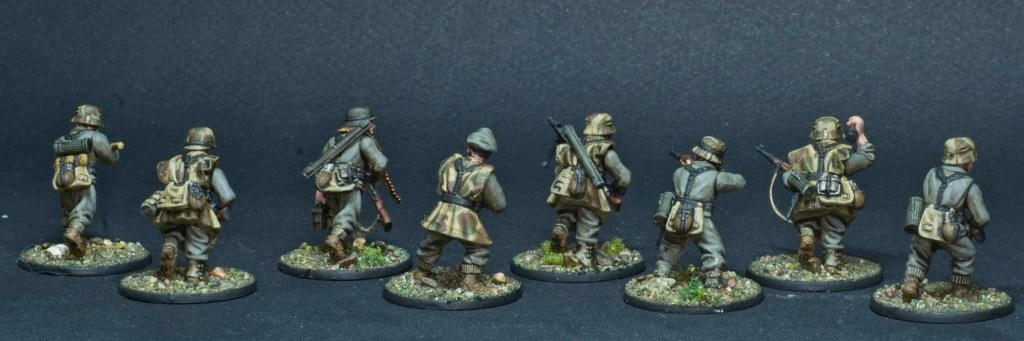
The WW2 bug is still very much around and I’ve now started painting the infantry in the German collection that was given to me. Starting with the Grenadiers, from Warlord Games’ plastic kit line.
I have 2 squads of these in the 1000pt list I’ve written up, both imaginatively armed in the exact same manner! 8 men, two as an MG team, one with Panzerfaust, and the rest with rifles.
I painted these using Duncan Rhodes’ guide, following the steps exactly up until some of the more detailed highlights that I skipped.
These were based with more base ready materials, this time the Scrublands mix. I think it looks quite nice, especially given the low amount of effort required!
I’ve been on a bit of a journey with these models, building and painting models that are evil in fantasy and sci-fi settings is one thing, but these are miniature representations of an organisation that caused harm in an unprecedented scaled to real people. I’ve had serious misgivings about painting and posting about this army, but at the end of the day I think historical wargaming can have a positive role in helping us and others keep in mind what happened in the past.
This is a bit more of a serious tone than usual on the blog, but I did want to address this as I think it’s important. I’ll probably talk some more about all this when I get to the troops of a more political nature…
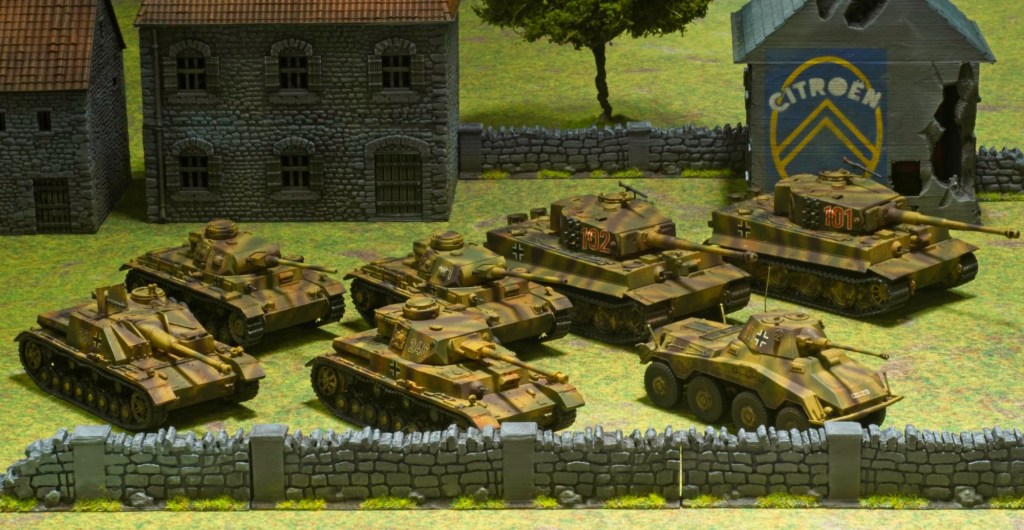
A friend of mine gave me his Bolt Action army last weekend after a year of not doing too much with it, he felt he’d rather not have it than having the pressure to complete it, and focus instead on Star Wars Legion. He’d amassed a pretty large collection of models, so this was very generous of him indeed. I’ve been itching to get a game of Bolt Action in after all this time so decided to act quickly and paint all his tanks so we could play the Tank War set of rules for Bolt Action, with the goal of painting the infantry later. After tallying up his vehicles (1 Puma, 2 Panzer III, 2 Tigers), I ended up at around 1500 points, so decided to round that up to 2000 by buying a couple of extra tanks to fill out the numbers (a Panzer IV and a Stug IV). This would let this army play against my own 1000pts of British tanks and another friend’s 1000pts of Russian tanks.
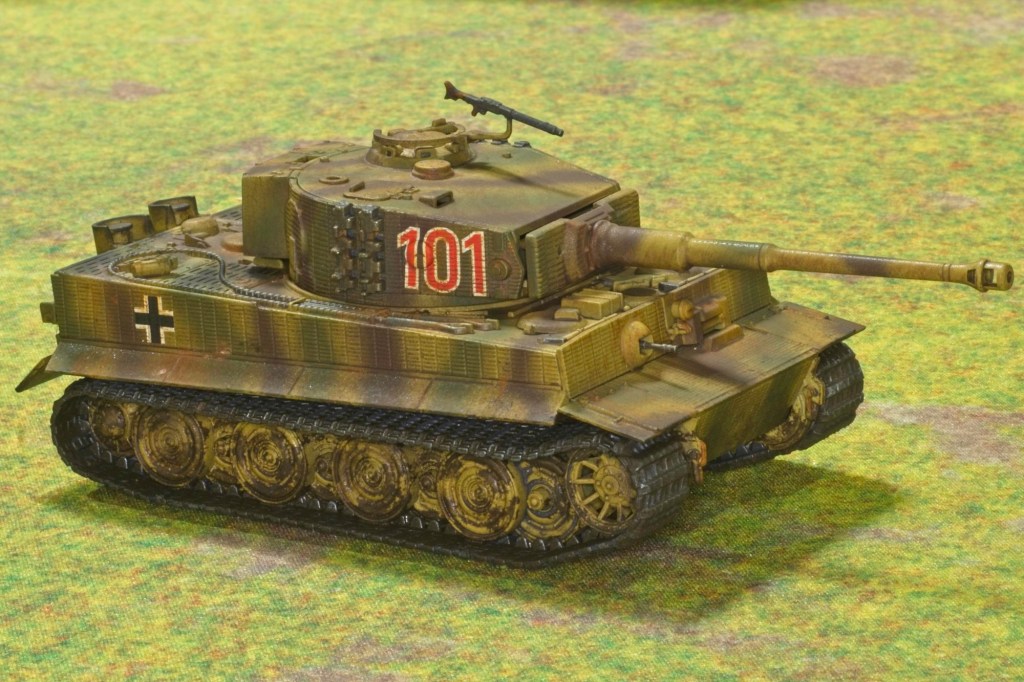
I decided to go for a late war scheme (the famed Dunkelgelb, Olivgrün, Rotbraun camo) to match my own armies which I mostly picked because of their presence in Normandy. The Panzer IIIs are a little bit out of place there, but I found three sources that mention there being a handful present, good enough for me!
With that goal in mind I decided that for time efficiency I would paint the lot together as there are a lot of efficiencies to be gained there. Tank painting with oils washes and layers of varnish has a lot of drying time in between steps, while the steps themselves are relatively short. Here’s a quick summary of the steps:
Undercoat – Vallejo Dunkelgelb Primer through the airbrush for the tank bodies, Vallejo Plate Mail Metal for the tracks (Kept separate where possible)
Camo – Vallejo Olivgrün and Vallejo Rotbraun through the airbrush, I decided to do a loose striped pattern.
Basecoat the bits that are not tank bodies (Rubber on the wheels, tracks where attached, attached equipment etc.)
Gloss Varnish the lot
Apply Decals
Gloss Varnish again
Overall oil wash – Abteiling 502 Dark Mud
Streaking rust, applied dots and streaked them downwards – Abteilung 502 Oxide Patina
Satin Varnish all over
Used Graphite pencil to wear the edges
Applied mud to tracks – AK Wet Mud
Applied dust – Mig Europeant Dust Dry Pigment
Matt varnish all over
Some of those decals were very tricky to apply! Luckily decal solvents saw me through! (I used Mig Decal Set/Fix for this)Very happy with the outcome of the rust streaks, I’ll definitely use that technique again.
Here’s a gallery of all the vehicles
The Tigers – Warlord Games/Italeri Plastic kitsThe Panzer IIIs – Warlord Games/Italeri Plastic kitsThe Puma – Warlord Games/Italeri Plastic kitThe Stug IV – Die Waffenkammer resin kitThe Panzer IV – Die Waffenkammer resin kit
Very fun little project, now I need to paint my British tanks otherwise this will all be in vain!


