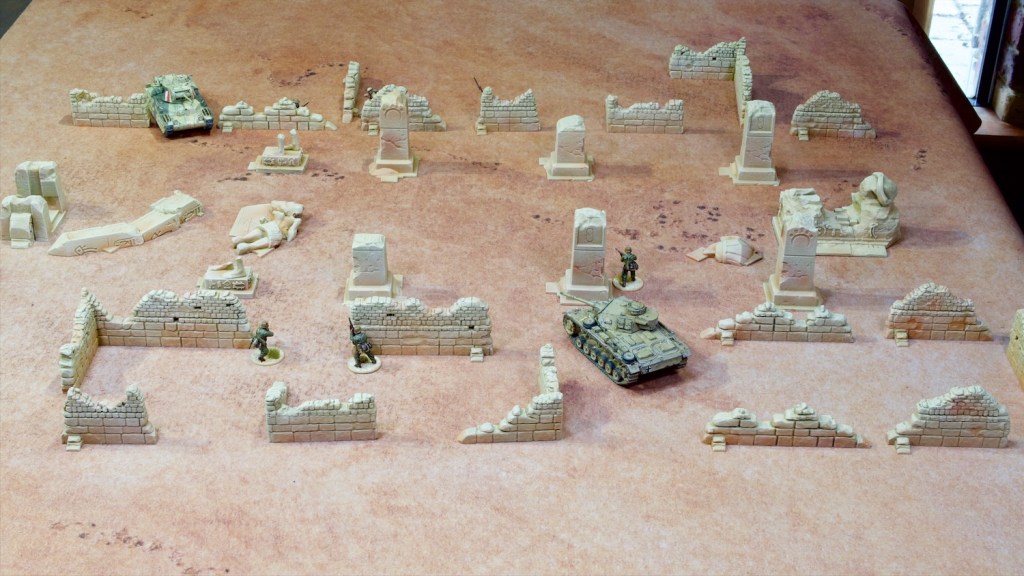
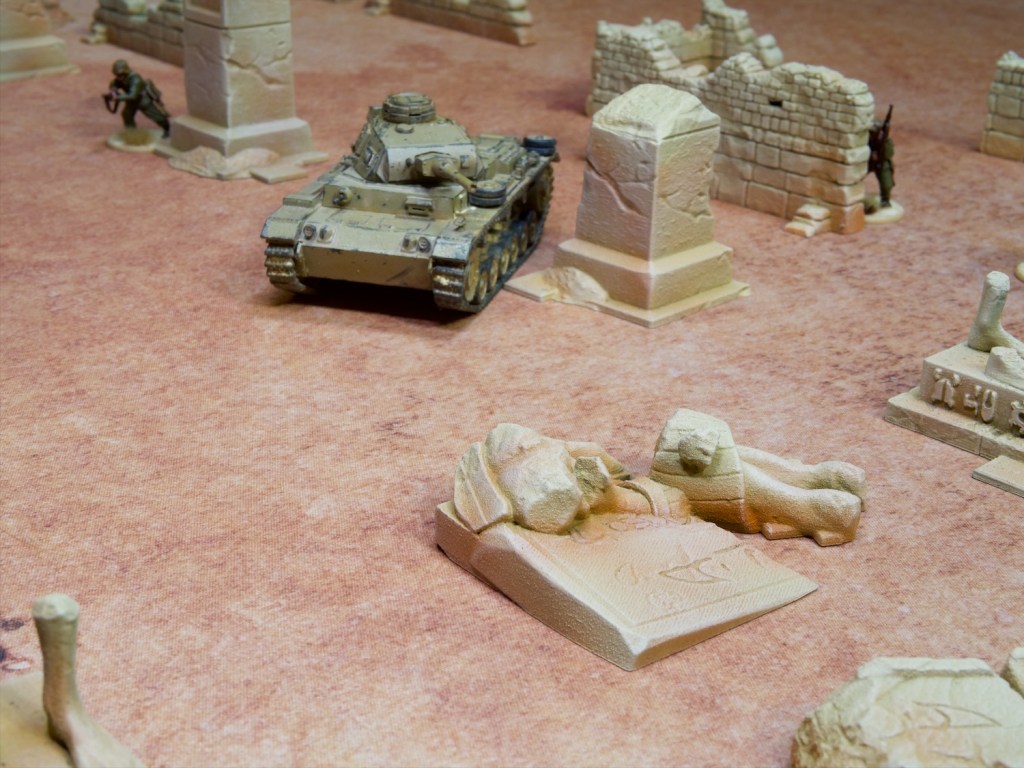
My 3D printer has been very busy these last two weeks, producing enough scatter terrain to cover a densely packed 3’x3′ area, or a more loosely covered 6’x4′ board. The theme: desert ruins, more specifically Egypt-like ruins.
The primary motivation for this effort has been the Silver Bayonet, I picked up the Egypt supplement a few weeks back and one of the North Star units for the game, and needed a nice set of terrain to play some of the missions. The good news is that I have a fair few other games that require desert terrain, such as Bolt Action for my North African forces, and Warhammer of course for my Tomb Kings.
The models I printed were from two sets: the ruined walls are by The Lost Adventures Co., and the Egyptian statues/columns etc are by Txarli Factory. I printed the walls at 65% scale to make them a nice size for my historical miniatures, allowing them to peek over the lower sections of wall.
I undercoated all the pieces with an old can of Citadel Roughcoat which is a spraycan-based texture paint (and long out of production, I’d love to find a good replacement). This had the dual effect of hiding the print lines on the models, and adding some nice grit for that sandstone look.
Painting-wise these were pretty straightforward. I sprayed Vallejo Primer German Dark Yellow all over, followed by a top down spray of Vallejo Model Colour Dark Sand through the airbrush. I then drybrushed Vallejo Model Colour Dark Sand, followed by another drybrush of Vallejo Game Color Bonewhite. At this stage I popped the pieces onto my desert mat and realised they looked out of place as the mat has quite a bit of red to it. To remedy this, I added patches of Vallejo Skin Wash Ink using the airbrush, followed by another drybrush of Vallejo Game Color Bonewhite. I would probably have skipped the first Bonewhite drybrush if I’d known I’d be doing another, but sometimes you find things out and need to go again!
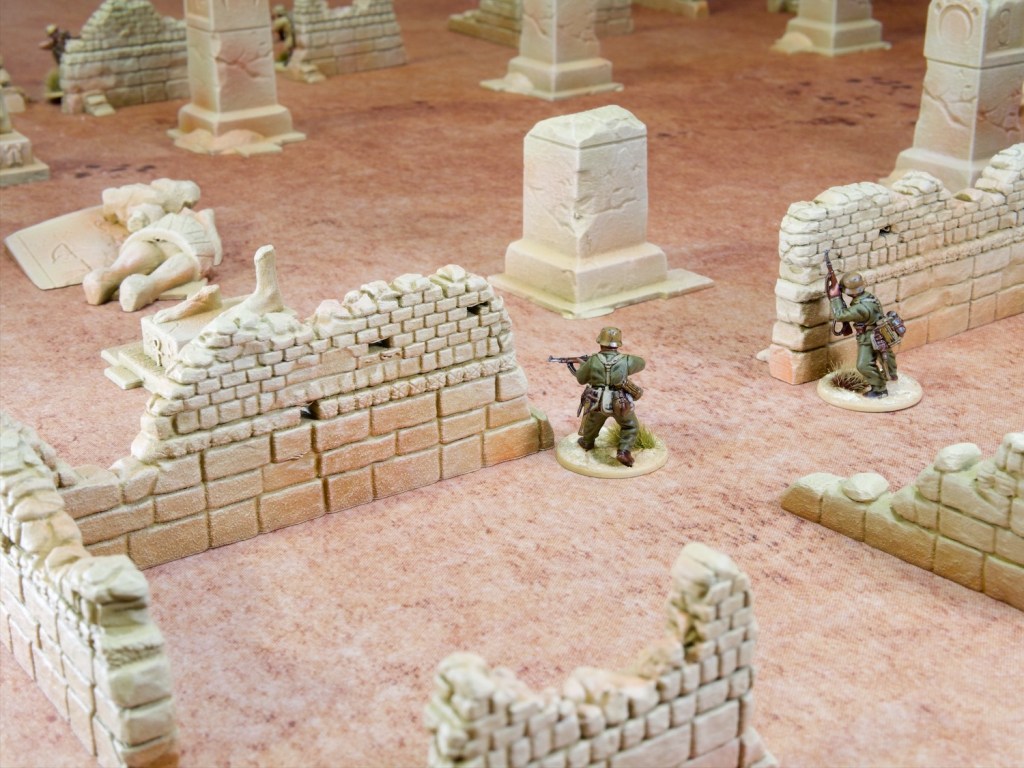
I’m really pleased with how these came out, the roughcoat really did a nice job of making the 3D prints more stonelike. The reddish tones also really tie the pieces to the game mat. Here’s a few more closeups showing off the different pieces:
A nice quick update after the longer last few posts. I do enjoy panting terrain as a nice break from more involved models. I’m currently painting up my Egypt campaign unit for Silver Bayonet (guess what nation!), and looking forward to playing some game with this new terrain. The Egypt 3D model set also comes with a sphinx and a pyramid so if I feel like filling out a bigger table I have what I need!
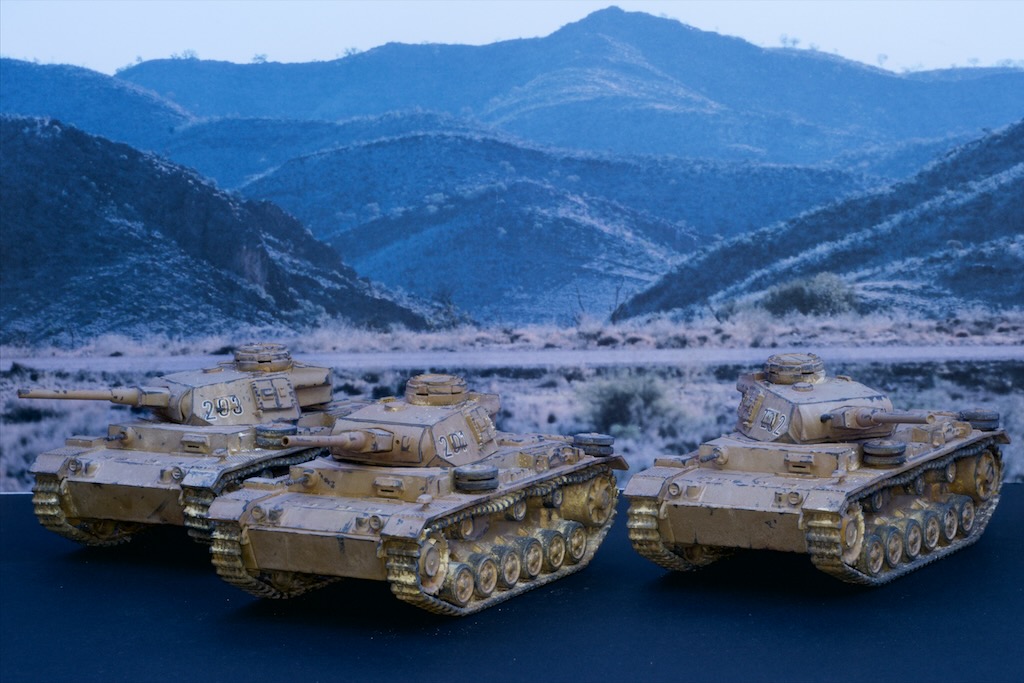
With the wrist on the mend and itching to get back into some painting I decided to tackle something with limited amounts of brushwork: tanks!
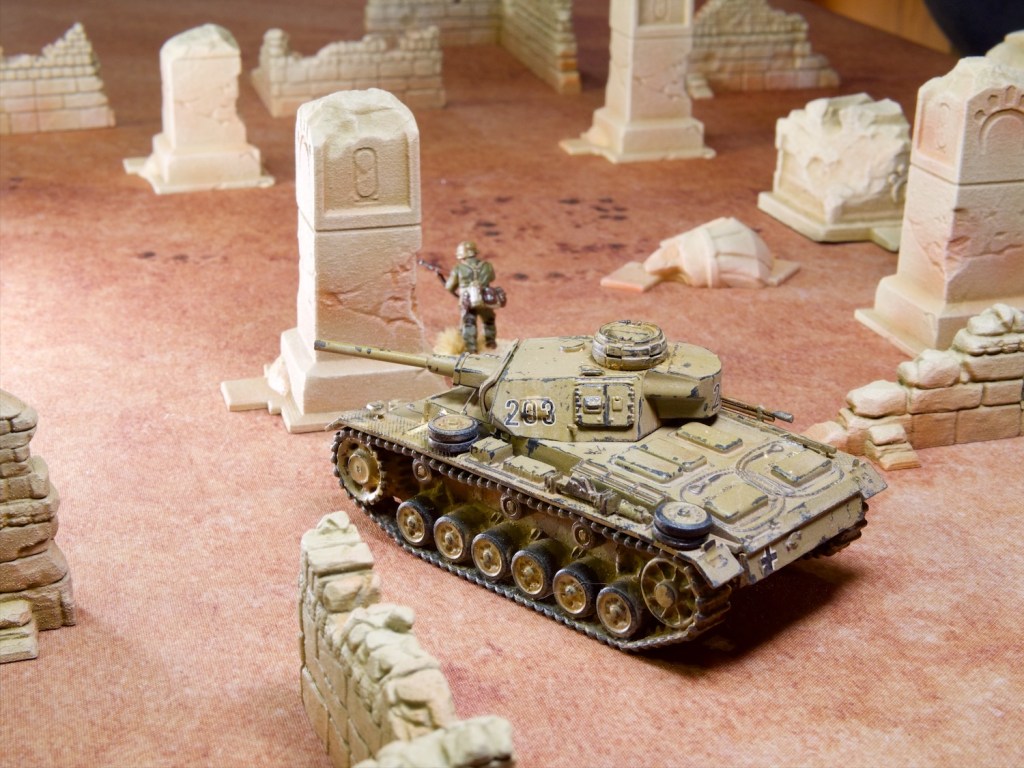
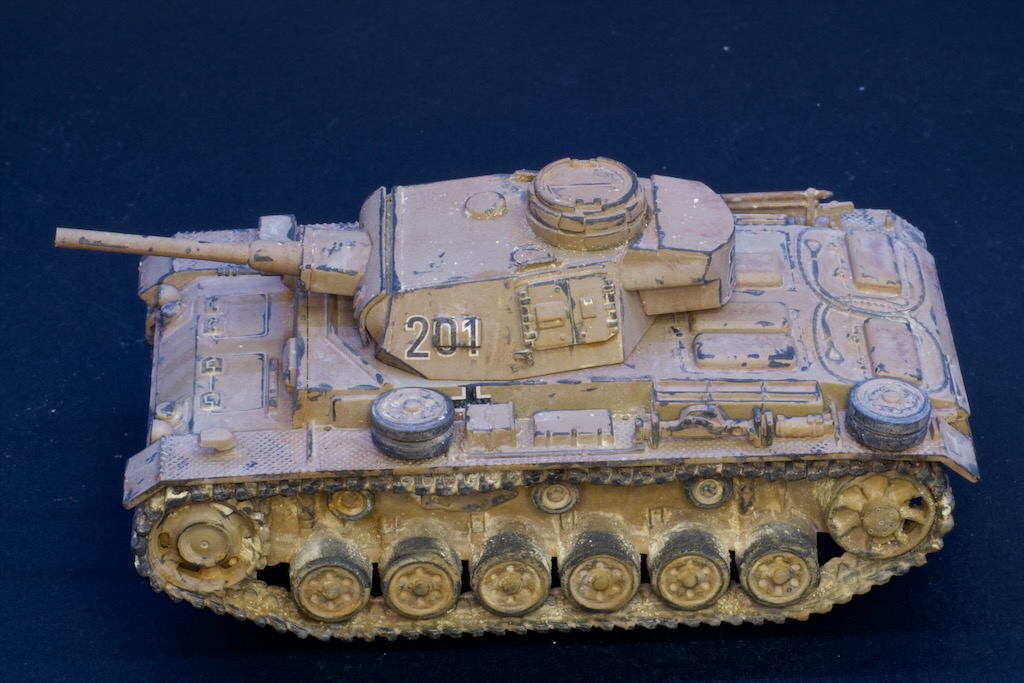
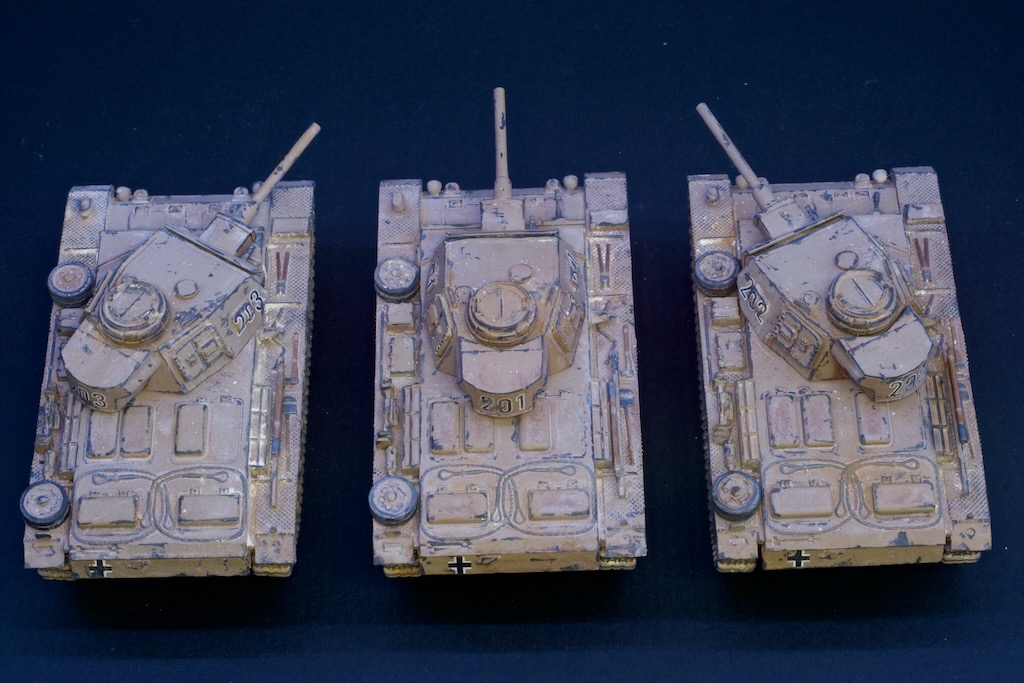
I’ve had a Panzer 3 half built for my North Africa Germans sitting in a box for a while and this seemed like a good occasion to finish it up. I then decided that the two P3s I painted for my late war Germans would make much more sense as reinforcements for North Africa, so decided to repaint them as well.
The two already painted had the longer later barrels, so step one was a bit of surgery to shorten them down to match the new one. I think it turned out pretty well, can you tell which are the cut down ones*?
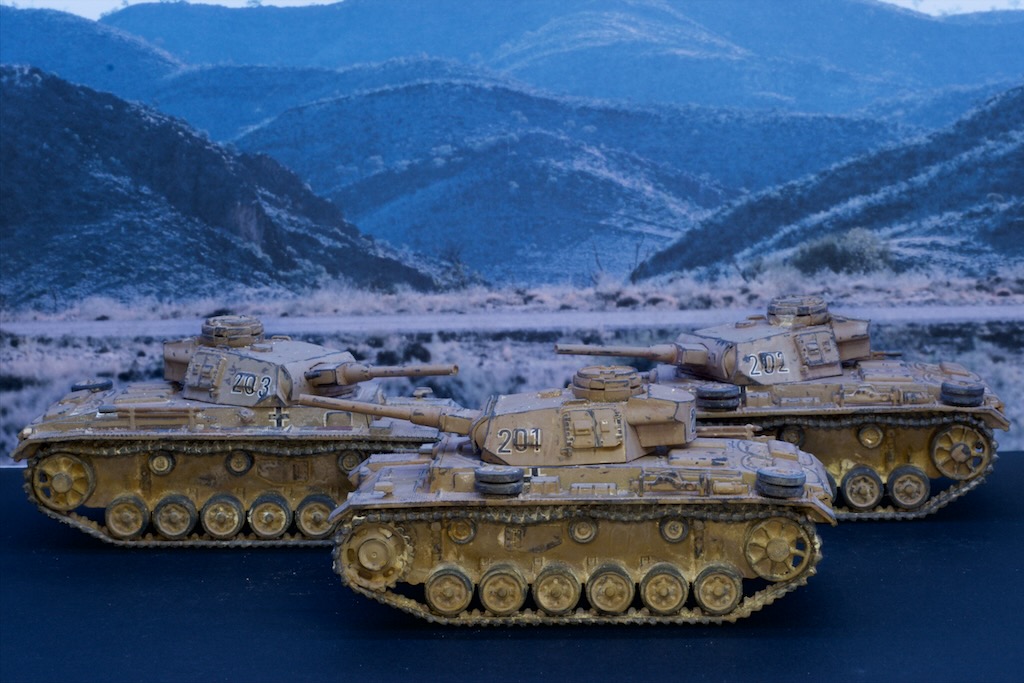
Painting-wise these were pretty straightforward, just an all-over coat of Vallejo Model Air Sand Yellow, followed by painting the tools attached to the outside of the tanks, and a lot of chipping and the rubber wheels with Vallejo German Grey. The fun came from the oils and the pigments, I wanted these to be very dusty so I went much heavier than I have on tanks in the past. These are covered in a variety of sandy/cream oils, and covered all over with pigments in the same kind of colours.
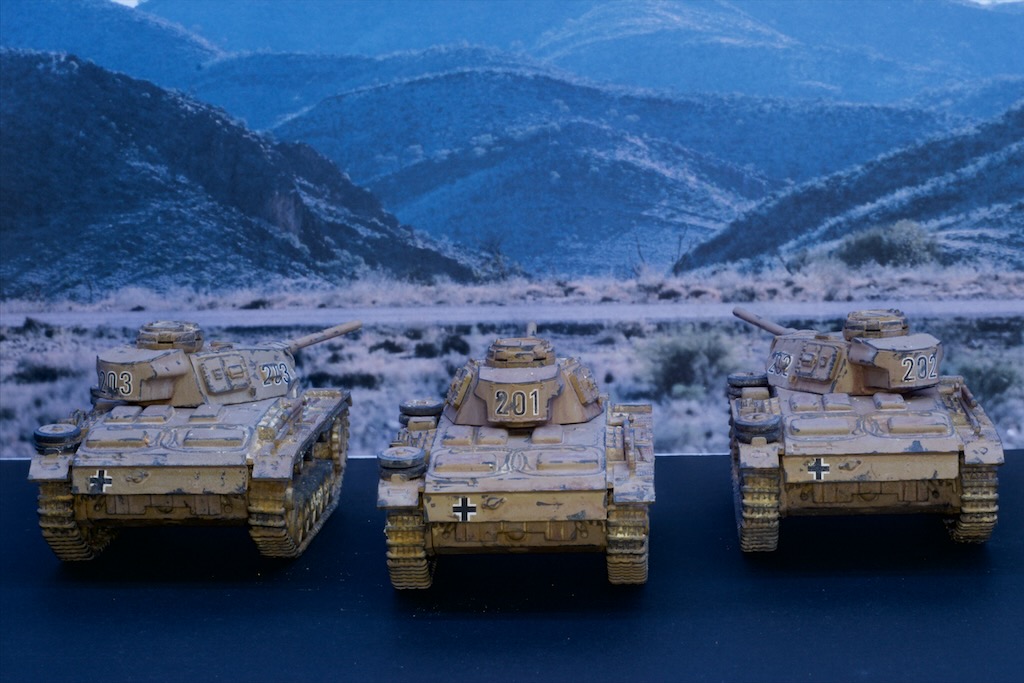
I did not enjoy putting on the turret decals last time, and was dreading it again this time! Things went much the same: a lot of repositioning and dousing on decal setter and crossing my fingers in hope! Overall though, I can’t complain with the outcome, I think they turned out pretty good.
Good to be back at the painting table, and I hope to be able to keep going!
* 201 is the new tank, and 202 and 203 are the repaints.
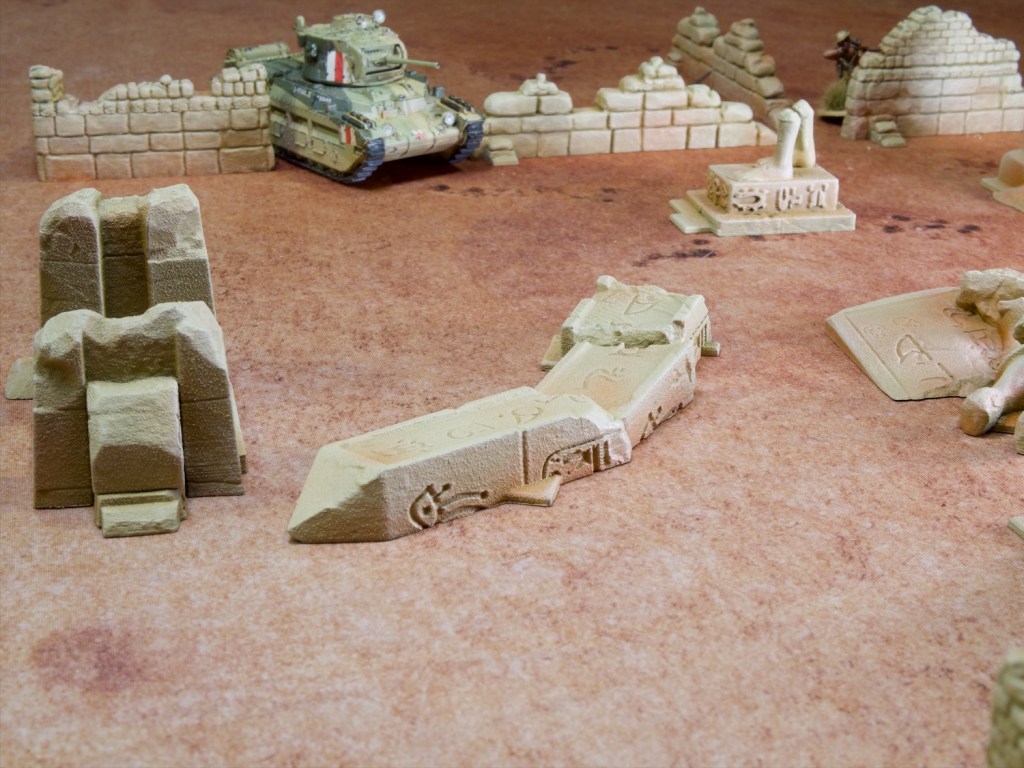
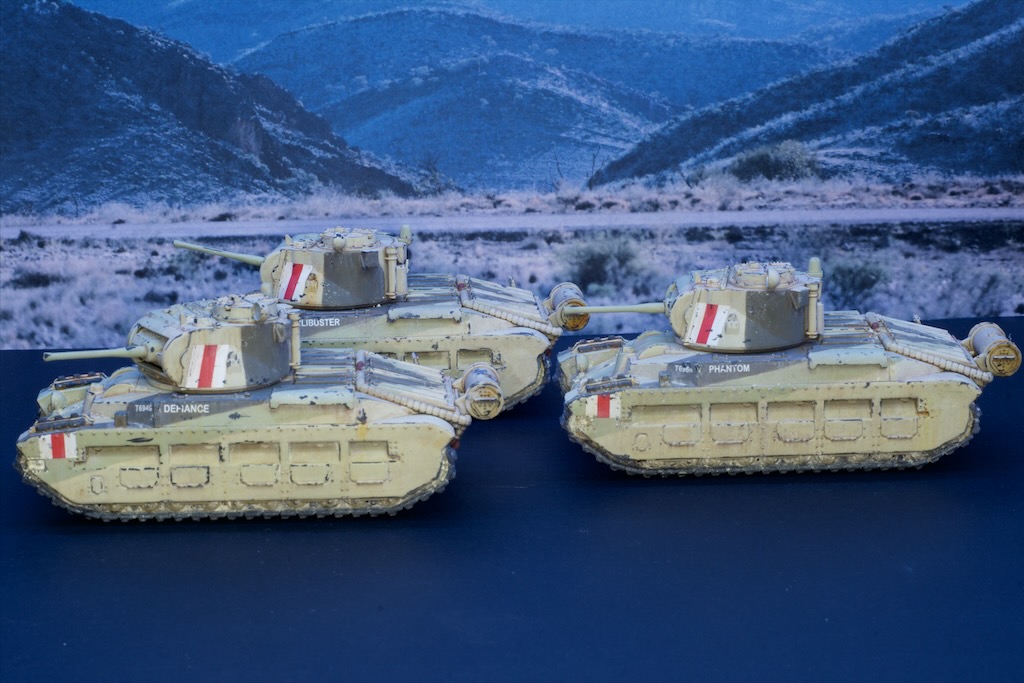
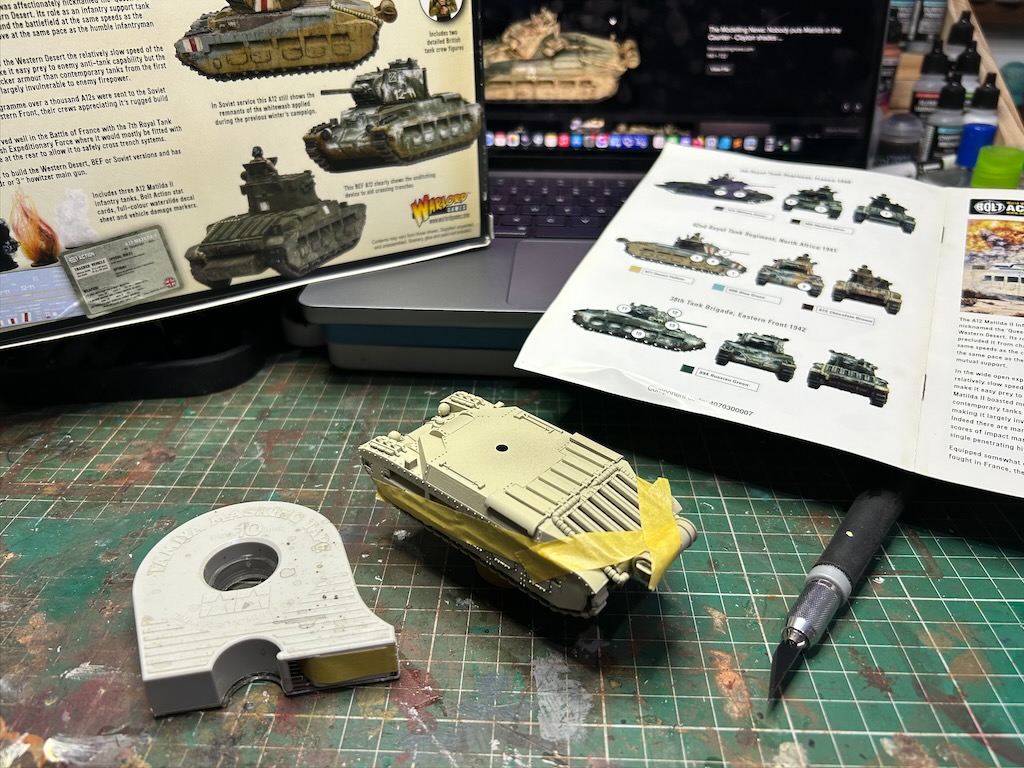
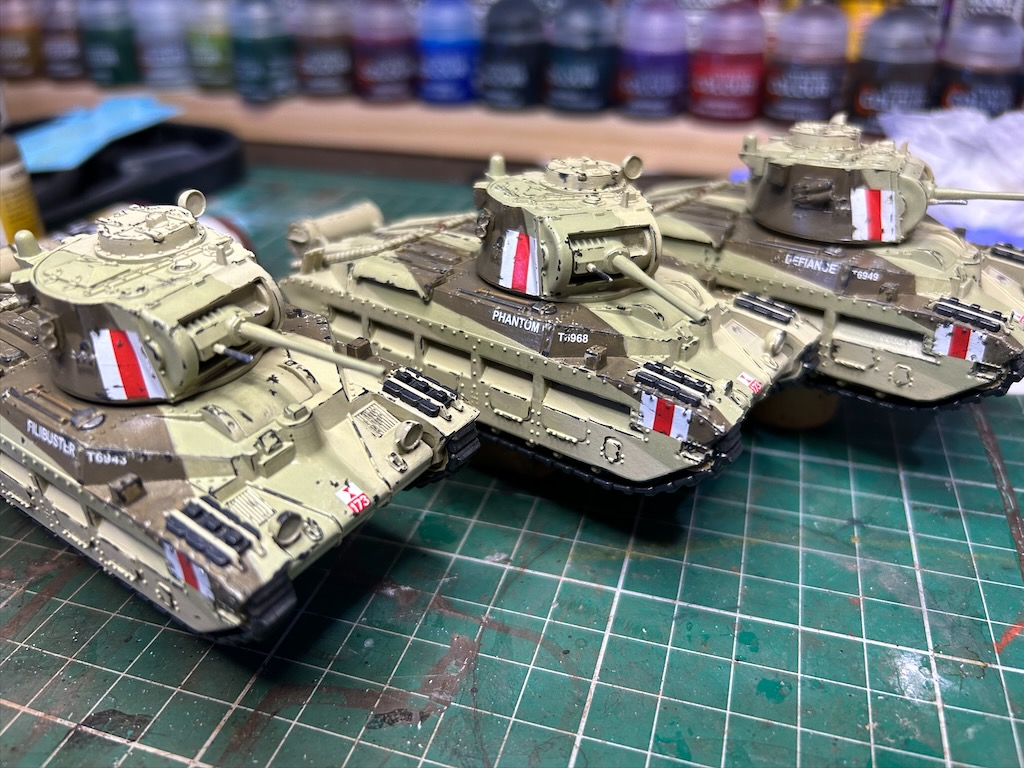
Back with a Western Desert post this week, with some more progress on the Allied side after dabbling in some Axis infantry last time around. This time with some armoured support for the commonwealth infantry I’ve painted so far, the famed Queen of the Desert: the Matilda Infantry Tank or rather three of them!
These are the Warlord Games plastic Matilda kits, more specifically their “Tank Troop” set for the Matilda which has three included for some tank heavy games. Usually a good way to get a bit of savings over buying three of the individual kit which is no bad thing. I painted these in the colours of the 42nd Royal Tank Regiment, probably the most famous desert Matildas, with model kits usually coming with the decals for “Phantom”. This kit came with enough decals for three named Matildas, Phantom included. I’m not sure if the other two are made up or historical names, I couldn’t find much (any!) info on them.
The 42nd RTR colours speak to me for a multitude of reasons, not least of which being that it’s just a nice scheme! There is some nostalgia there for me too, as the three bands (white/red/white) present on the 42nd’s tanks seem to be the inspiration (I’m guessing here, could be very wrong!) for a lot of the similarly banded markings that were made for Imperial Guard tanks in early editions of Warhammer 40,000 which I gazed at for many hours in the pages of White Dwarf magazine.
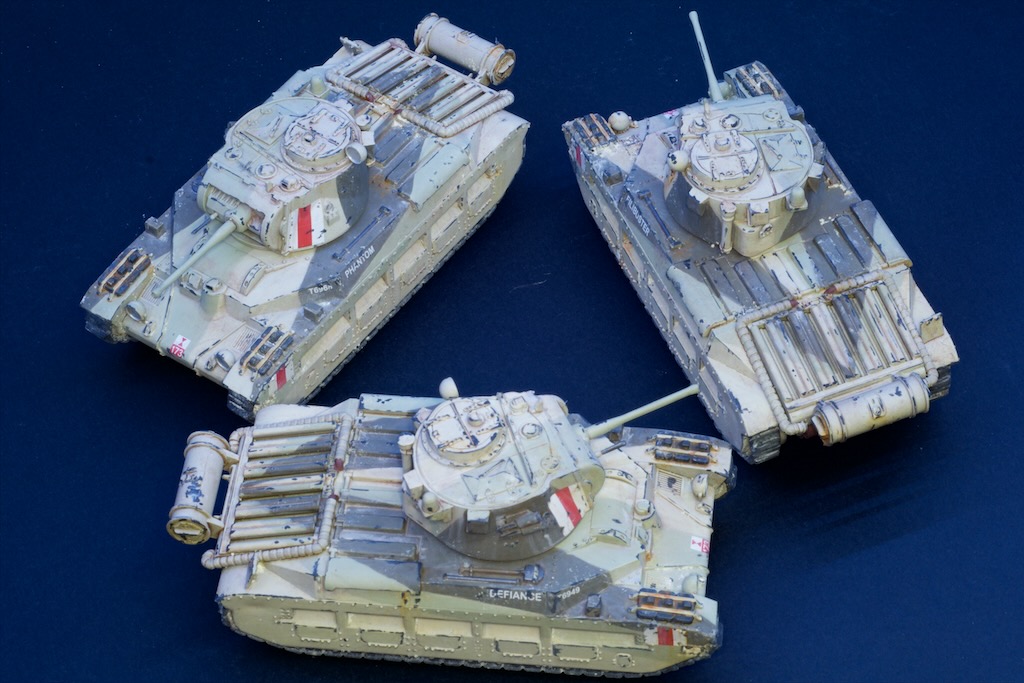
Some of you may be familiar with the rather eccentric camouflage scheme visible on tanks early (circa 1941) in the desert war, the infamous Caunter scheme! I say infamous because it clearly has started a vigorous debate on the colours used in its application, the most famous of which is the sky blue middle section visible in so many books/museums/model kit box arts. Reading up on the scheme was a rollercoaster ride to say the least! It seems that the ever-present blue paint is in fact not accurate and rather the result of a museum painting their Matilda incorrectly followed by a great number of copies of said mistake! More recent research seems to point towards the Caunter scheme making use of much more subtle colours indeed, and model paint companies have created sets that match the latest information. I elected to buy Vallejo’s attempt at this more “correct” Caunter colours, but I believe AK Interactive also make a set that’s supposed to be accurate.
With the problem of the colours to use solved (or solved enough for my standards! I’m sure there are some strong opinions on which of AK or Vallejo (or neither!) are accurate), now came the issue of application. As you can see from the photo above, the scheme makes use of some rather strange geometric shapes, with long straight lines right across some rather intense details. My first thought was to try to mask these and apply the colours with the airbrush.
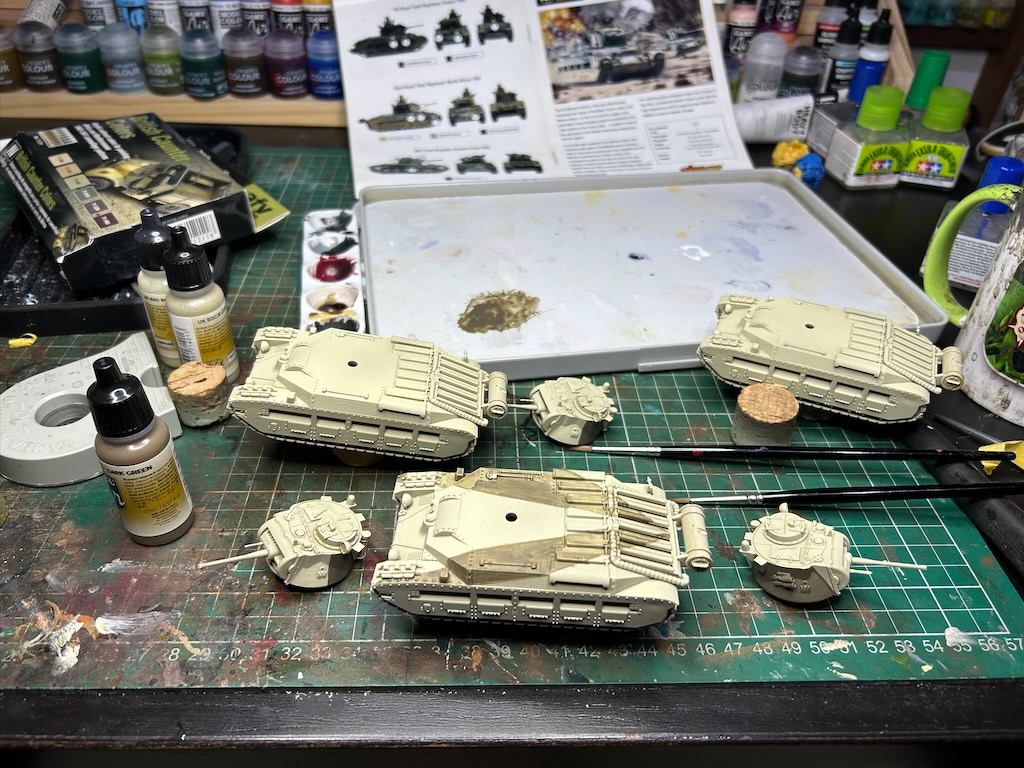
I got as far as masking all of the dark green sections on the bodies of all three tanks before throwing in the towel, there were so many gaps under the tape, there would have been overspray all over the place! I’m sure masking is a solid option at larger scales, but for 1/56 (28mm) I’m not sure the effort is worth it. Clearly then, I was going to have to hand paint the scheme…
I did this by carefully sketching out the shapes using dilute paint, before filling them in and repeating the process 3-4times to ensure good coverage. The Vallejo Caunter set is made up of airbrush paints so quite dilute already, which made the process longer but did mean even with 3-4 coats I had a nice smooth finish at the end. Understanding where the patterns go was a battle in itself, and I used a mix of references: photos from the era, the Warlord Games painted Matildas on the box cover, and other modeller’s attempts at Caunter on Matildas.
You can see the dark green done on all three tanks in the photo above.
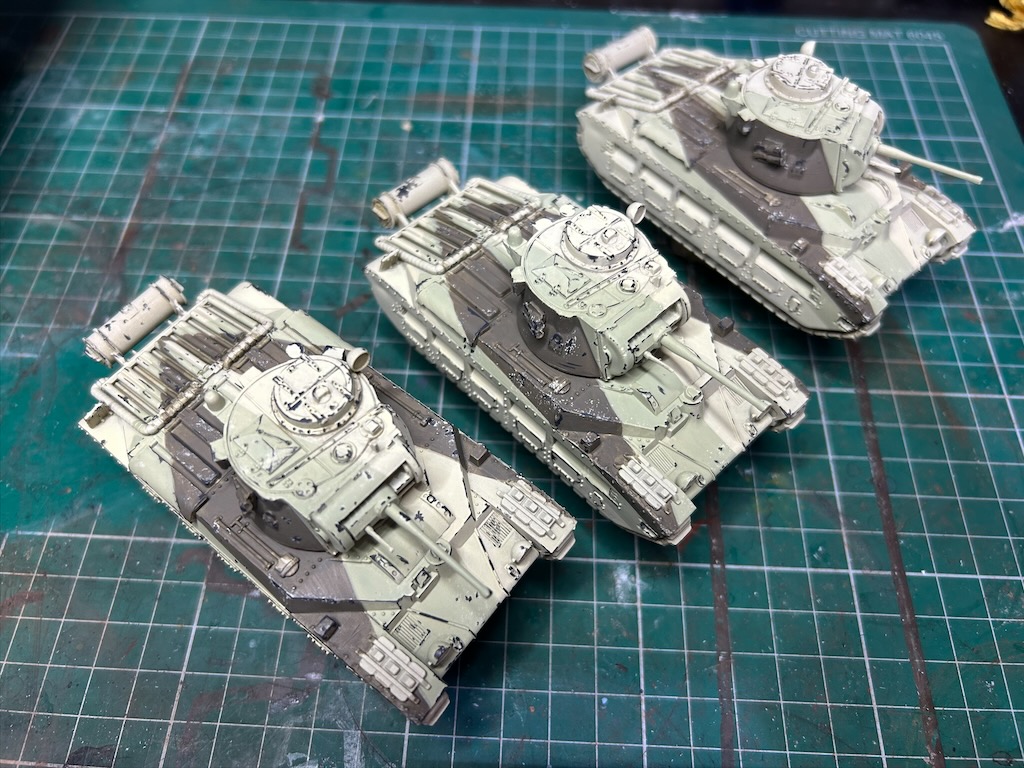
I followed the same process for the silver grey sections.
This was followed by a pass of chipping, first by sponging on the base coat colour of Portland Stone back over the dark green and silver grey sections, followed by painted on chips with Vallejo German Grey. This gave me two levels of chipping for a bit more realism.
I then basecoated in the rest of the kit around the tank, tracks etc.
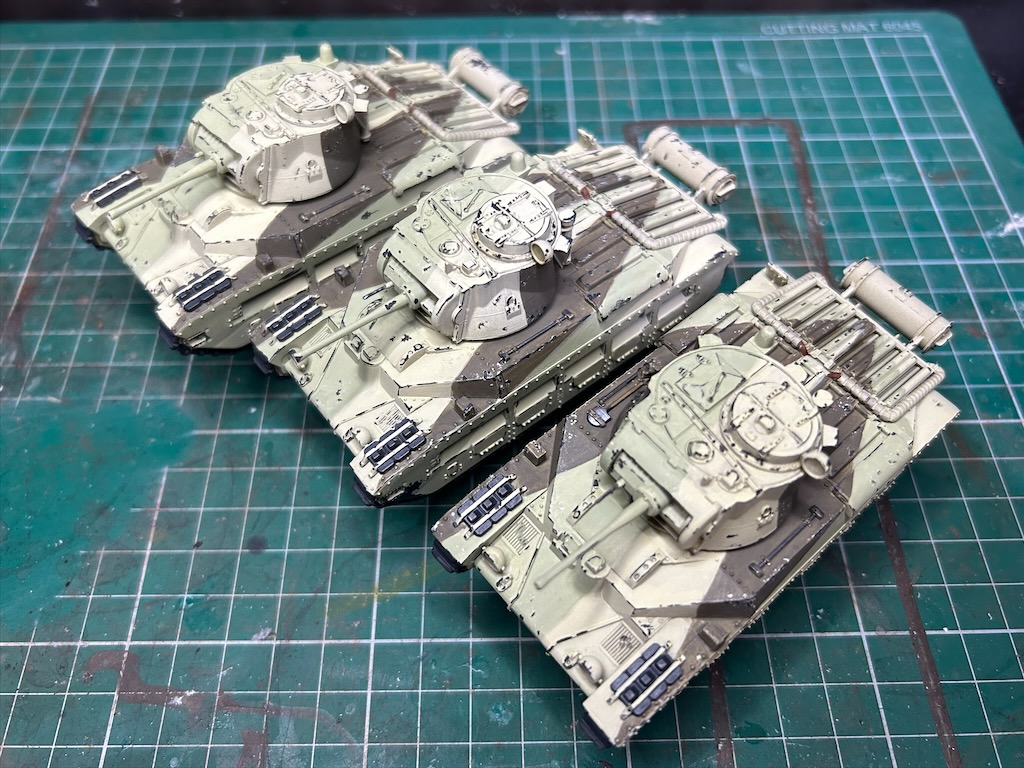
This was followed by an all over gloss varnish, then decal application, then chipping of said decals to blend them in. The models were then re-glossed all over and hit with some simple oil washes for some shading and some dusty streaks and rust spots for added interest. I then added dry pigments to the tracks and bottom and sides of the tanks, followed by a pass of matt varnish and they were ready for photos! This is all pretty standard historical modelling, but I don’t think I’ve shown process shots for it on the blog before, so hopefully it’s interesting to look at!
I really enjoyed painting these models, and glad I’ve gotten them painted after putting them off for a long time as I was dreading painting the Caunter scheme. Sometimes you just have to jump in and go for it! As is currently planned I only have two more vehicles to paint in the scheme: two universal carriers, but who knows, models are constantly adding themselves to this project! Regardless, I now know how I paint Caunter, which means no more worrying about how I might go about it.
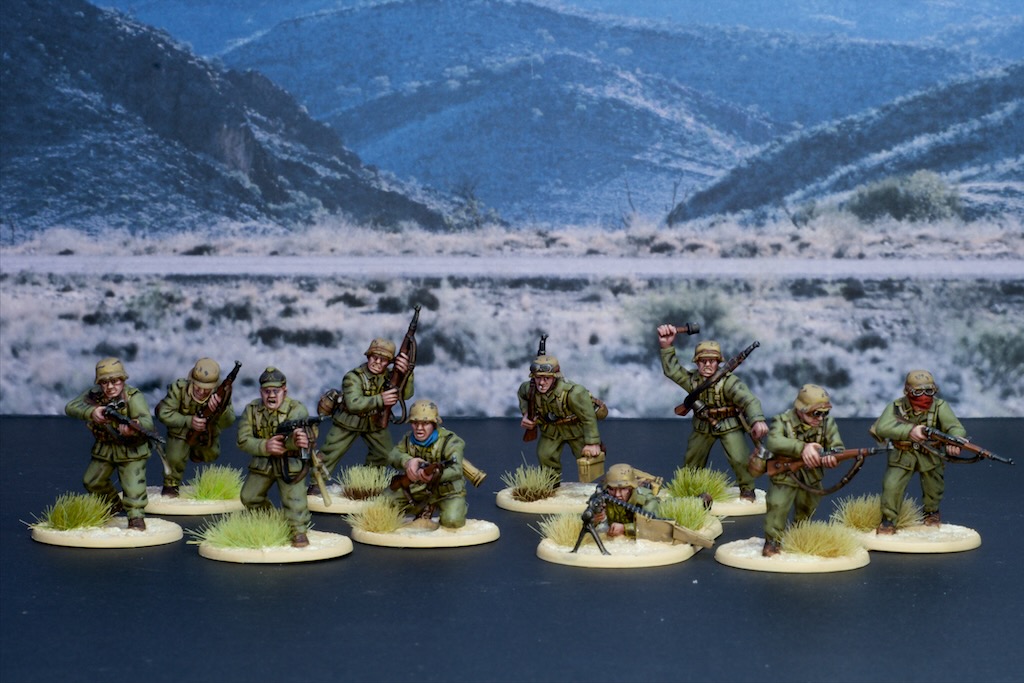
Having painted enough infantry for my first platoon of 8th Army, it was time to paint some of their antagonists: the Afrika Korps! Just like for the 8th Army models I’ve painted so far, these are Warlord Games models and being some of their relatively new plastics are quite nice to build and paint.
It took me a couple of attempts to get the colour I wanted for their fatigues, having at first started with a much yellower green that ended up not looking very good. I’m not sure how accurate this green has ended up being, and I should probably have highlighted them further to simulate the sun-faded look that would have been prevalent, but these look nice to me and were a nice balance of looks to effort! Additionally they stand well apart from the 8th Army models in their almost cream uniforms this way.
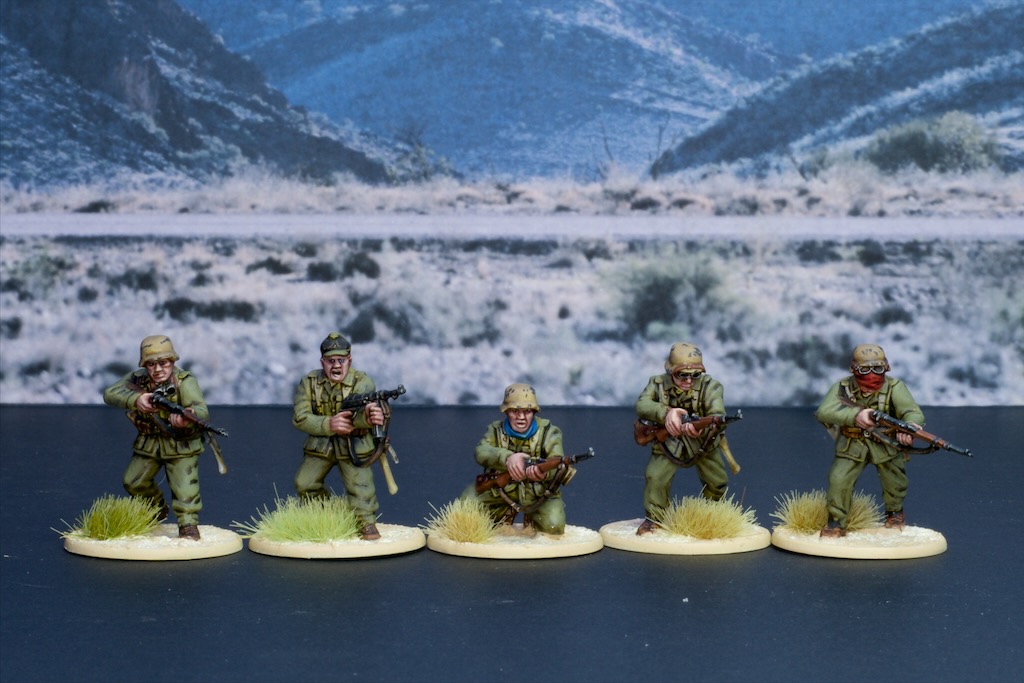
Plenty of fun details to paint on these models, with the face coverings offering the opportunity to add a bit of colour to this sea of olives and khakis! The goggles were a fun detail too, I wasn’t to sure how to paint them, but the references I found seemed to be tinted so I painted them in the silver and filled the lenses with GW Contrast Wildwood which turned out ok I think.
The kit comes with heads sporting the pith helmet the AK wore early in the campaign, and considering the time I’m roughly painting these for (1941) they maybe should be wearing them, but I do like the look of the steel helmet and apparently they were available also early on so this lets me build these in a more generic manner (i.e. if I want to play scenarios in 42-43 as well).
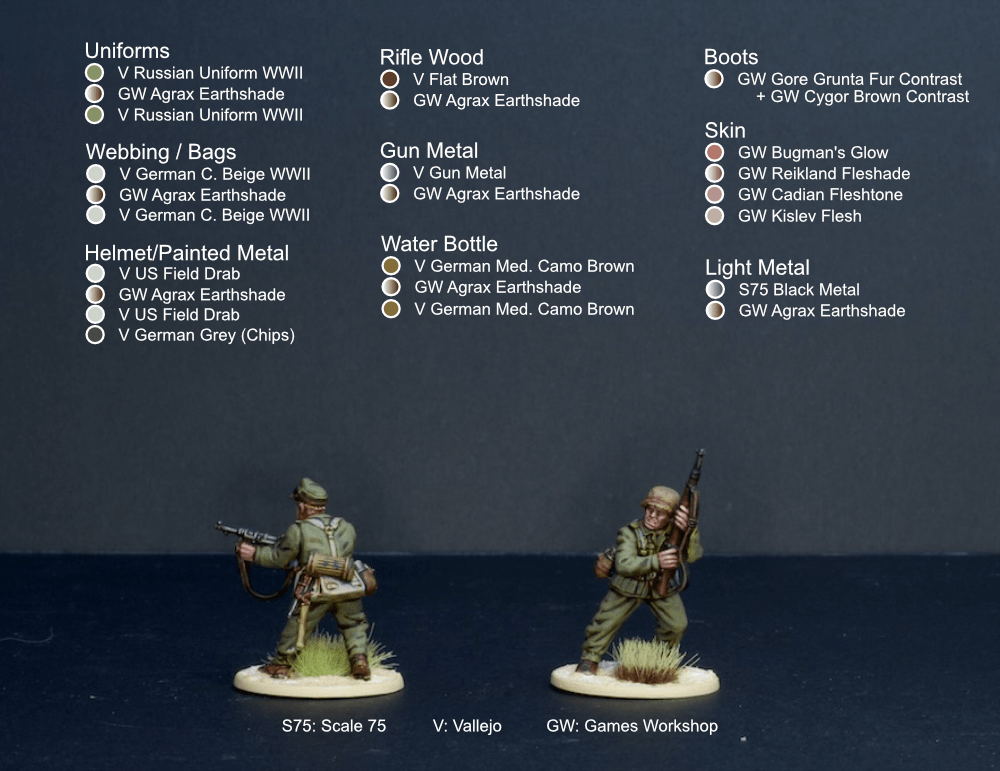
As always when painting the first unit for a new army I made myself a painting guide, very useful for me as I like to jump between projects all the time and need a refresher when I get back to something. Let me know if you find it useful yourself!
Anyway that was a fun project and will keep progressing this over the long term, to hopefully get two sizeable forces that can do battle with each other!
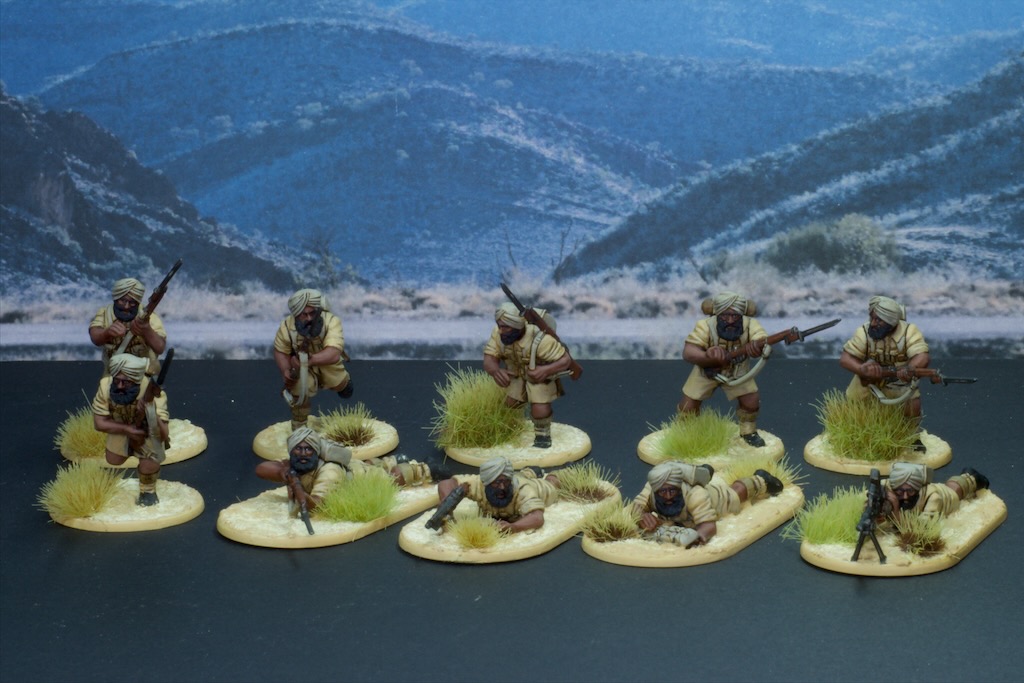
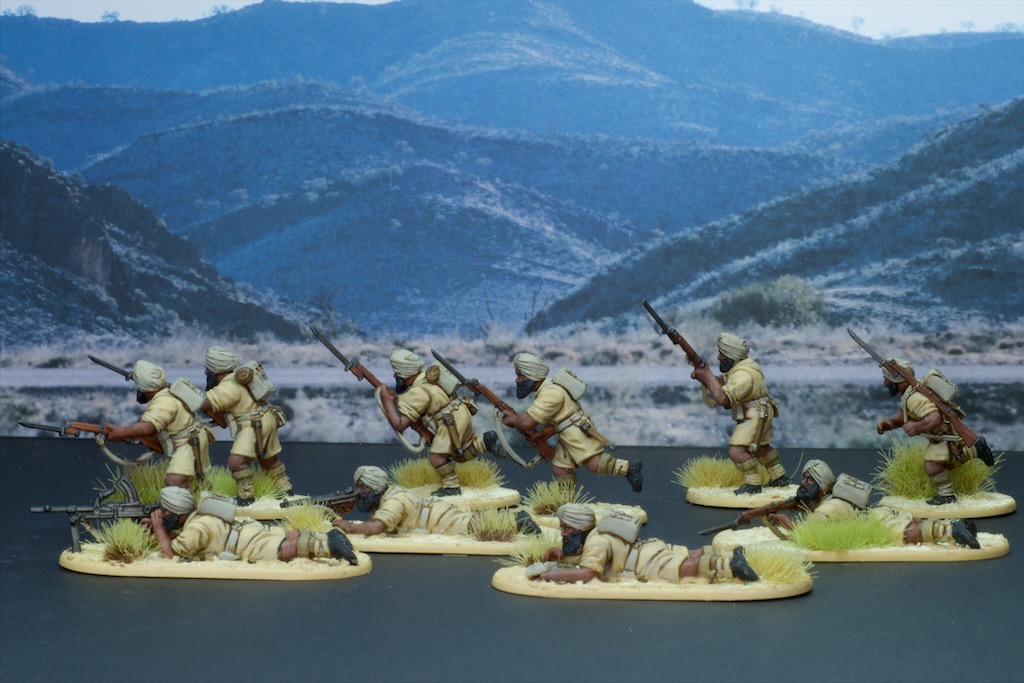
Back in North African Theatre for this update, with an addition to my 8th Army forces; this section of Sikh infantrymen.
Ever since I cracked open the 8th Army set from Warlord Games I’ve been eyeing off the different head options that are included, and I decided that while this platoon is supposed to be from a British regiment clearly in the heat of battle this section from an Indian regiment must have been joined them! I really like these models, Warlord did a great job here. More than just the models, I’m keen to showcase the variety of troops that fought in the desert, and while I won’t be building a section for each head option in the set (there are a lot if you consider the options also included in the Commonwealth Infantry set!), I wanted to not just stick to Brodie helmets.
These models also mark the end of the first platoon with regards to infantry, leaving me with 3 sections of infantry done and a royal engineers section. Progress is slow, but it is progress! I have a fair amount of infantry left to paint for the 8th army side of this project as I have my second platoon’s worth to paint (nominally as Australian, we’ll see who else sneaks in there!), and also the entirety of the other side (DAK) as well!
From a painting point of view, these are doe exactly the same as my other 8th Army troops except the skin of course. For the skin I used Vallejo Flat Brown, followed by a light wash of Agrax Earthshade, a highlight of Vallejo Flat Brown (effectively leaving the Agrax Earthshade in the very recesses), followed by a highlight of Vallejo Flat Brown mixed with Vallejo Heavy Skintone, and a final highlight of the previous mixture plus a dash of Vallejo Iraqi Sand.
The mixes I listed above were done to match colour swatches I’d made from sampling the colours present in a photo I found online. It’s the first time I try to do something like that and I think the results worked rather well, so I’ll definitely try that again in the future.
The background I used in the photo is a printed out photo I took when visiting the Flinders Ranges in the middle of Australia. Not quite North Africa, but it is a desert so close enough for my purposes! I spent a couple of weeks out there back in 2014 in the middle of winter and it was freezing cold and so dry that my lips were cracking no matter how much balm I put on! The scenery was fantastic however and the night skies unbelievable for someone that grew up in light polluted Europe.
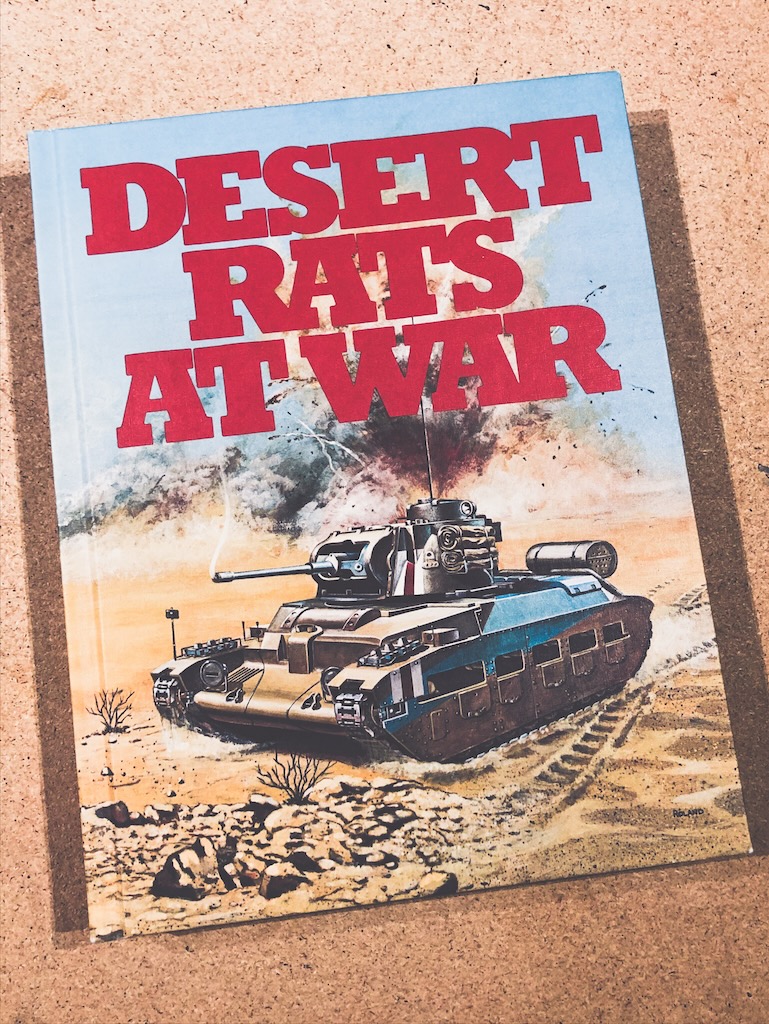
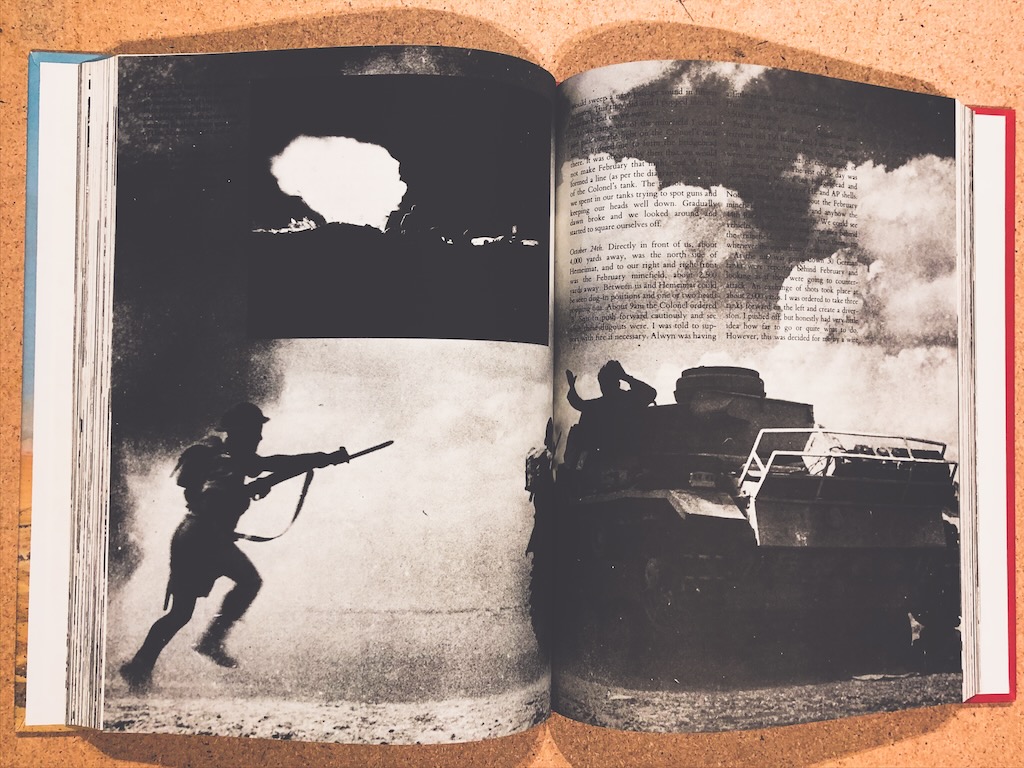
Finally, here’s something I stumbled across in a second hand store yesterday! A really nice book from the late 70s on the Desert Rats. Plenty of great photographs that I’ll be pouring over for ideas!
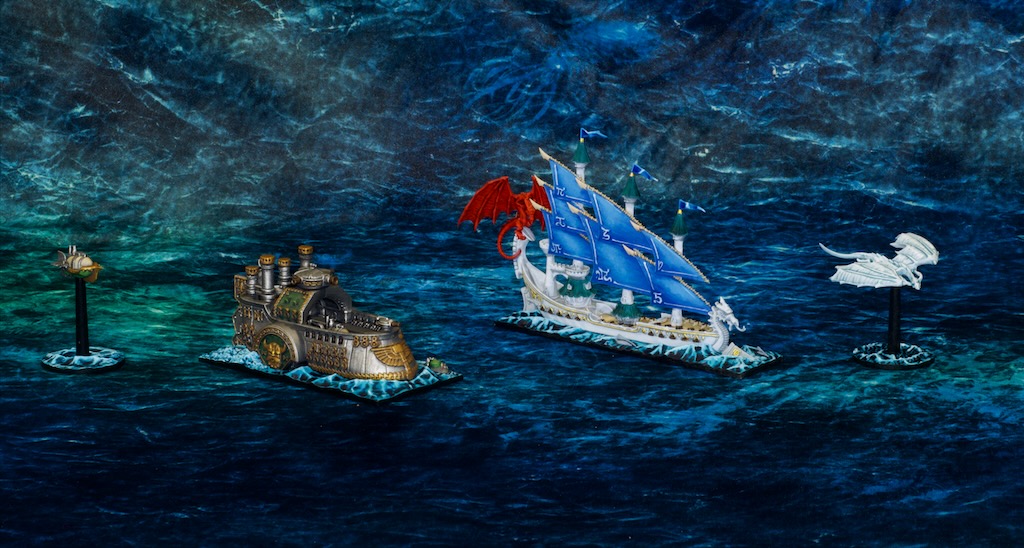
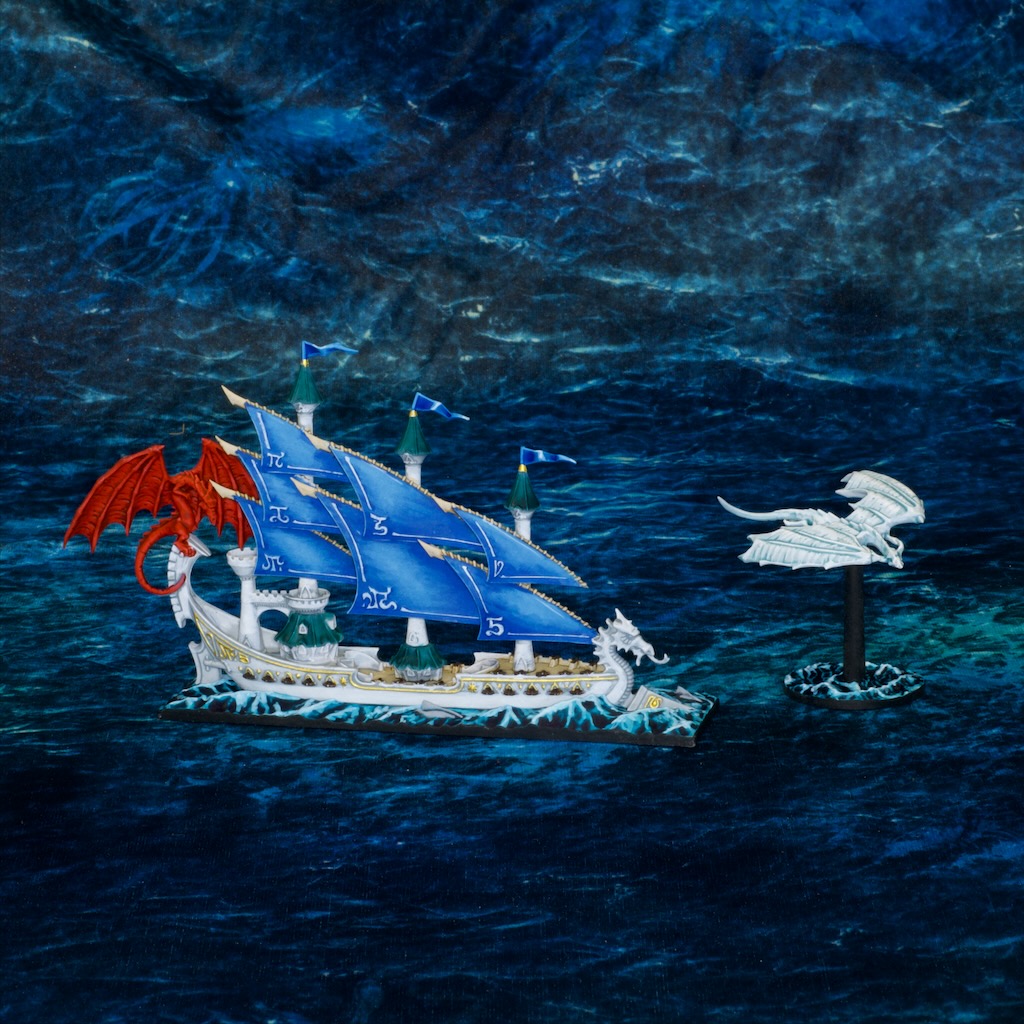
This week saw me paint a few odd things, starting with a sudden urge to paint models from Dreadfleet, a 10 and a bit year old standalone naval game from Games Workshop, set in the old Warhammer universe. I bought my set upon release, built all the models and then never painted any. Never too late to get to that though, just had to wait for inspiration to strike! There are quite a few ships and its of terrain in the game, so plenty more to paint before I can call it done, hopefully I won’t wait 10 years to paint the next batch!
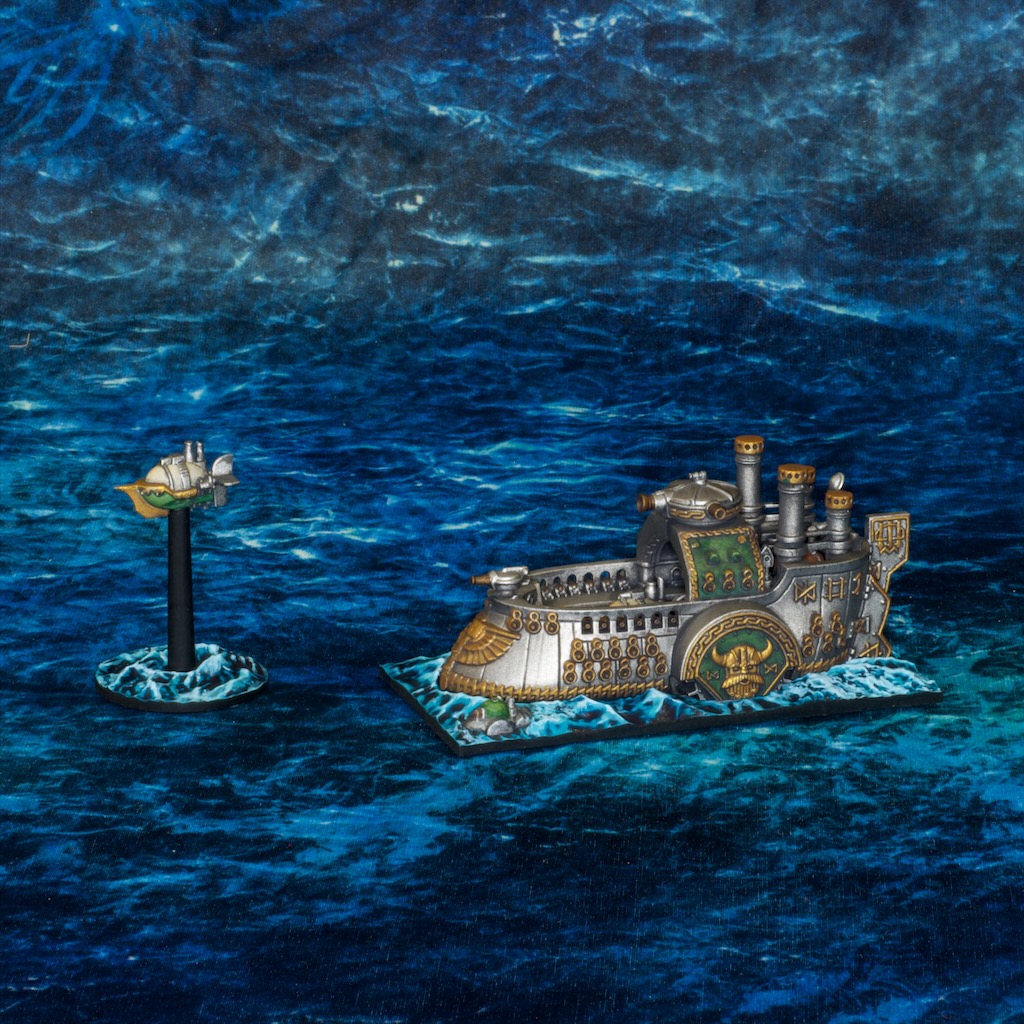
Grimnir’s Thunder
First up we have Grimnir’s Thunder, the dwarven ship. Some ships in the game have small pieces they can send out, and in this case this is a dirigeable. You can barely see another ready to launch peeking out of the deck.
Seadrake
The second one I tackled was Seadrake, the high elf ship. This one has dragons!
These are very cool models, if a bit challenging to paint as they have a lot of overlapping pieces and are a smaller scale than I’m used to painting. They have however been quite enjoyable to paint! The mat that comes with the game also provides a really nice backdrop for photos!
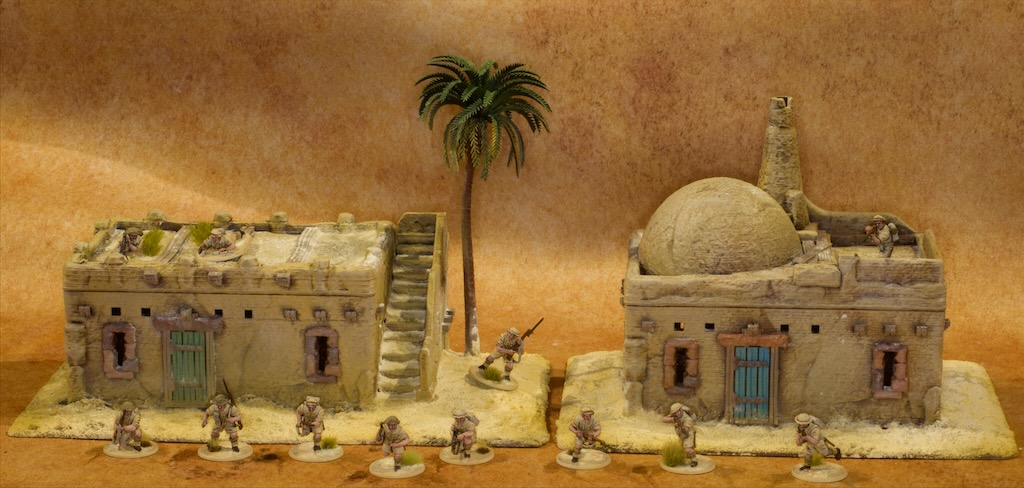
This week also marked my first foray into painting terrain for my North Africa WW2 project, with these two houses. I printed these on my 3d printer (you can find the files I used here) and based them on pieces of MDF. The palm tree is a cheap plastic model I found on eBay. I have a whole batch of these so expect to see them on other terrain pieces in the future!
I painted them with craft paints using a series of progressively brighter dry brushes, nothing fancy but it looks ok.
I used a lot of cream grout to make the sand on the base. This ended up being far too bright for my desert mat so I airbrushed some warmer tones to get it closer to where it needed to be. It’s quite a bit brighter but looks reasonable to me now.
As a parting note I played in a Star Wars Legion tournament over the weekend with my Galactic Empire army. This was my first attempt at playing the game (nothing quite like diving in head first!), and I really enjoyed myself. I didn’t do particularly well (won one of my three games so not all bad!), but I did manage to leave with the best painted army award so am happy with that!
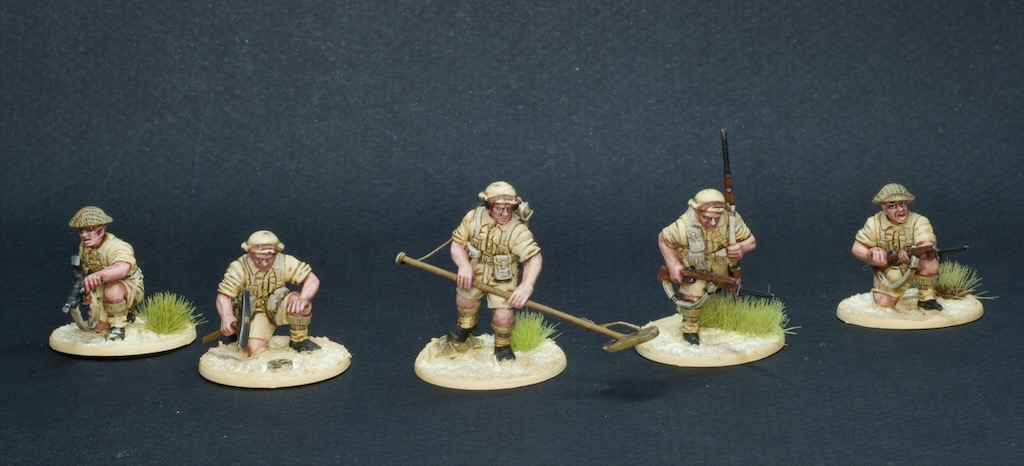
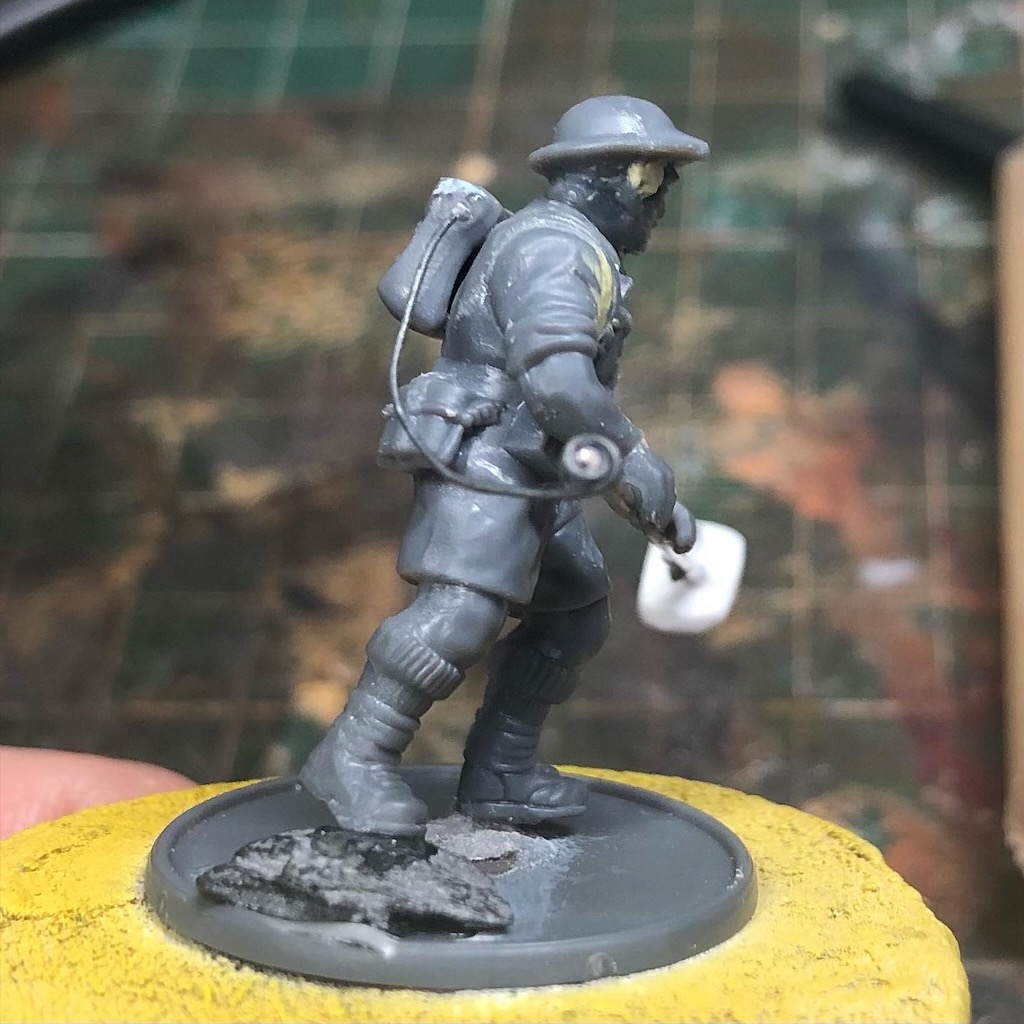
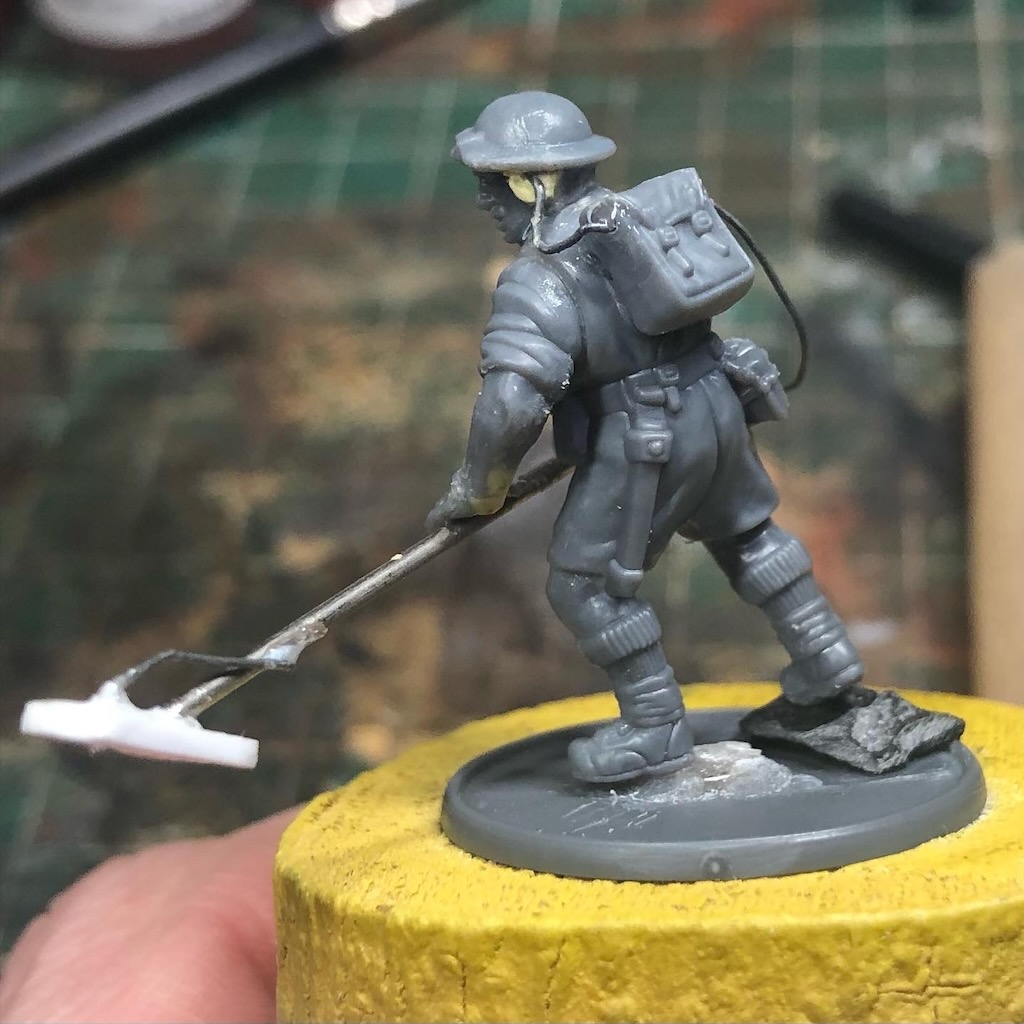
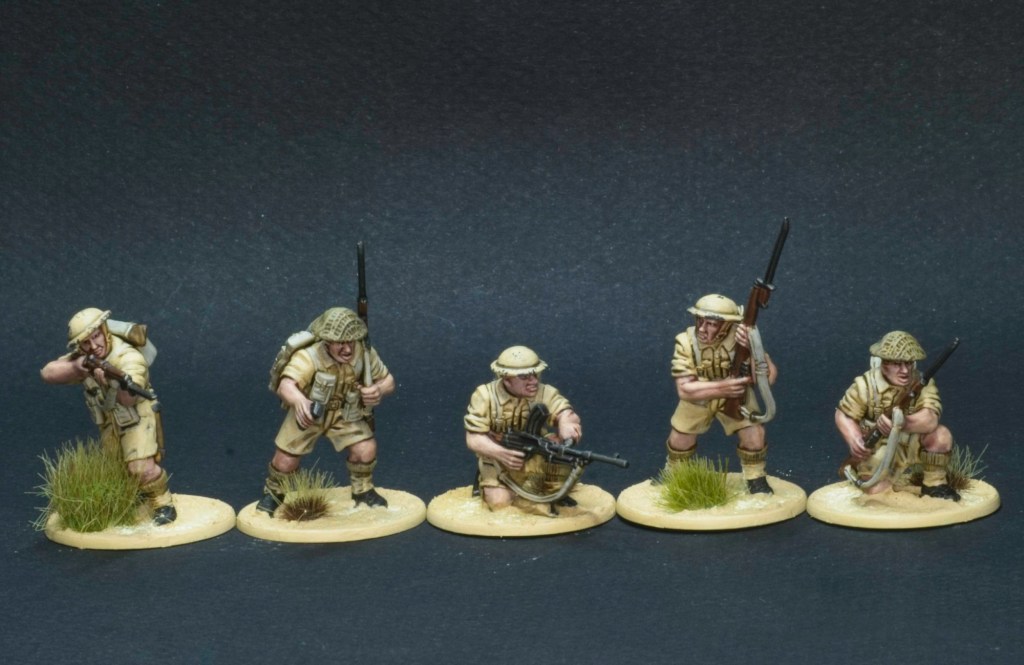
To break up painting basic infantry I decided to put together and paint my 8th army engineer section this week.
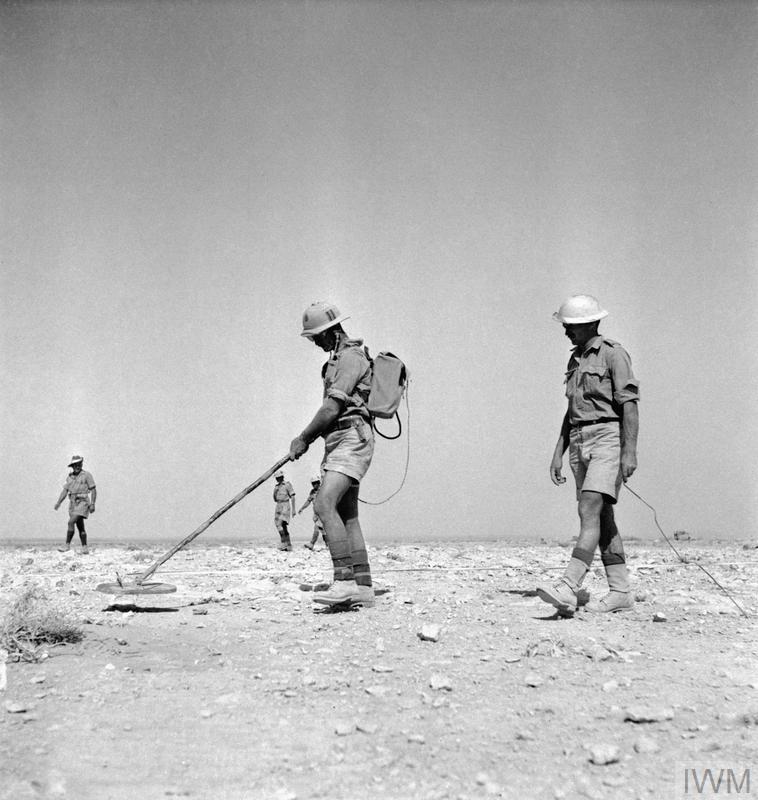
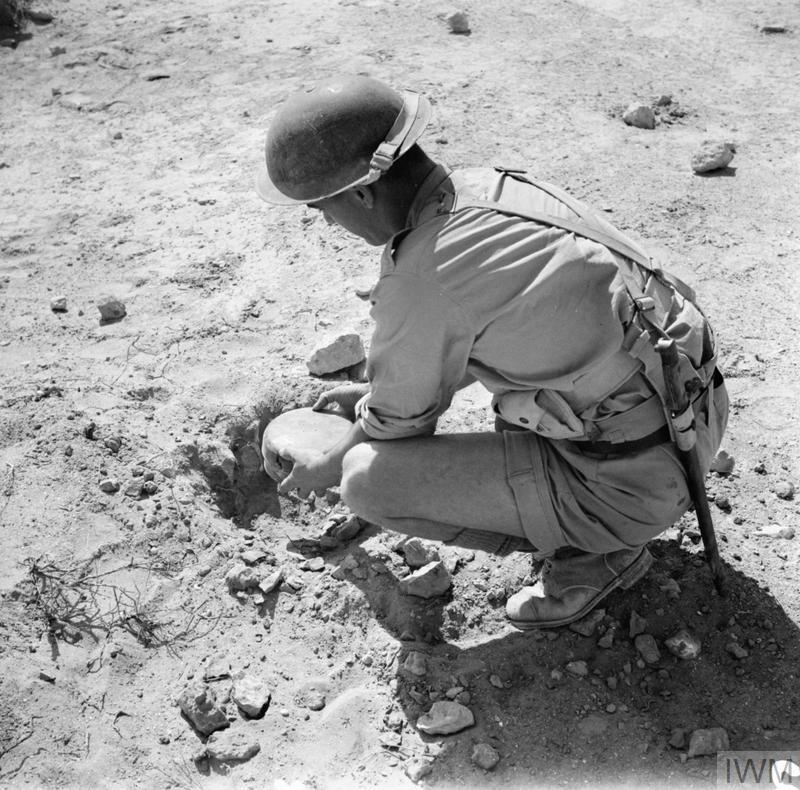
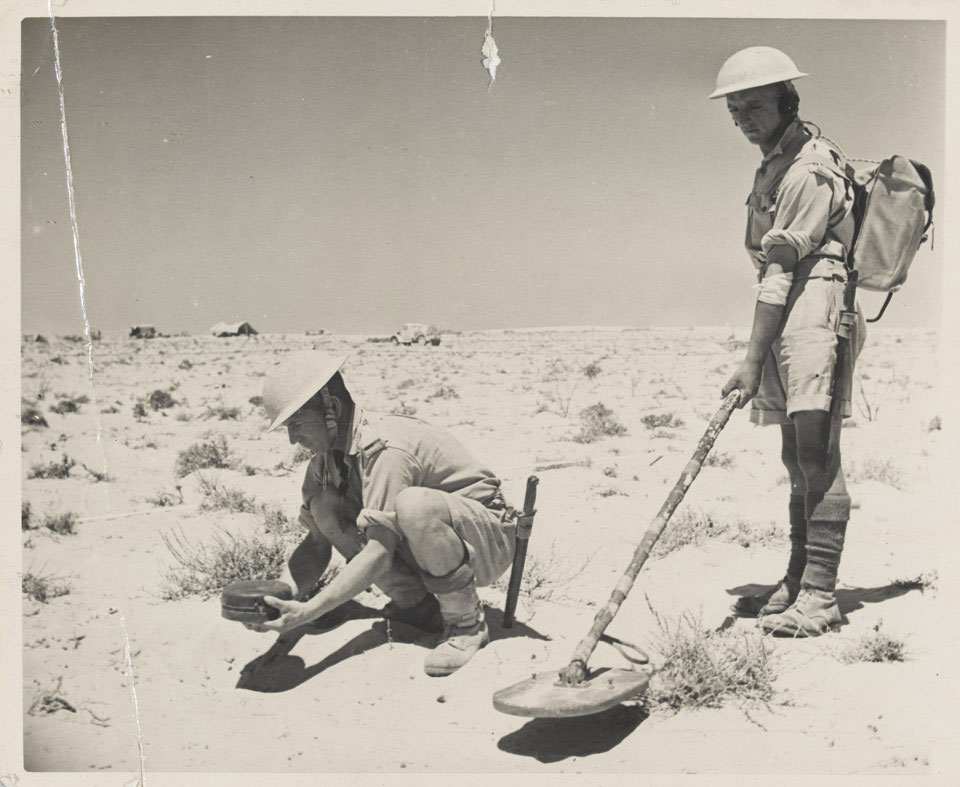
I wanted them to stand out from the infantry sections and therefore did a bit of research and found some great reference photos of royal engineers in the North African desert, with the ever present Polish metal detector. Now as far as I can tell 1941 is too early for the detector to have made its way to North Africa (most sources point to 1942), so it’s a bit anachronistic to include one here, but sometimes the rule of cool trumps accuracy!
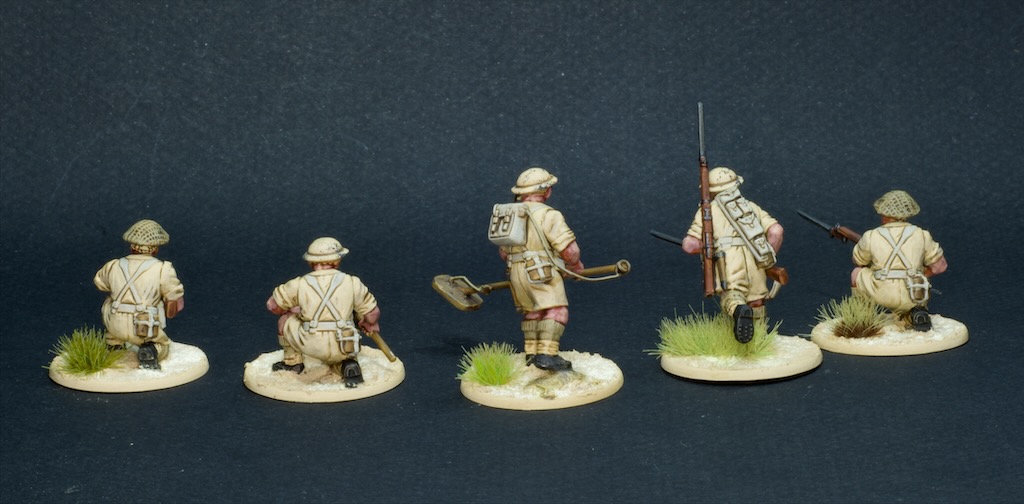
From a painting perspective, again nothing new, these are done the same way my infantry were painted.
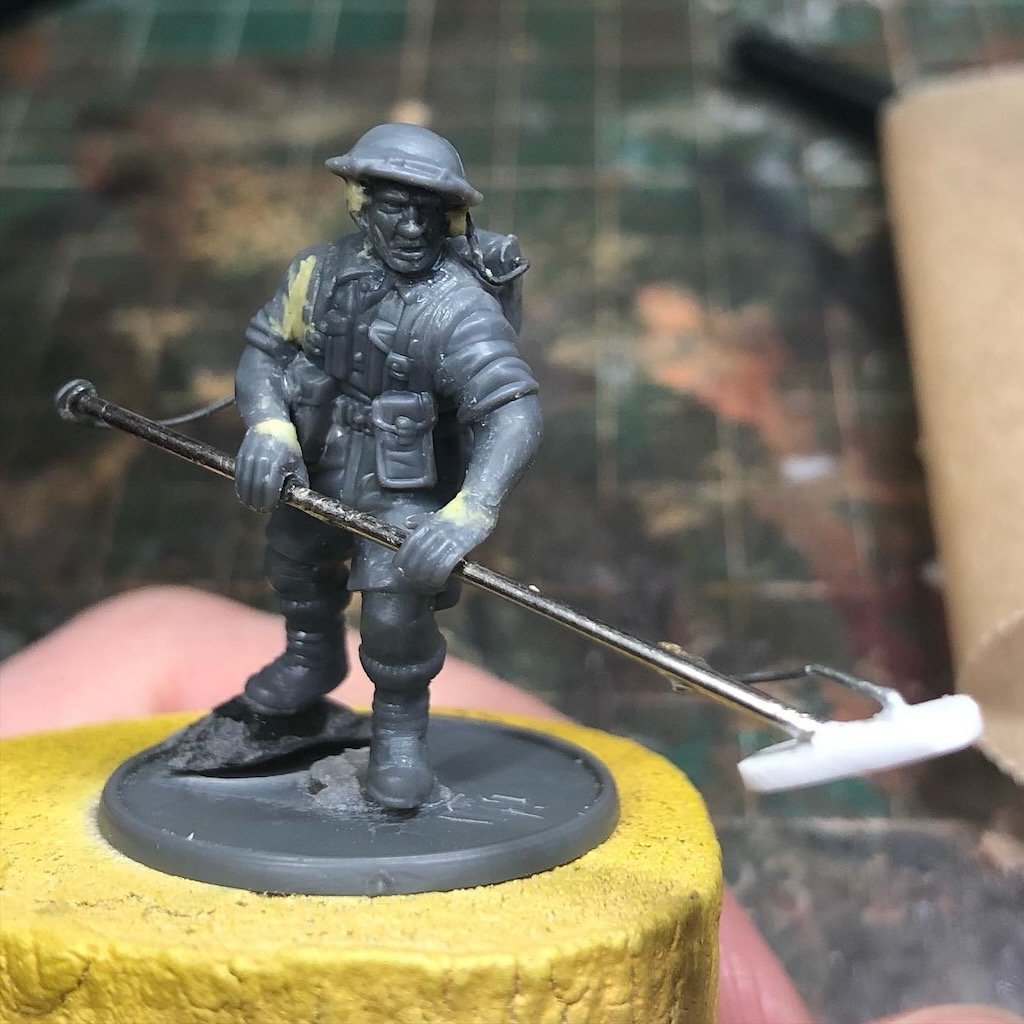
More interesting perhaps is modelling of the engineer with the detector I did using bits of wire and some plastic card.
Warlord games makes a model of en engineer with a detector, but he’s done up in late war uniform and uses a later mark of detector. So I decided to make my own. Not the most skilful job, but I enjoyed myself and I think it looks fine on the table!
Update on the master list:
1940-42 Commonwealth Infantry Brigade (British)
– 2nd Lieutenant – 2 Extra men
– Artillery Forward Observer
– 10-Man Infantry Section – LMG, SMG
– 10-Man Infantry Section – LMG, SMG
– 10-Man Infantry Section – LMG, SMG
– 5-Man Royal Engineers Section – LMG, Anti-tank grenades
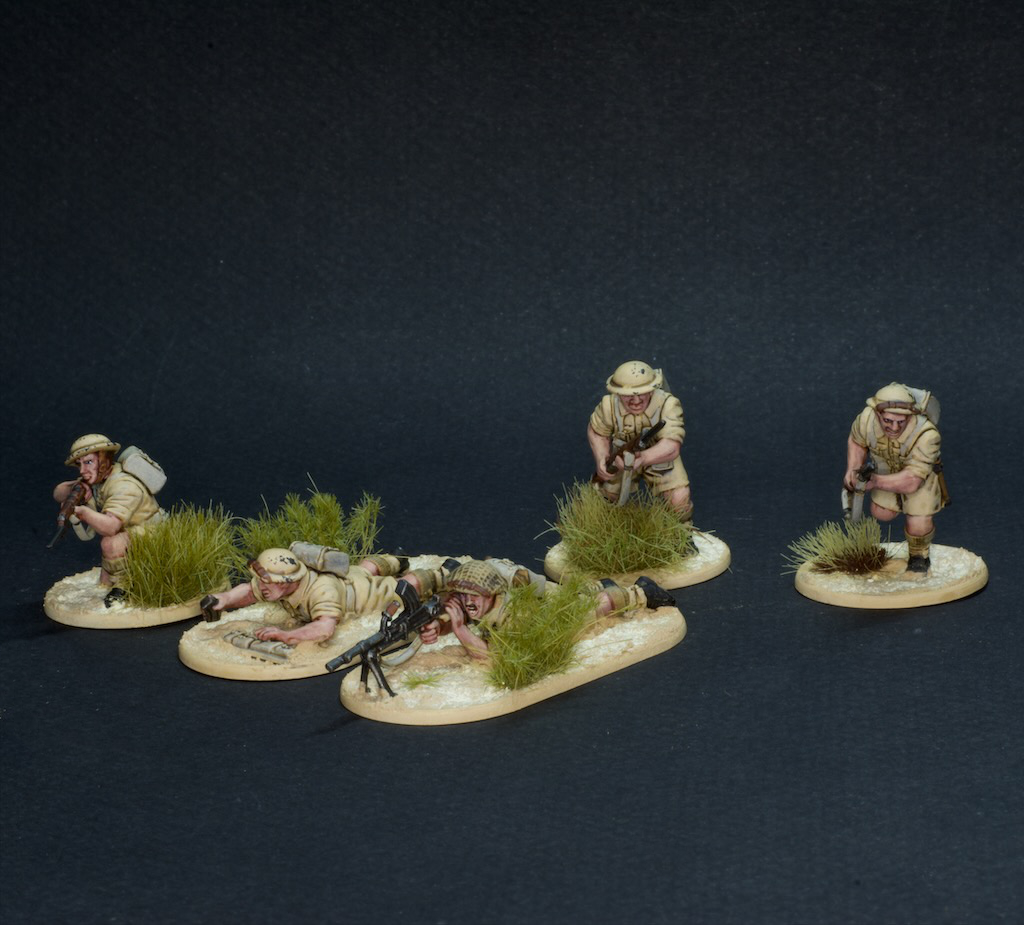
Back with a continuation of the 1941 North Africa project, this time with more of the same!
There isn’t too much to discuss from a painting standpoint, these were done in exactly the same manner as my previous post.
I built the Bren team prone for a bit of variety.
I was pretty happy with how some of the eyes on these turned out so here’s a look at that!
There will be plenty more where these came from, I have a whole lot more infantry to paint for this army as you might expect (and plenty more on the German side when I get to them!). This leads me to talk about what I’ve got planned for this army. As I mentioned last time, this army was partly inspired by my Great Grandfather having been part of 8th army in WW2, hence building these as British (the Warlord kits provide a ton of different heads for troops from all over the empire). I also plan on adding some Australian troops to the army as a nod to where I live now.
Here’s my planned army list with the currently painted models crossed out in red:
1940-42 Commonwealth Infantry Brigade (British)
– 2nd Lieutenant – 2 Extra men
– Artillery Forward Observer
– 10-Man Infantry Section – LMG, SMG
– 10-Man Infantry Section – LMG, SMG
– 10-Man Infantry Section – LMG, SMG
– 5-Man Royal Engineers Section – LMG, Anti-tank grenades
Hi all, it’s been a little while since the last post on the blog (almost 3 weeks!). Most of that delay has been because of preparations for this new project I’ve embarked on. This new project (if you’ve read the title you know!) is for some more WWII action, this time in North Africa early-ish in the war.
It’s become clear to me that finishing my 2ème DB army did not in fact cure me of the want to paint more models of the period, and in fact made me keen to move on to the next theatre instead! So why North Africa, and why 1941? There are a couple of answers to these questions so here we go.
North Africa has always been one of those theatres that drew my attention, my first model kit way back when was a spitfire in desert camo and clearly that made an impression on my younger self. Fast forward a few years and I started playing the first Battlefield game (Battlefield 1942) and spent hours playing the El Alamein and Tobruk maps, which wound up being some of my favourites of the game. When my friends and I decided to start playing Bolt Action we settled on late war Europe as the primary theatre we would all put armies together for, but North Africa was also well into the running and I was always keen to do something there.
What sealed the deal was series of conversations I had with my Dad and his Mum not long after finishing the 2ème DB models, which revealed to me that one of his Grandfathers had fought in North Africa and Italy as part of the Buffs (Royal East Kent Regiment). Once I learned that I went on a good old internet scour looking for any information I could find on what the Buffs had gotten up to during the war. By extension that meant reading a lot about the North African campaign in general and well there was no saving me from painting armies for that campaign after that!
That tackles the North Africa part, but why 1941? That answer is a lot simpler, I wanted to paint early war tanks!
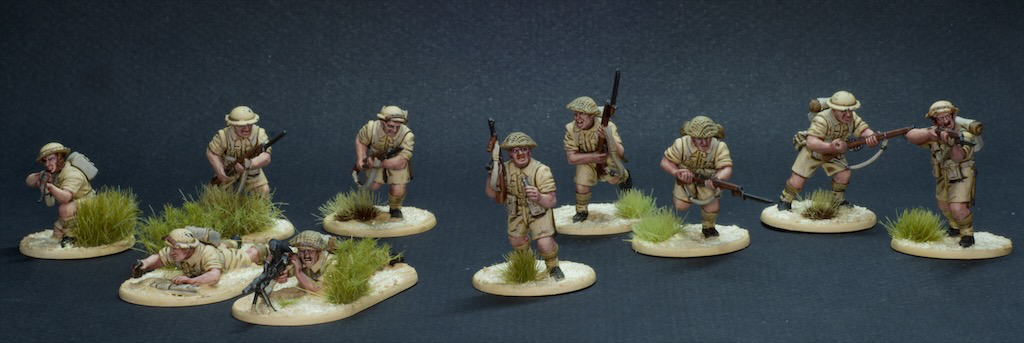
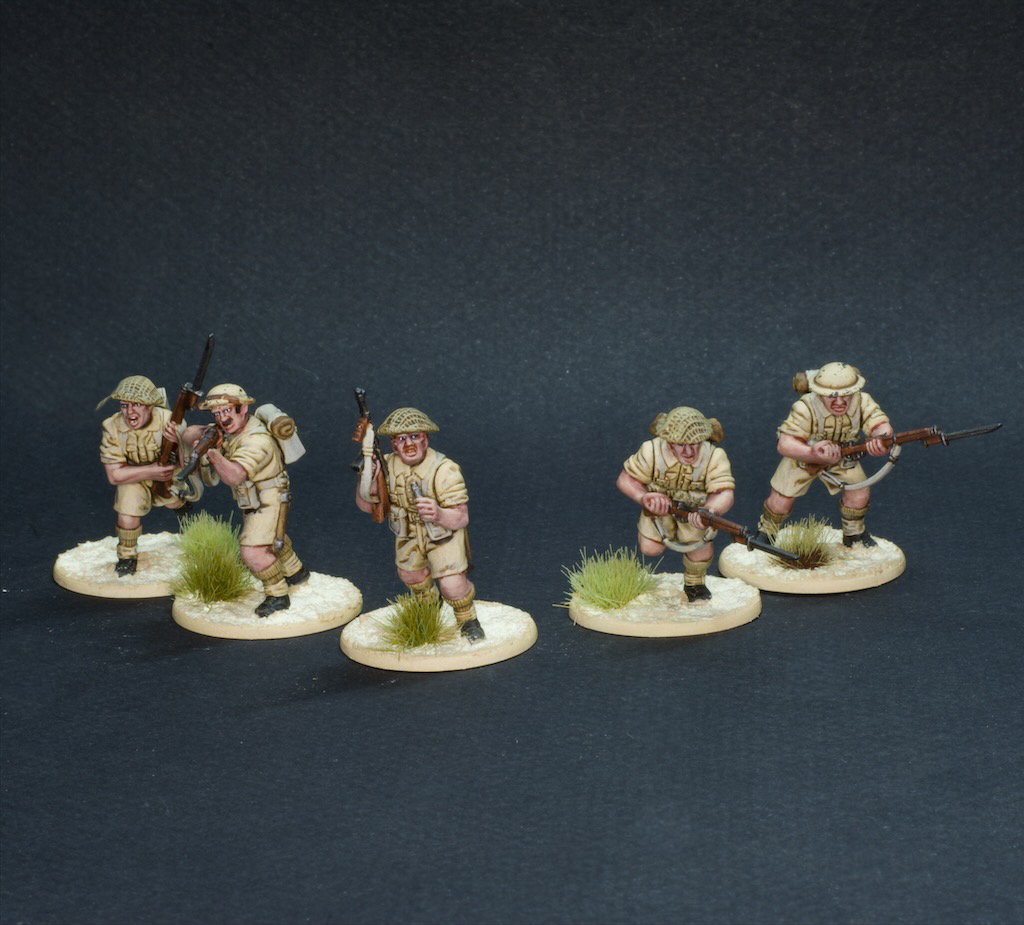
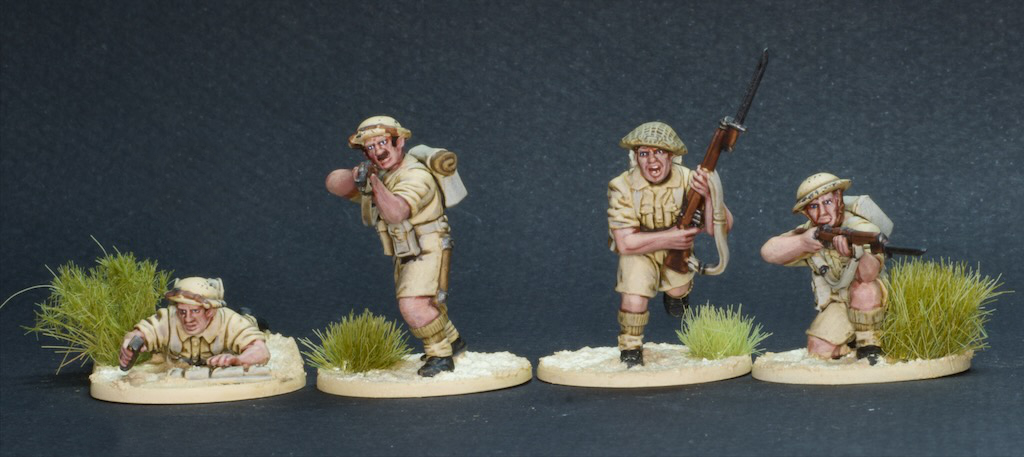
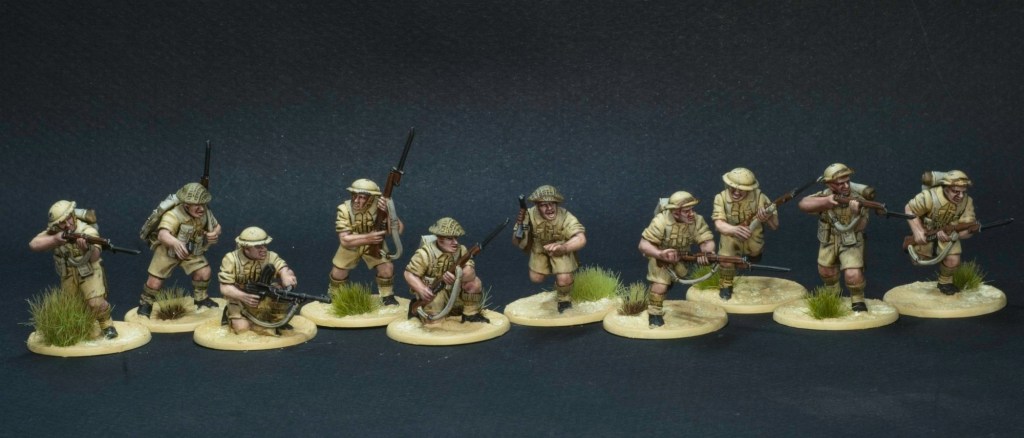
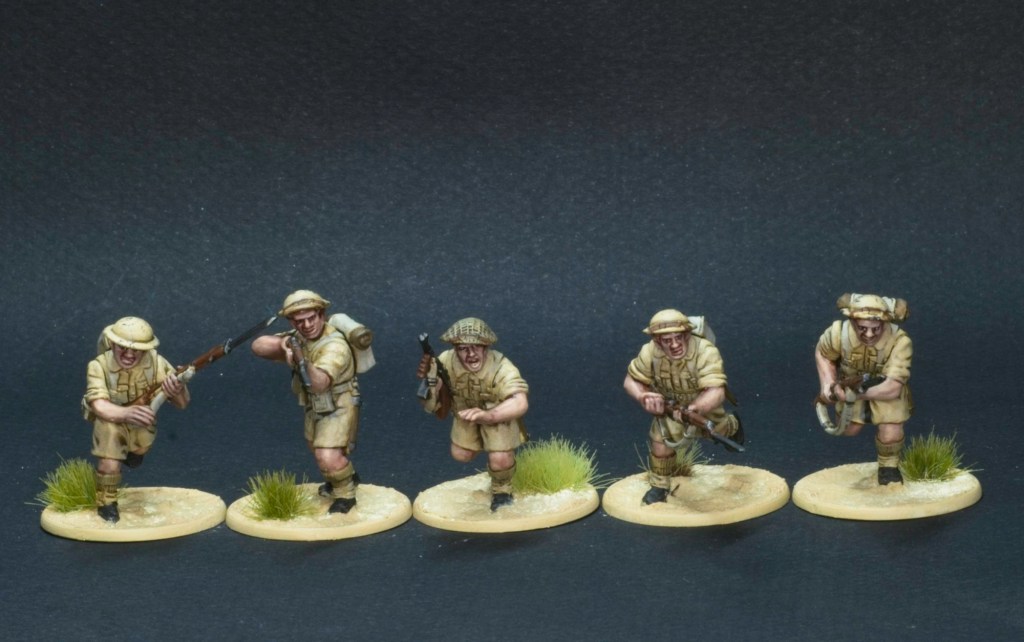
So here we are with the first models done for the project: some British infantrymen. I wanted to start with these as my Great-Grandfather was an infantryman and it therefore seemed right to start here. They’re not modelled after any regiment in particular although they could definitely stand in for the Buffs! These are Warlord Games’ 8th Army Infantry Plastics.
Painting-wise these were relatively simple, they’re mostly one colour after all! I created a record of the paints I used, as usual mostly so I remember how I did things down the track, but if it helps someone with their models then that’s always a nice bonus!
I broke away from my usual black base rims for these, but I really wanted to communicate that sun-drenched look and the bright rims really contributed to that I think. They’re painted in Vallejo Iraqi sand.
The reason this post isn’t called 1941 8th Army in North Africa is that as part of this project I plan on painting two armies: an 8th Army force, and their opponents the Afrika Korps (Sorry Italians! I’m sure I’ll get around to painting some). So look forward to seeing some of these painted up too in the near future!
Anyway this should keep me busy for a while! I have a lot more models to get done for this project, including many more British infantry, some Australian infantry (as a nod to where I now live), german infantry, trucks, tanks, artillery etc.