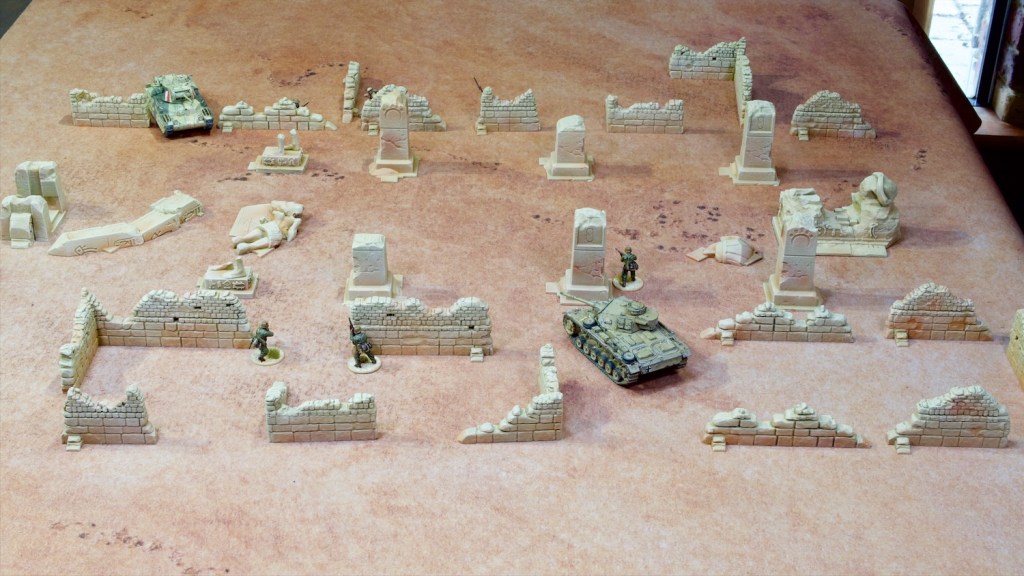
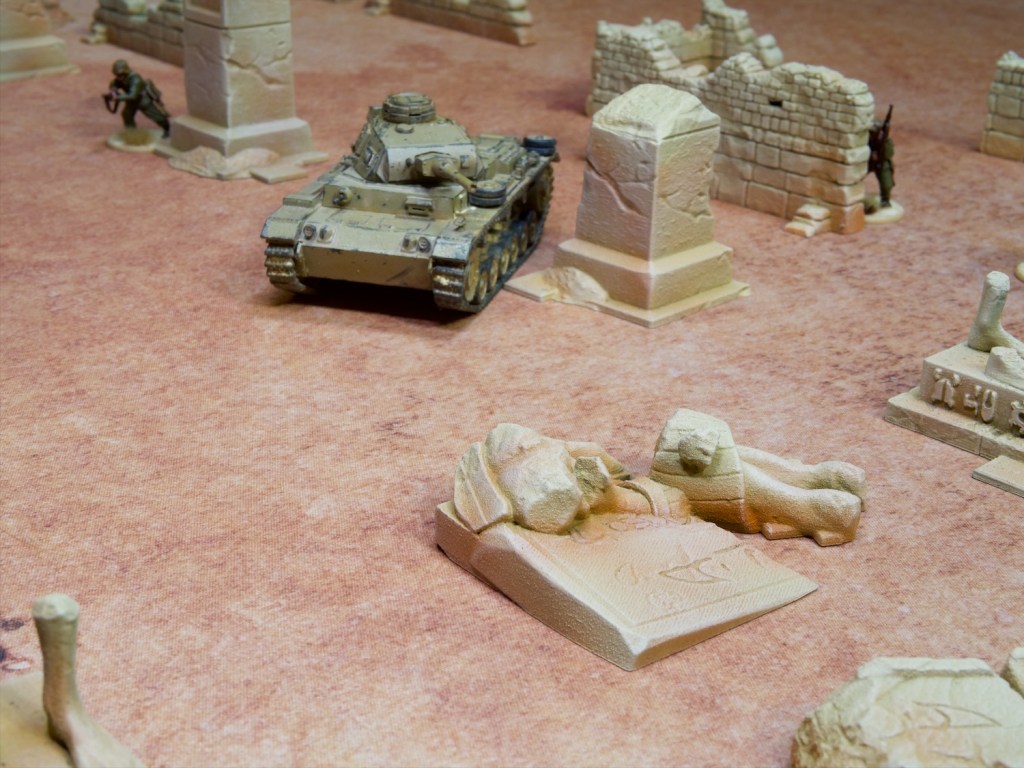
My 3D printer has been very busy these last two weeks, producing enough scatter terrain to cover a densely packed 3’x3′ area, or a more loosely covered 6’x4′ board. The theme: desert ruins, more specifically Egypt-like ruins.
The primary motivation for this effort has been the Silver Bayonet, I picked up the Egypt supplement a few weeks back and one of the North Star units for the game, and needed a nice set of terrain to play some of the missions. The good news is that I have a fair few other games that require desert terrain, such as Bolt Action for my North African forces, and Warhammer of course for my Tomb Kings.
The models I printed were from two sets: the ruined walls are by The Lost Adventures Co., and the Egyptian statues/columns etc are by Txarli Factory. I printed the walls at 65% scale to make them a nice size for my historical miniatures, allowing them to peek over the lower sections of wall.
I undercoated all the pieces with an old can of Citadel Roughcoat which is a spraycan-based texture paint (and long out of production, I’d love to find a good replacement). This had the dual effect of hiding the print lines on the models, and adding some nice grit for that sandstone look.
Painting-wise these were pretty straightforward. I sprayed Vallejo Primer German Dark Yellow all over, followed by a top down spray of Vallejo Model Colour Dark Sand through the airbrush. I then drybrushed Vallejo Model Colour Dark Sand, followed by another drybrush of Vallejo Game Color Bonewhite. At this stage I popped the pieces onto my desert mat and realised they looked out of place as the mat has quite a bit of red to it. To remedy this, I added patches of Vallejo Skin Wash Ink using the airbrush, followed by another drybrush of Vallejo Game Color Bonewhite. I would probably have skipped the first Bonewhite drybrush if I’d known I’d be doing another, but sometimes you find things out and need to go again!
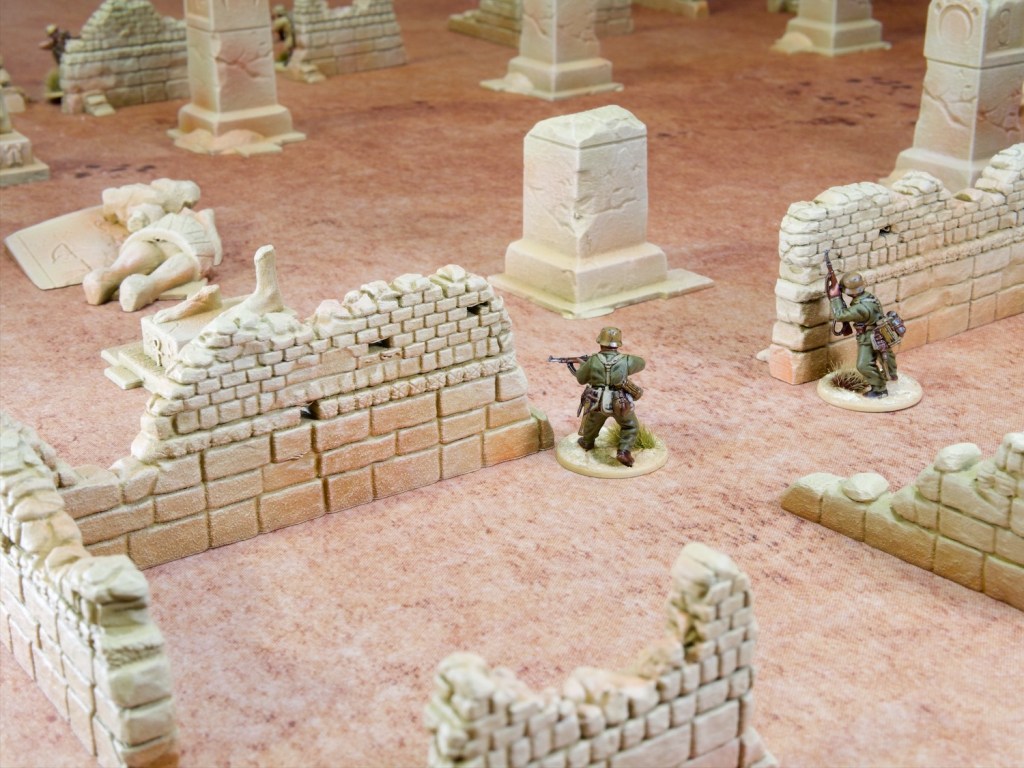
I’m really pleased with how these came out, the roughcoat really did a nice job of making the 3D prints more stonelike. The reddish tones also really tie the pieces to the game mat. Here’s a few more closeups showing off the different pieces:
A nice quick update after the longer last few posts. I do enjoy panting terrain as a nice break from more involved models. I’m currently painting up my Egypt campaign unit for Silver Bayonet (guess what nation!), and looking forward to playing some game with this new terrain. The Egypt 3D model set also comes with a sphinx and a pyramid so if I feel like filling out a bigger table I have what I need!
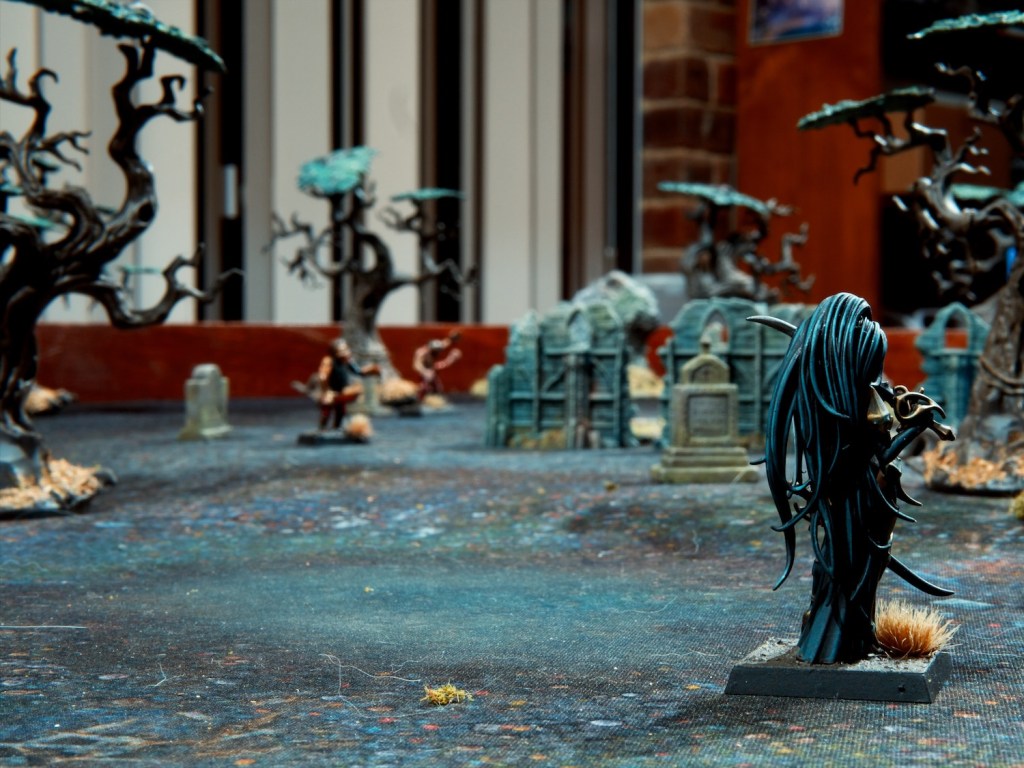
After last week’s fun with The Silver Bayonet I was keen to continue with more of the solo missons in the book. The second mission has the unit come across a ruined chapel and investigate it. Unfortunately for them, zombies have overrun it, and some more powerful undead are lurking about!
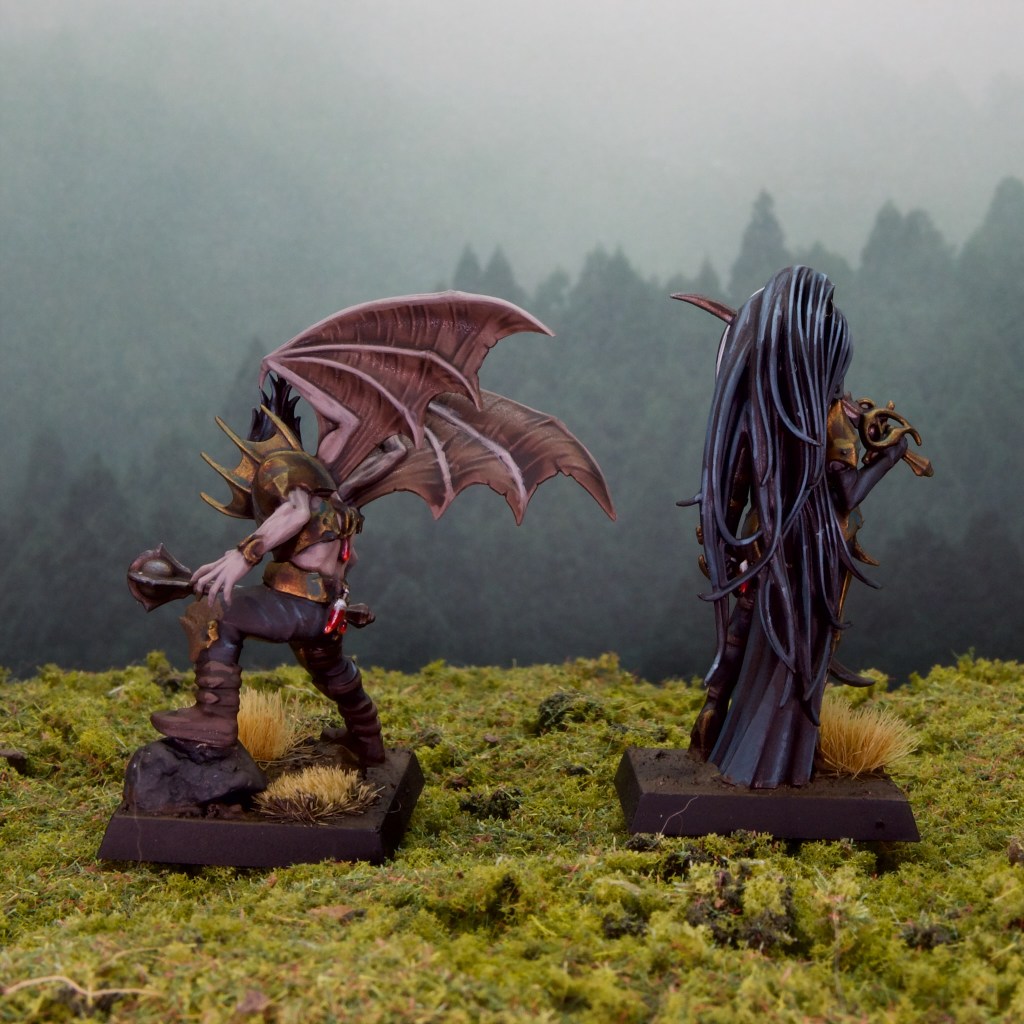
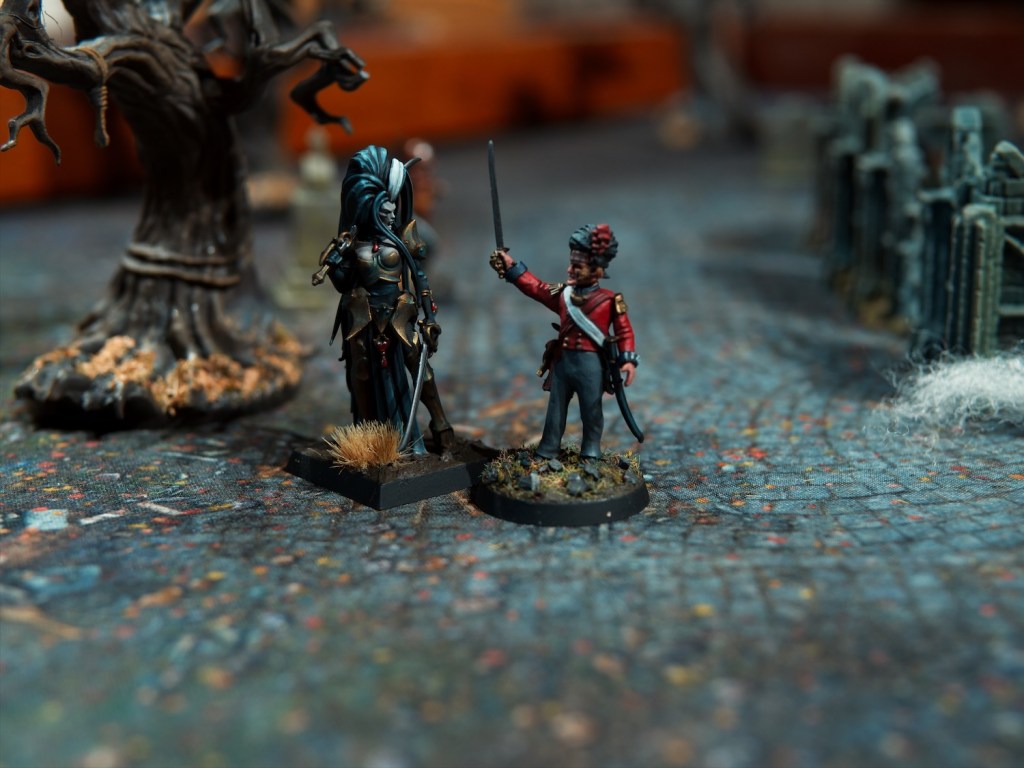
I was covered for the zombie miniatures, but needed some vampires that looked a bit less overtly warhammer-y, so I decided to paint up a couple of the less over the top miniatures out of the Crimson Court Warhammer Underworlds warband. I based them on square bases as I think I’m most likely to use them for Warhammer Old World going forwards.
I kept the colours very muted on these, with black cloth and the bronze dulled down. These models were really nice to paint, with nice crisp details but not too much going on. I love painting glass vials too so glad to see some on both these models, clearly they like carrying a top up with them!
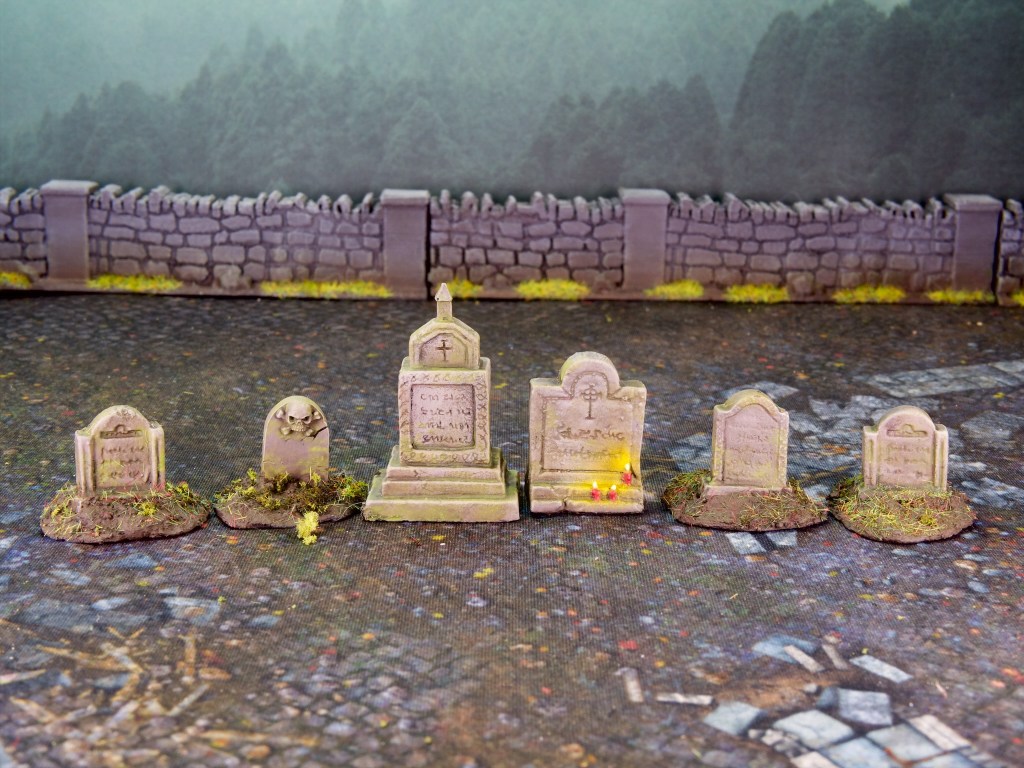
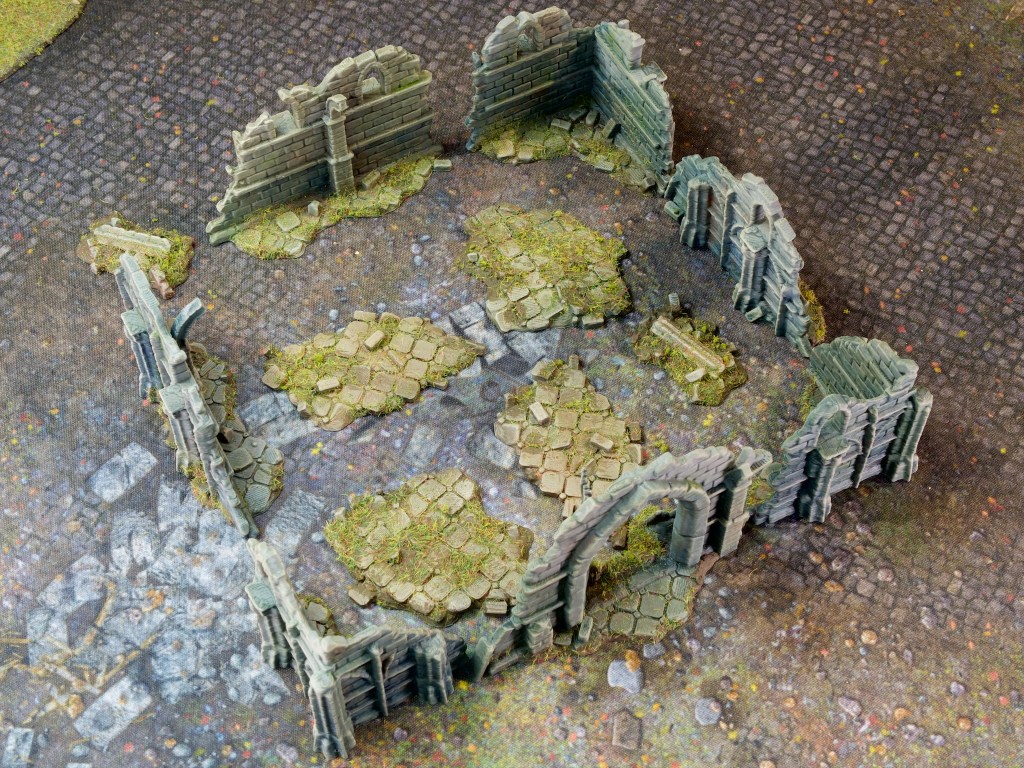
I also needed a bit more terrain for the scenario, namely a set of tombstones and a ruined chapel. The tombstones are really nice resin models from Tabletop World except the one with a skull and crossbones which is from the old Warhammer Skeleton sprue. I painted these pretty quickly, with a grey undercoat, brown wash, some grey and cream drybrushes. All topped off with some nice mossy greens using some enamel washes.
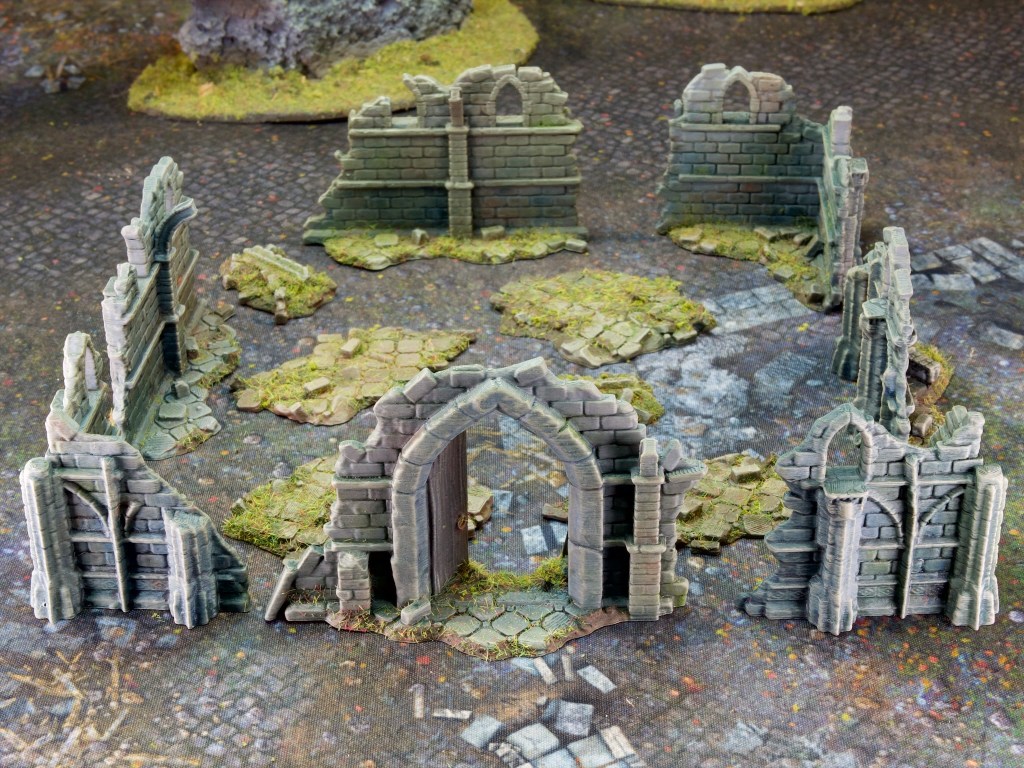
Finally, the ruined chapel. This is a nice modular ruined church STL set by Vae Victis Miniatures, which I printed at 50% size to make into a reasonable size for a chapel. The scenario calls for a 6″ x 6″ footprint for the chapel which the pieces you see above fit nicely into.
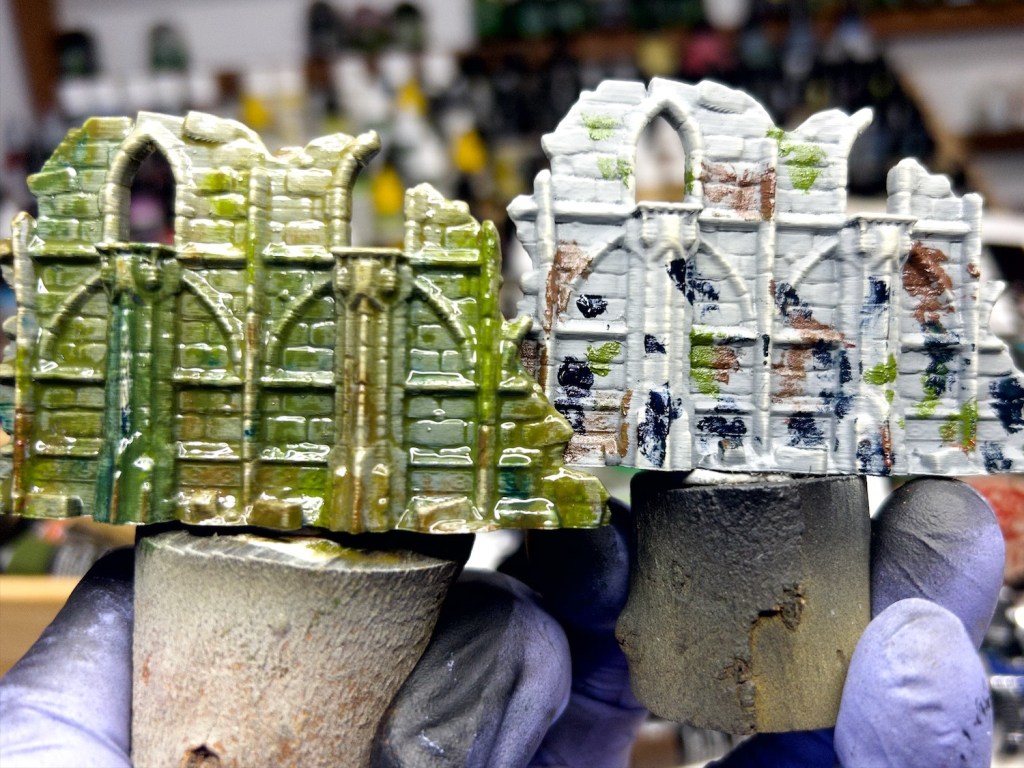
I had a bit of fun painting this, starting with a grey undercoat, then spotting on varied colours of oil paint. I then used some thinner to spread the oil paint around and create some nice variation. You can see what I mean in the photo below.
I left the wet pieces dry overnight, then wiped off the oil from the raised areas. I then left that all rest for a few days, and once fully dry, did a few drybrushes to pick out the raised areas. Was all quite fast apart from the drying! With the terrain and the antagonists ready, I set the board up for the mission and got started!
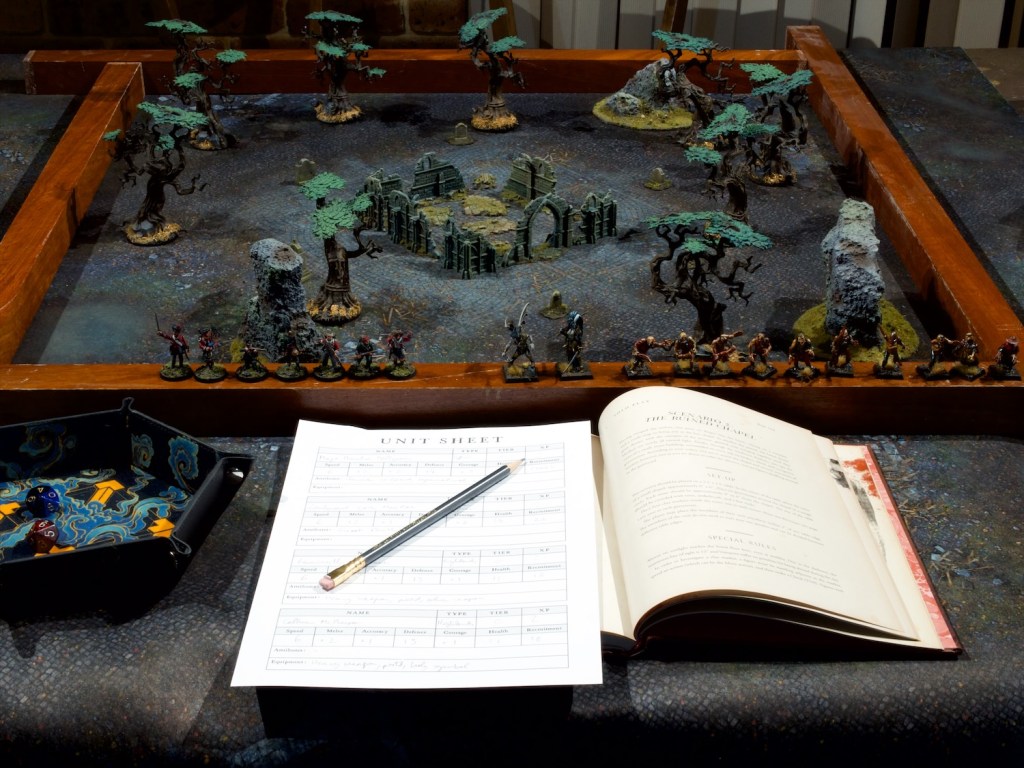
Ready to go!
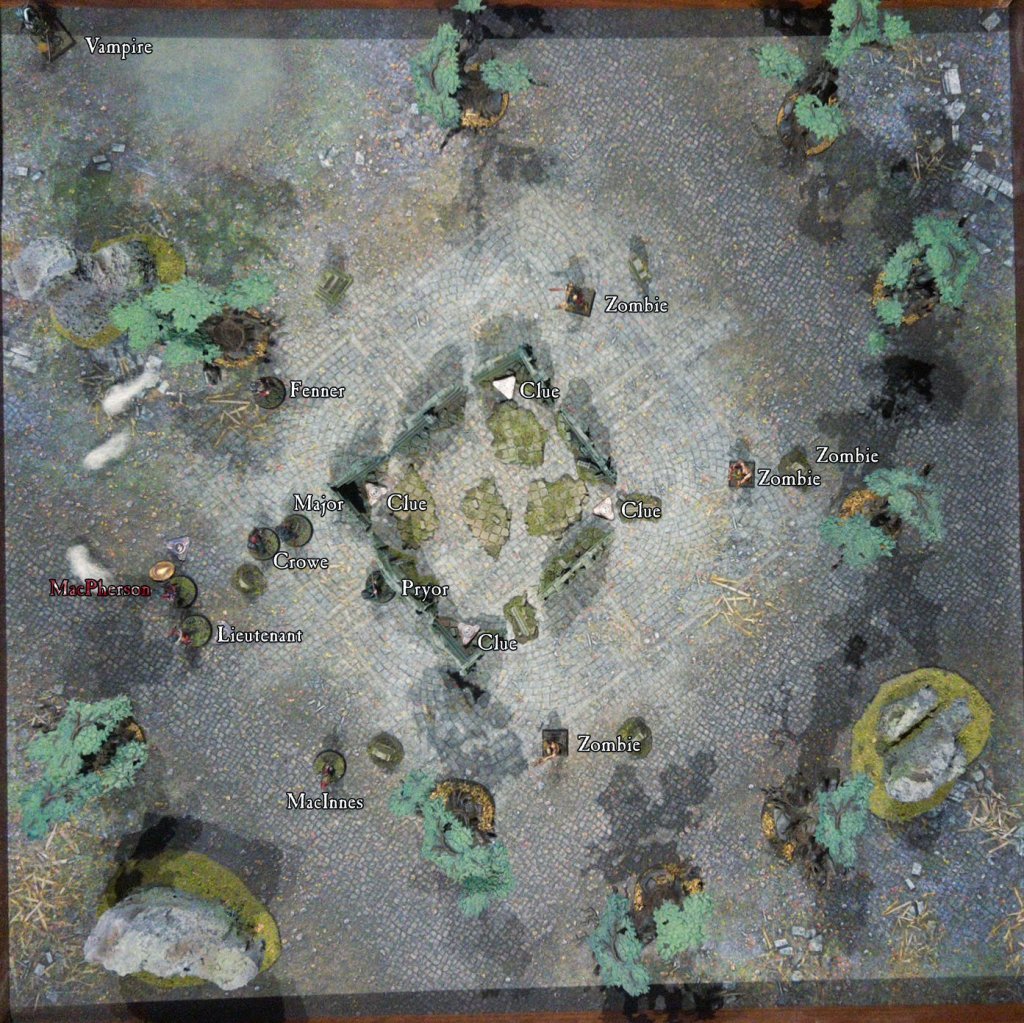
As I mentioned at the start, the premise behind the mission is that my unit is looking for a ruined chapel to investigate it, and at the mission’s start has just arrived at said chapel, but finds it swarming with undead. The unit needs to battle through revenants and investigate the clue tokens in the chapel and move anything they find off the table.
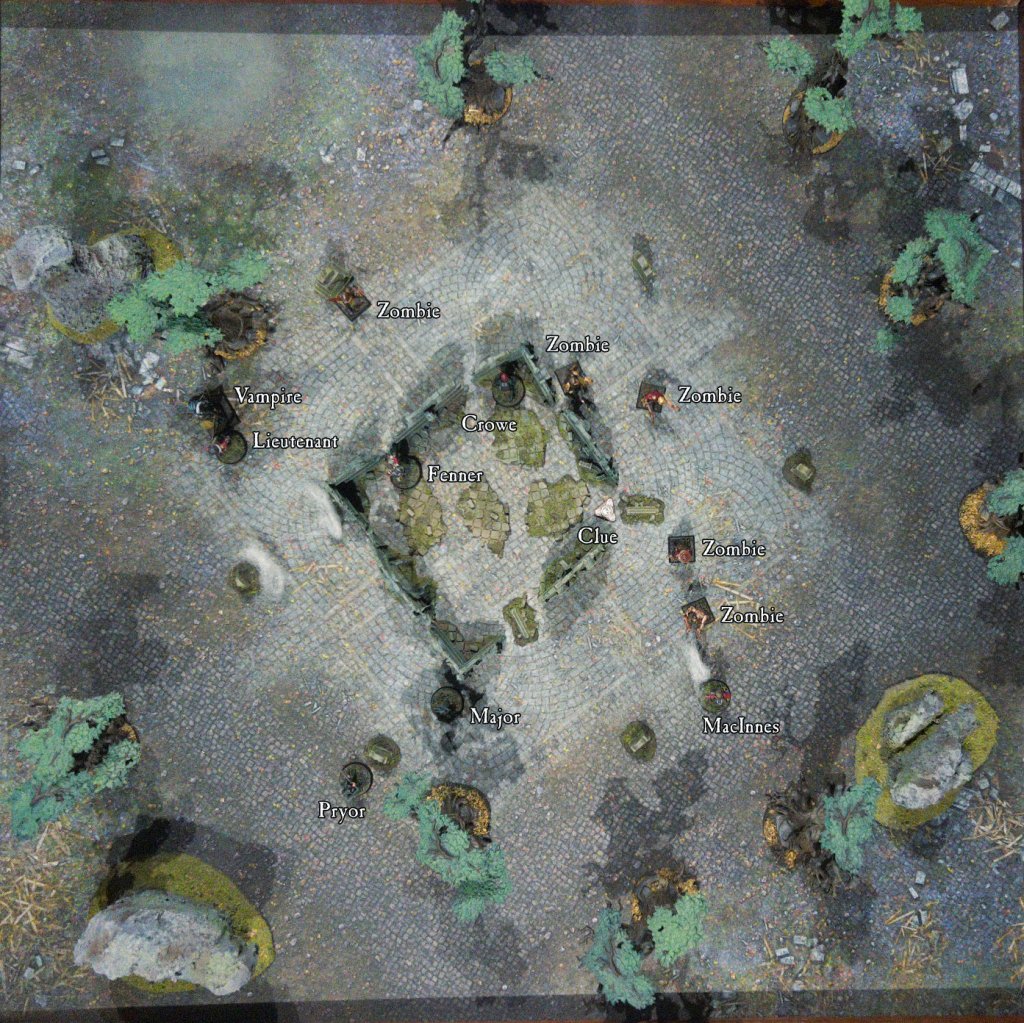
Initial setup.
The board is setup with the chapel at the center, a clue in each corner, a rough circle of grave stones around the chapel, with a zombie (these are called revenants in the game, but I keep forgetting!) at each grave stone. I was allowed to place my models within 2″ of any board edge, split up in as many groups as I liked. I remembered from the first game how useful it was to have backup so I decided to keep my full unit together, sacrificing searching power for increased survival chances. If you can’t remember the characters in the unit feel free to check out my earlier post. I also go into a bit of detail on how the rules work in that post so I would recommend reading it first if you’re interested in that.
Turn 1
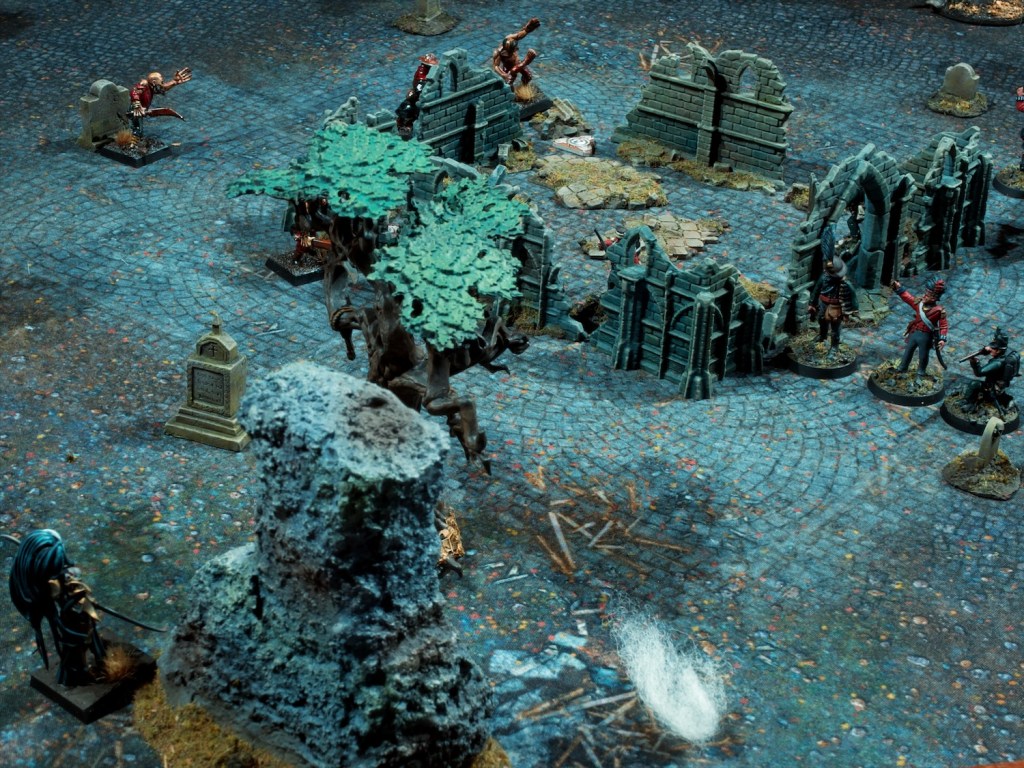
Turn one starts very poorly, with MacPherson charging the closest zombie, hitting it with his claymore and dealing some damage, but the zombie’s return blow critically injures him and takes him out of the game. Lieutenant MacRae charges that same zombie and finishes it off with a blow from his sword.
MacPherson is taken out by the zombie’s blows, Lieutenant MacRae rushes in to avenge him!
Crowe fires his rifle at the next zombie, only dealing a small amount of damage as they are not particularly bothered by ranged attacks. MacInnes then finishes off that same zombie with a strike from his massive axe. All the while the zombies are coming closer.
The Major fires his rifle at the next closest zombie, injuring it. Fenner then fires his musket at that same zombie, misses, charges it with his bayonet and takes it out (after I used a skill re-roll). Pryor sprints towards the chapel doorway.
A mysterious form walks onto the battlefield…
At the end of the turn a vampire arrives, and another zombie springs up from a random gravestone.
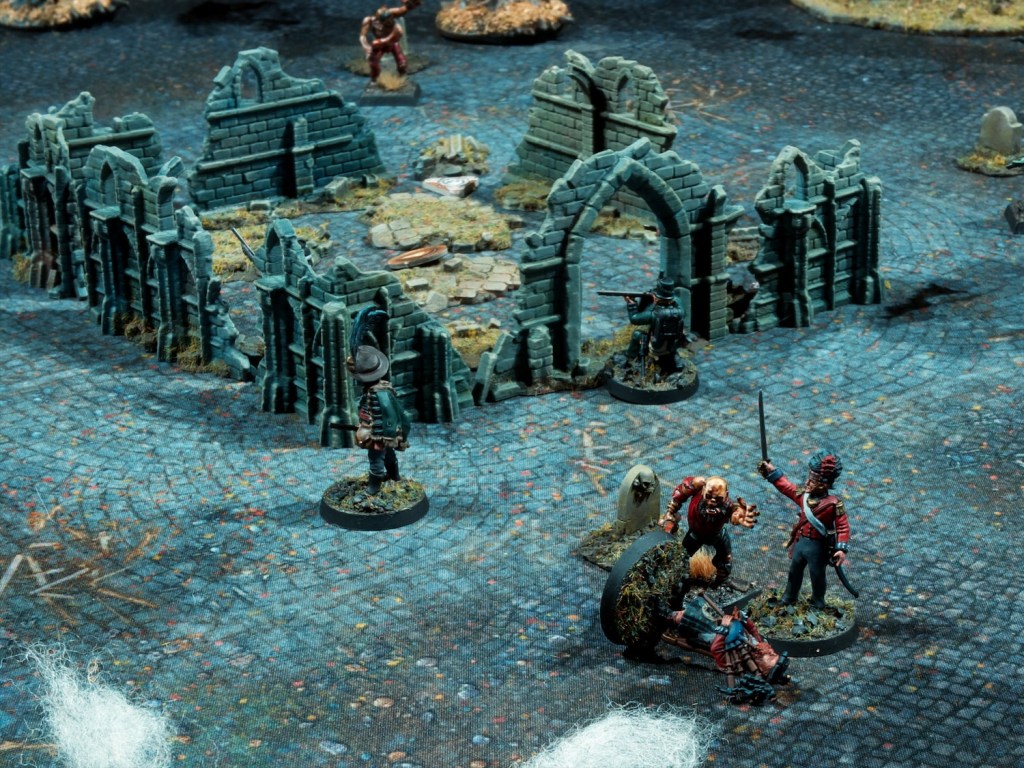
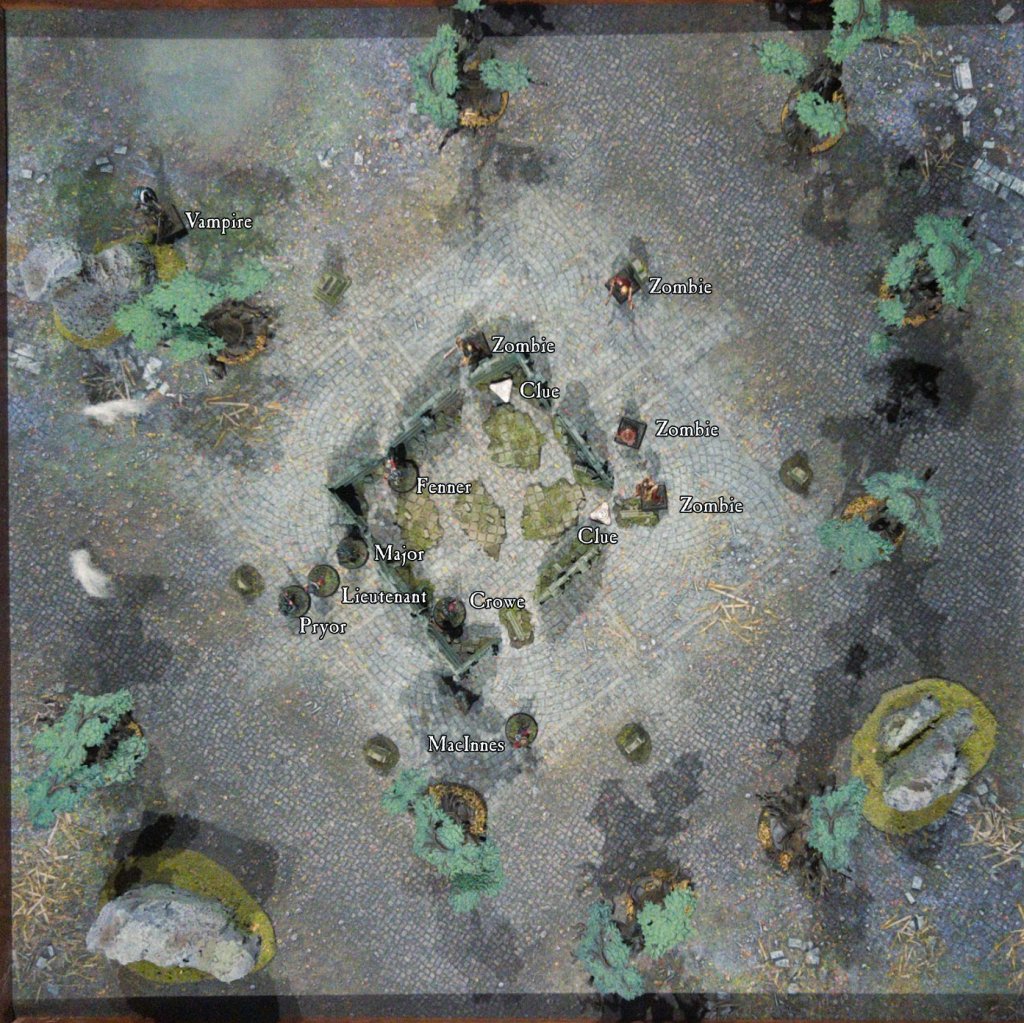
The state of things at the end of turn 1.
Turn 2
Fenner moves into the chapel, finding something of interest in the closest corner: a bag of silver shot! Crowe heads for another promising area of the chapel and scrounges up a silver knife. Both men feel a little bit more equipped for the horrors that await them outside of the chapel walls. Meanwhile, MacInnes continues his zombie hunt, charging the next closest and scoring a solid hit. The zombie’s strike back misses completely. The zombie then attacks MacInnes, but misses again, giving MacInnes the opportunity to finish it off with his own strike back. The rest of the zombies shamble forwards. In the far corner, the vampire approaches the Major and the men surrounding him.
The unit prepares a silver-filled volley for the approaching monstrosity.
The major spots the shape coming towards him, loads silver shot into his rifle and backs away, closer to the chapel entrance. The Lieutenant and Pryor both line up next to the Major, ready to greet the new arrival with a well-timed volley. Another zombie claws its way out of a shallow grave…
The state of things at the end of turn 2.
Turn 3
Fenner loads one of his newfound silver bullets into his musket and sights through a crack in the chapel wall. Crowe keeps on searching the chapel and finds a small icon which gives me an extra power die in my fate pool (i.e. an extra re-roll!). To give the members of the team searching the chapel some more time, MacInnes fires his pistol at the zombies, misses, then rushes out towards them, drawing them away.
MacInnes draws the zombies away from the chapel.
The vampire moves closer to the Major and his two sidekicks. All three open fire, but only the Lieutenant hits with his pistol. The Lieutenant is not equipped with silver shot, but his great faith means his attacks are blessed, which allows him to injure the Vampire. Bolstered by his success, the Lieutenant charges in, but locks eyes with the Vampire and its hypnotic powers freeze him in place.
Lieutenant MacRae might have bitten off more than he can chew…
With a groan, another zombie emerges from the soft ground.
The state of things at the end of turn 3.
Turn 4
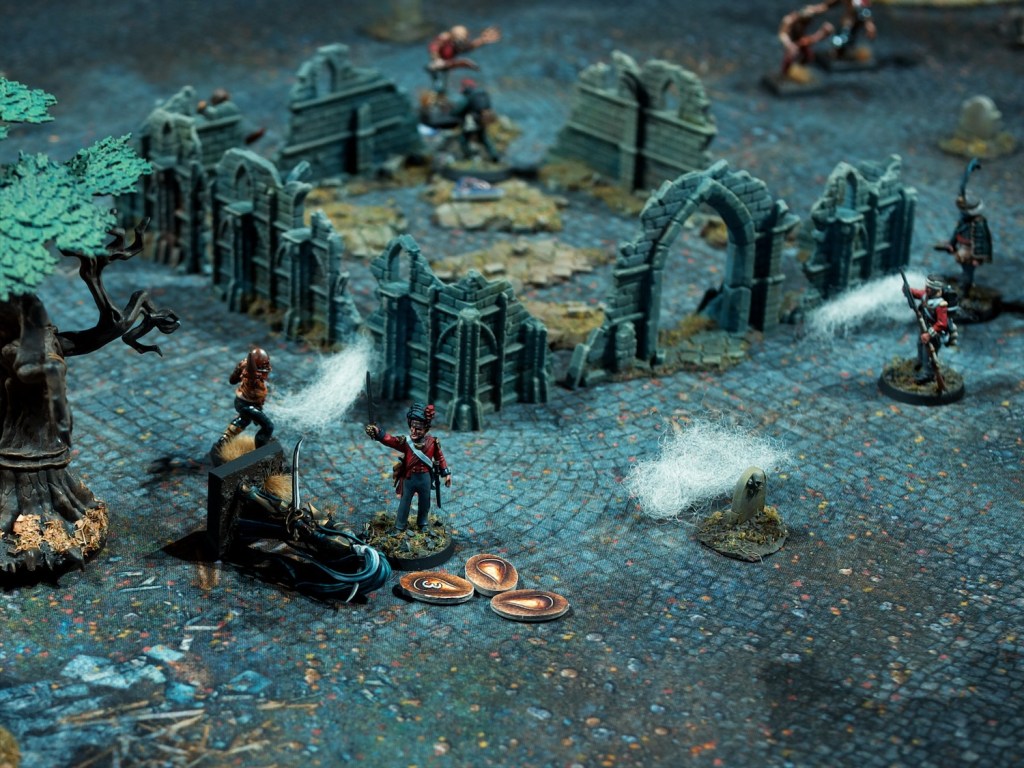
Fenner now has a clear shot on the vampire and takes it, but misses. He rushes out the the chapel, time to sound the retreat! Crowe takes the time to investigate the last corner of the chapel and finds a strange candelabra. He packs away the relic and makes ready to leave the chapel. The Major quickly reloads his rifle and shoots at the vampire but misses.
On the far side of the chapel, McInnes is caught by one of the zombies he’s been baiting and suffers a nasty hit. He backs away to stay out of reach of the second zombie, but in so doing exposes Crowe who is attacked in turn. The zombie misses, and Crowe sticks his bayonet into the Zombie almost taking it out. MacInnes moves away from the zombies and reloads his pistol.
The Vampire attacks the hypnotised Lieutenant and scores a nasty hit, which causes the Lieutenant to have to take a terror test which he fails spectacularly and is paralysed with fear as a result.
Lieutenant MacRae fights off his fear and the hypnotic powers of the vampire to strike at it. After the judicial use of a re-roll, his sword finds its target and the silver of his blade finishes off the vampire.
Lieutenant MacRae triumphant.
Fearing the arrival of another vampire, Pryor reloads his rifle and moves away from the chapel. Another zombie erupts out of the ground.
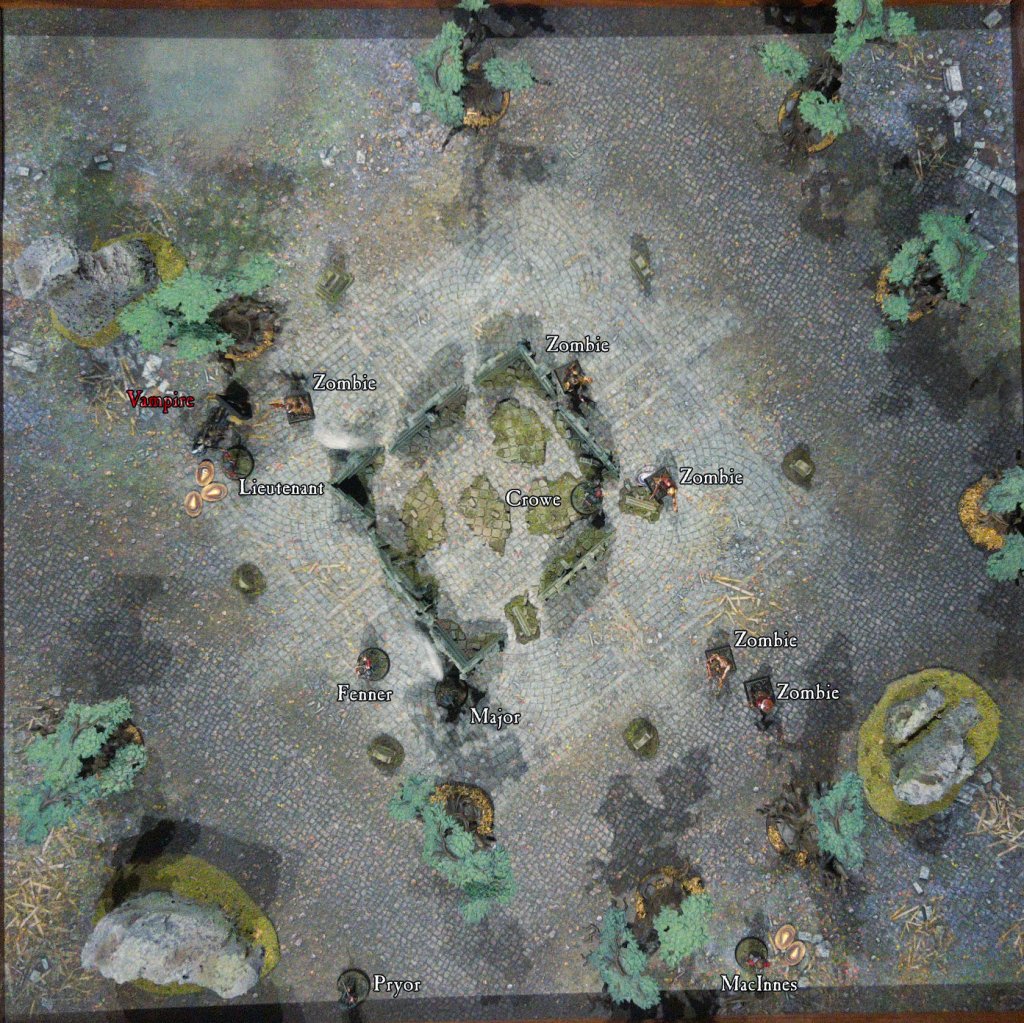
The state of things at the end of turn 4.
Turns 5 and 6
With the vampire slain and the chapel thoroughly searched it’s time to leave the area before the unit gets overwhelmed. MacInnes leaves the board first, with the rest of the unit moving towards their closest board edge and reloading their blackpowder weapons. At the end of turn 5 another vampire arrives right next to where MacInnes left the board (close call!).
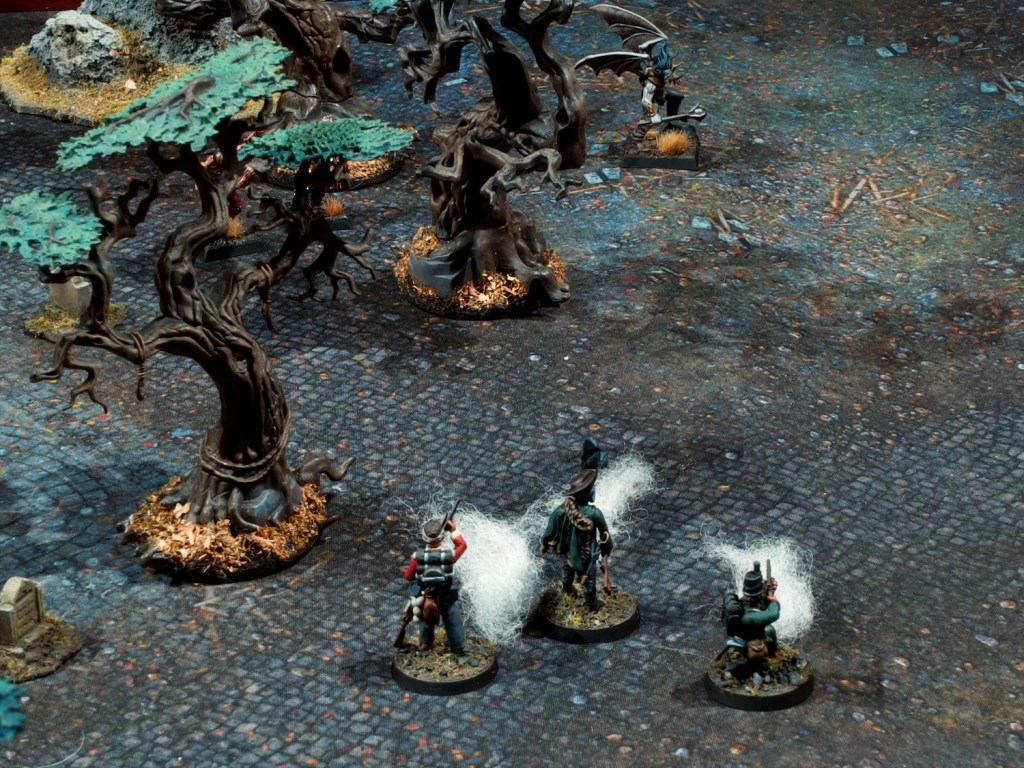
Turn 6 sees the unit unloading a volley into the newly arrived vampire, and this time did not miss, killing it before moving off the board.
If they’d missed at least they’d have a nice cloud of smoke to cover their escape!
This mission felt a lot more tense than the first one, I came really close to losing more than just MacPherson, and I spent a lot of time retreating from fights. Last time, musketry was quite powerful, whereas in this mission the zombies were resistant to it, and the vampires completely immune if the musket wasn’t loaded with silver. MacPherson survived his injuries, but now has the shakes permanently, making his aim with his pistol much less good. Luckily for me he’s more of a close combat character!
Overall the mission was tremendous fun, and I’ll happily play through the rest of the solo missions in the book. Painting a few models and some terrain and getting to use them in a game immediately was very rewarding.
I tried to improve my battle report style with changes to how I wrote the action up and with the extra annotations on the top down photos. Keen to get any feedback on how you feel this reads compared to last week or if you have any idea how to improve it!