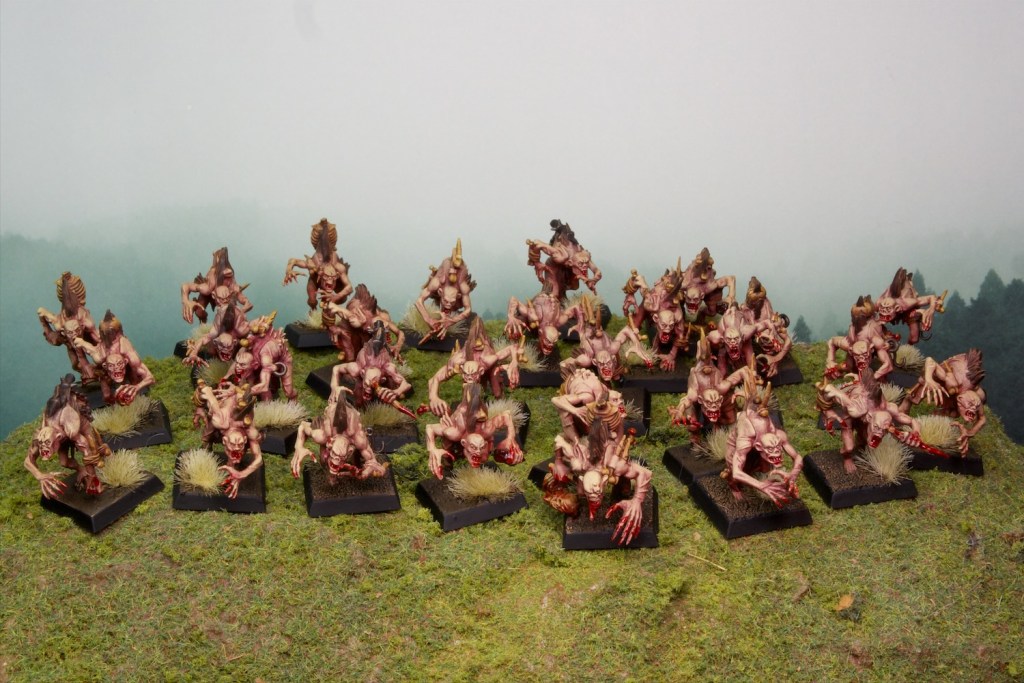
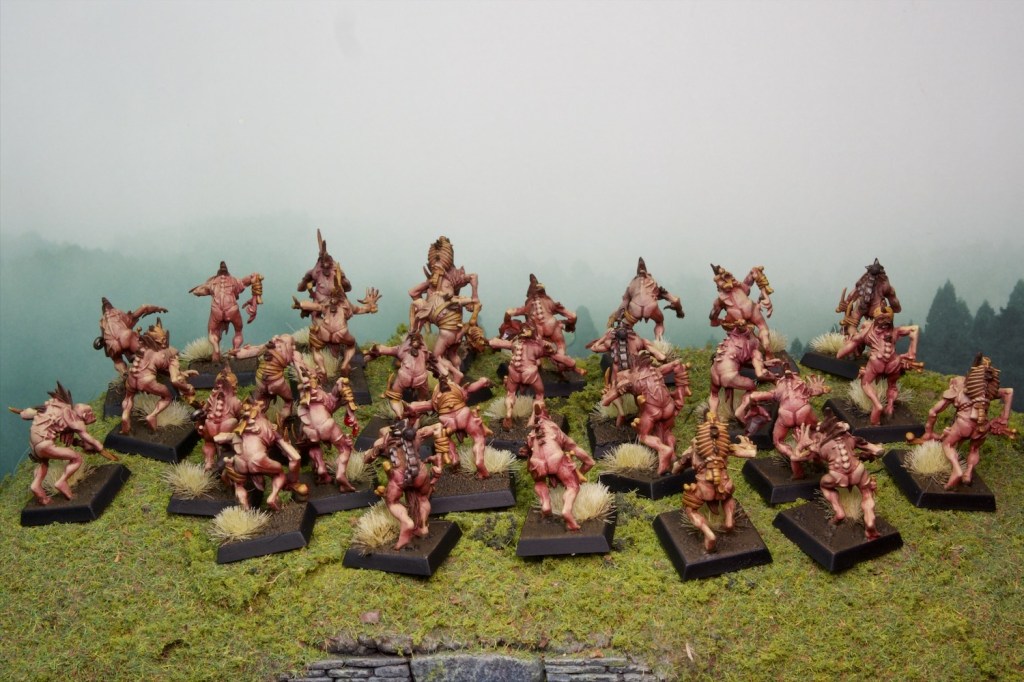
I’ve been busy trying to get through the remaining miniatures needed for the 100 target I have in the 1 Million Miniatures challenge. I left the last post at 36, and with just over a month left I needed a bit of a speed boost. Luckily for me I found 29 of the most speed paintable miniatures: Ghouls!
So why are they so speed paintable? Well they’re mostly organic materials, which lend themselves really well to airbrushing and washing, which are two elements that help you get far fast. On top of that, they’re mostly one organic material: skin!
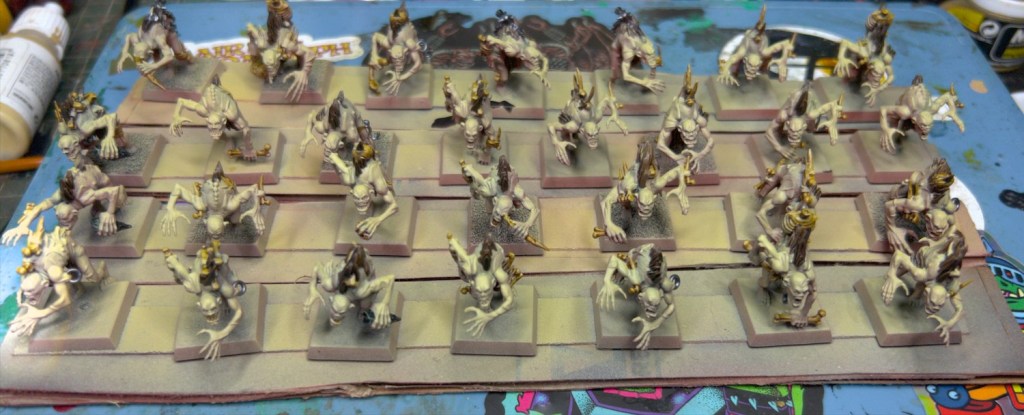
To get these done fast, I leveraged my airbrush to get a terracotta colour base coat, followed by a dead flesh zenithal (from above) spray. I then picked out bones, fur, leather, stone, using contrast paints, and painted over the metal areas.
Airbrushed and contrasted!
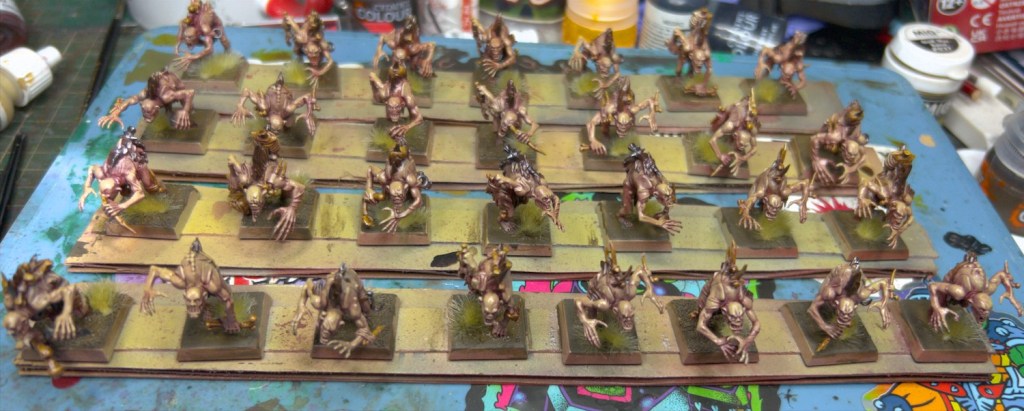
I then airbrushed some acrylic floor polish all over them (an old military modelling trick – basically a cheap way to get gloss varnish). Once that was dry (helped along with a hair dryer), I did an all over oil wash with a mix of terracotta, magenta, brown, and a blueish grey to get a brownish purple with some red accents. Again I helped it along with a hair dryer before wiping the oil off the raised areas with some makeup sponges. I then applied some texture paste and grass clumps to the bases and left everything to dry/cure overnight.
Washed and Based!
The next morning I did a brown acrylic wash over the bases, painted the base rims, airbrushed on some matt varnish and painted on some blood effects on their mouths and hands. Overall painting time was approximately 4h split over the two sessions ~2.5 hours before the overnight drying session, and an hour or so for the final touches. So nice and quick for 29 models!
I quite like this kind of painting, it’s quite cathartic to just glob oil paint all over your models knowing you can clean them up after. There’s not too many models you can do this to however. I did do something similar in the past with acrylic washes for the Goblin Town models, but I think I like the oil route better, it’s more controllable and the extended drying time is actually really helpful when doing so many models.
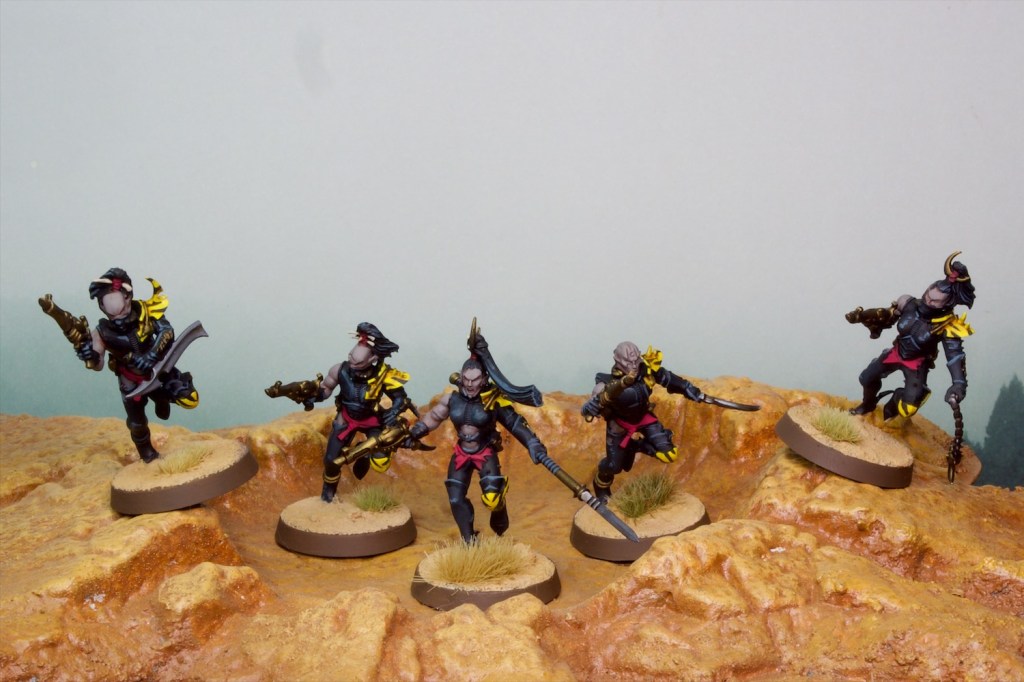
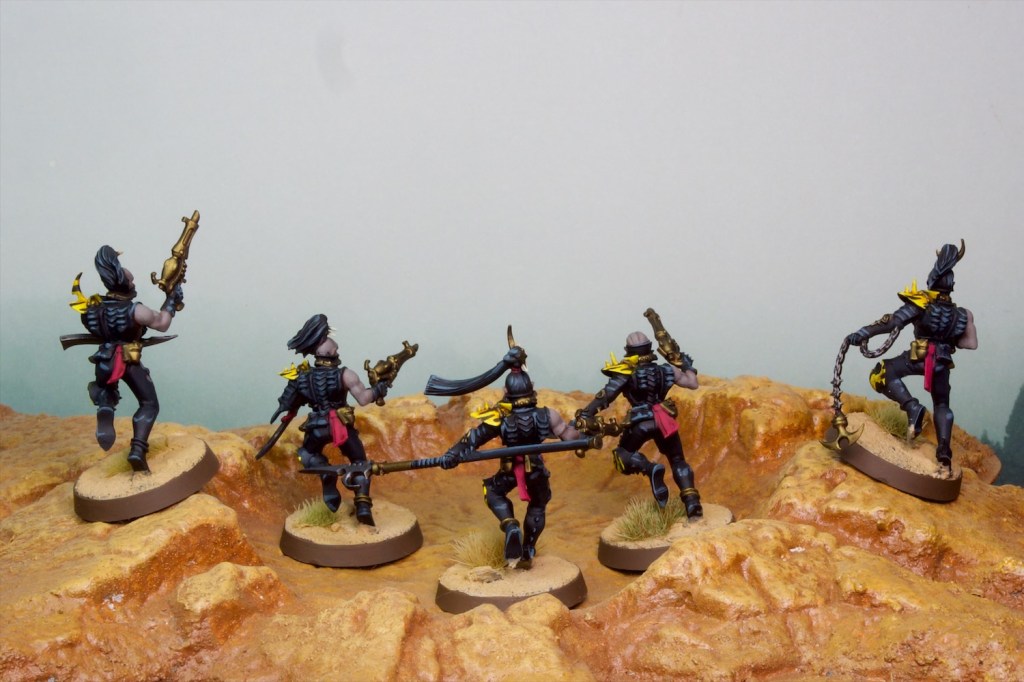
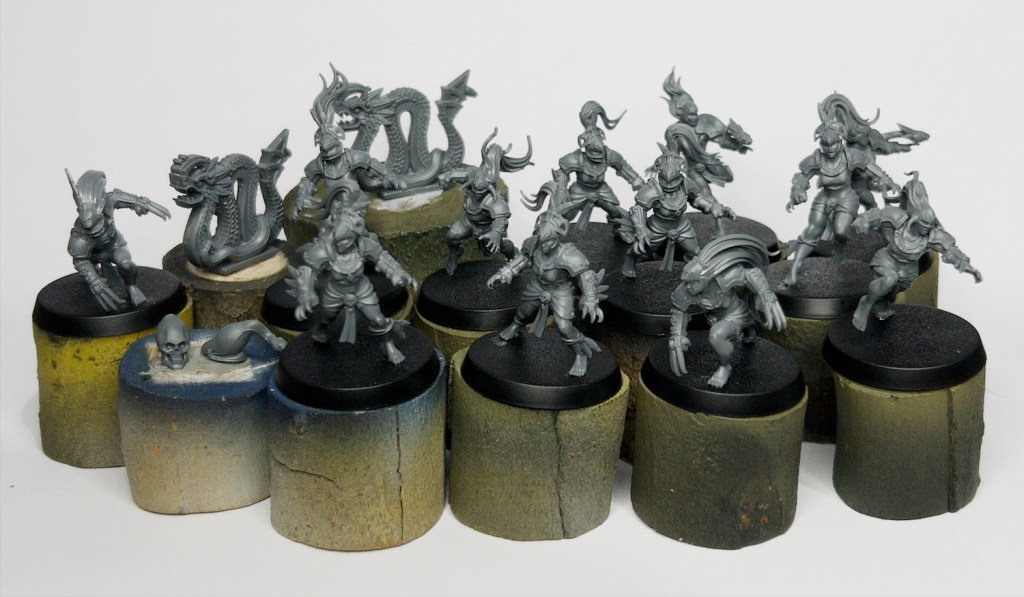
I also tried out my new Dark Eldar scheme on some Wyches:
They’re probably a little rough for my liking, so I might take my time a bit more on the next batch, but they still look nice at table level.
Anyway that adds a nice 34 extra miniatures to my tally, taking me up to 70 total which is a much more comfortable place to be with little over a month to go in the challenge. Let’s see what catches my fancy next!
Back in December last year, Games Workshop announced their 1 Million miniatures challenge, which has people pledging in their local Warhammer stores to paint 25, 50, or 100 miniatures between January and early May. I figured that would be a fun thing to do so I duly pledged I’d do 100 miniatures thinking that would be a piece of cake (foolish!). I had this great idea that this would serve as a good excuse to paint my Tomb Kings starter set which has 90+ miniatures in it, and skeletons being relatively easy to paint that would be that.
Trouble was, building 90+ skeletons in one shot is actually quite boring, and I quickly found my enthusiasm dwindled to pretty much nothing. Which left me in early-march with just the last two post’s worth of miniatures done for the challenge: the Flagellants and the Amazon Blood Bowl Team, totalling 20 miniatures. Suddenly to make the 100 by May 9th I needed to paint something like 1.3 models a day.
So I switched tack to the methodology that gets me painting the most: abandon all plans and paint whatever I feel like at the time. Hence this post which shows of the eclectic result of the whatever I feel like strategy, but in so doing adds another 16 models to the tally. I’ll show them off in painting order.
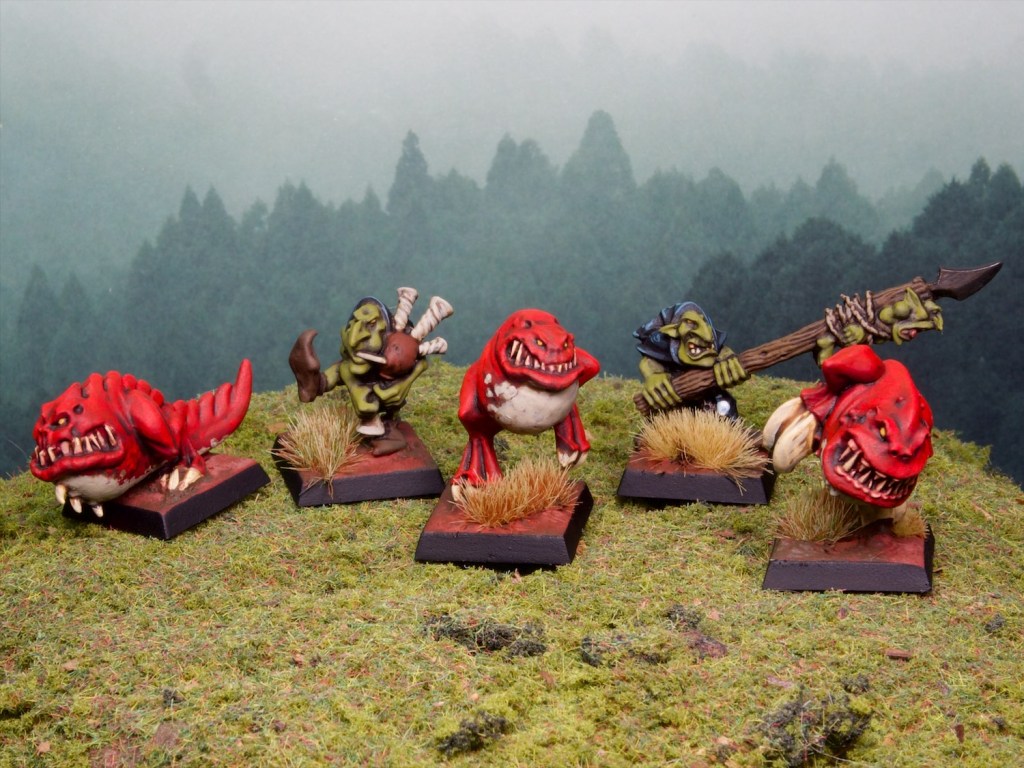
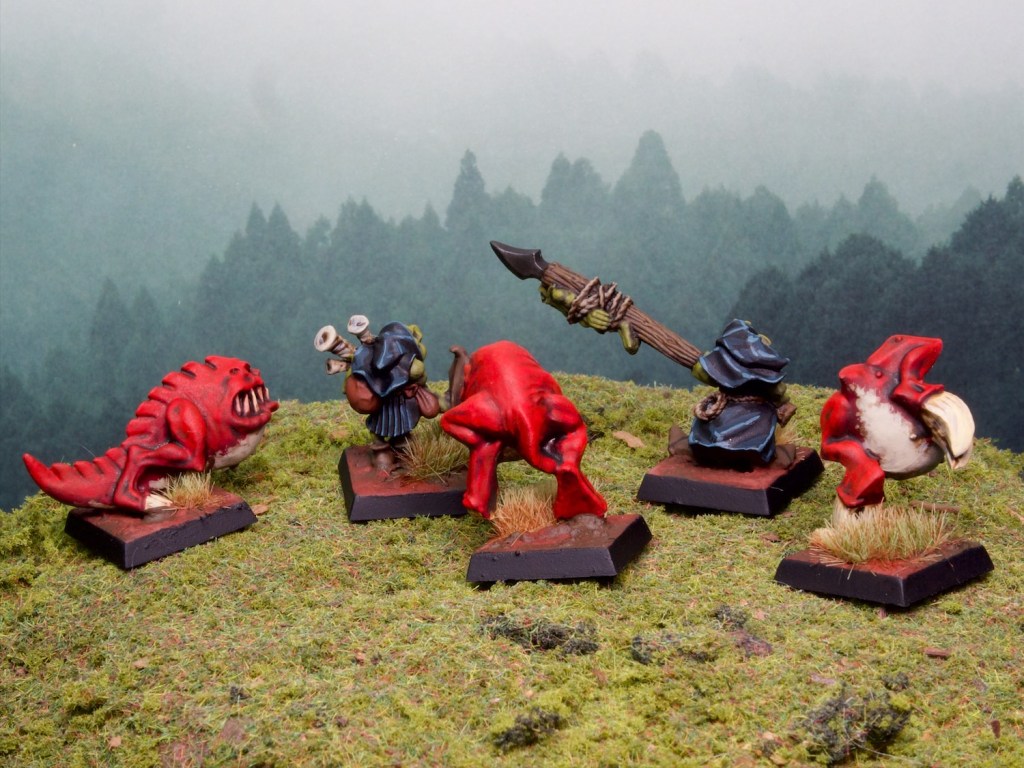
First up we have these wacky Goblin Squid Herders and their charges, three mean-looking Squigs!
These models are very fun, and were great to paint. I really enjoyed doing the patterns on the Squig bellies, and felt they were necessary to break up what would otherwise have just been angry red balls with legs!
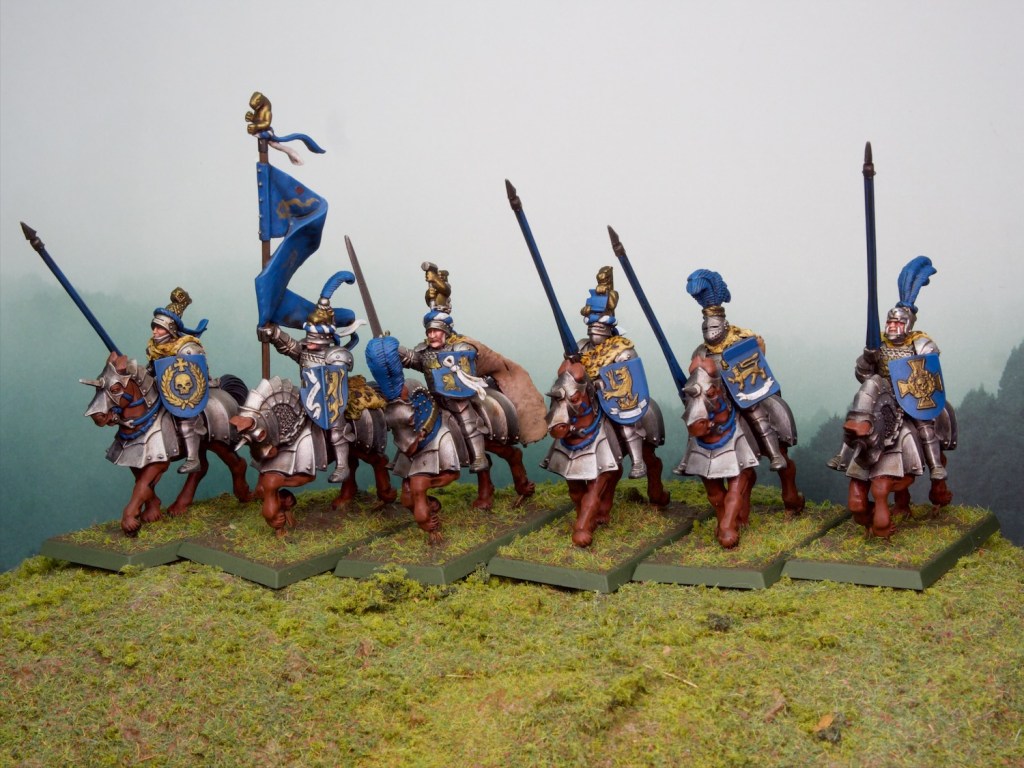
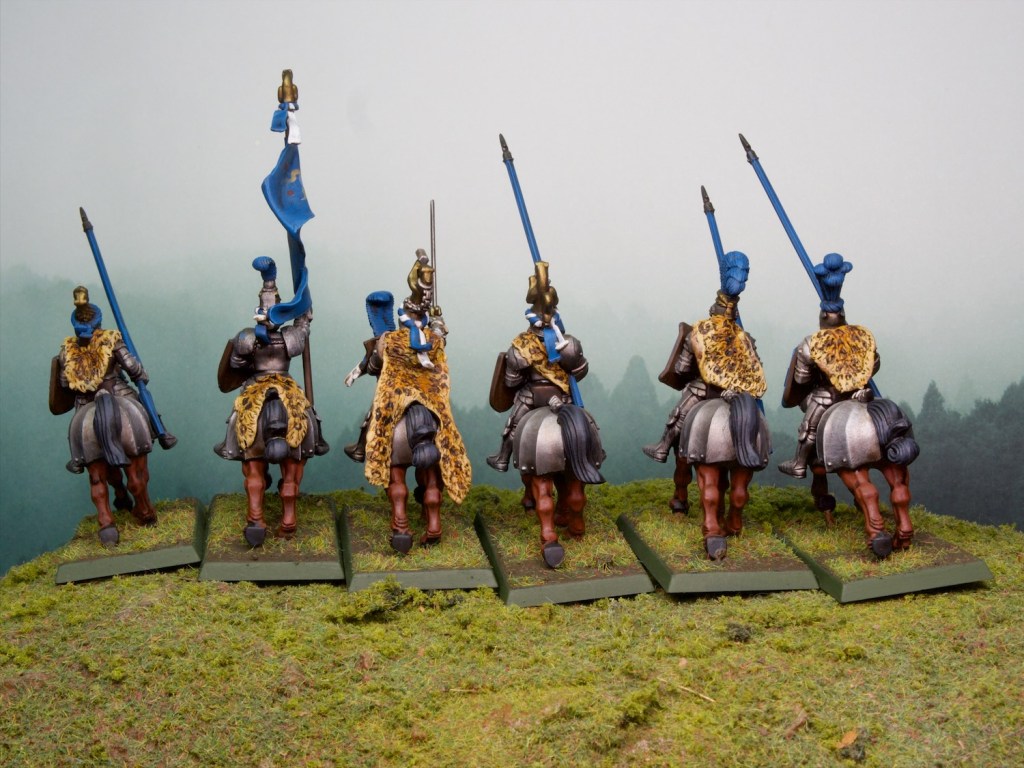
Next up we have this unit of Empire Knights converted and painted to be of the order of Knights Panther.
I made the cloaks and other fur applications from greenstuff which was good practice (but also really slow, bad idea when trying to paint 100 miniatures, whatever I feel like isn’t always efficient). The paint job on these was quick, although I spent a bit of time on the furs as the signature element of these models. This mostly involved creating the gradient from yellowy-brown to cream on the furs before painting on the spots using dark brown contrast paint.
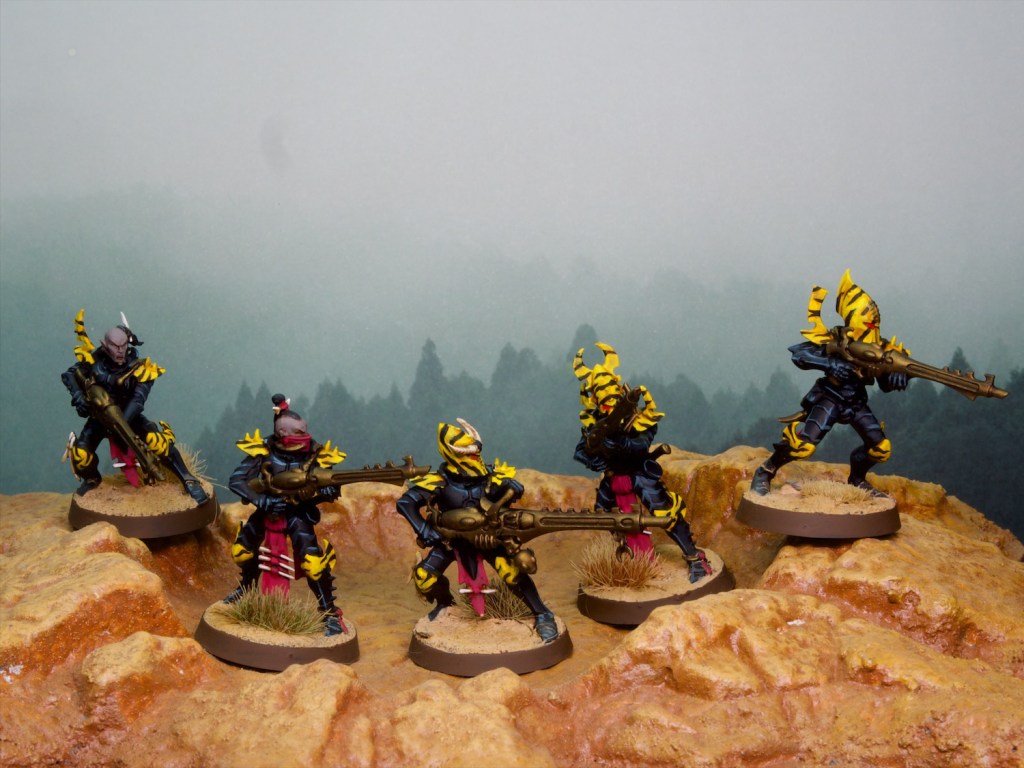
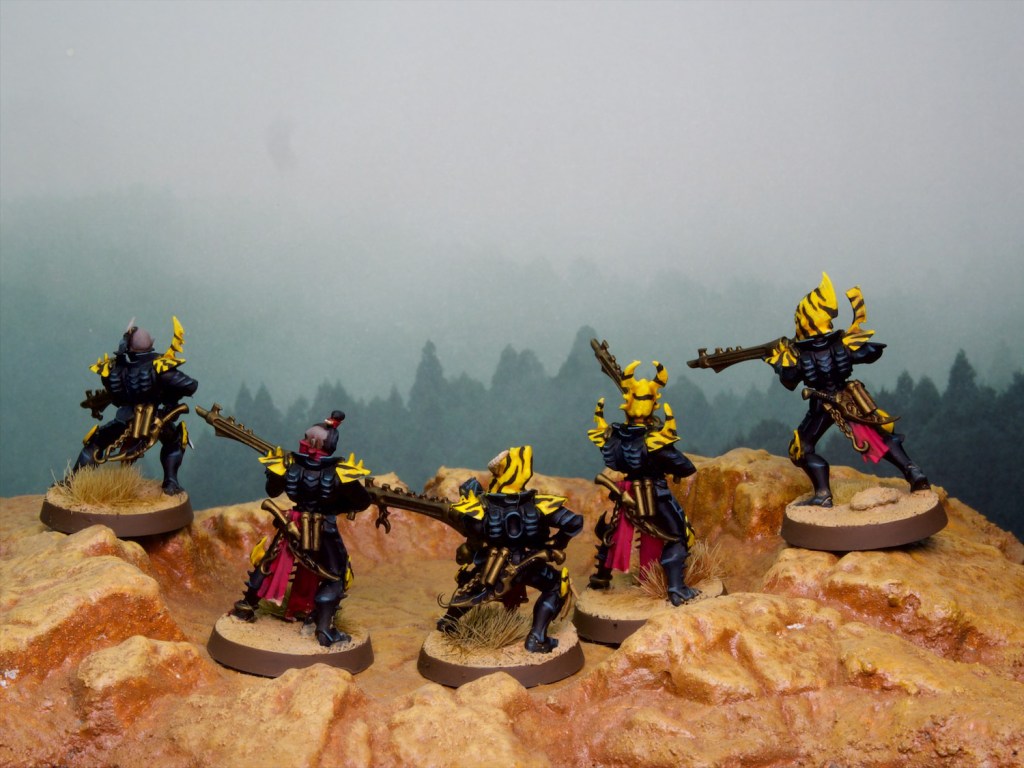
Finally we’re staying with animal patterns but in a much more synthetic setting with the last entry in this post: some Dark Eldar warriors with a wild (pun intended) colour scheme. I’ll go more in depth on the influences for this scheme in another post hopefully, but long story short I saw some very cool, extremely 80s, Eldar colour schemes in the 1st edition Warhammer 40,000 rulebook and went from there. Some of the tiger stripes are a bit wonky, but I got better as I went along and learned what worked and what didn’t. The scheme is surprisingly fast to paint, mainly because most of the armour is black and I find I can do that black with blue-ish edge highlight look pretty quickly (don’t look too close at those highlights thanks).
I hope you’ve enjoyed this look into the mix of models that made the cut for things I felt like painting in the last few weeks! This is a bit of a microcosm for how I approach this hobby and why if you’ve followed this blog for a bit you’ll have noticed me jumping from project to project all the time. I value the fun I get out of this hobby more than anything else and that means I’m always trying to paint what inspires me. I like to think of it as striking while the iron is hot on an idea.
That might mean I get excited on a project for a few months then stop when I get excited about something else. This might seem unproductive, but at the end of the day I find even if I park a project for a bit, inspiration will come back at some stage and that is the time to resume it. If I push through when I’m not inspired anymore I’ll a) not enjoy myself and b) get a worse result, both of which are things I like to avoid. Anyway that’s enough yammering, I have 64 more models to paint!
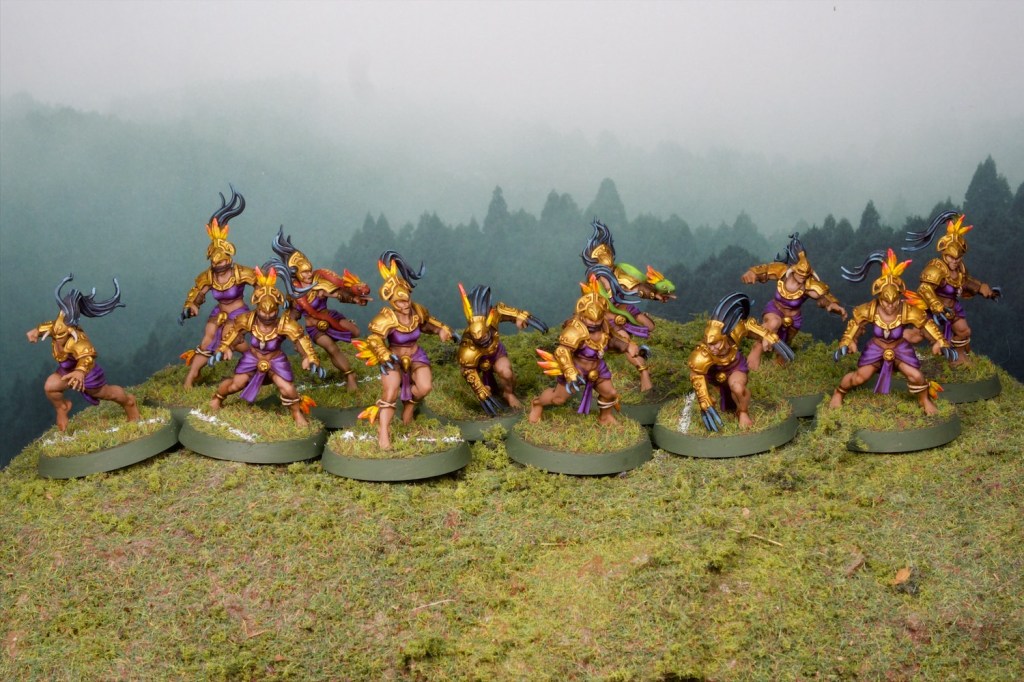
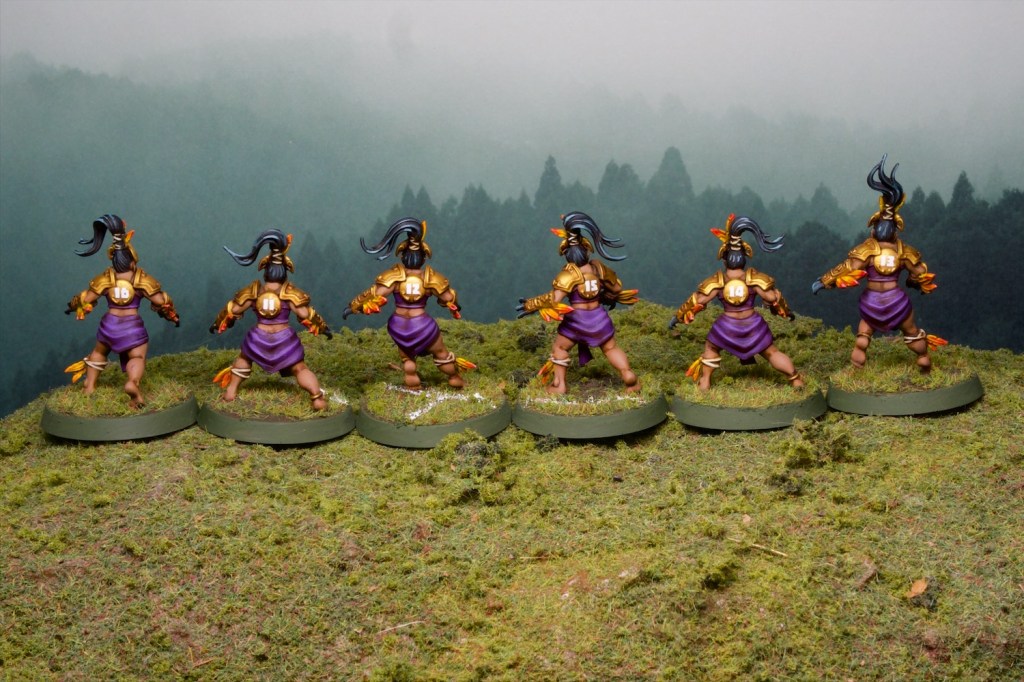
I’ve taken a slight detour through the screaming crowds of Blood Bowl fans over the last couple of weeks, as my gaming group decided to get ready for some games of Blood Bowl after the release of the latest edition of the rules. I’ve always enjoyed Blood Bowl, so I did not take much convincing and found myself assembling a freshly unsealed box of Amazons soon after.
I’d sort of kept an eye on Blood Bowl models over the last few years, and was always pretty impressed with the sculpts. Now I’ve put a modern team together and painted it I can say they stand up to that initial impression. They’re great models, with a nice amount of detail (but not so much they’re tedious to paint, which is a great balance).
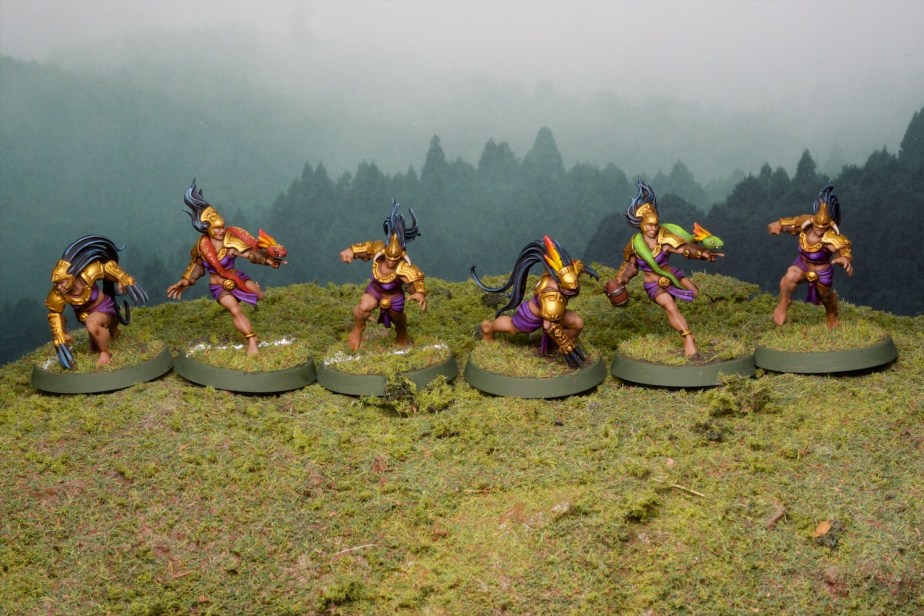
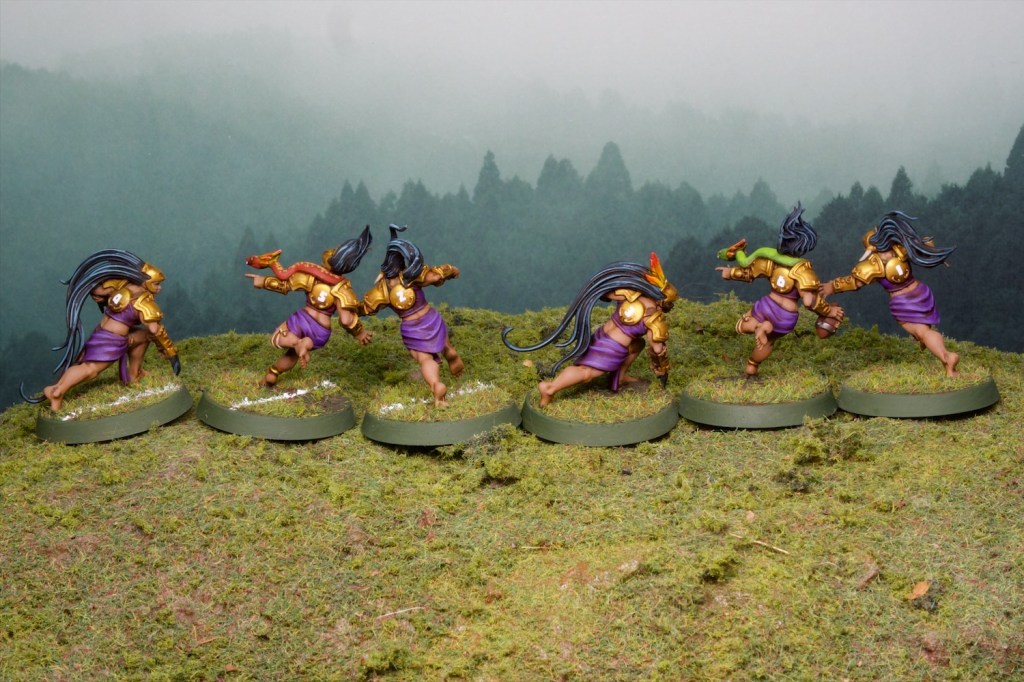
The specialist players.The specialist players from the back.
I went for a gold and purple colour scheme for no other reason than I found it pleasing to the eye. The yellow and red feathers were inspired by the artwork for the Magic: The Gathering set Ixalan which has these really cool yellow/red/purple feathered dinosaurs all through it.
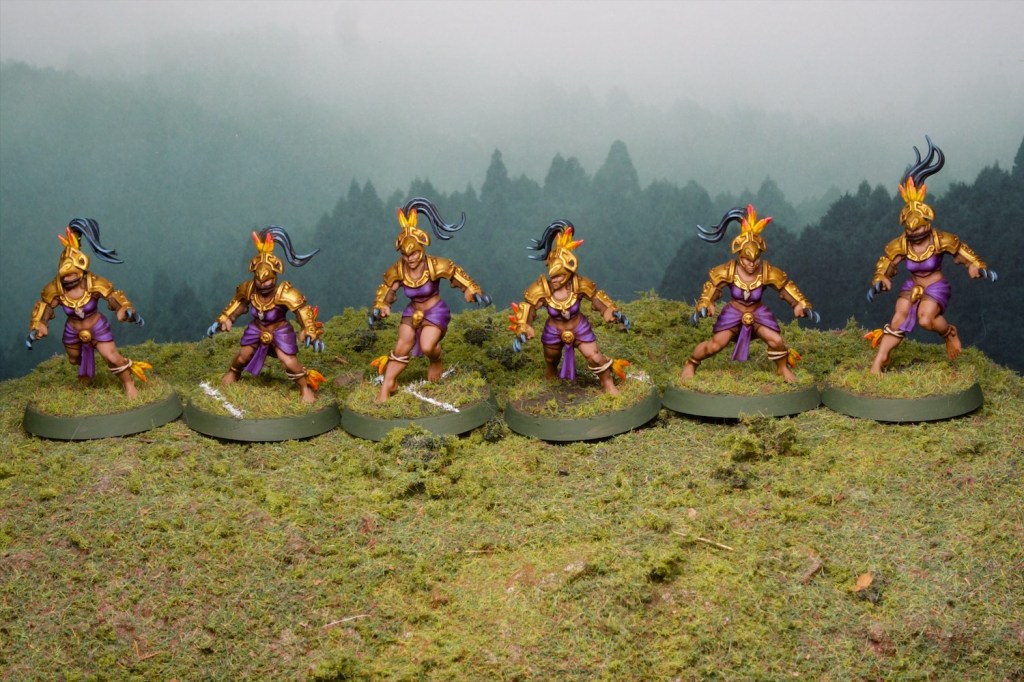
The lineswomen.The lineswomen from the back.
The numbers are from the transfer sheet that came with the set. They also had transfers for the base rims to indicate the player positions (e.g. blitzer etc.) which I’m sure is practical but I didn’t really like the look of that so I avoided them.
I look forward to playing some games with them, it’s been ages since I’ve played tabletop Blood Bowl (I’ve played a bit of the video games in the intervening years). Amazons were very fun to play back in the day and I hope that still holds.
I wanted to show a photo of my setup for batch painting after a discussion with Jeff over at https://kuribospainting.com on holders for miniatures in the last post‘s comments.
As you can see I tack on the models to some bits of branch I’ve cut up into ~4cm cylinders. I find these quite comfortable to hold and they have a nice bit of weight to them (they’re eucalyptus, so quite dense) which means the models don’t topple over. I prime the models like this and don’t take them off till I go paint the base rims. Having one per model is quite practical. You can also see some of the markers and the balls which I didn’t paint yet, I’ll get to them at a later date!
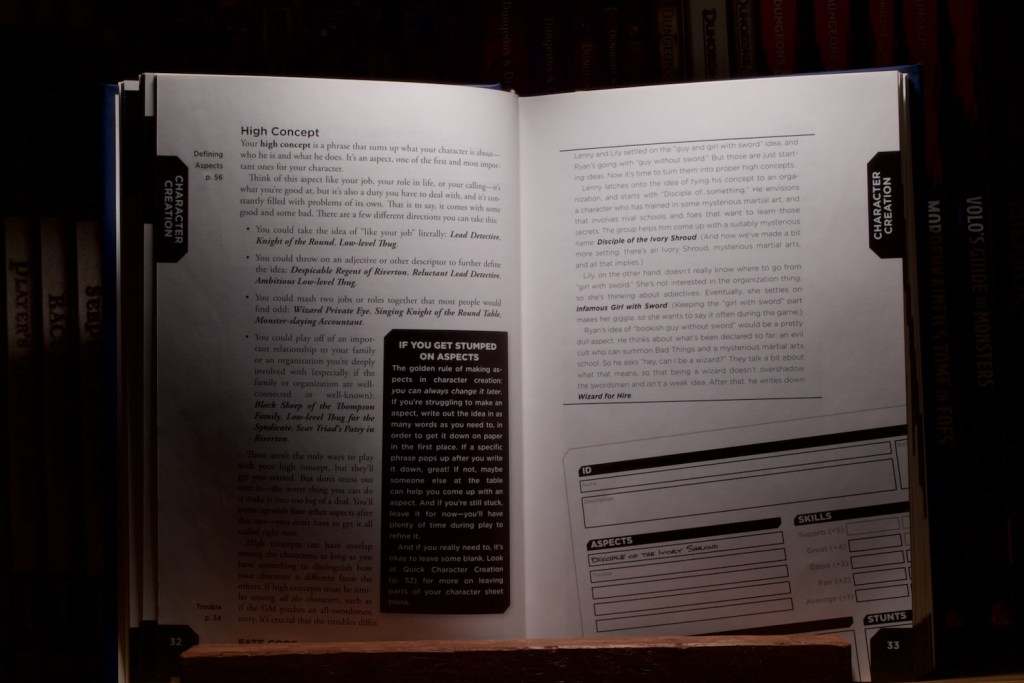
For the second instalment of From the shelves I have Fate Core from 2013.
Fate is a really interesting system that has clearly influenced a lot of later roleplaying games. I’ve played a decent amount of it over the years (although mostly an earlier version, which was part of the Dresden Files roleplaying game). As I mentioned earlier this book is from 2013 and represented a refreshed version of Fate. I’d actually never read it, so it’s been sitting on my shelves unread for 10 or so years. One good outcome of this series is that I’ve finally read through it.
The core concept of Fate is the Aspect system. The way that works is characters, antagonists, locations, basically anything in the game works have aspects, which are short descriptive sentences. These sentences can be used in the game to change what is happening by spending a resource called fate points. For example a player with a character with the aspect “Avid wargamer” could spend a fate point to get a bonus to a roll to do with statistics (this is called invoking an aspect), the player justifying this because their character is very familiar with probabilities. This works for locations too, if a location is “dimly lit”, the player could spend a fate point to get a bonus to hiding. The games master can also use these aspects to make the player’s life difficult (called a compel), for example by making the “Avid wargamer” fail to resist going into a games store when they’re meant to be meeting a friend somewhere else. When the GM does this, they offer the player a fate point which they can spend later for a positive bonus. This whole aspect system is very cool and makes the game really character driven.
There are quite a few other systems to the game but I’m focusing on aspects because I think they’re an interesting mechanic that I’d like to leverage in wargames. It would be quite easy to give aspects to units on the battlefield (e.g. “Bodyguard to the King”, “Want to prove themselves”, “Fled in the last battle”) and give players a pool of fate points they can use to invoke the aspects of their own troops for bonuses, or compel their opponent’s troops to do something negative, but passing a fate point to the opposition in so doing. I think it would be great fun for more narrative games.
From a book writing perspective, I think this is a really well laid out book, with an abundance of clarifications for the reader. The pages above are a good representation of the style of the book, with a rules section (left page), a play example (right page, italics), and where appropriate an example of what the rule looks like on the character sheet. You also have these dark tabs on the edges of the pages that make it really easy to find sections by quickly flicking through the book.
Overall I’m impressed with the book, and really like what the game is doing. In practice my group has struggled with Fate, the system as a whole just doesn’t quite work for us and that’s why we stopped playing it. However it is packed with great ideas and I’ve re-used plenty of them throughout the years and plan on doing so plenty more in the future. Fate has also clearly had an impact on many later roleplaying games, and I find Fate mechanics or ideas all the time when reading/playing other roleplaying games.
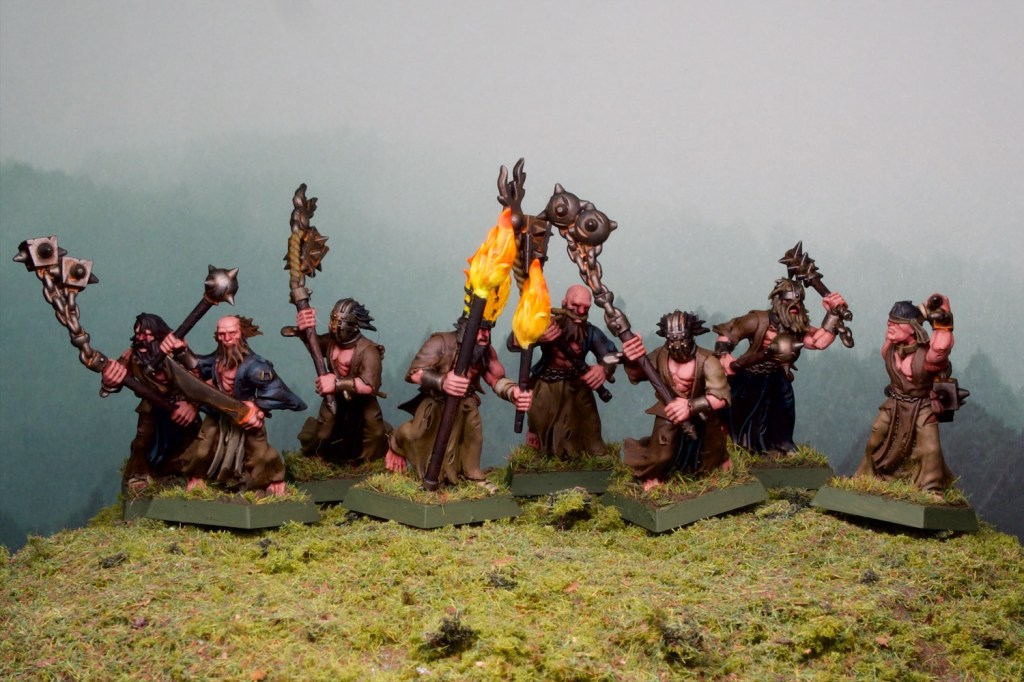
As I mentioned last post, I hadn’t done too much painting over the Christmas break, but I decided this week to break that negative streak and get back into it! The best way to do that was to pick an easy project and that meant finishing this next batch of Flagellants.
These will fight alongside the last batch, most likely in games of Midgard – hence the two sets of 8 models which make up a base each.
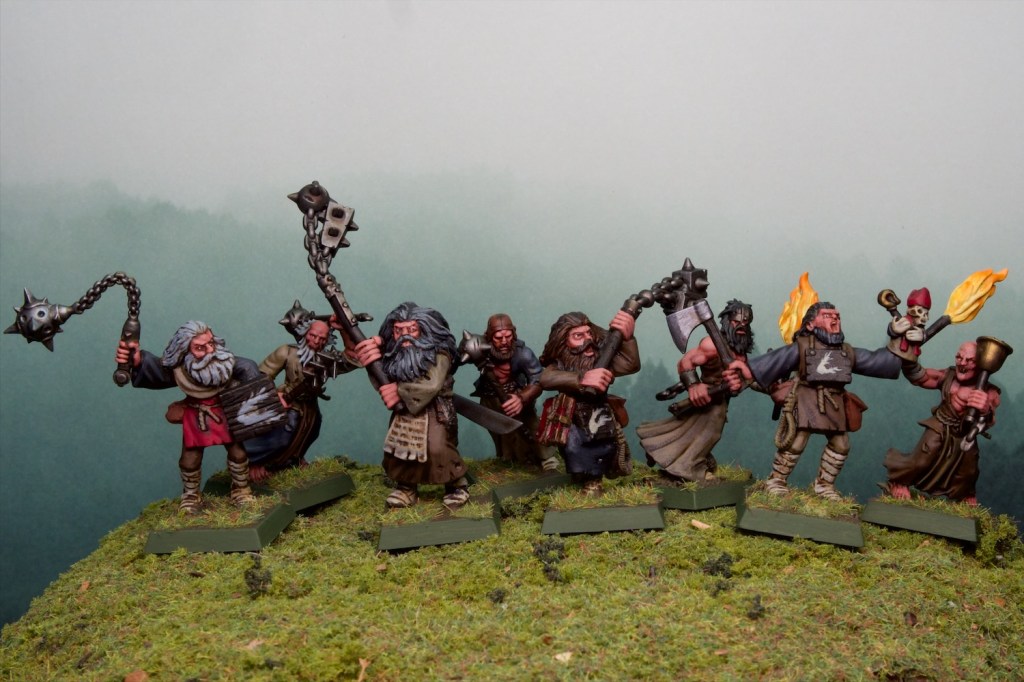
There’s not too much to discuss painting-wise, these are your bog standard doom saying, apocalypse preaching, world is ending types, in their usual accoutrements: brown and black rags! I tried to break up the mass of rags with some different shades of brown (I think I have 3 all up), as well as the aforementioned black sections. The fire was fun to paint, with some wet blended yellows and oranges over an off-white base coat.
If you remember my last post, I discussed creating a space in my posts to talk through books from my gaming bookshelf, partly to remind myself of old favourites, but mostly to motivate me to crack open those that have sat unread for many years. I’m a little bit undecided if these should be standalone posts or be part of “regular” posts (as I’ve done here; open to opinions if you have any!). Anyway, here’s my first shot at a segment I decided to call From the Shelves.
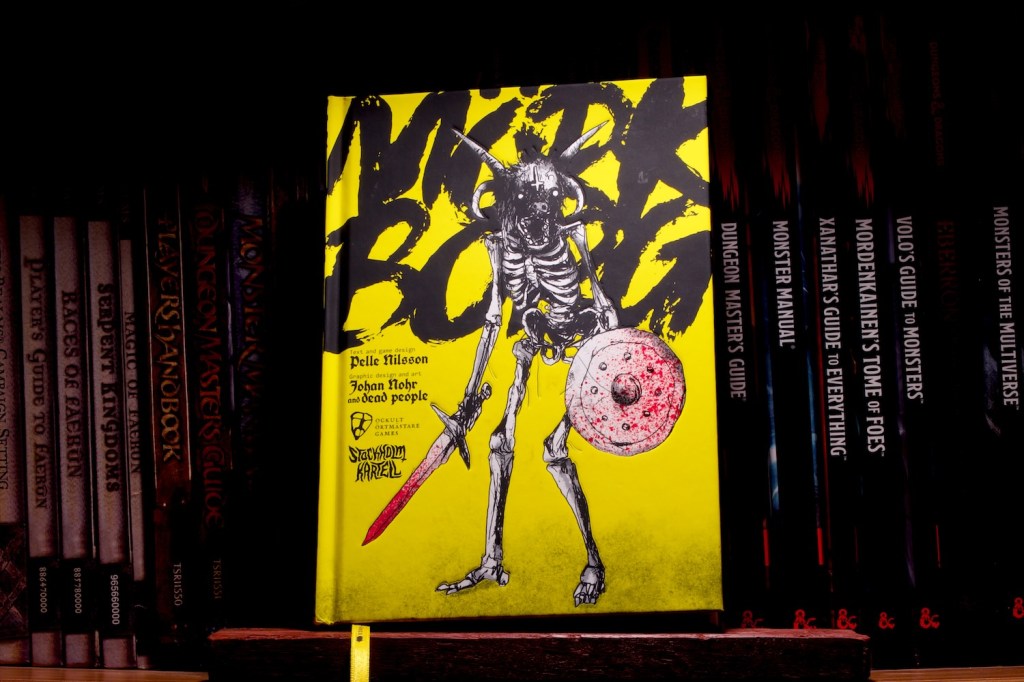
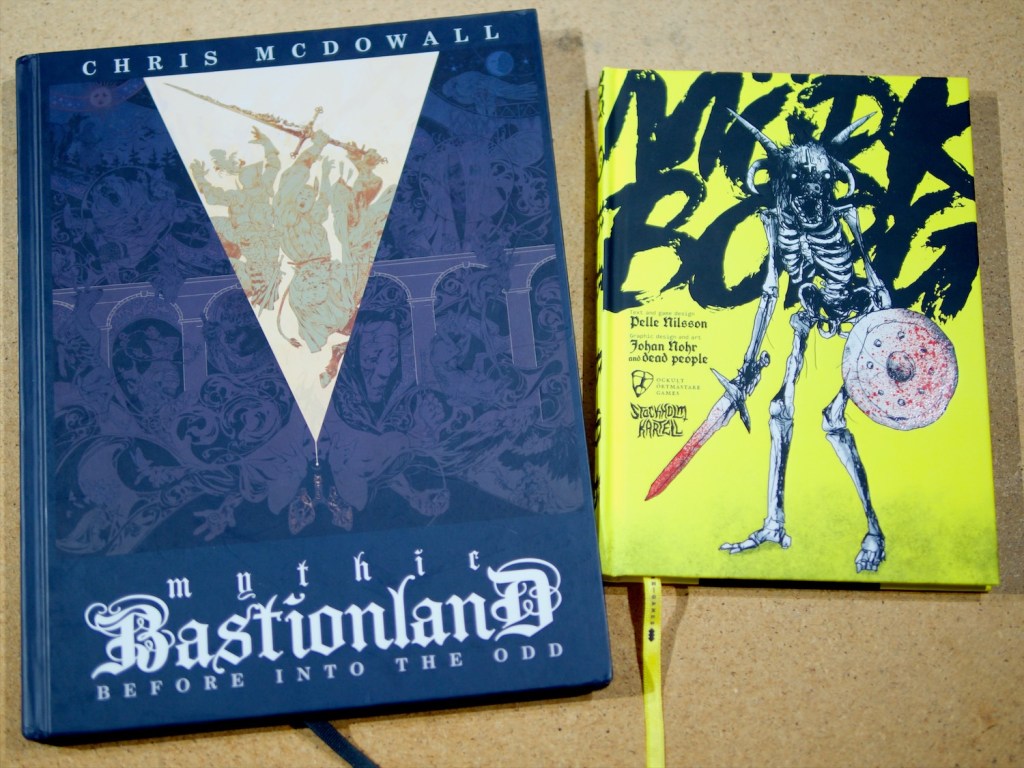
For the inaugural From the Shelves segment, I decided to pick out a book that has some nice thematic parallels to the flagellants above: Mörk Borg. Mörk Borg is a rules-light roleplaying game that sort of blurs the line between art project and game, with some pretty wild graphic design that looks like nothing else I’ve ever read.
I’ve had my eye on this book for quite a while (it was originally released in 2020), but I only picked it up in December last year, as my gaming group started talking about running short games instead of long campaigns as our default way to play RPGs. The book is pretty short (80 something pages, most of which are pretty light on text) and the rules are very simple (~8 pages of the book are the actual rules of the game). There’s a few pages on the setting (the world is about to end, and things are generally pretty grim; maybe the flagellants are right!), then character creation rules which are mostly dice driven (i.e. result in pretty random characters), this is followed by the main game rules, some optional classes, a bestiary, and an introductory adventure. All in all a pretty complete game given the small format.
The game itself is a simplified fantasy adventure system, in the OSR genre (i.e. tries to capture some of the nature of early RPGs), but has its own voice rather than being a classic Dungeons and Dragons reproduction. While the universe at first glance is extremely grim, there is a tongue in cheek feel to the whole book which reminds me of early Warhammer fantasy/40k publications. This in some ways is so over the top it’s impossible to take it too seriously and I’m sure this ridiculousness will lead to some great moments at the gaming table.
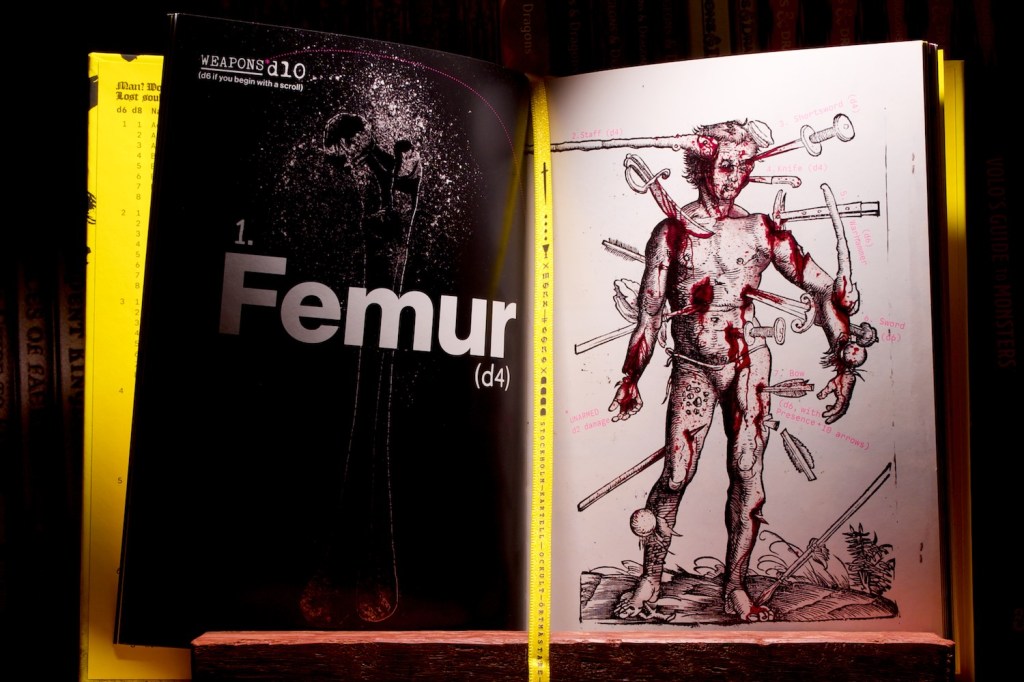
One of the more unusual weapons tables I’ve seen!
The crazy graphic design is pretty interesting, on the one hand it does a great job of communicating the feel of the game, but possibly more importantly it does a good job of making different sections easy to find. I read an article on this book that discussed that as each page looks different, you end up using the art/text as a landmark when flicking through the book, and I very much agree with that. The book also has the index on the rear inside cover which is a genius move that makes it very easy to consult at a moment’s notice.
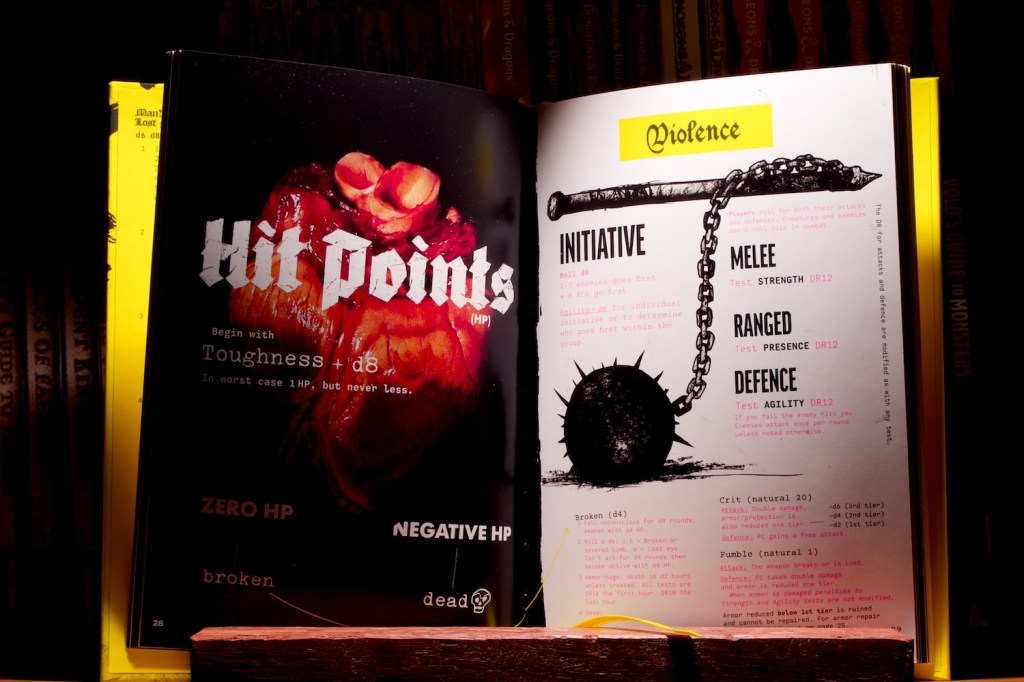
Looking for rules on hit points? Just find the page with the big heart!
Overall the book is a fun read and I really look forward to running games of it. It has a great amount of support out there from 3rd party publishers due to its permissive license model, so it’s hard to run out of pre-prepared content. It even has a in-universe 3rd-party miniature skirmish game called Forbidden Psalm which I’ll have to check out some day!
Hopefully you’ve enjoyed this quick look into this book, I’ve definitely enjoyed reading it and now I’m going to go try to convince my friends to play the game.
Over the Christmas break I reconnected with one of my favourite pastimes: reading roleplaying game books (hence me posting something painting-related just once over two weeks of mostly free time!). I have a regular gaming group with which I play roleplaying games (and the occasional wargame!), and we play quite a few different games, but my gaming bookshelf is filled with games I’ve never played (and in some cases never read). I’d like to turn that around to some extent, and use the blog to motivate me to read through these books and write up my thoughts around them (More on that later!).
What I immediately got out of my readings however is a furthering of my appreciation of narrative gaming (as opposed to competitive gaming), and/or rules light games. I’m saying and/or because I see quite a bit of overlap between the two. While narrative games aren’t always rules light, both narrative games and rules light games expect players to come up with rules for their games, which is very different to competitive games where rules are expected to be provided.
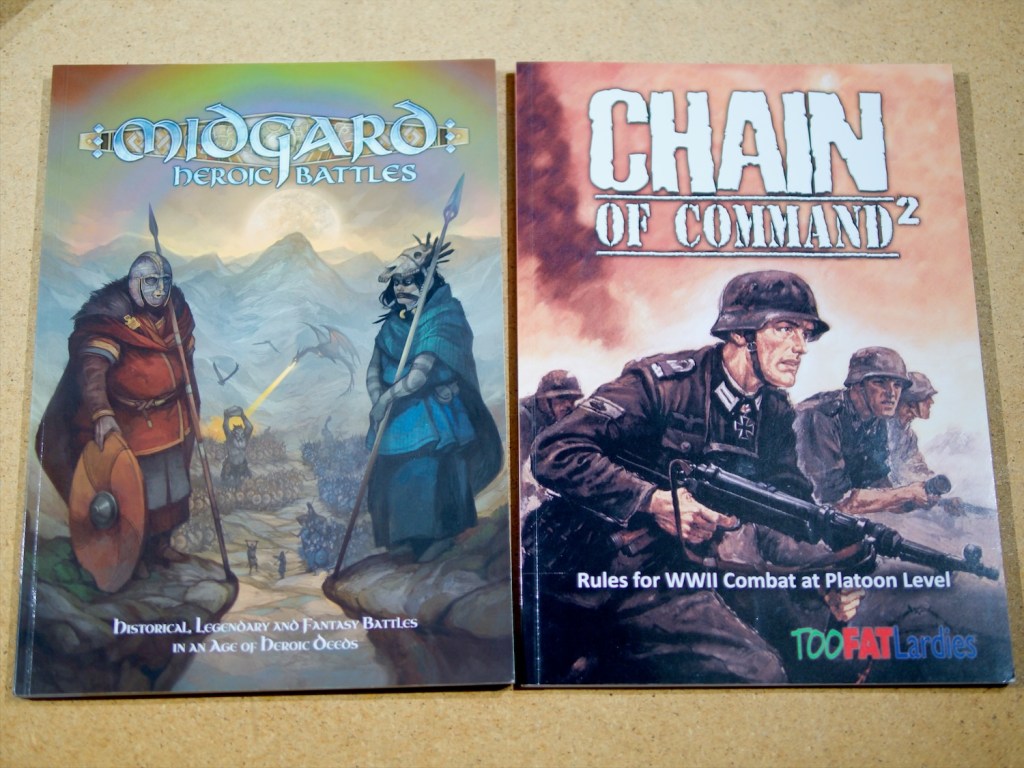
This personal shift is something that’s been happening quite a bit over the last year, you’ve seen me take to Midgard over Warhammer and other historical and fantastical rulesets, Chain of Command over Bolt Action, explore narrative solo gaming with The Silver Bayonet and dip my toes into rules writing with my own rules-light skirmish game Masse d’Armes. This was a very wargames focussed transition, but this Christmas reading got me effectively in the same place for roleplaying games.
Neither is rules-light as such, but they are lighter rules than many other similar wargames, and both have a definite narrative bent.
I’m enjoying lighter rules in games for a few reasons. First of all, my time is more limited now than when I was younger, therefore my ability to a) play games, and b) read a massive rulebook front to back is much more limited than it used to be. I also more importantly have had a bit of an attitude shift to gaming itself, moving from a mindset of doing well in a game, playing to win etc. to enjoying the stories that emerge from these games. Looking back on 20+ years of wargaming, I don’t remember many of my victories (maybe not many to remember hah!), but I do remember plenty of fun moments in games where a lone soldier took down some chaos monstrosity, or when a unit of puny Skaven clan rats routed a mighty dragon.
The Silver Bayonet’s light rules had a lot of influence on my own attempt at writing rules.
More competitive play-styles tend to rely on tight rulesets, which cater to (or try to) all situations that can arise in games – and therefore lead to big rulebooks. This style of game aims for game balance and fairness. In wargames of this style this means that players can assemble their armies and expect a game where in theory the best general can walk away with the victory. In roleplaying games, while not competitive as such, this tendency to aim for game balance as well as fairness is also present, with games trying to make sure all players are roughly the same power level and therefore able to have the same amount of fun. Games in this vein tend to have rules covering all kinds of situations so that the game master needs to make as few rulings as possible during games – keeping things fair.
This competitive play style is very common in wargames because it means you can build your army to a common ruleset and play games against anyone else that has also followed those rules. It allows tournaments to be played, but also allows for random pickup games at clubs. This shared rules phenomena is also present in roleplaying games, with games organised at stores and conventions following rules familiar to players that may not know each other before the game. This is the style of games I played for most of my gaming life, whether it be Warhammer or Dungeons and Dragons. If a query came up, I expected to be able to pick up a rulebook and find out how to resolve it (or failing that go look at FAQs online).
Mythic Bastionland’s main rules fit on a handful of pages, so do Mörk Borg’s.
Rules-light games on the other hand expect that situations will arise that will not be covered by the rules and therefore need some adjudicating during play. This is not a bug, it’s a feature. There is a movement in the roleplaying space called the OSR (Old School Renaissance/Revolution) which calls back to some glorious past vision of roleplaying in the 80s and 90s. I’m not sure things were that rosy, but I have to say the ethos that’s come out of that movement definitely resonates with me. One of the mantras I hear in this space is “Rulings not rules” which touches on that exact point: the rules provide a framework, the players (the game master mostly) are expected to fill in the gaps as they arise.
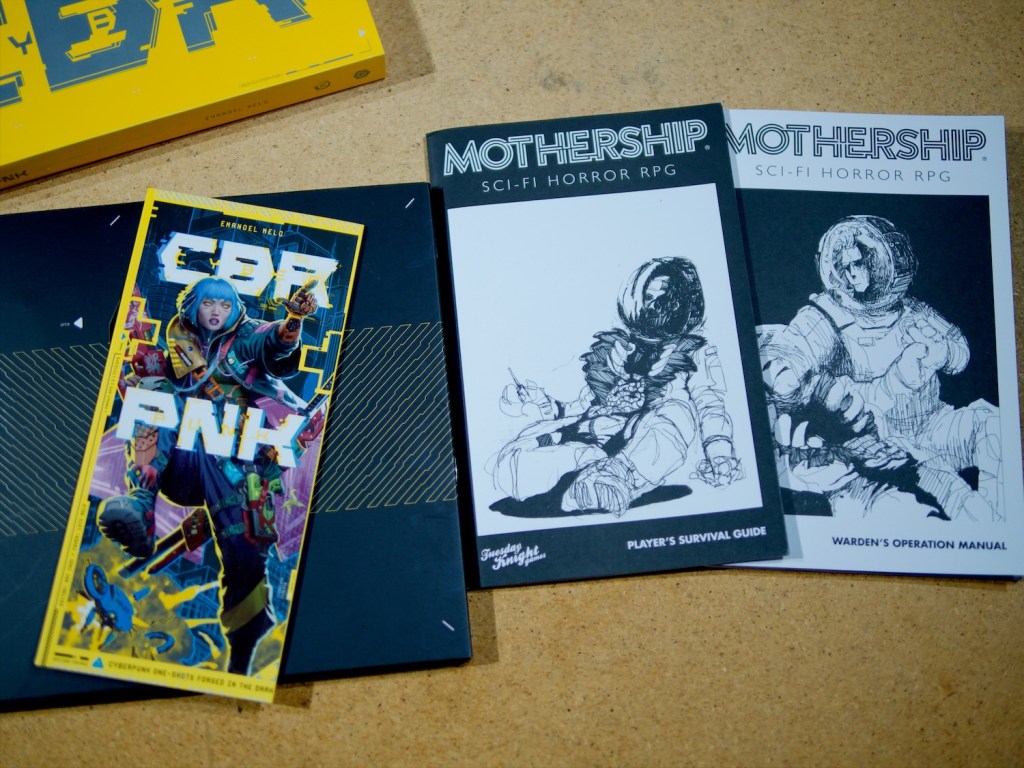
CBR+PNK’s rules are literally a pamphlet, and Mothership fits in a few zine-style booklets.
This sounds like more work, but in practice I really like it – I would much rather make a call on rules in the moment than try to find the relevant rule in a book. It’s probably not any faster, but it creates a shift in focus: instead of thinking about how to play the rules, you start thinking about how to play the situation in the game. For example, say a unit retreats into a dangerous magical swamp. A comprehensive set of rules might say they take d6 hits and how to resolve them. A more rules-light game might not, and the players will have to decide what this swamp does. Maybe this is a necromantic swamp filled with the dead dragging the living down and therefore some agility or initiative test might be in order to avoid being drowned. Perhaps the players land on the same rules they would have been given by a more comprehensive ruleset, but at least they’ve thought about what is happening in the imagined world.
Clearly I’m enjoying this shift, so what took me so long? Well I was always worried about this game balance and fairness aspect. For me, house rules were never going to be as tested as “proper” rules, and therefore would lead to unfair and consequently unfun games. I’ve now come to the decision that fairness is overrated in these games we play, and we’re much more likely to have a good time if we don’t worry so much about what is fair, and rather focus on what is unfolding in the game. The price of this is that it might be hard for me to find people that want to play games the way I do at a club or store. Luckily for me I have some friends that enjoy this play style, and we’re having a great time. This right there might be the reason you prefer one style of game over another, and that’s just fine – do what works for you!
To get back to that sentence right at the top on how I want to use the blog to motivate me to read through my book pile of shame, I’ve decided to try something along the lines of a series of posts dedicated to books. For these I would pick a book off my bookshelf, read through it and write down my thoughts. Not really as a review, more like reading notes. It would likely be a mix of wargames books and roleplaying books, which given this blog is 99% about wargaming might be a bit of a change but hopefully those of you that aren’t into roleplaying might find the posts interesting if only from your familiarity with rulebooks!
Anyway I hope my digression into games rules was interesting to read, let me know in the comments what you think about all this!
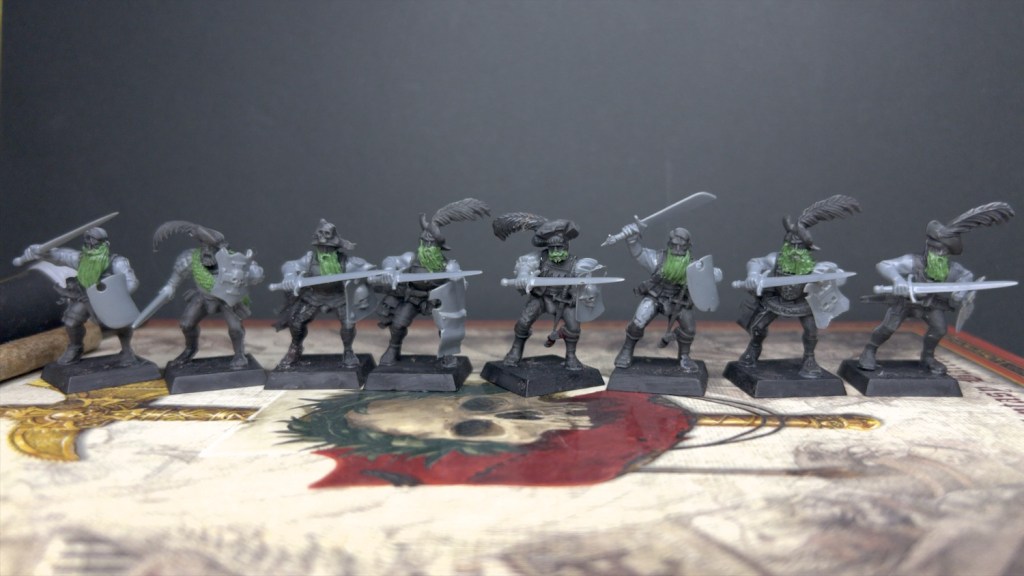
I haven’t painted much over the last few weeks as it’s been a bit of a busy time, with some travelling (more on that later!) but I managed to chip away some more at some Empire models.
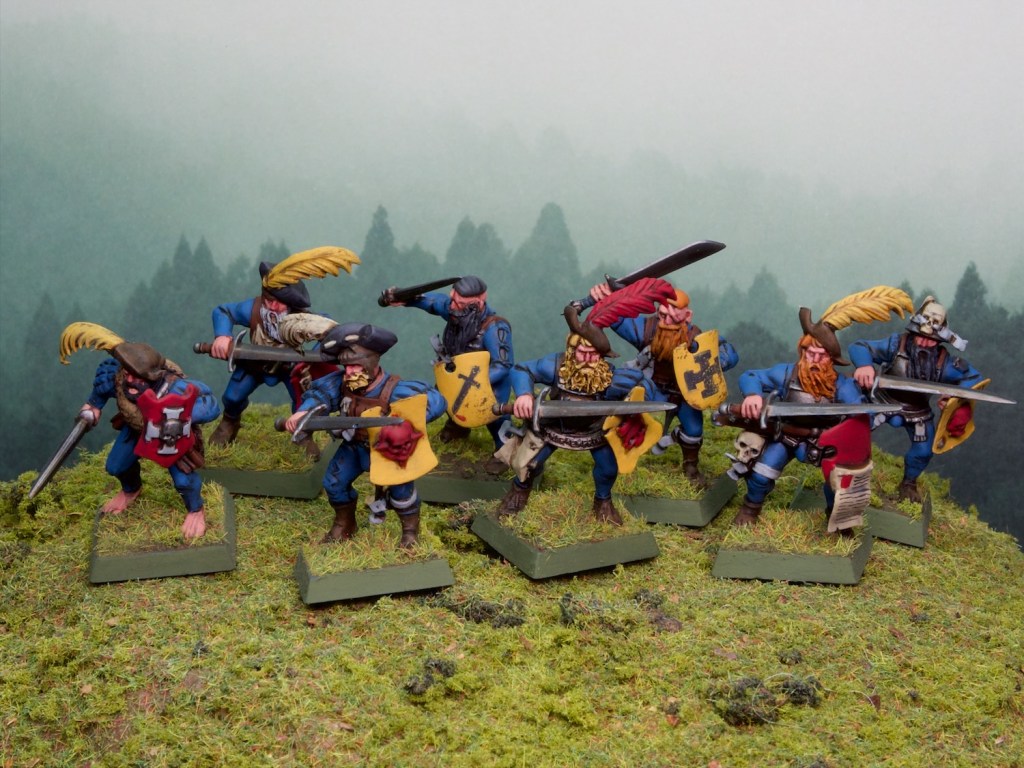
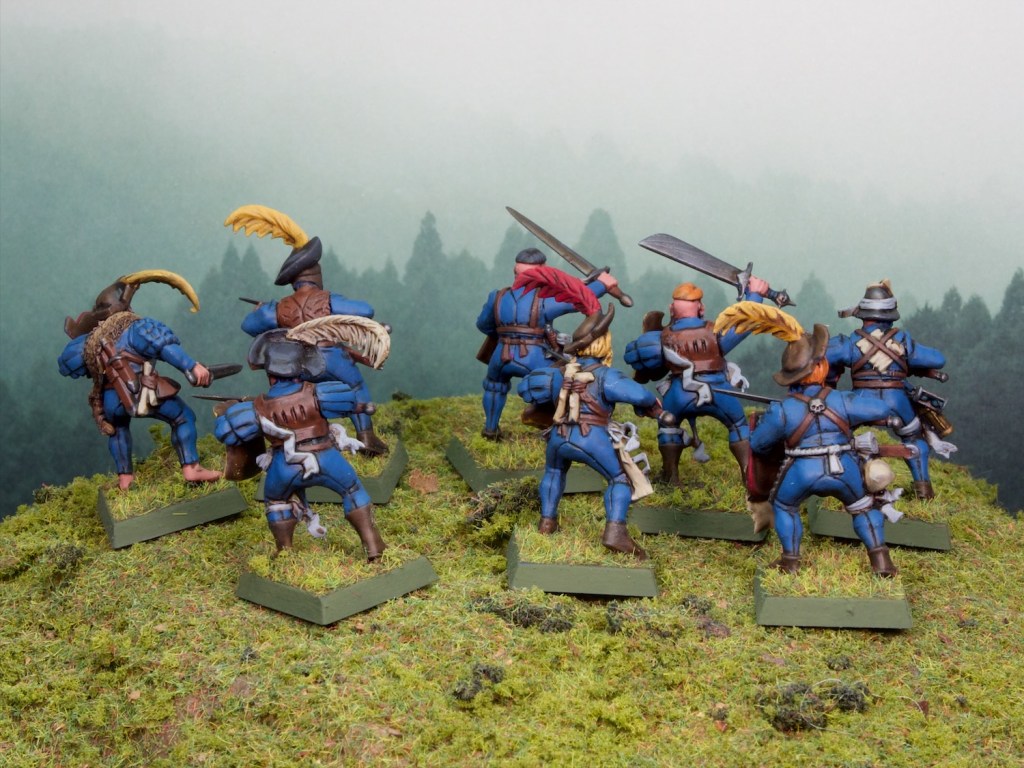
After learning to sculpt beards for last post’s Valten, I tried my hand at it again on these swordsmen. I wanted to represent some state troops from Middenland, one of the northern provinces of the Empire which is presumably filled with gruff bearded men. The Storm of Chaos campaign is mostly set around Middenheim which is the capital of Middenland. These models will then be fighting on their home ground.
The uniform of Middenland is just blue, but the book I have on Empire uniforms suggests multicoloured feathers, and I extended that to the shields. They might be a bit more colourful than the average representation of Middlenlanders but they work for me.
These models are “rescues”, in a previous life they belonged to a friend that had built them as halberdiers, but all of the halberds had broken over the years. I inherited them a little while back and have since then stripped them of paint and rebuilt them as swordsmen from spare arms I had.
I find that I can get most if not all the paint off when stripping plastics, but there is always some residue which adds a bit of texture to the models. As a result I wouldn’t use these as display models but they’re ok for armies!
You can see what I mean in the unpainted photo above, the light grey plastic is the new parts I glued on, while the dark grey/black areas are the stripped models. You can also see my attempts at sculpting!
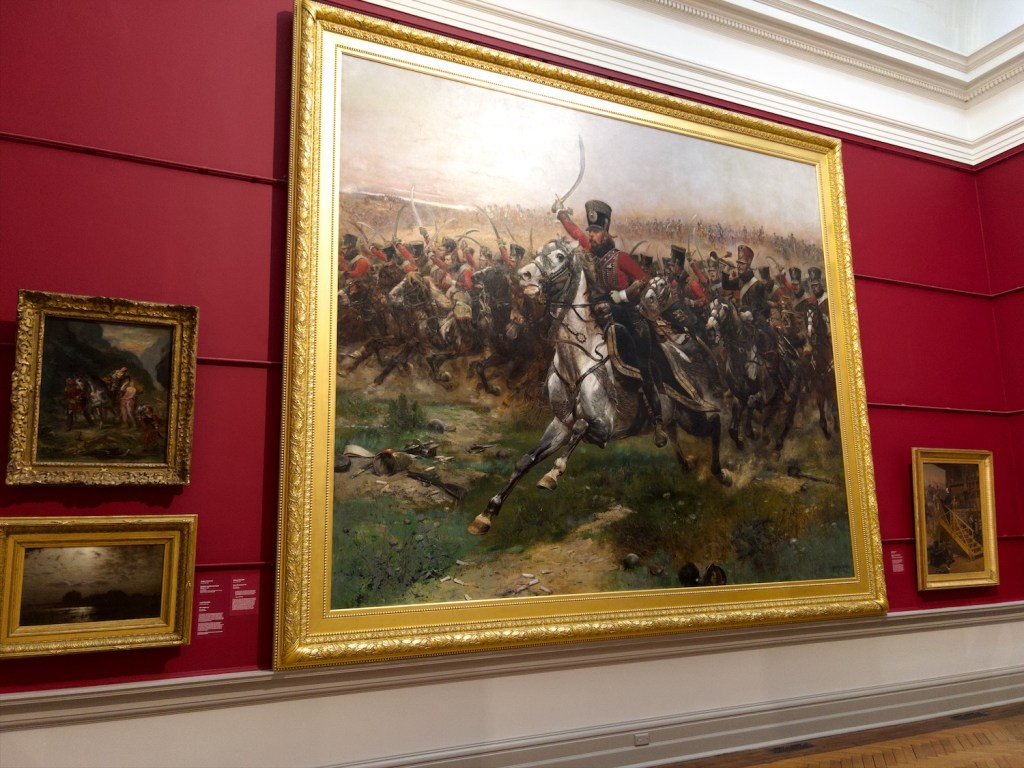
I mentioned travel above, I ducked over to Sydney for a few days to see a concert at the Opera house (a metal band would you believe!). I took the opportunity to visit some museums and the art gallery there and wanted to share this humungous painting of some Napoleonic cavalry by Édouard Detaille.
The painting is something like 4.5x5m and dominates the room. You can get a better view of the painting itself on the gallery’s website (https://www.artgallery.nsw.gov.au/collection/works/4560/), but hopefully my photo gives you a sense of scale! The whole gallery was very inspirational, plenty of ideas to pinch for hobby projects!
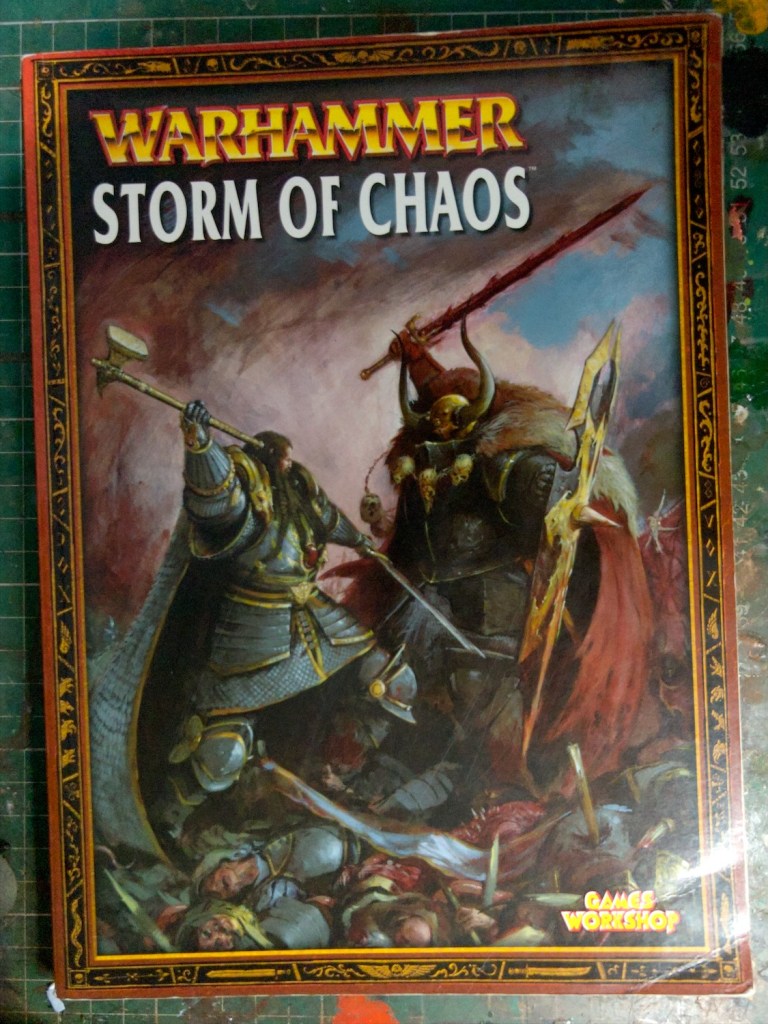
I’ve had a productive week, getting a fair bit built and painted. I’m still inspired by the idea of playing out a big game set in Warhammer’s Storm of Chaos campaign, specifically the battle that occurs as part of the relief of Middenheim by a combined army of Empire, High Elves, and Dwarfs. It sounds like a great excuse to break out our collective collections and play a very large game for most of a day (using the Midgard rules).
For those not in the know, Middenheim is a big city built on a mountain in the Empire, and is the target of a very large Chaos invasion led by Archaon, the biggest baddest Chaos champion. Middenheim is pretty much impregnable because of its natural defenses so the Chaos forces settle down for a long siege. Meanwhile Karl Franz, the emperor (of the empire!) gathers an army to relieve the city, with troops from many provinces of the empire. Along the way he’s joined by a Dwarf army and a High Elf army who both recognise the threat posed by the Chaos invasion. Alongside Karl Franz is Valten, who as a young man single-handedly wiped out a beastman attack on his village and has since been hailed/raised as Sigmar (the chief god of the empire) returned. There’s a whole interesting sub-story a to whether that is the case or not, but regardless the powers that be seem to buy into the story (or at least realise that if the people believe it it doesn’t make much of a difference). As a result, Karl Franz gives Valten the warhammer (the one on the cover of all the books), Ghal Maraz, and when the elves and dwarfs join up with Karl’s army, they also gift equipment to Valten, the dwarfs give him a suit of armour (that was orginally meant for Sigmar himself) and the elves a mighty steed (sired by the horse of Tyrion, the greatest high elf hero).
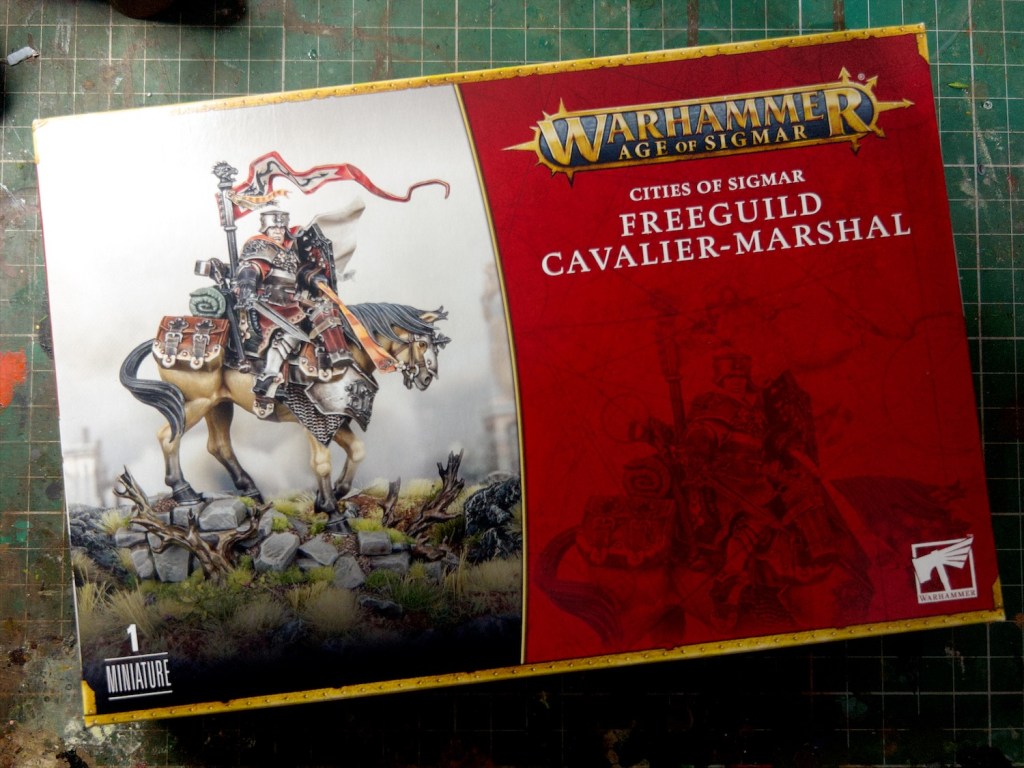
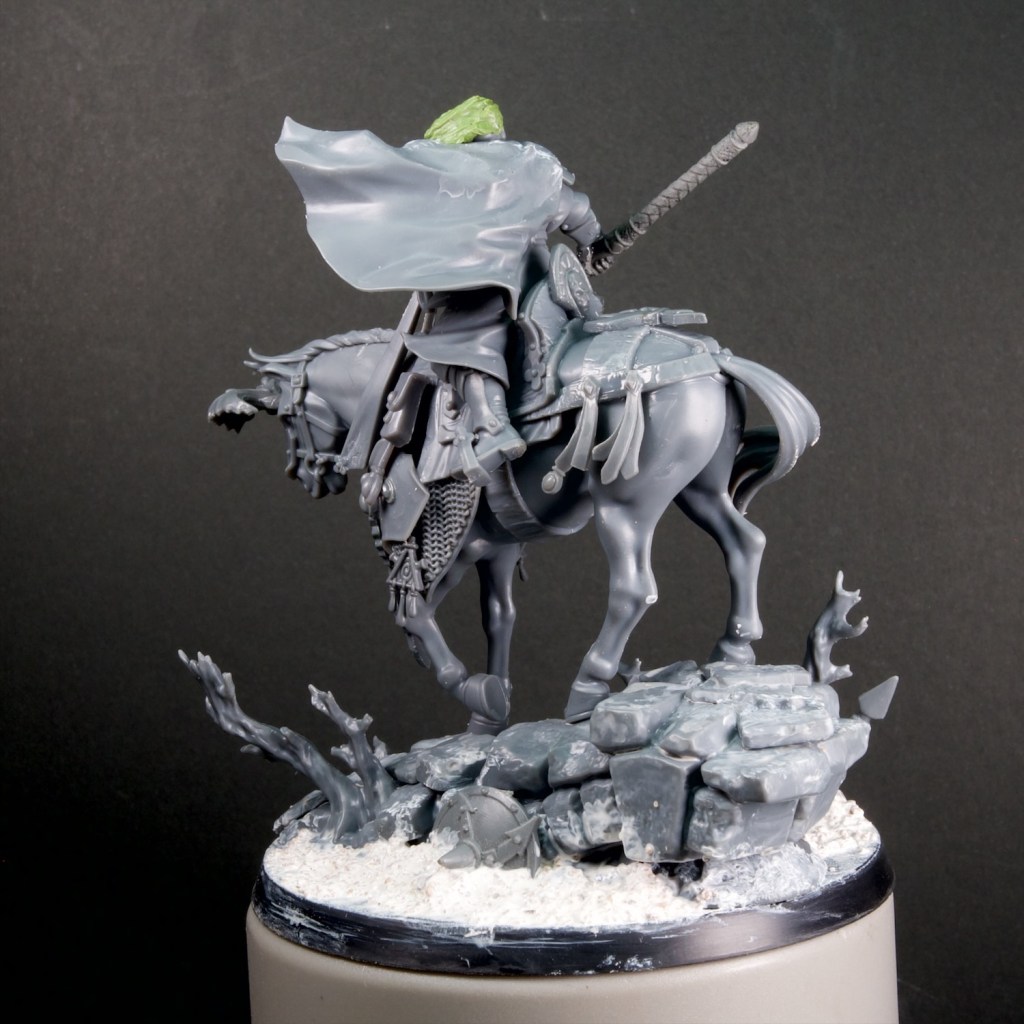
The reason I’m telling you all this is that I built and painted a custom model for Valten, and tried to capture the story in that model. Valten had a model at the time of release of the campaign book (~2004) and I think was re-released as a Finecast model during that later era. I was scouring ebay for the model and despairing slightly at the prices (and postage, UK or US to Australia is veeery expensive these days). After some deliberation I decided to just convert my own out of a model I’ve had my eye on for quite a while: the Cities of Sigmar Cavalier-Marshal.
The character of Valten is a bit of a tragic, maybe reluctant hero in my mind, the cavalier model really has a weary look to it that I think really fits Valten so it seemed like a great base for the model.
I removed as much iconography off the horse as I could and added lots of spare high elf bits I had big around to sell the horse as a gift from the elves. I kept the armour on the rider as is, the cities of sigmar range armours have a very angular look to them which I think is good for a dwarven made suit of armour.
For the head I liked the expression on the Cavalier model, but Valten has long hair and a long beard, while the Cavalier is clean shaven and short haired. So I decided to do something I do rarely, which is to sculpt! It was a bit daunting to build up this centrepiece model and to try my hand at something new right on its face, but I found this very handy tutorial by Valbjorn on YouTube and at least I knew I was going in with a plan. The result is ok I think, a bit rough in some places (not helped by the age of my green stuff) but it does the job!
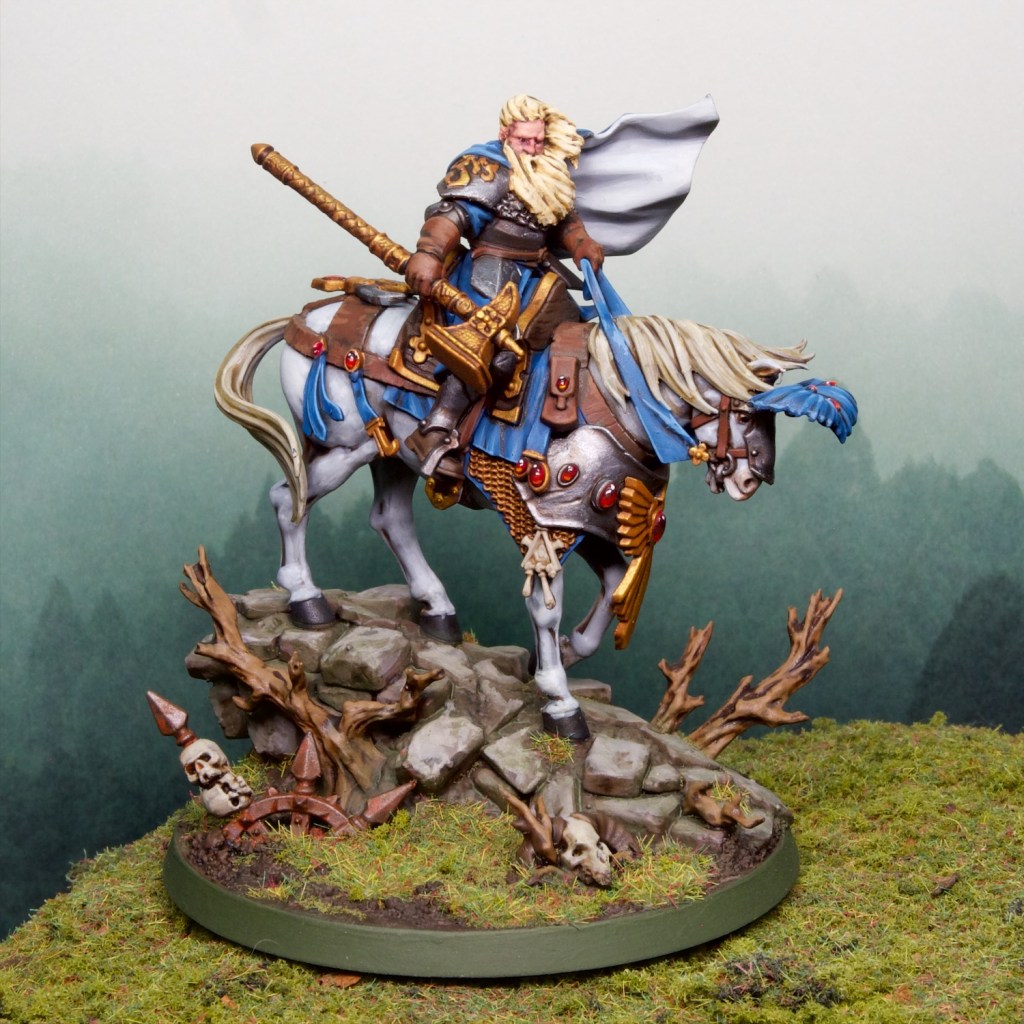
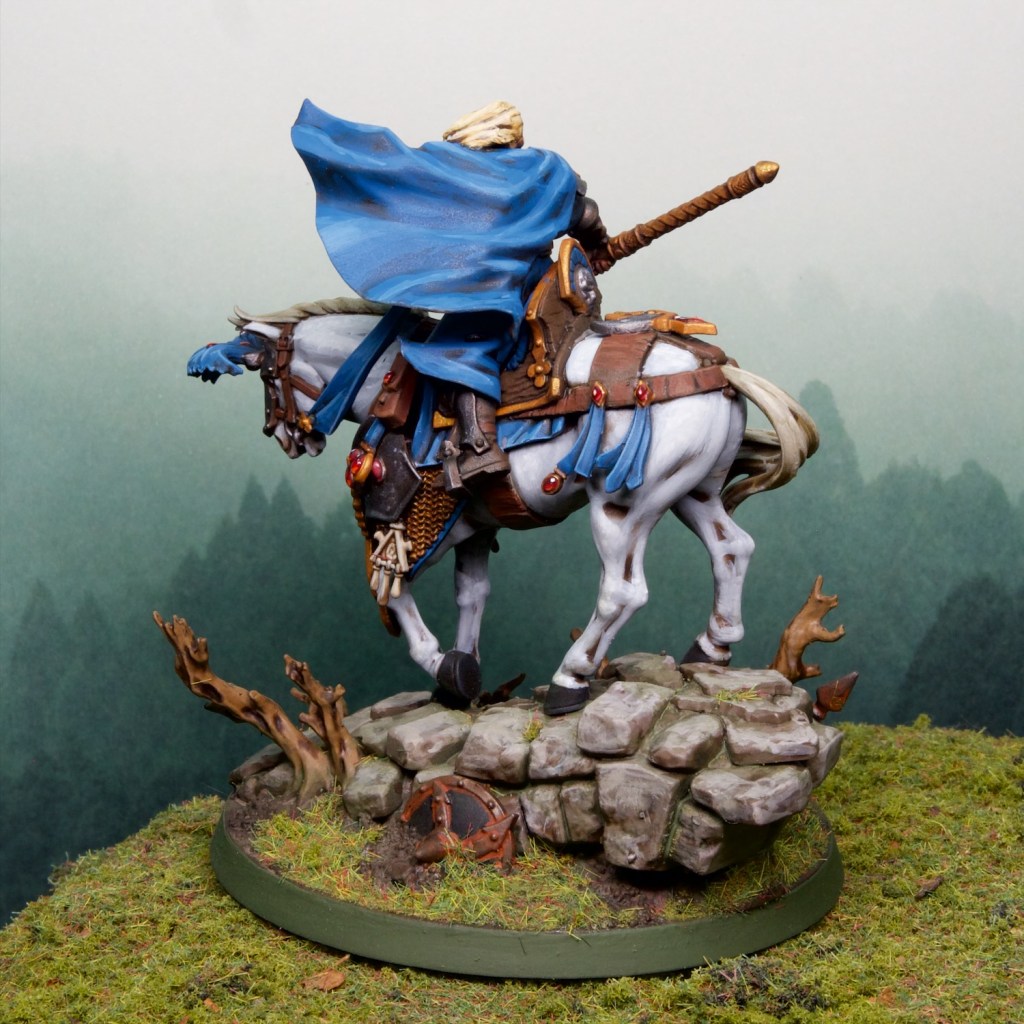
For the painting stage I stuck to blues, whites, and gold as a scheme. This is how the original model was painted and helps with the whole Elven influence on the horse.
The cavalier model comes with a very cool scenic base meant to fit on an oval base. I decided to go for a 60mm round base instead so had to fill out some of the extra space. I cut up some chaos bits and blended everything in using a mix of acrylic paste and sand.
Overall I’m very happy with the model, was fun to get kit bashing and even do a bit of sculpting. It’s been a while since I painted a bigger character model and that’s enjoyable too. Getting to spend some more time on some of the details I would usually keep simpler for regular army models makes for a nice change.
Valten is not all that I finished this week, I also painted up the first batch of some Flagellants for that same empire army.
Four of these are originally Mordheim models, some of the first models I ever bought in fact, as part of the Witch Hunter warband for the game. They’ve seen a lot of mistreatment throughout the years, and all had some breakage over that time, so I fixed them up with some plastic parts. The other four are from the current (still 10+ years old I think), plastic flagellants kit. I have another 8 to paint up of these, for a future update.
There you go, busy week but I’m happy with what I got done!
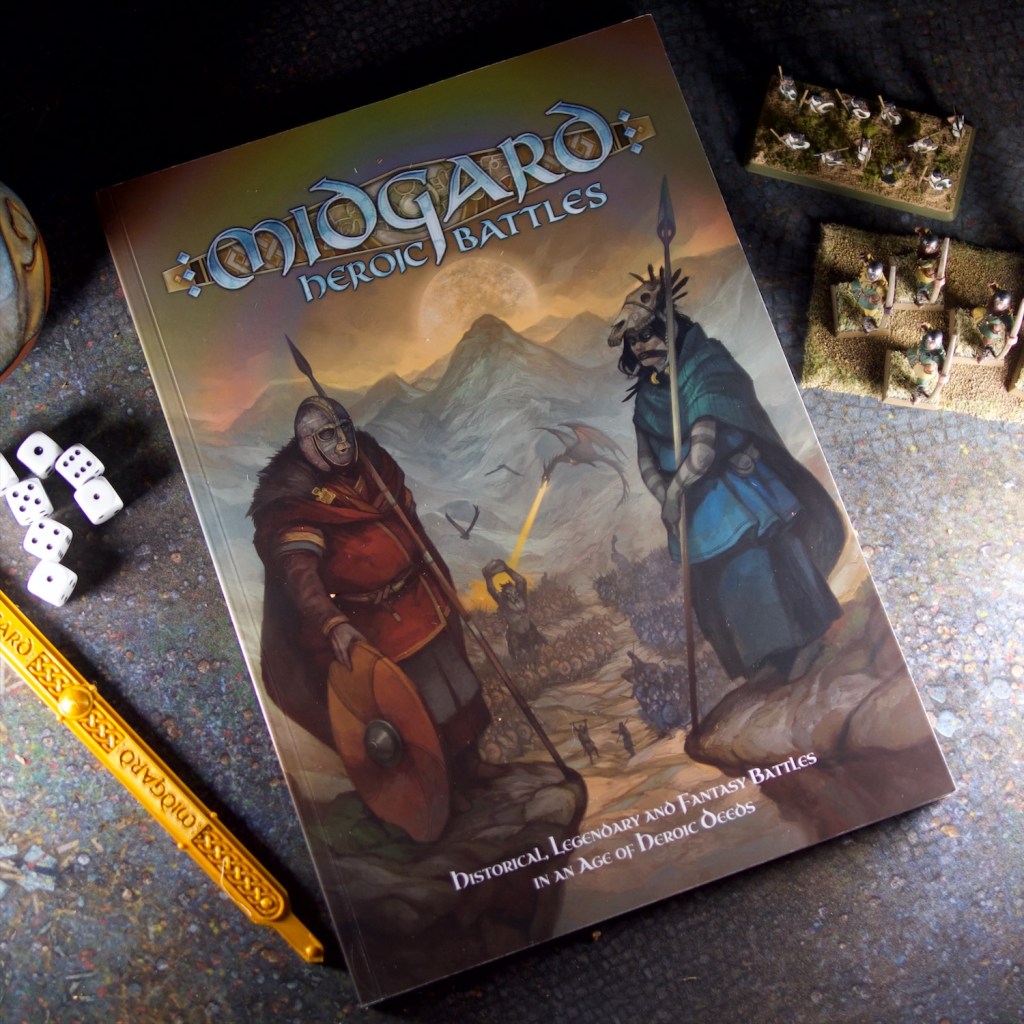
I noticed last post that I was starting to mention aspects of Midgard Heroic Battles that I’d never really explained and felt that a review post for the game might be in order. Clearly if you’ve seen my other posts you’ll know this review will be a positive one, but I think it provides some useful information about the game for players that might be interested in picking it up.
What is Midgard Heroic Battles?
Midgard Heroic Battles (Midgard from now on!) is a set of rules for playing out battles in any setting that can be described as having the following characteristics:
Battles are fought mostly by ranked up regiments of close order fighters wielding spears/swords/axes/etc, supported by cavalry and skirmishers (and sometimes monsters/elephants!)
Shooting is helpful but not the primary way to win a battle.
Most importantly, leaders lead from the front. They are found where the melee is thickest, performing mighty deeds (or dying mighty deaths!) that will be sung of by the bards for aeons to come.
This covers quite the range of historical eras (roughly antiquity all the way to sometime in the Middle Ages when leaders decided to focus on strategy over feats of arms), but also covers a swathe of fantastical settings (Tolkien’s Middle Earth being a prime example).
In addition to this broad applicability setting-wise, Midgard also is a scale agnostic system that handles whatever your collection can throw at it. I achieves this through its adaptive measurement system (the spear throw) and flexible list building.
The spear throw
The spear throw (ST) is the basic unit of measure of the game. Pretty much everything in the game is measured in multiples of STs, for example units are always 1ST wide, cavalry move 2ST per move, short bows can fire arrows 3ST away etc. A ST does not have a fixed length; how long a ST is depends on the scale of the miniatures you use. For 28mm miniatures, the suggested ST is 12cm long (which lets you fit 8-10 miniatures on your 1ST wide base), while for smaller miniatures (say 15mm or less) the suggestion is to use an 8cm ST. This is a purely subjective choice, driven primarily by how you like your units to look on the tabletop. Want wider units? Use a larger ST.
By using this abstract measure, the rules do something quite clever, which is to provide ranges for all kinds of things in the game while never committing to a fixed measure. No need to do some on the fly measurement conversions (“this bow shoots 20 inches at 28mm, we’re playing at 15mm so it should shoot 10.71 inches!”), just get/make a measuring stick of your chosen ST and you can measure everything you need for the scale you’re playing at.
Left is an 8cm spear throw base and measuring stick, right is a 12cm spear throw base and measuring stick. These very stylish measuring sticks are STLs that can be purchased from the TooFatLardies site.
Here is the first hint of what the game is trying (and therefore not trying) for: this is a game that is not aiming to be particularly suitable for random pickup games at a club or say for playing tournaments. It is important that both sides in a game use the same ST length. Unlike in a Warhammer-style ruleset which mandates all aspects of the game and therefore provides a common standard for all gamers to align to, Midgard requires pre-agreement on the ST the game will be played at. Considering the ST affects the bases of all the units on both sides, that is not an inconsiderable hobby hurdle to overcome if one gamer has based their army on 8cm bases and the other on 12cm.
The List-building
Midgard provides a set of generic profiles (such as Heavy Infantry, Skirmishers, Light Cavalry, etc.) which can be modified by changing their equipment (e.g. adding or removing armour), and the addition of traits which modify the behaviour of the units (e.g. impetuous can force the unit to charge).
Much like STs this list building is a cooperative activity and not done in a vacuum. The maximum armour for most units is 4, which might represent a mail and a shield for a dark ages game, or full plate armour in a later medieval game. What’s important here is that relative to each other, both sides in a game are consistent. This again indicates tournament play is not the point of Midgard, it would be hard to coordinate a room full of players to achieve this.
What you get as a result is an extremely flexible list building system that is capable of representing all kinds of troops, whether historical or fantastical. I’ve been able to create fun and evocative profiles for my Middle-Earth miniatures, my Warhammer miniatures, and my emerging Punic Wars collection so far.
The author provides a number of lists in the back of the rulebook, as well as many more on his website https://mogsymakes.net/resources-for-midgard-heroic-battles/ alongside some great list builders that make putting armies together a breeze.
As a result of the above, Midgard feels more like a framework for creating games than a simple self-contained game. While it is possible to just get the models required to field some of the armies in the back of the book and play a game as is, the real power of the game in my opinion is to provide an easy way to get your collection on the table and playing fun games with it.
Midgard Gameplay
“This flexibility is nice, but once I have chosen my ST and made my army lists, what’s the actual game like?”
If you have War of the Ring trays around, they are perfect for Midgard.
The answer is Midgard is a very fun rank and flank ruleset, that is fast to play, easy to pick up, but hard to master. In its pages you’ll find rules for the usual array of restricted ranked unit movement rules (a staple of the genre), shooting and combat. All of these are quite streamlined compared to what I’m used to from Warhammer and other such systems. Generally all combat/shooting die rolls require you to get a 5 or above (no complex comparison tables here), and modifiers halve the size of your dice pool rather than modify the target number. This makes for some rather quick combat resolution, and keeps the game going.
The only other die roll to remember is the command die roll, which is used for situations where a unit may not do what it is told (e.g. holding still instead of pursuing a fleeing unit), similar to leadership tests in Warhammer. Just as combat rolls, this is a set number and never changes (again speeding things up!).
Heroes matter greatly in the game, leading your troops and assisting them by using a resource called mighty deeds. Heroes get these according to their level and can spend said deeds on making units re-roll failed command tests, get extra attacks, cast spells, and most shamefully to keep themselves safe.
Framing all these rules is the reputation system. This pool of tokens represents the morale of the army, and grows with the acts of bravery of heroes and shrinks when losing units or when heroes bring dishonour upon themselves. If your reputation is at or below zero at the end of the turn, your army breaks and you lose the game.
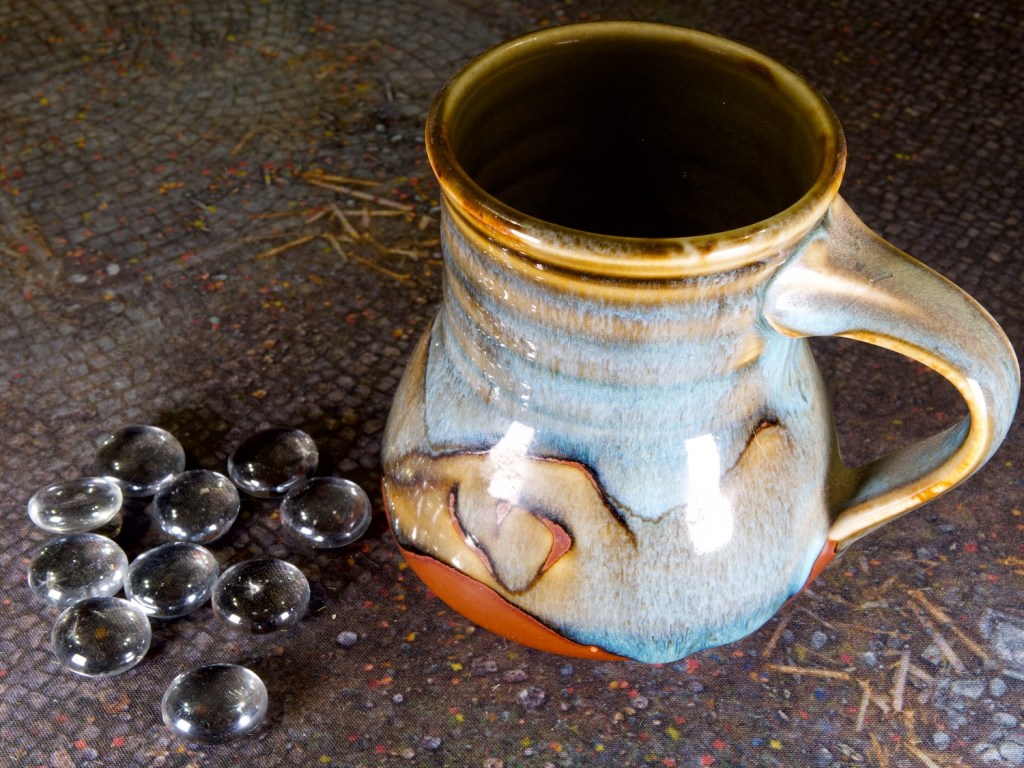
The main advantage of the reputation system is that it lets you use your coolest cups for their true purpose: gaming.
This resource drives the behaviour of the players in a really fun way: as their reputation drops, players have no choice but to dive in and try to regain the upper hand through desperate actions with their heroes. This is magnified when an army’s reputation drops to zero during a turn, as they have until the end of the turn to get it back above zero, which makes for some extremely fun (and cinematic!) moments where heroes lead wild charges in the forlorn hope of reinvigorating their side.
Who Is Midgard For?
As highlighted above, Midgard is not a tournament game, and is probably not particularly well suited to a pickup game scenario against unknown opponents at a club or other. What Midgard excels at is creating fun narrative games where the two sides and a scenario are created specifically for those games. This is really good for convention games where the game is set up and the players join in, and I’ve found it excellent for games with my game group, where I’ve set up a scenario for two forces and invited my friends over to play it out.
I’m not sure I would have known what to do with Midgard 10 or so years ago, as I was very much in the playing tournaments and pickup games paradigm, with armies specifically created for an edition of a game, ready to play against anyone with an army for the matching system. In some ways that’s an easier way to go as there is no need to coordinate anything for a game (beyond a time and a place), everyone is following the same set of rules and can just show up with their legal army. If that’s how you want to do most of your gaming then Midgard might not be for you.
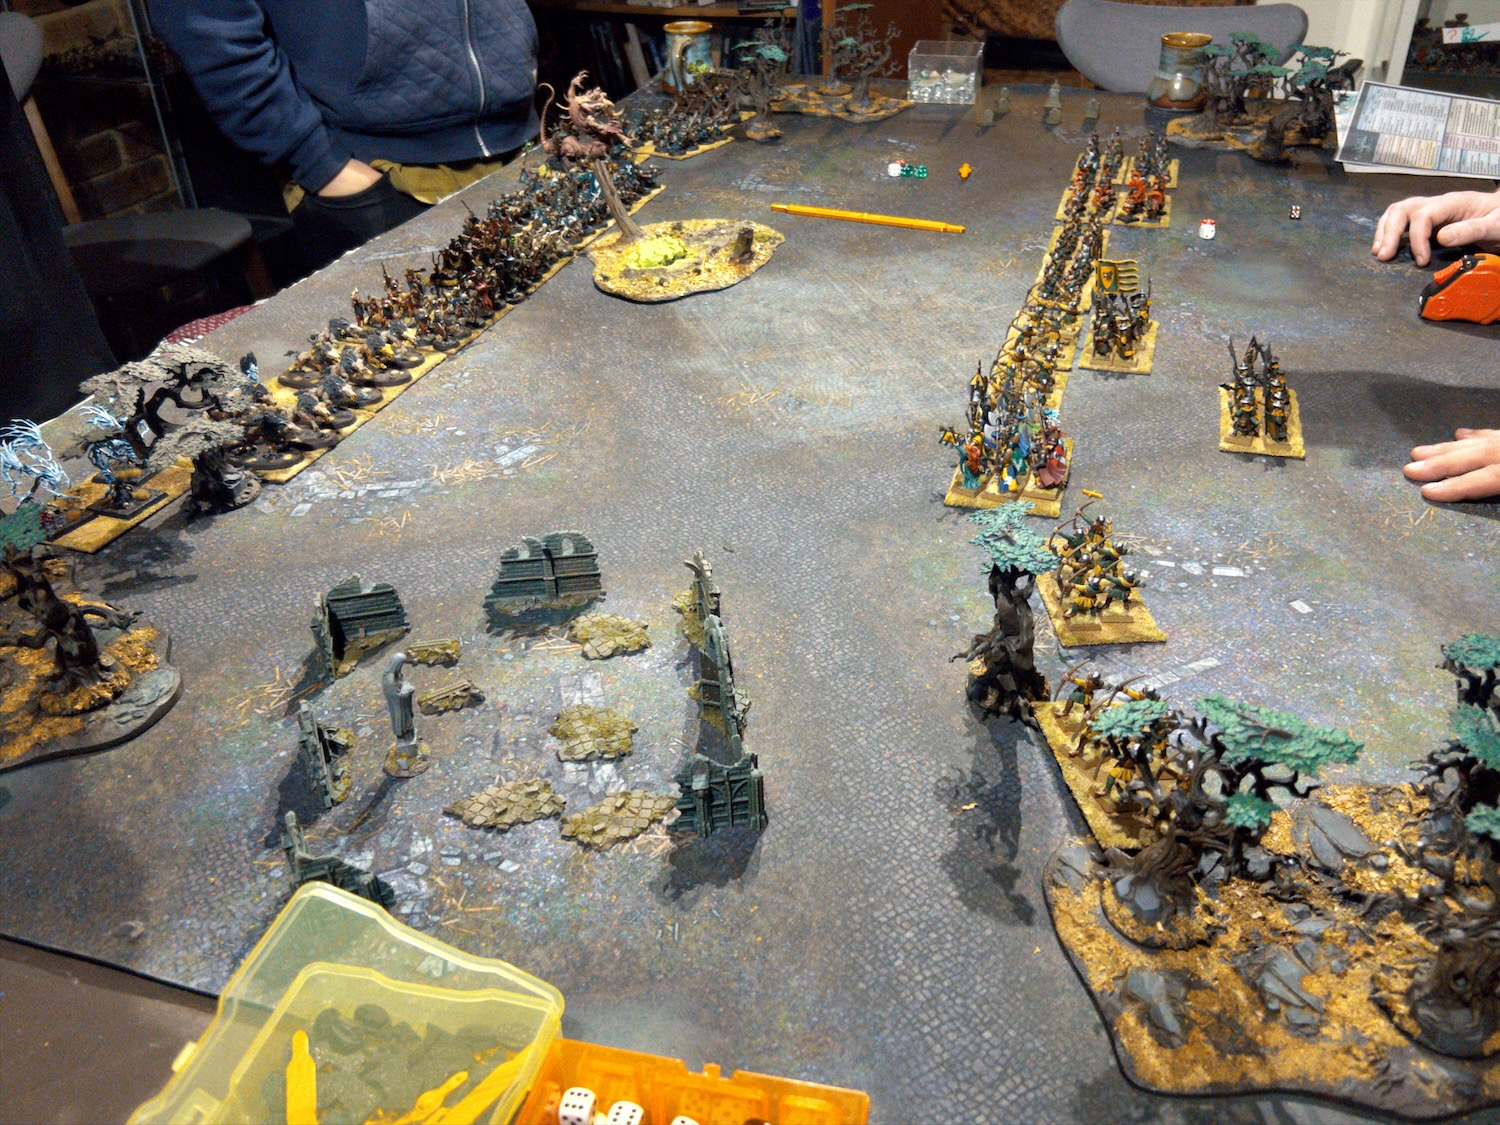
The games look great too!
I have much less time for gaming these days and find that what I really want to do when I do is to get a group of friends together and play a big fun game. Midgard helps me do that in quite a few ways. First, it’s easy to play – I know that friends that aren’t regular wargamers will have an easy time picking it up (recently one of said non-wargaming friends corrected me on the rules multiple times during a game!). This really broadens the pool of players, and I’d recommend Midgard for teaching new players a wargame. Second, while building lists sounds like a lot of work, I think building lists for Midgard is much faster and easier than building lists for Warhammer – even with the need to keep both sides somewhat consistent. Third, the game is fast to play. The rules stay out of the way of the action, and games with hundreds of models can take as little as a few hours to play through. Finally, the game lets me use my whole miniatures collection. While I have some armies that are legal armies in other systems, I have some that are too small or out of date and haven’t seen play in many years. Midgard with its flexible list building system has had me scrounging through my cases (which has been a great trip down memory lane), thinking up scenarios for all kinds of settings.
If the above sounds like a good time then I heartily recommend you check out Midgard. It’s likely to be the most played game by far in my group this year, and I look forward to finding out what else we can do with it.
I’ve been talking a decent amount about Midgard Heroic Battles over the last few posts, and that’s unlikely to change as I’ve been thoroughly enjoying the game. Part of what’s made it fun for me has been the flexibility and general simplicity of the ruleset. It’s meant that for the last few weeks, units that I haven’t put on the battlefield for years have been taking part in some really fun games.
While most games we’ve played so far have been Lord of the Rings themed, we’ve been wondering if the rules would work well for games in the Warhammer setting. While we enjoy the new Warhammer the Old World rules, they’re quite complex and don’t necessarily make for a beginner friendly game. We have a few friends in our gaming group that are not wargamers (board games and roleplaying games are their usual fare), and haven’t really been interested in playing Warhammer before. They have however been enjoying the games of Midgard we’ve been playing, and have been happy to play more, which is great news for me!
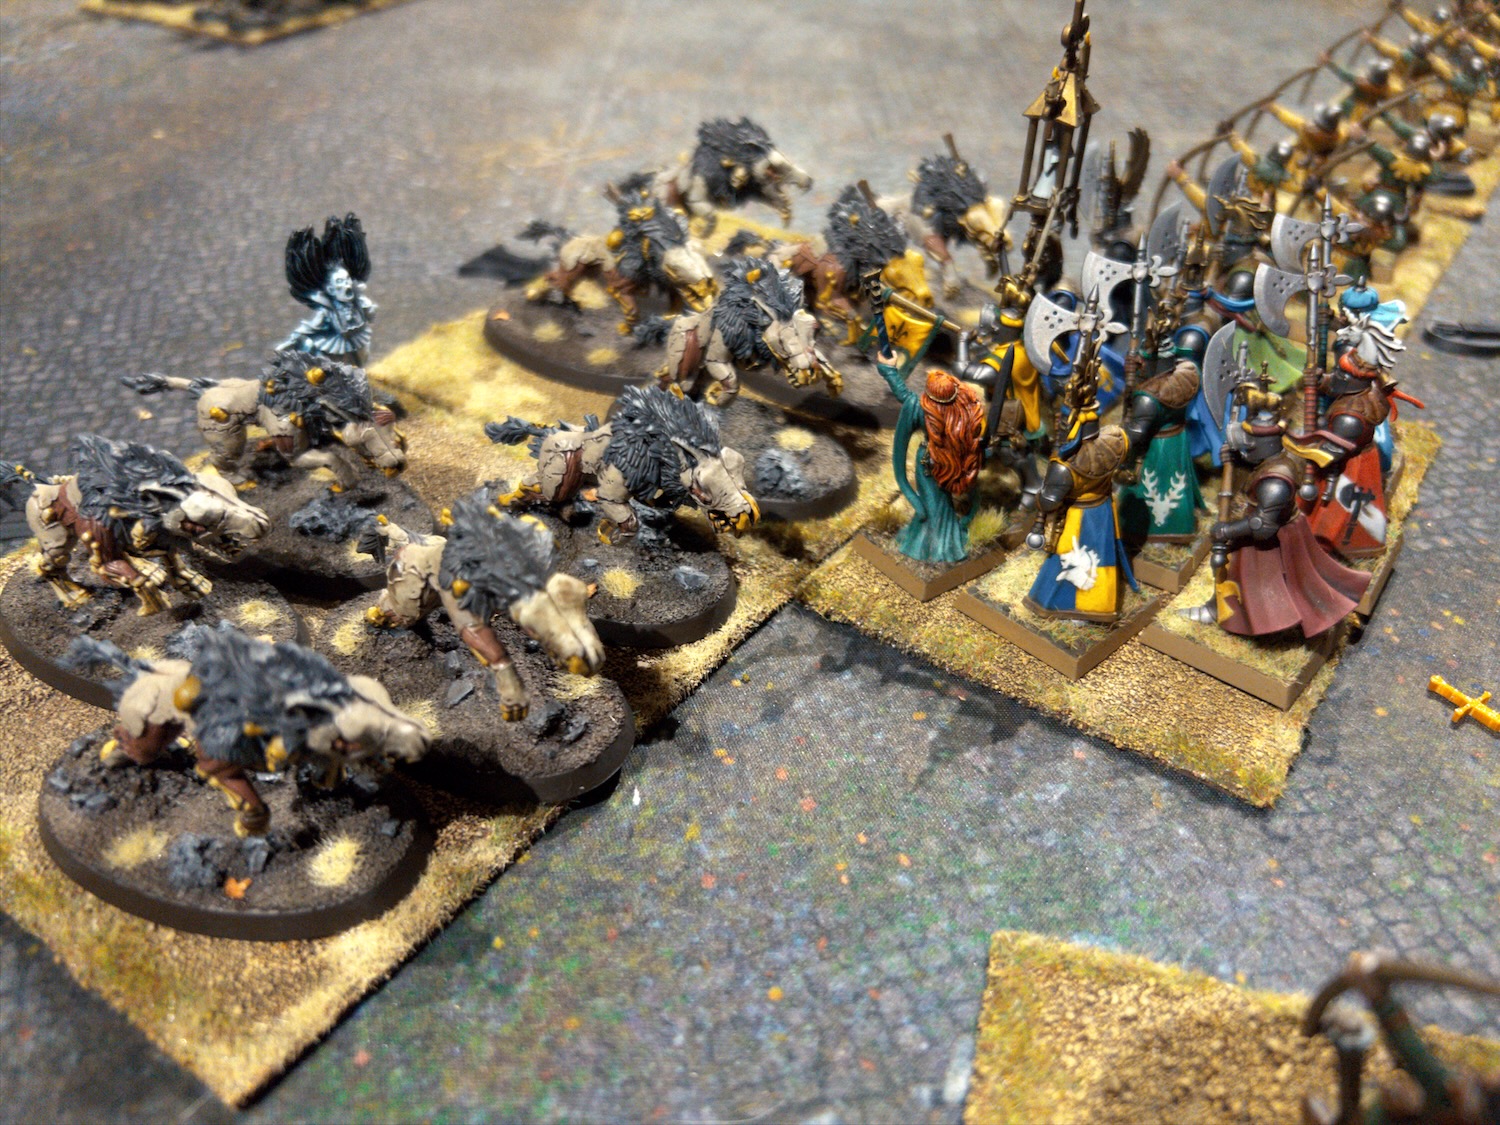
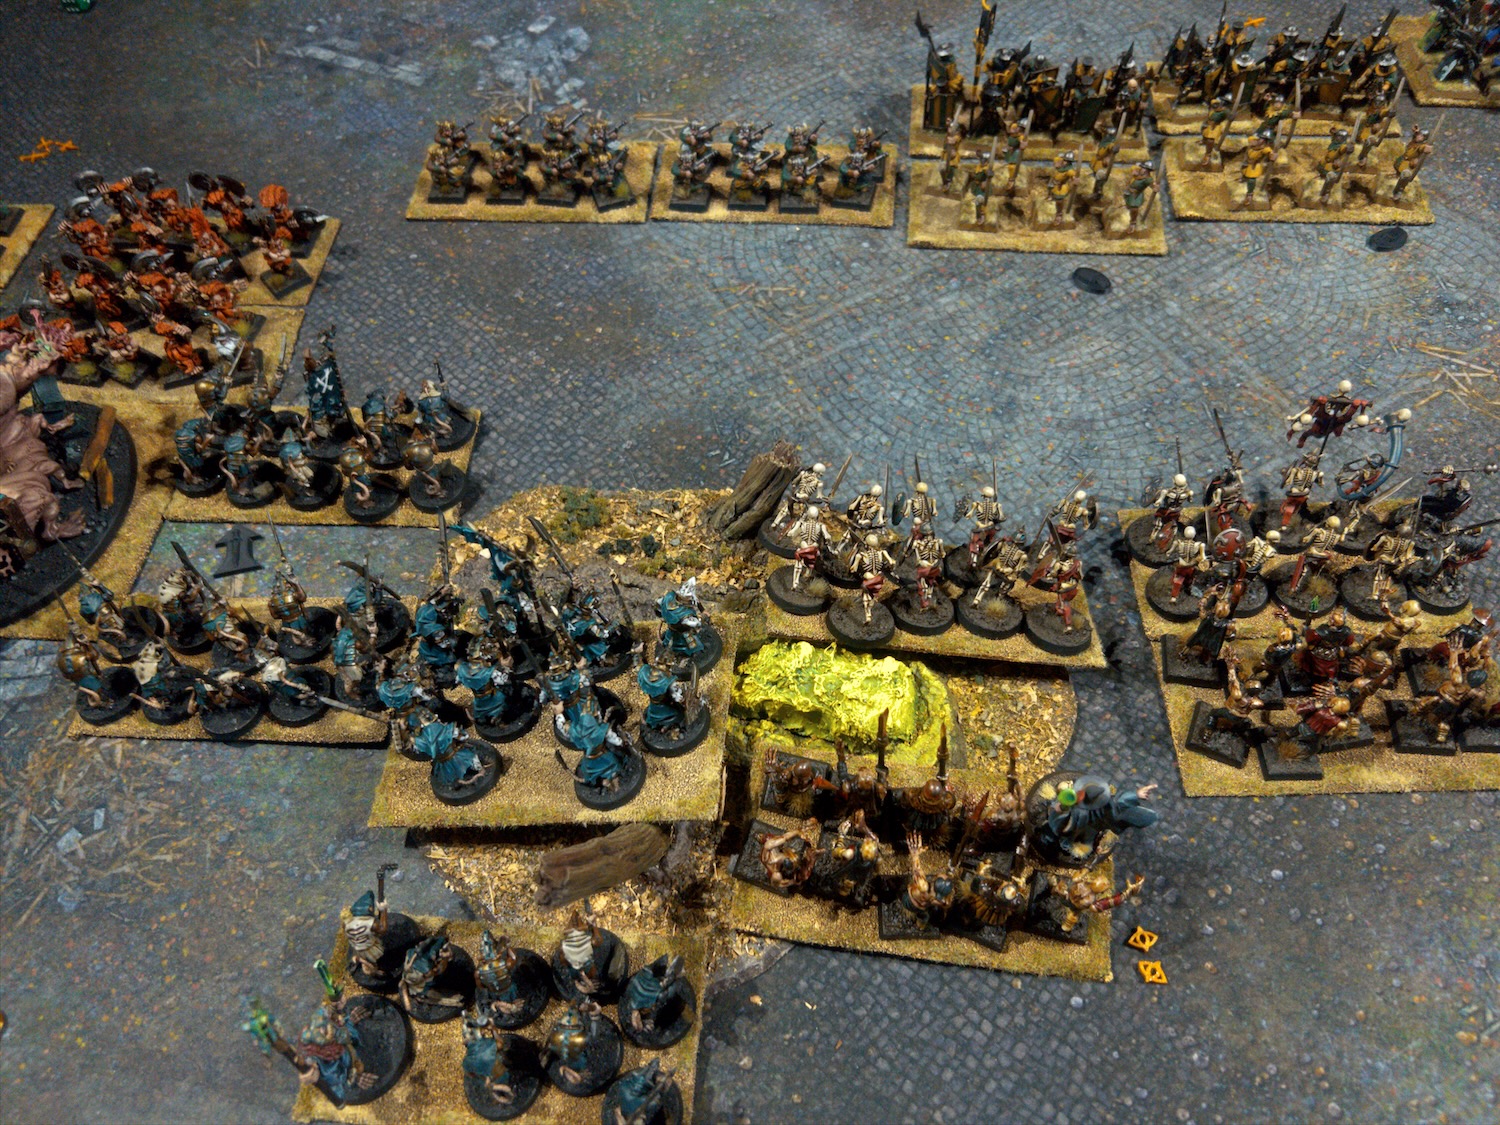
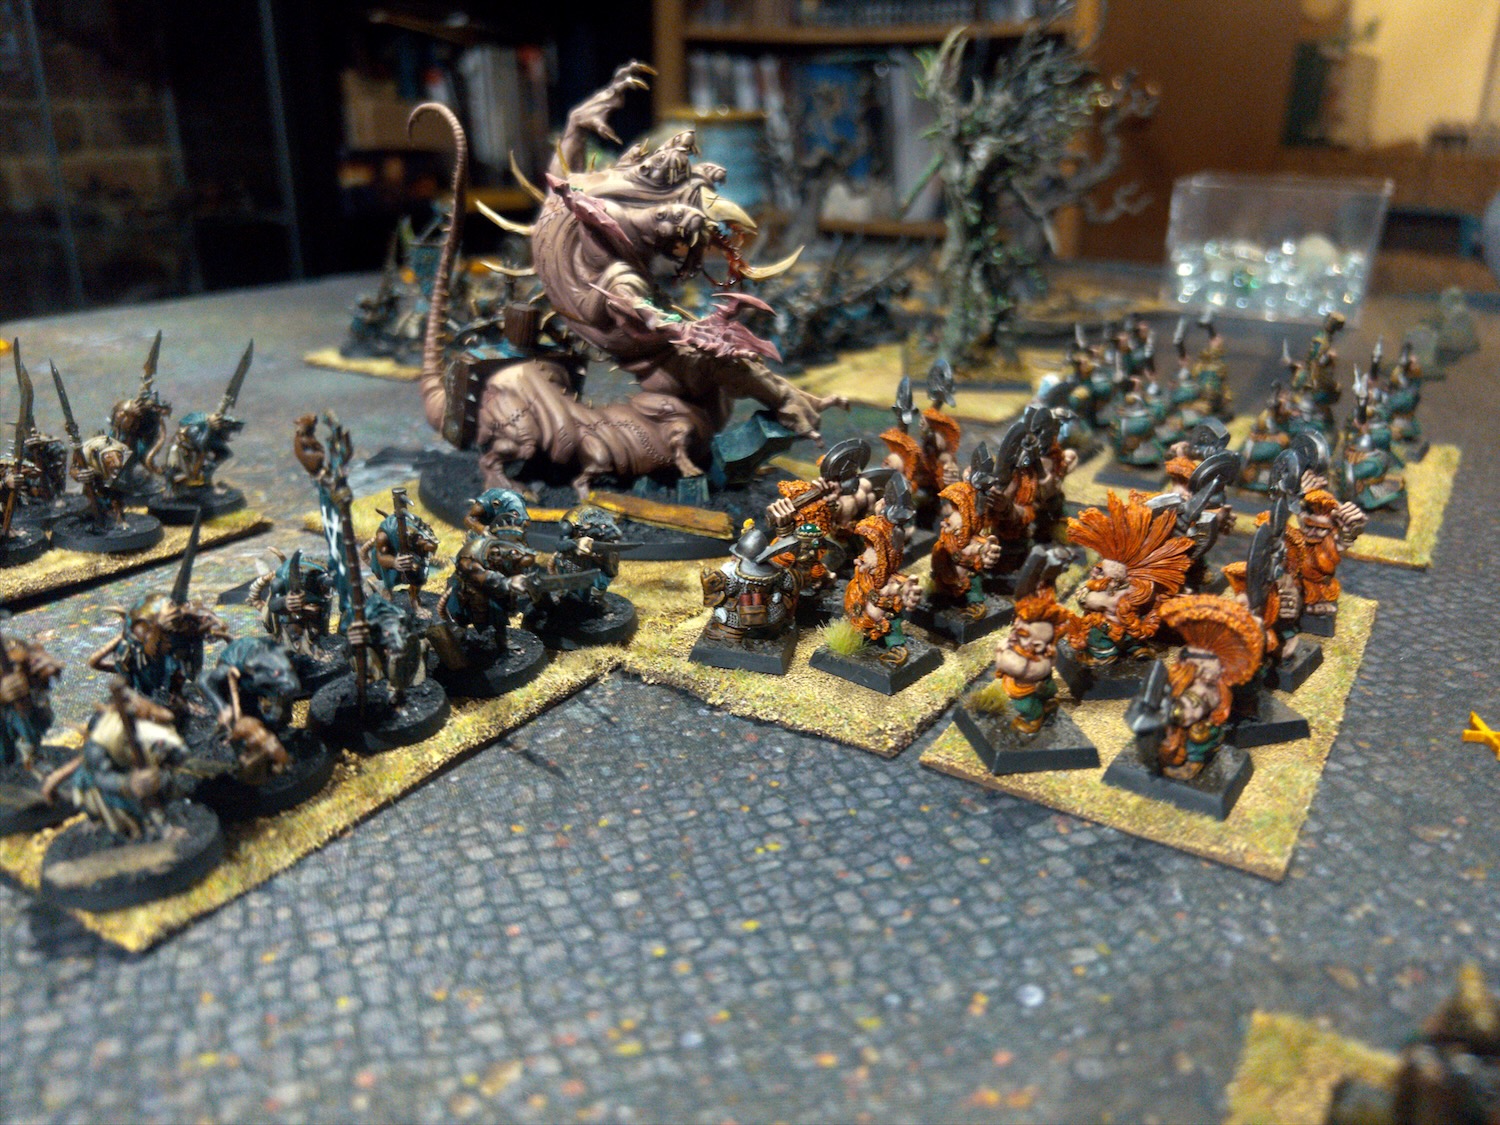
This week I had a few of those friends over and we played a big game involving four armies: a loose alliance of Skaven and Undead against Dwarves and Bretonnians. Two of the players were wargaming novices, one is relatively new, and one is an enfranchised wargamer. I was running the game as a games master. Despite the lack of experience of most of the players, and the relatively large size of the game, we comfortably got through the game in an evening which is a testament to the rules.
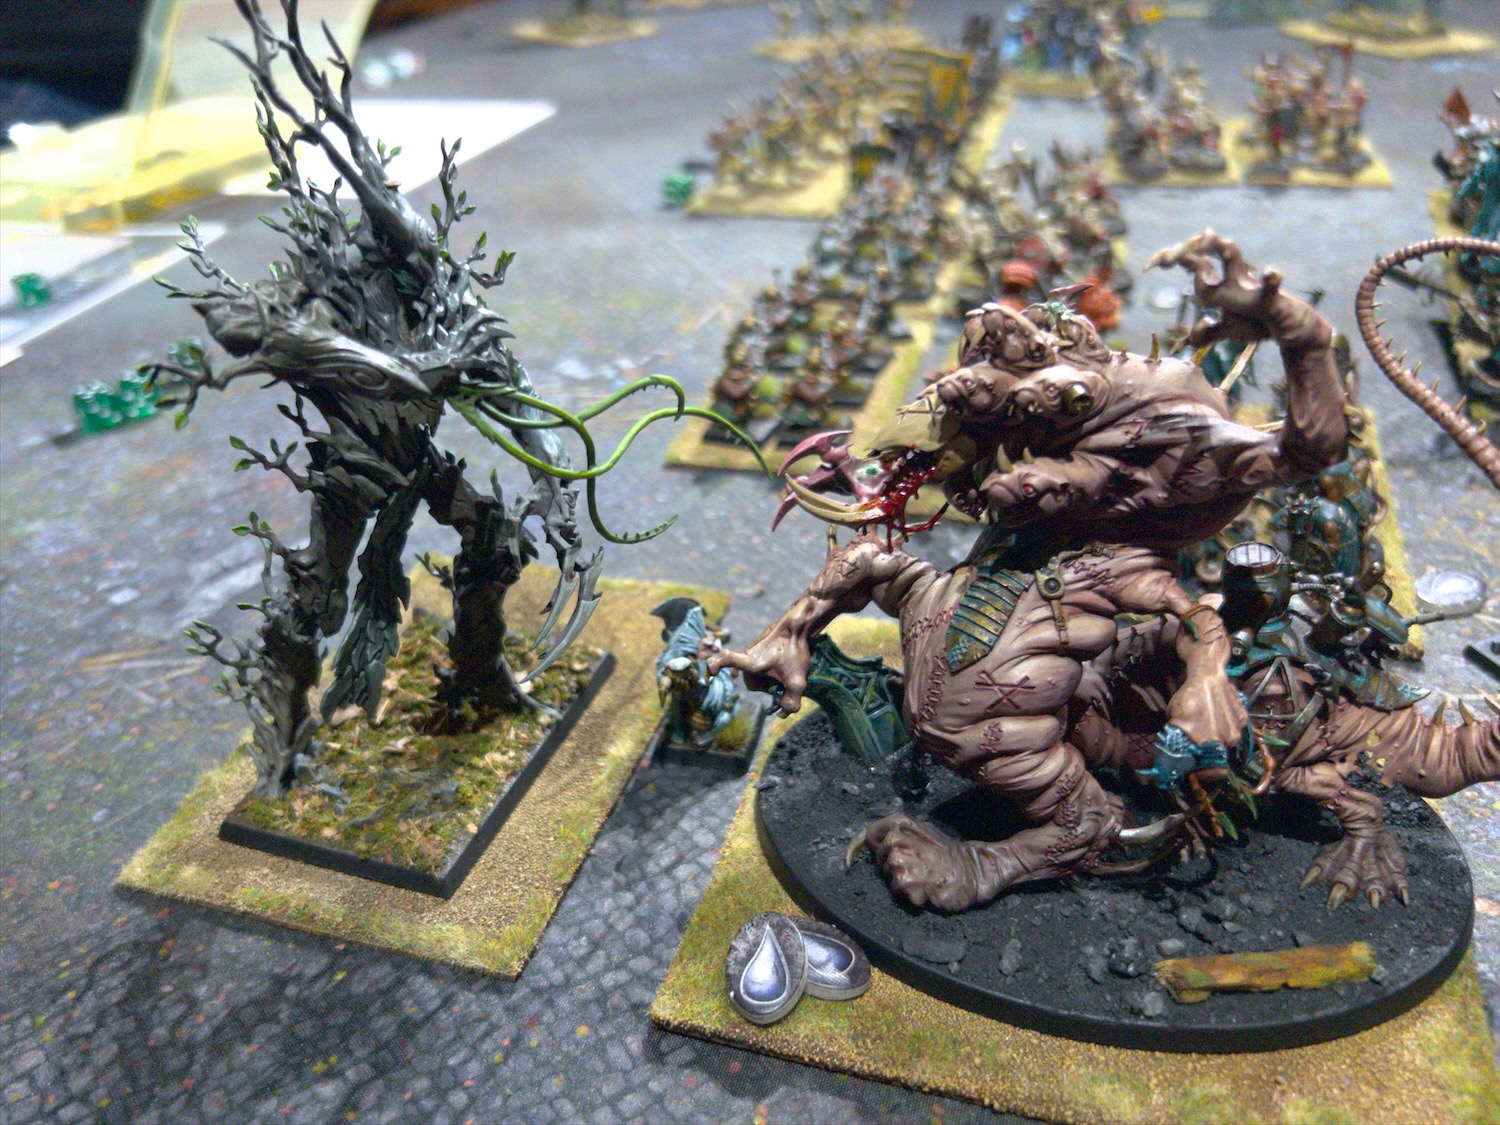
The scenario I set up was as follows: the Skaven and Undead armies needed to hold onto a warpstone meteor while the Dwarf/Bretonnian alliance needed to get them clear of it. To spice things up some, I placed four isolated trees on the board (i.e. not on the forest bases), and after turn one revealed them to actually be treemen who were generally opposed to the idea of big battles being fought in their forests and went after whatever unit was closest. Despite this extra chaos the game was extremely close and ended with both sides within a single reputation point of each other (reputation tracks your force morale, if it’s at or below 0 at the end of the turn, you lose the game). The Skaven/Undead forces won the day, but it really could have gone either way.
Overall, the game was a success I’d say, all the players enjoyed themselves, the game was fun, and it generally felt like playing Warhammer without the big rules overhead. What was missing however was some of that Warhammer atmosphere that is generated by things such as wizards miscasting and Skaven wargear blowing up. Midgard as a low-fantasy/historical wargame does not really cater for this out of the box, but it is easy enough to add some house rules to capture this, and I’ll be doing that going forwards.
After this successful foray into playing Warhammer with Midgard, I’ve been excited about the possibilities. As I said in the opener, Midgard is a very flexible game system, and looks to be able to cater for some of the more esoteric things that can be found in the Warhammer setting and are not catered for in the normal Warhammer rules. With that in mind I’ve been reading through the late 80s/early 90s Realm of Chaos books which are probably about as esoteric as Warhammer gets (I’m sure I’ll be shown something more esoteric in the comments!), and having a great time imagining what that could look like in a game of Midgard.
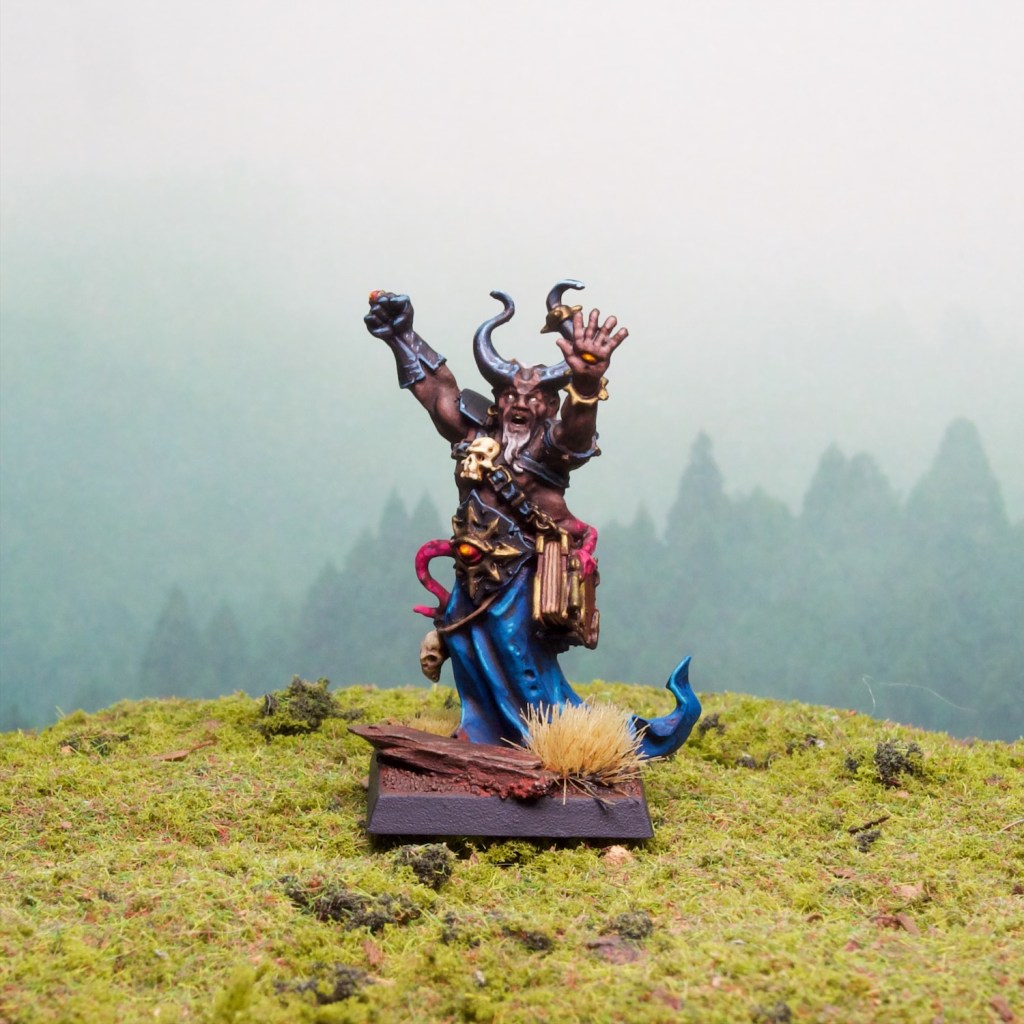
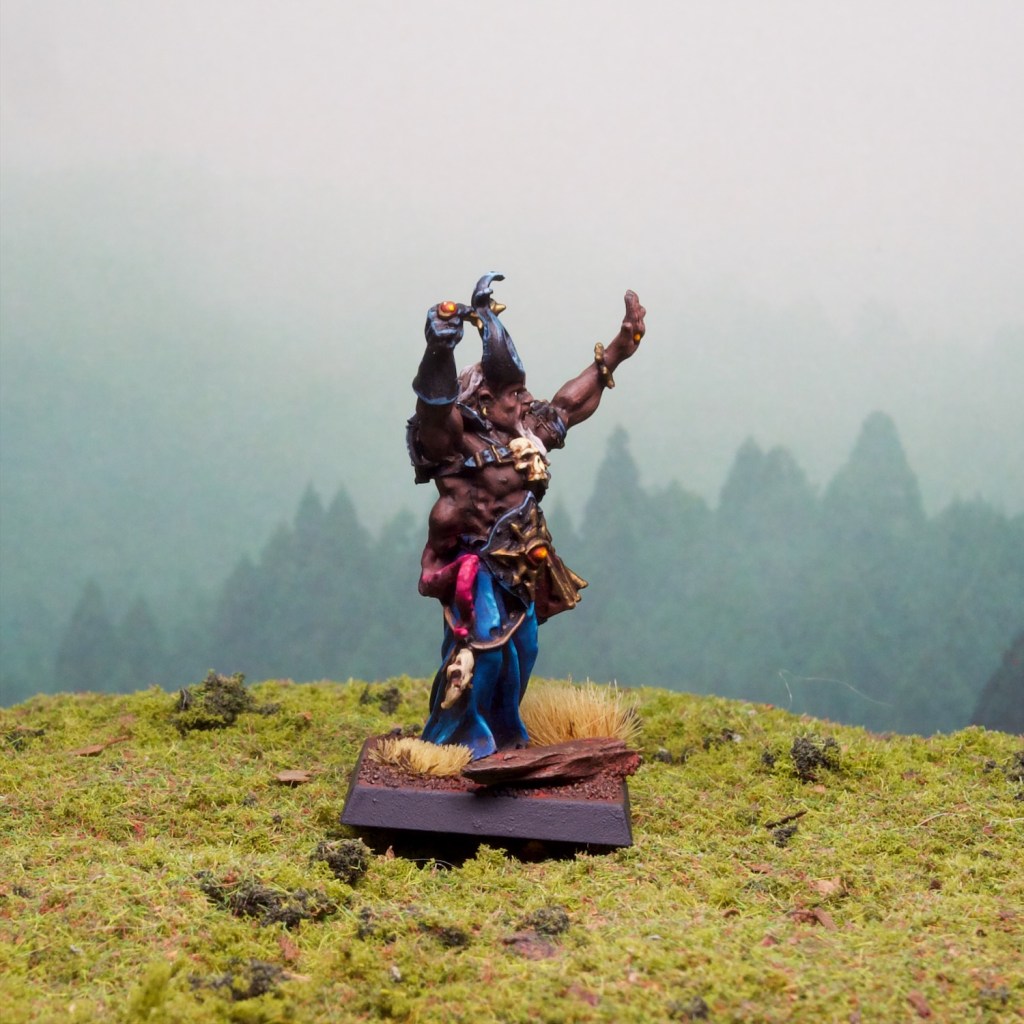
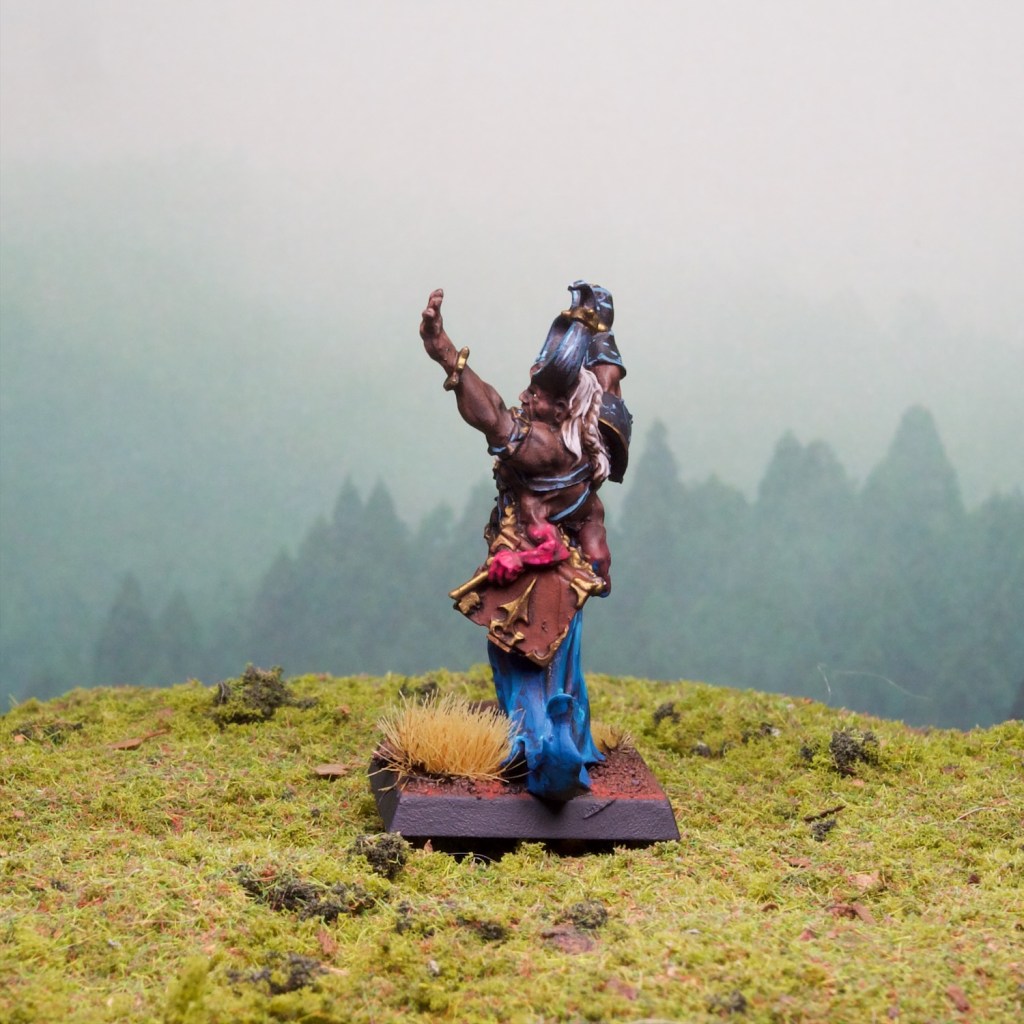
Needless to say some of this energy was redirected towards miniature painting, and in this case towards this Chaos Sorcerer that I found in a case while scrounging for Chaos models for my Midgard/Realm of Chaos plans.
This is a really cool model that was released for Games Day 2010, and that I bought back then. It’s therefore been undercoated in a case for 15 years, and I was well past time I got some paint on him!
I had some fun with the skin (especially the parts with the extra limbs!). I’ve been trying to work on painting darker skin tones and I’d picked up some of the Duncan Rhodes/Two Thin Coats paints made for this purpose (Druid Flesh and Bard Skin). I really like how they worked, although I did feel they needed a touch of extra warmth so I glazed some Citadel Contrast Wyldwood over the top which did the trick.
The model has a lot of nice little details on it which were great fun to paint, the small hand holding the key to the book being my favourite.
I’m sure we’ll see this Sorcerer lead a Midgard contingent at some stage!
I’ve been really enjoying Midgard Heroic Battles as you might have been able to tell from my last few posts. While I’ve been working on my Epic scale Punic War armies specifically for the game, I’ve really enjoyed the opportunity it has given me to break out some older models I’ve had painted for a long time that have not hit the gaming table in almost just as long. So far these models have mostly been Lord of the Rings/Middle Earth models, as they fit nicely in the War of the Ring movement trays that work quite well for Midgard. I’ve been wanting to use the rules to play with Warhammer models and historical models however, and those do not (generally) work with the War of the Ring trays.
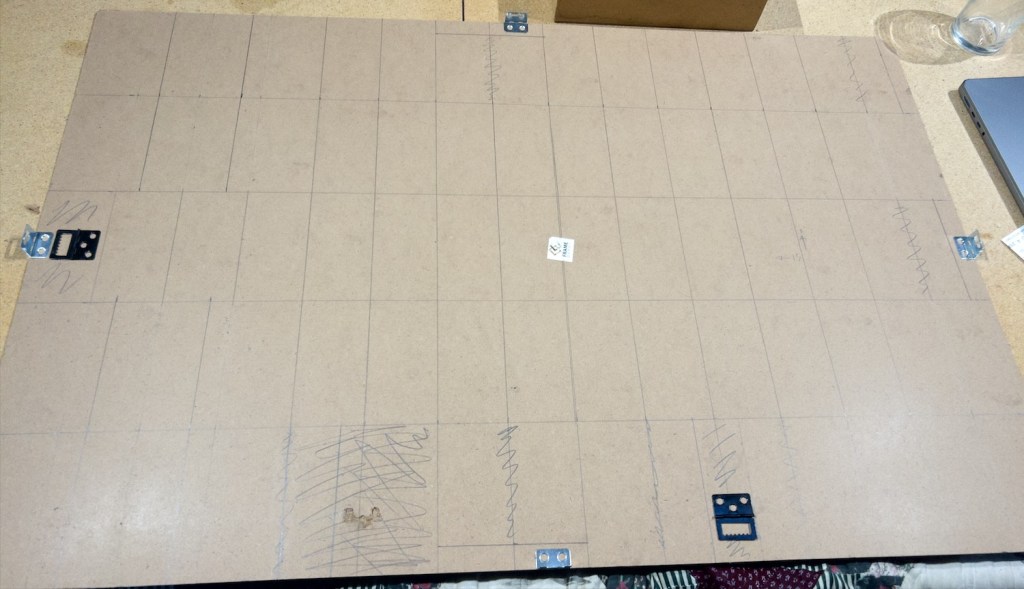
The opportunity to remedy this problem came in an unusual form, when a large frame containing a cool fantasy map came off the wall and smashed itself on the ground. The frame itself was wrecked, and so was the glass, but the MDF backing on it was mostly OK (the map also survived unscathed!). This meant I had a mostly nice sheet of 60x90cm 3mm MDF on my hands, and realised it would be a good solution to my Midgard basing issue.
Midgard requires a common frontage for all units, but is pretty flexible on depth for models of greater size. This frontage is recommended to be 12cm for 28mm scale miniatures (you can change this, one of the really cool things that makes the game scale agnostic – for example my Punic Wars models are on 8cm bases), and the default depth is half the frontage. Most infantry units should fit on 12x6cm bases, while units with larger footprints should increase the depth (e.g. calvalry might be on 12x10cm, large monsters on 12x12cm etc.).
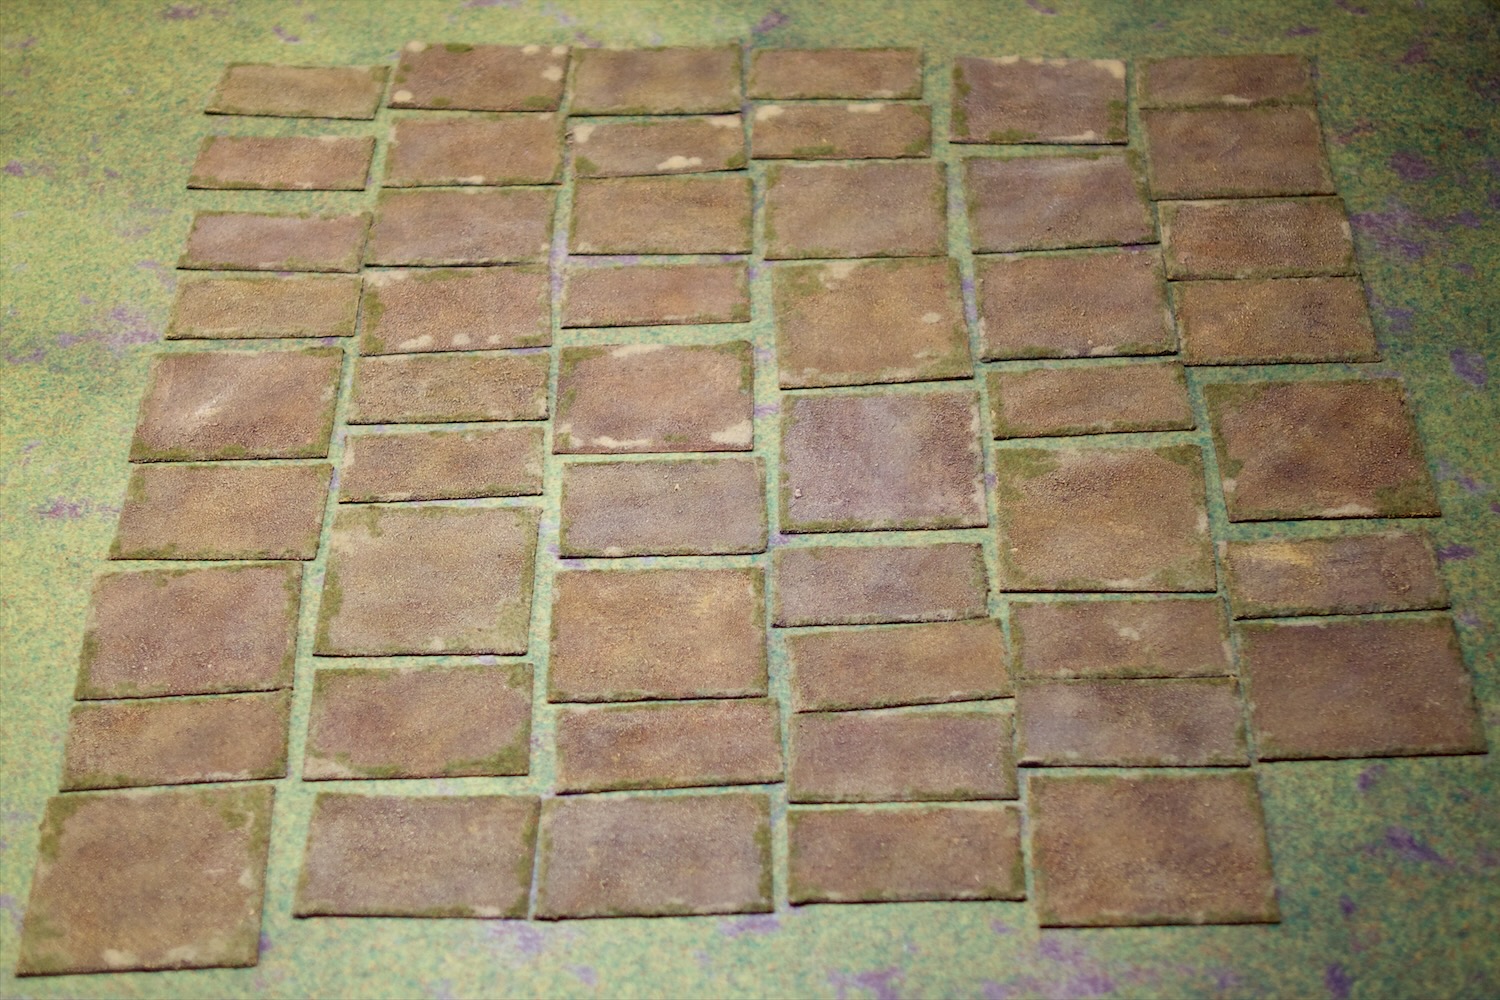
The good news for me is that 60 is nicely divisible by 12 and 90 by six, so I was able to plot a 12x6cm grid on my frame backing. I of course wasn’t able to fully utilise the board, as the hardware is anchored there (not that strongly clearly, you can see bottom left the spot where the other loop broke off leading to my frame mishap in the first place!). I used the marked bases with hardware on them to extend the 6cm depth of some bases to 10cm. In other areas you can see where I turned four 12×6 bases into three 12×8, and where I combined 2 12×6 bases into one 12×12 base. This gave me a nice spread off sizes, and more bases (I hope) than I could ever use!
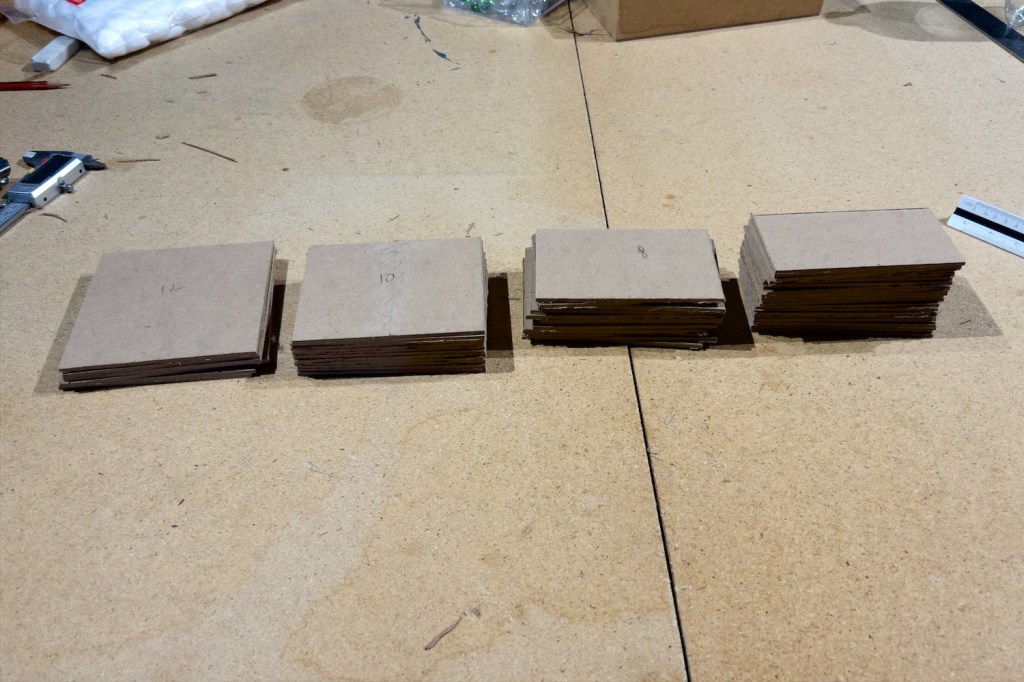
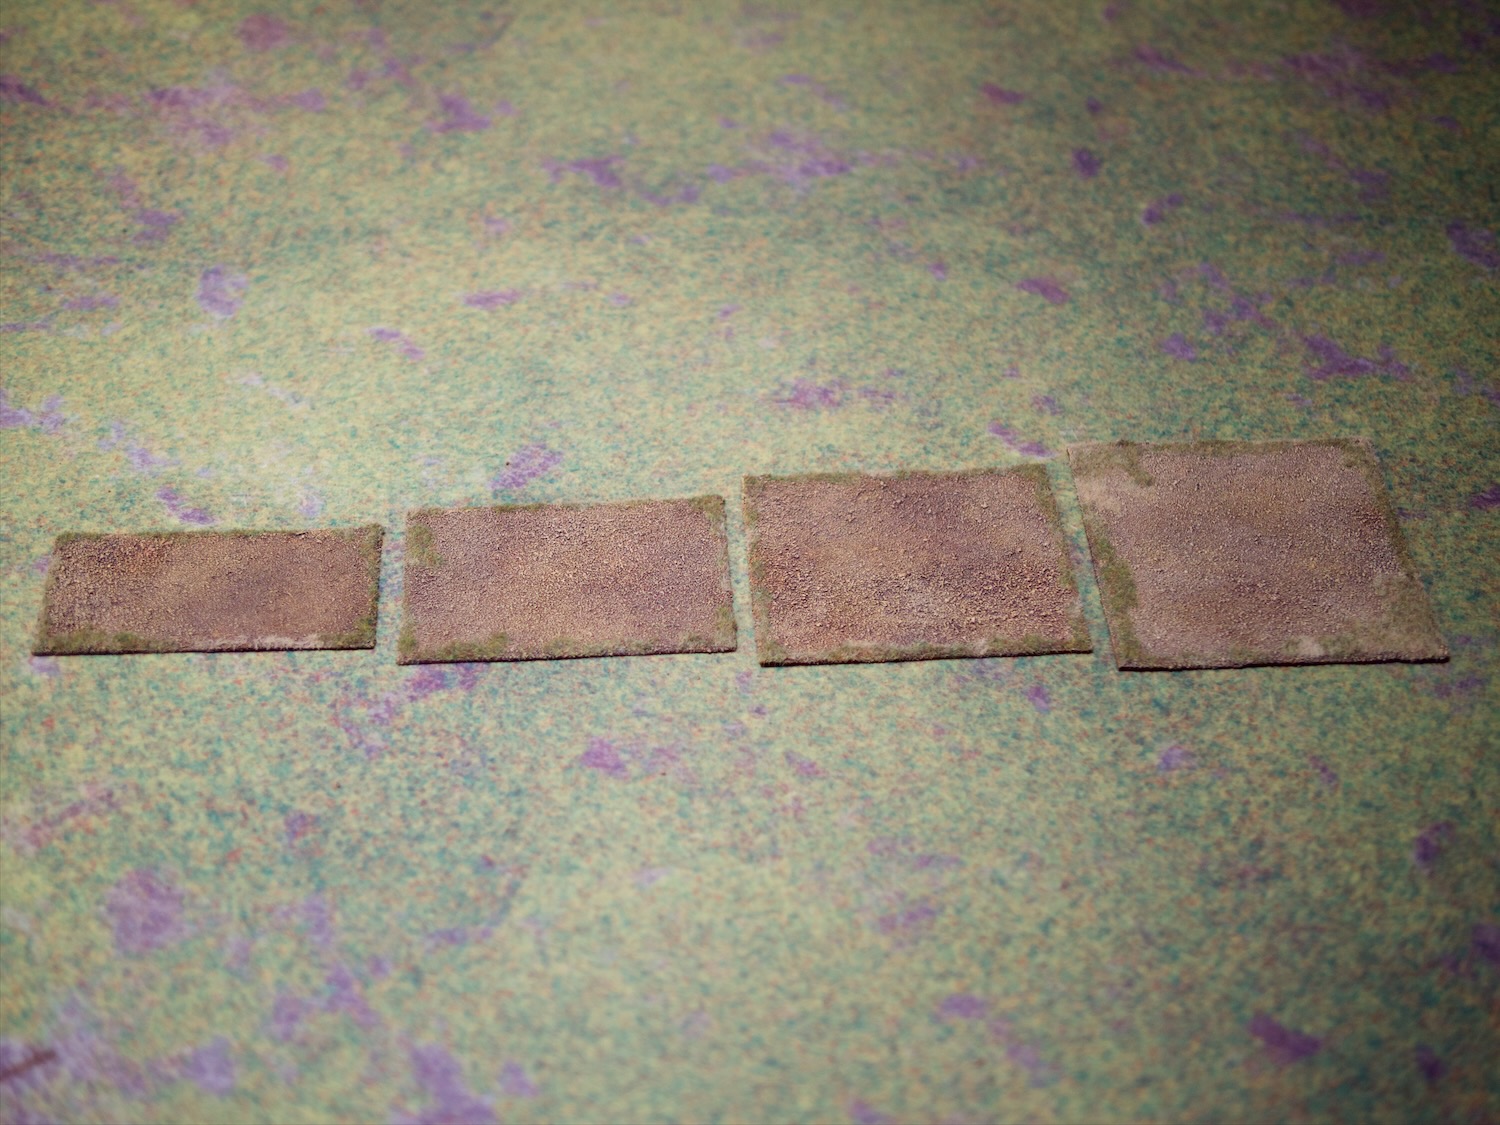
I usually use a jigsaw for MDF, but these needed to be pretty straight cuts and I didn’t think I could manage them freehand with the jigsaw. I went back and forth considering a few other methods for cutting these, but I ended up settling on using a long metal ruler and a box cutter. I read online that you can cut through 3mm MDF most of the way with the cutter, then snap the board along the cut, much like you would with plasticard. That worked pretty well, giving mostly clean edges apart from the snapped section. That was easy enough to trim away though so in general I think this is a pretty good method. Note that MDF dust is nasty stuff so wear a mask whenever cutting or sanding it – have a look at Guru Pig’s thoughtful comment below for more detail. Left-to-right above you can see the stacks of 12-10-8-6cm deep bases.
I glued sand on the bases and painted them with a series of dry brushes of successively lighter brown tones (raw umber, yellow ochre, yellow ochre with a touch of white), followed by some light flocking with green and dry static grass around the rims where model bases would most likely not sit. Painting that many was a bit tedious I have to say, but the results are hopefully worth it! Let’s take a look at them in action.
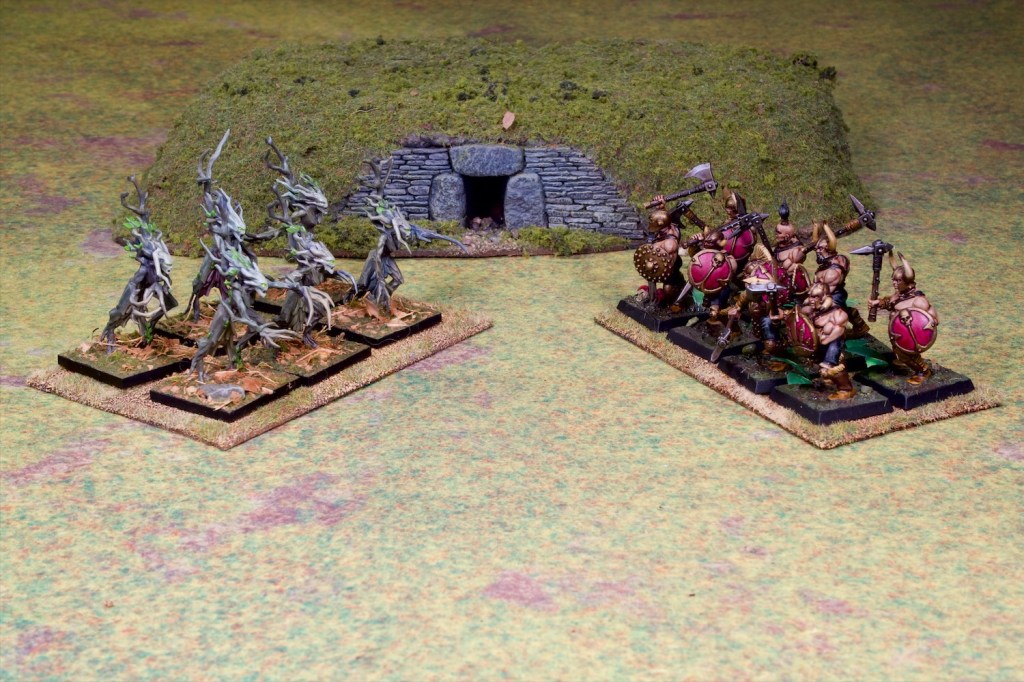
In the photo above we have on the left the 12x8cm base – good for larger infantry such as these dryads, on the right the 12x6cm regular infantry tray, which comfortably fits eight 25mm square based infantry.
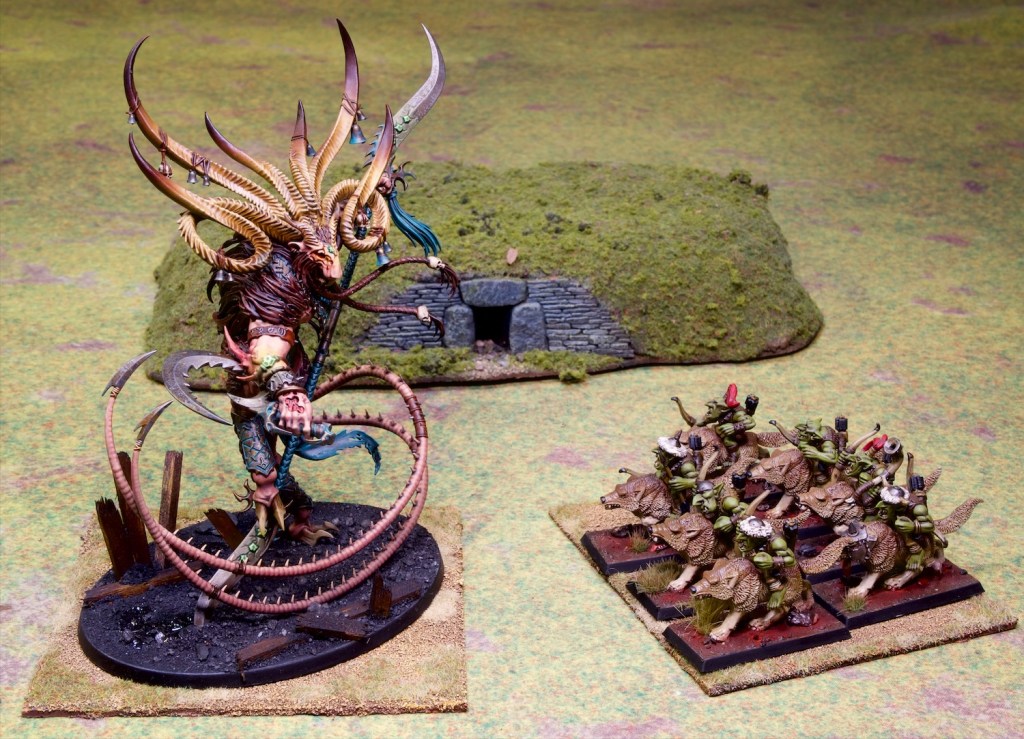
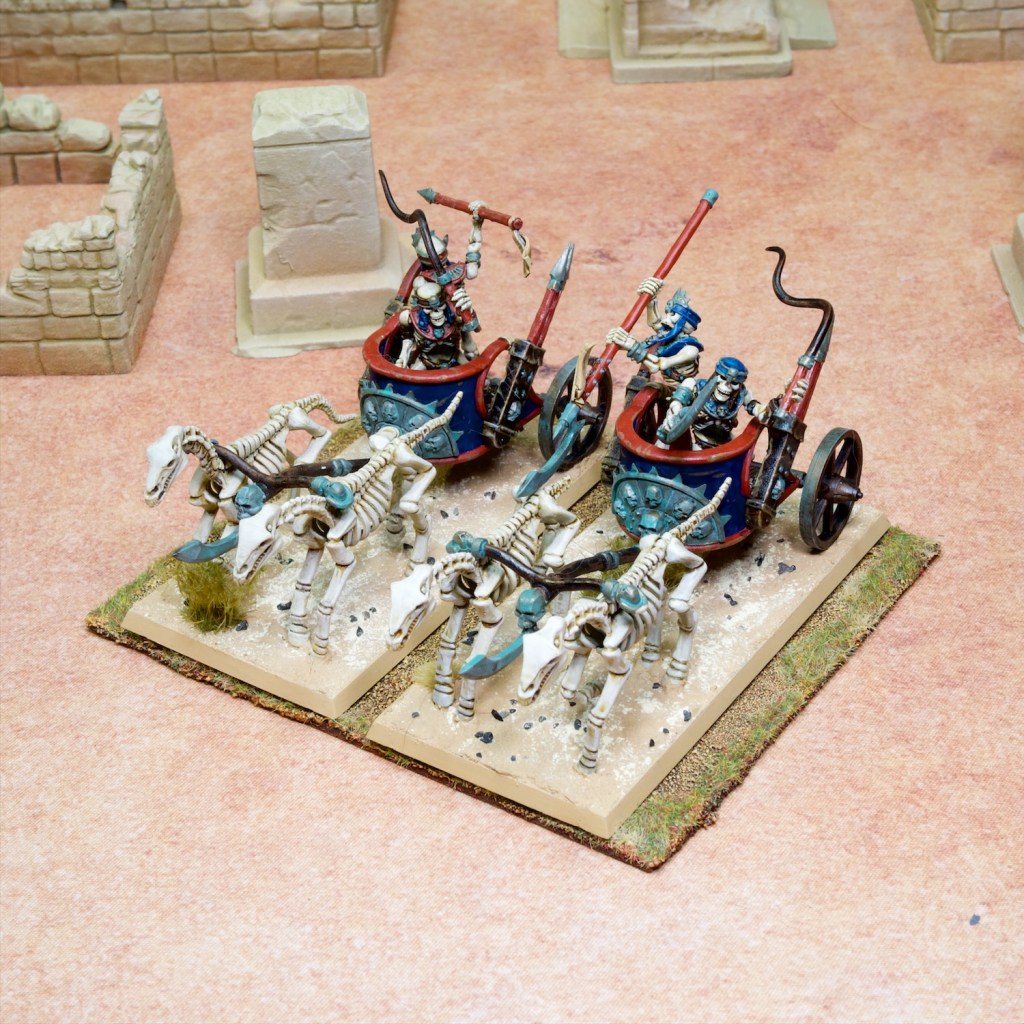
Left is the 12x12cm tray, big enough to fit this Verminlord, and right is the 12x10cm tray, good for cavalry models.
I painted and flocked the trays so they wouldn’t look too out of place on either of the mats I use for gaming the most, i.e. the green field and the desert you see in the photo above.
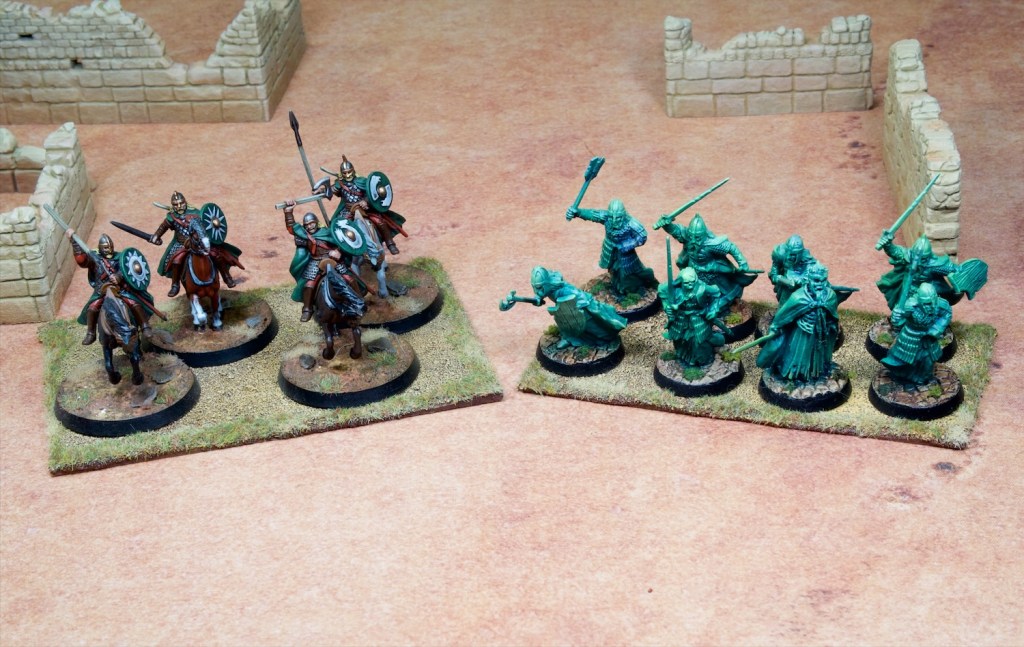
The Lord of the Rings miniatures also work fine on these, the cavalry bases with four models look better than the two you get on the War of the Rings bases.
Overall, these bases are pretty plain, and I think for armies that I build specifically for Midgard I’d like to use the opportunity to make proper scenic bases. These however have the advantage of being very flexible and letting me field a lot of existing armies in fun games of Midgard. I’m very much looking forward to that.