Ghoulish Speed Painting

I’ve been busy trying to get through the remaining miniatures needed for the 100 target I have in the 1 Million Miniatures challenge. I left the last post at 36, and with just over a month left I needed a bit of a speed boost. Luckily for me I found 29 of the most speed paintable miniatures: Ghouls!

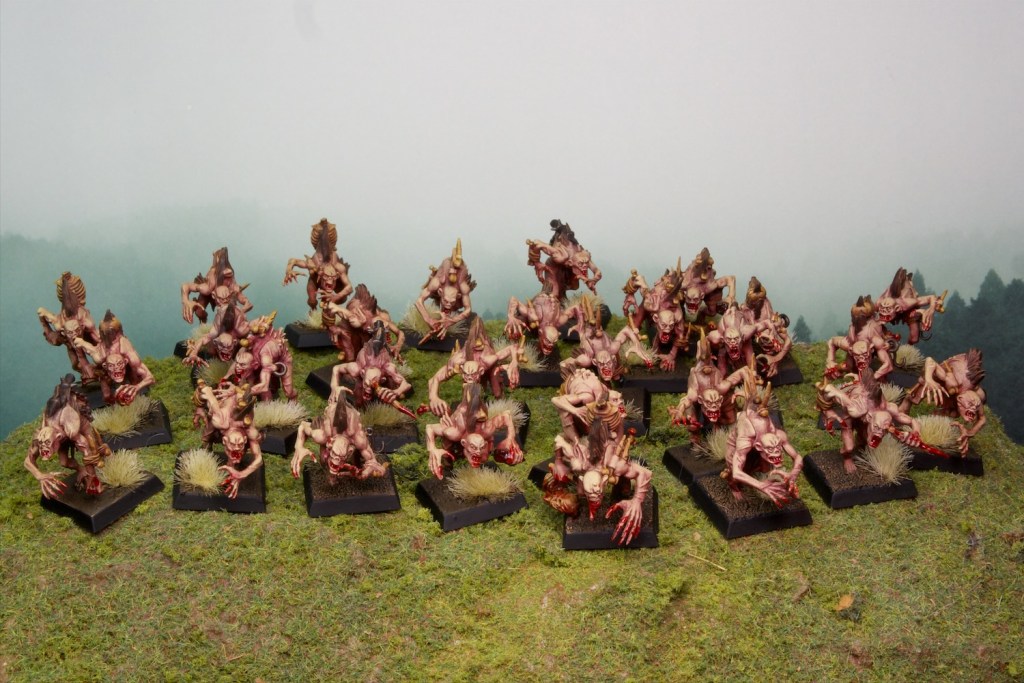
So why are they so speed paintable? Well they’re mostly organic materials, which lend themselves really well to airbrushing and washing, which are two elements that help you get far fast. On top of that, they’re mostly one organic material: skin!

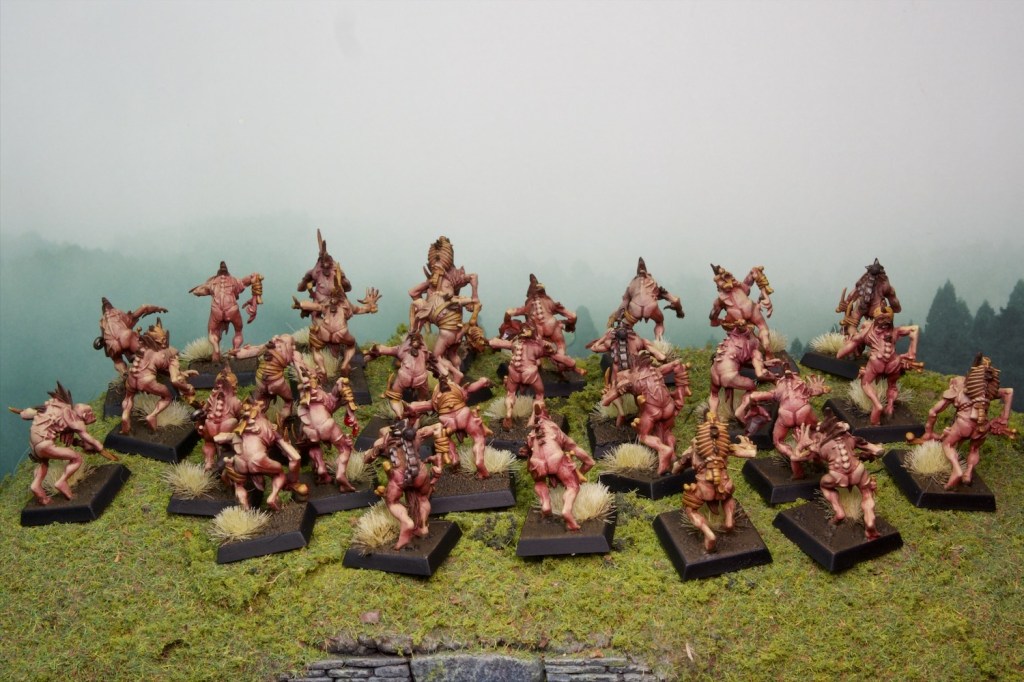
To get these done fast, I leveraged my airbrush to get a terracotta colour base coat, followed by a dead flesh zenithal (from above) spray. I then picked out bones, fur, leather, stone, using contrast paints, and painted over the metal areas.

Airbrushed and contrasted!

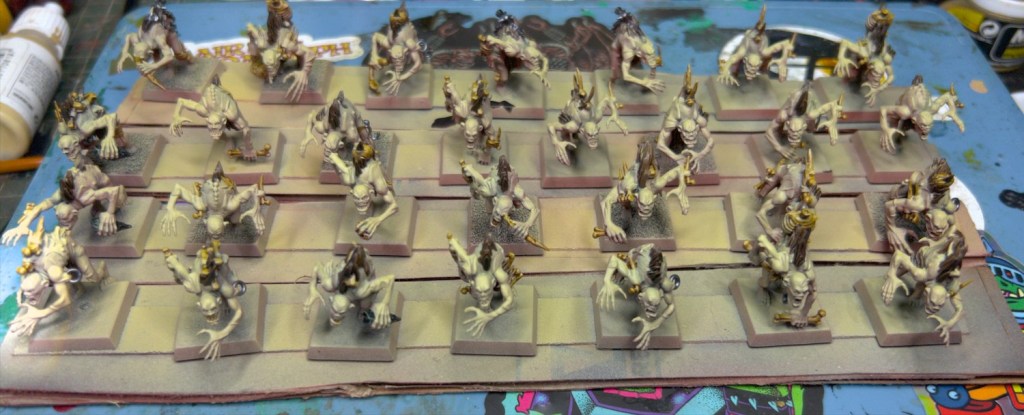
I then airbrushed some acrylic floor polish all over them (an old military modelling trick – basically a cheap way to get gloss varnish). Once that was dry (helped along with a hair dryer), I did an all over oil wash with a mix of terracotta, magenta, brown, and a blueish grey to get a brownish purple with some red accents. Again I helped it along with a hair dryer before wiping the oil off the raised areas with some makeup sponges. I then applied some texture paste and grass clumps to the bases and left everything to dry/cure overnight.

Washed and Based!

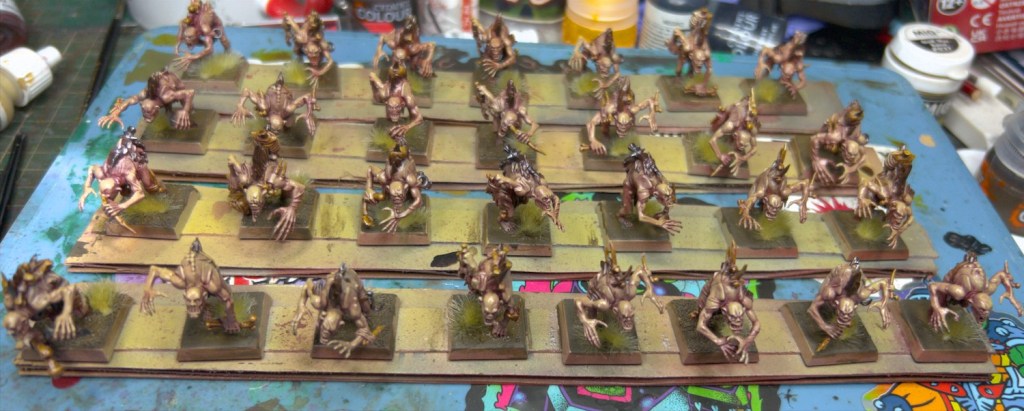
The next morning I did a brown acrylic wash over the bases, painted the base rims, airbrushed on some matt varnish and painted on some blood effects on their mouths and hands. Overall painting time was approximately 4h split over the two sessions ~2.5 hours before the overnight drying session, and an hour or so for the final touches. So nice and quick for 29 models!

I quite like this kind of painting, it’s quite cathartic to just glob oil paint all over your models knowing you can clean them up after. There’s not too many models you can do this to however. I did do something similar in the past with acrylic washes for the Goblin Town models, but I think I like the oil route better, it’s more controllable and the extended drying time is actually really helpful when doing so many models.

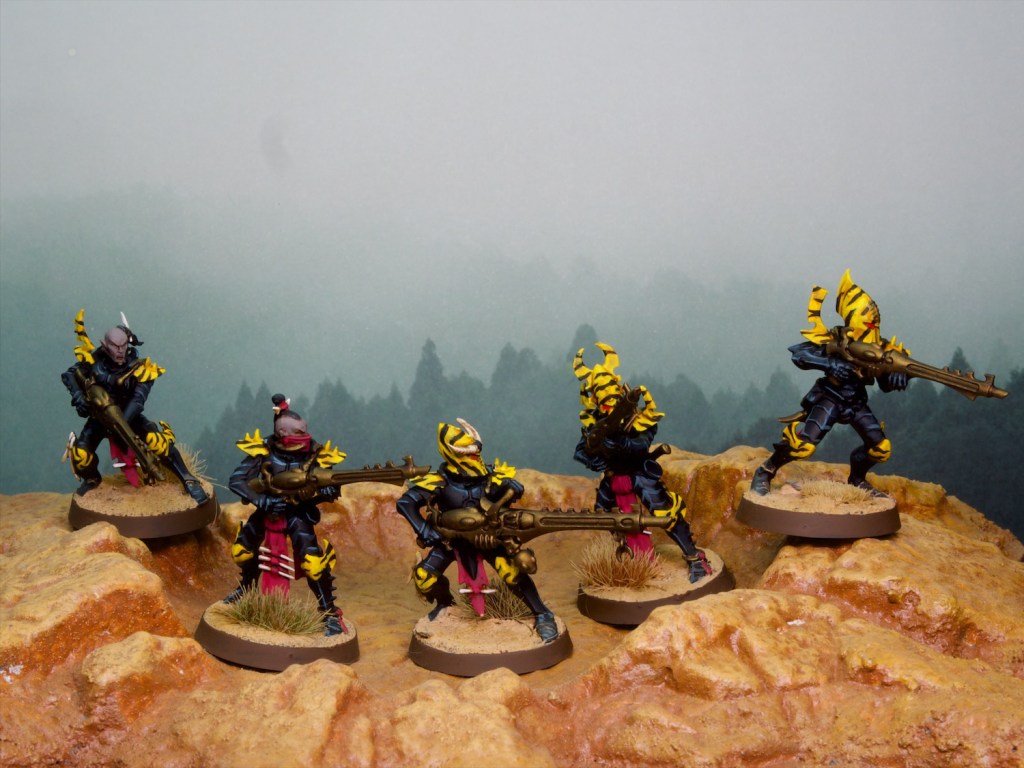
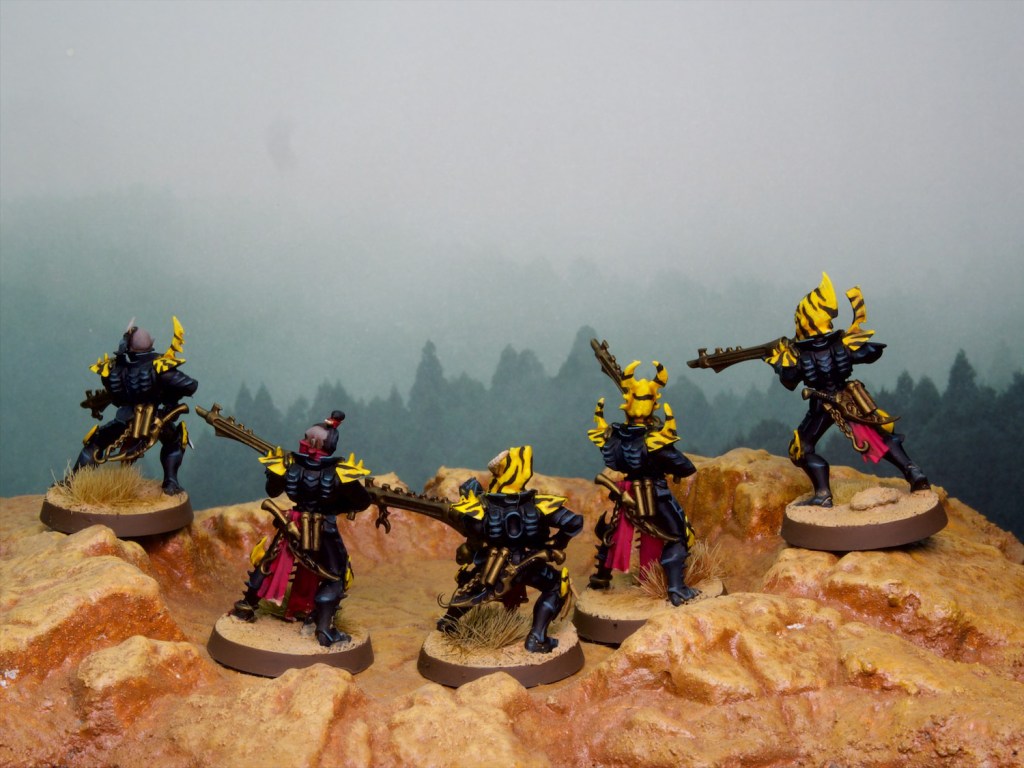
I also tried out my new Dark Eldar scheme on some Wyches:

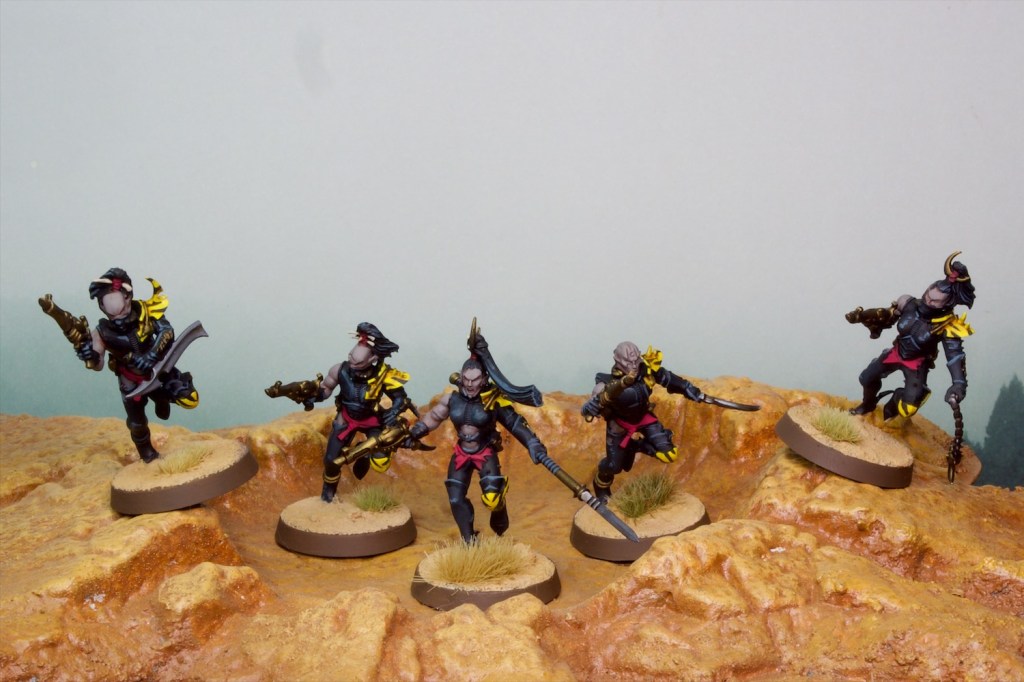
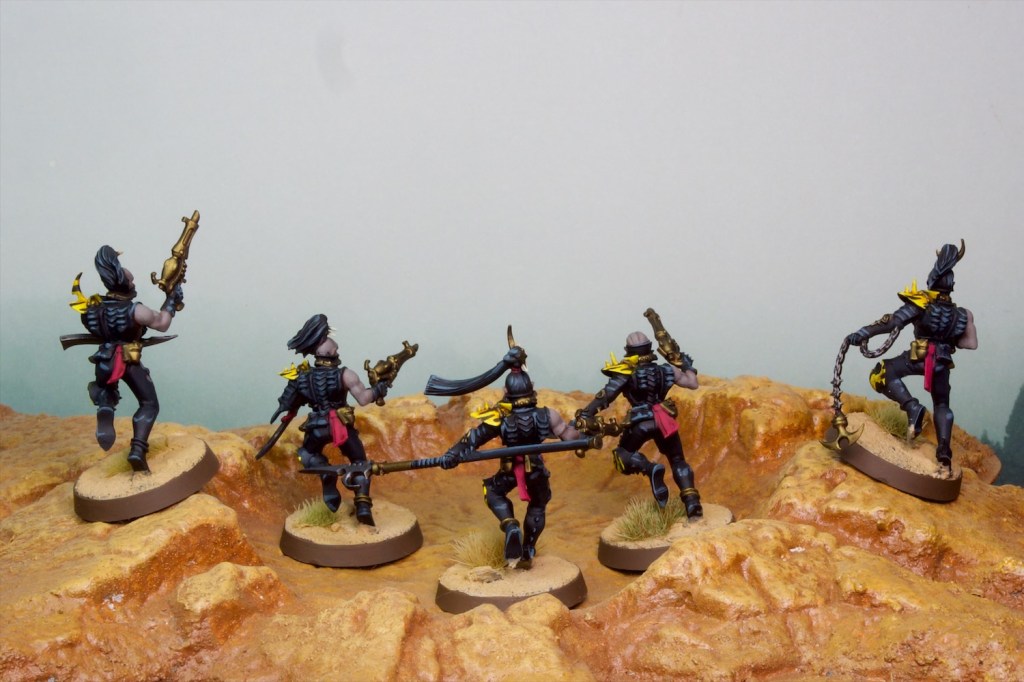
They’re probably a little rough for my liking, so I might take my time a bit more on the next batch, but they still look nice at table level.

Anyway that adds a nice 34 extra miniatures to my tally, taking me up to 70 total which is a much more comfortable place to be with little over a month to go in the challenge. Let’s see what catches my fancy next!

1 Million Miniatures

Back in December last year, Games Workshop announced their 1 Million miniatures challenge, which has people pledging in their local Warhammer stores to paint 25, 50, or 100 miniatures between January and early May. I figured that would be a fun thing to do so I duly pledged I’d do 100 miniatures thinking that would be a piece of cake (foolish!). I had this great idea that this would serve as a good excuse to paint my Tomb Kings starter set which has 90+ miniatures in it, and skeletons being relatively easy to paint that would be that.

Trouble was, building 90+ skeletons in one shot is actually quite boring, and I quickly found my enthusiasm dwindled to pretty much nothing. Which left me in early-march with just the last two post’s worth of miniatures done for the challenge: the Flagellants and the Amazon Blood Bowl Team, totalling 20 miniatures. Suddenly to make the 100 by May 9th I needed to paint something like 1.3 models a day.

So I switched tack to the methodology that gets me painting the most: abandon all plans and paint whatever I feel like at the time. Hence this post which shows of the eclectic result of the whatever I feel like strategy, but in so doing adds another 16 models to the tally. I’ll show them off in painting order.

First up we have these wacky Goblin Squid Herders and their charges, three mean-looking Squigs!

These models are very fun, and were great to paint. I really enjoyed doing the patterns on the Squig bellies, and felt they were necessary to break up what would otherwise have just been angry red balls with legs!

Next up we have this unit of Empire Knights converted and painted to be of the order of Knights Panther.

I made the cloaks and other fur applications from greenstuff which was good practice (but also really slow, bad idea when trying to paint 100 miniatures, whatever I feel like isn’t always efficient). The paint job on these was quick, although I spent a bit of time on the furs as the signature element of these models. This mostly involved creating the gradient from yellowy-brown to cream on the furs before painting on the spots using dark brown contrast paint.

Finally we’re staying with animal patterns but in a much more synthetic setting with the last entry in this post: some Dark Eldar warriors with a wild (pun intended) colour scheme. I’ll go more in depth on the influences for this scheme in another post hopefully, but long story short I saw some very cool, extremely 80s, Eldar colour schemes in the 1st edition Warhammer 40,000 rulebook and went from there. Some of the tiger stripes are a bit wonky, but I got better as I went along and learned what worked and what didn’t. The scheme is surprisingly fast to paint, mainly because most of the armour is black and I find I can do that black with blue-ish edge highlight look pretty quickly (don’t look too close at those highlights thanks).

I hope you’ve enjoyed this look into the mix of models that made the cut for things I felt like painting in the last few weeks! This is a bit of a microcosm for how I approach this hobby and why if you’ve followed this blog for a bit you’ll have noticed me jumping from project to project all the time. I value the fun I get out of this hobby more than anything else and that means I’m always trying to paint what inspires me. I like to think of it as striking while the iron is hot on an idea.

That might mean I get excited on a project for a few months then stop when I get excited about something else. This might seem unproductive, but at the end of the day I find even if I park a project for a bit, inspiration will come back at some stage and that is the time to resume it. If I push through when I’m not inspired anymore I’ll a) not enjoy myself and b) get a worse result, both of which are things I like to avoid. Anyway that’s enough yammering, I have 64 more models to paint!

Black Templars

I’ve had a burst of nostalgia these last few weeks, and have been pulling out old rulebooks and old armies to look at and remember my earlier days in this hobby. One of those armies was my Black Templar space marines, that I played in 5th edition Warhammer 40,000 (somewhere around 2008-2010 I would guess). That army saw a lot of play time, and not a lot of painting time, so generally sits at the mostly base coated stage. Considering how much I enjoyed playing this army I decided they deserved some attention at the painting table and pulled out a few to throw some paint on.

I kept things simple, mostly concentrating on doing a lot of line highlights! With the rest of the colours being relatively flat. When you think about it, these all around line highlights don’t make much sense but they are a definite part of that era’s studio painting (still are to some extent!). They are however quite tedious, and while objectively these models were pretty quick to paint, I still had to motivate myself to get back to them.

Anyway, I’m happy with how these look for the effort I put in, and I did enjoy the trip down memory lane they took me on. I do want to get the lot of them done at some stage, but have enough ongoing projects to keep me busy in the short term without adding to them! So for now these 5 act as a nice “palette cleanser”!

With that in mind, I better jot down my recipes so I can match them in the future!

Brand abbreviations – VMC: Vallejo Model Color, VGC: Vallejo Game Color, VP: Vallejo Pigments, GW: Games Workshop Citadel, S75: Scale 75, AK: AK Interactive, MP: Ammo Mig Pigments,

  • Line Highlights: VMC Dark Sea Blue, VMC Dark Sea Blue + VGC Steel Grey, VGC Steel Grey
  • Shoulder Pads: VMC Iraqi Sand, VMC Iraqi Sand + VGC Bonewhite, VGC Bonewhite
  • Scrolls/Seals/etc: VMC English Uniform, VMC English Uniform + VMC Stone Grey, VMC Stone Grey
  • Red: VGC Heavy Red, GW Nuln Oil, VGC Heavy red
  • Metal: VGC Chainmail, GW Nuln Oil, S75 Black Metal
  • Eyes: VGC Heavy Red, VMC Orange Red
  • Brass: S75 Necro Gold
  • Basing: AK Terrains Sandy Desert (texture), VP Dark Yellow Ochre, MP Gulf War Sand, MP Light Rust

Weirdboy

For this round of the challenge we picked HQ choices, and I decided to paint a model that I’ve had and loved for a long time, but never go around to: an Orc shaman from the old Warhammer Fantasy Battles game, to use as a weirdboy for the orks (with a k!).

Boyz look on in awe as the weirdboy summons the power of Gork (or Mork!)

I wanted to keep the model as is even though I was planning on using him as a 40k ork, so to make sure he fit in with the rest of my force, I used the base to cement him in the universe. This also had the added benefit of making the model taller, which is appropriate since this model is tiny compared to the current Weirdboy model.

The paintjob followed the rest of the army, the main departure being the glowing green eyes of the staff, which were added after I’d painted the rest of the model by first picking out the eyes in white, then airbrushing Vallejo Model Air Escorpena Green where I wanted the glow. This was followed by picking out the eyes again using a mix of Vallejo Game Livery Green and Kimera White.

A quick one for this round, which was very practical as I’ve ended up needing to paint quite a few models this week!

Beast Snagga Boyz

Back with more orks, this time with a distinct lack of yellow! Indeed these are not Bad Moons, but Goffs, the meanest and most serious of all Orks. I do enjoy that the 40k game system lets you include detachments from varying clans, this lets you mash together different parts of ork society into a single army. In the background ork clans often join up when there’s a big enough fight to get them all interested (presumably that’s a really easy condition to satisfy!).

The best snagga boyz are big brutes that love getting stuck in to the enemy at close range and for that reason they make a lot of sense as Goffs to me. These are brand new models to the range, and they’re quite a bit more detailed than the old plastics as tends to be the case. This has a double edged effect: on the one hand there are a lot of fun details to paint, on the other they took a bit longer than regular boyz to paint which is somewhat a negative when trying to get an army done!

I painted these much like the rest of the army, the exception being that there are no yellow metal plates, instead goffs adorn themselves with black painted armour, with patterns painted in white (checkered for the most part) and red.

The checkers were a little bit tedious to get clean, but a couple of passes seemed to do the trick. The other feature these models have that regular boyz do not is the animal pelts that cover their backs. I kept to the goff palette here and painted them red for the most part, with a reddish brown instead for the furs (I decided I didn’t want red fur).

Overall very fun to paint, it’s been nice to branch out into painting other clans!

Boyz are back!

Good news on the injury front, I can see properly again! Over the last week my vision got much better to the point where I could paint miniatures again. I was so excited that I left my second terrain project half done and dived right back into the squad of Ork Boyz I was painting before my injury.

Not too much to talk about on the painting front, these were painted much as my original boyz squad was done. I have my recipe down for these Bad Moons and am sticking to it!

I’ve been able to see well enough to get back to work for a few weeks now, but mini painting still eluded me. Something about the close vision was hard for me, but that’s been slowly improving over time. With my return to the painting table my ork army challenge resumes, at the pace of one unit every two weeks.

I’ve written up some lists for a 2000 point army and there are a lot more models to paint before I reach that size. Slowly but surely I’ll get there!

Troops has been chosen again for the challenge’s next round and for me that means more boyz, but with a couple of twists this time. Happy to be painting miniatures again, and hope not to have to go through that ever again!

A 40k Table’s Worth of Terrain

I’ve had a bit of a setback with my painting: a week ago I tripped and fell face first onto a wooden barrel and fractured my eye socket which has had quite the impact on my ability to see properly as you might imagine. Time will tell if I need surgery to fix any lingering issues, but in the meantime precision painting is right out, which means the army challenge I’ve been doing is on pause until I can regain the ability to see properly. I’ve found myself with a week off work so I thought I’d focus on a less demanding painting project: terrain!

Bad Moon orks survey the battlefield atop imperial ruins

I had a fair amount of the previous generation of warhammer 40,000 terrain sets, the ruined imperial buildings that came out in the Cities of Death era, in my pile of long-neglected kits and this seemed to be a good time to put them together. No precision building required! I had in mind the following requirements: 1) the terrain needs to be playable (i.e. no crazy complex buildings with overhangs that make it hard to reach for models), 2) should support competitive play (most of my 40k playing friends are very into competitive play), 3) should be nice to look at!

Requirement 2 is the most demanding, but thankfully the current body behind the World Team Championships has a very clear document on how their tables are to be set up (check http://worldteamchampionship.com/wp-content/uploads/2020/09/WTC-2021-Terrain-Maps-9.31-Low-Res.pdf if you’re interested), and that seems to be the standard followed by events (locally anyway). I’m not a fan of the cardboard cutout-type terrain they use for these events, but I felt that the older 40k terrain kits would lend themselves pretty well to creating nice looking alternatives with close enough gameplay.

I picked one of the tables in the WTC PDF and went about recreating the pieces I would need:

  • 2 Large Buildings
  • 4 Smaller Buildings
  • 12 Containers
  • 2 Craters

For the large buildings I used the Shrine of the Aquila kit, and for the smaller buildings I used the old Imperial Sector kits. For the containers I used the containers I’d painted for This is Not a Test (https://lairofthelagomorph.wordpress.com/2021/02/04/containers/). For the craters, I used the old GW craters.

Example Layout

I wanted to be able to use the terrain for less codified play too so I made sure to build and paint the 6 building sections in pairs so they could be combined into a bigger single building.

Large Building
Smaller Building 1
Smaller Building 2

The buildings were painted very simply in three steps:

  1. Undercoat with coloured spray can (I chose three light colours at the hardware store, each building got a different colour inside and out)
  2. Sponge some rusted chips (I used some acrylic burnt umber and old case foam)
  3. Rust wash (I diluted some acrylic raw umber with water and dish soap, then covered all the buildings in it)

I’m very happy with how that rust wash settled and dried, that was a bit of an experiment but came out very good I think.

I want to go back over these at some stage in the future and paint in some of the more detailed areas (a lot of skulls for example!) but this will have to wait for the old eyesight to come back. For now they have a nice industrial or ship-like look to them that I don’t mind

Craters

The craters were simply done with a series of successively lighter drybrushes using Raw and Burnt Umber, Yellow Ocher, and White.

Overall a nice project to keep me busy this week, I think my eyesight is getting better (I’ve been able to type this post with not too much difficulty!) but it’s slow going so I may not be painting regular miniatures for a little bit. On the plus side I have a lot of terrain in dire need of paint, so that may just be my focus over the coming weeks.

2nd ed. Grots!

Here’s a blast from the past! For this round of the challenge we went back to troops, and I had the perfect unit lined up for the occasion: 20 gretchin from the second edition of Warhammer 40,000. These have been lying around boxes of ork bits as bare plastic for a very long time indeed!

How many times can you paint the same face without going mad?!

Painting 20 of the exact same model is a bit mind numbing but I do find it easier than painting 20 models that are all similar but not quite the same. At least in the same model case you can just get in a rhythm and you’ll find the same bits in the same place each time. Pick a colour and get through it!

These are really characterful models and were also fun to paint because of that. I tried to simplify the paintjob on some of the areas of the model to speed up the process, but I found I was having enough fun that I did quite a few stages on some areas. The skin is the same four green stages I do on the orks, only lacking the red wash I give the orks on their lips and around the eyes. For some reason these models felt they should stay all green!

From the back you can see the one real shortcut I took: their tunics. These were done with a single coat of GW’s Snakebite Leather over the Vallejo Dunkelgelb undercoat. I think that worked out ok. Juxtaposed with the more worked-on areas it looks less lazy than it might otherwise.

Overall a very fun round of the challenge, and I still have just under a week till the next round to fill with some other project. I have some more Riders of Rohan on the go, so they might get finished in that time, we’ll see!

Meganobz, Pt. 1

For this round of the challenge, we went back to elites and I chose to get started on the rather large pile of Meganobz in my possession. I had hoped to get more than this done, but sometimes life gets busy and painting time cut short! Still I got three done, enough to qualify as a legal unit!

These were interesting to paint, I wasn’t sure whether to undercoat them the ochre-yellow I’ve used for the rest of the army, or got to sliver to help with the amount of metal on the models. I settled on silver with the idea that painting in the metal plates yellow would be less work than picking out metal details in silver later. I think that decision worked out, so the next batch will also start from silver, and any vehicles I do for the army will follow the same method.

The large amount of metal aside, these were painted much like the rest of the army to keep things consistent. I like to keep my ork models looking different to each other to communicate the ramshackle nature of their engineering, so I tried to vary the colours of details as much as possible across these, especially when those details are from the same parts of the kit (for example the gun arm on the leftmost and center ork are the same piece)

Overall I’m happy with these and now I have a set method for approaching them I hope to get more done next time we pick elites!

Bad Moons Warboss

For this round of the challenge we chose the HQ slot, which I immediately knew I wanted to paint up this warboss for. I’ve had this model (like most of my Orks!) for many years, and been looking forward to painting it for a long time. I got him in the Stormclaw box (Orks vs. Space Wolves), but I’m pretty sure you can get him in another set these days. One of my first ever models was the old metal warboss with an attack squig on his arm, so I think one of the reasons I like this model so much is nostalgia!

I painted this model much like the rest of the army so far. I don’t generally like to actively paint my characters to a higher standard, they just tend to get more details due to the fact I’m painting them alone rather than as part of a batch.

The first squig in the army was blue (on the Runtherd from last round), and I decided to make this one blue as well. Hadn’t quite decided if I was going to keep all of the army’s squigs blue, but it’s looking more likely now!

The rockets on the gun were an interesting challenge, I wanted them to stand out from each other, but not look too toylike even though I was going to paint them mostly straight primary colours. I think it worked out ok.

I really enjoyed painting those gun holsters, leather is one of those materials I find quite interesting to paint, you can add a lot of hard surface techniques like texture and scratches to this organic material. I usually paint leather from a dark warm brown all the way up to a bone colour for those extreme highlights. Here I tried something a bit different, by starting with my midtone (Vallejo Game Color Beasty Brown), and washing in the shadows with Agrax Earthshade. Then proceeded through with my usual steps up to bone. That felt like it lacked that richness I get from my usual process, so I glazed some Vallejo Game Ink Flesh Wash over the end result, which added that warmth back in. I think this ended up being a bit faster than layering all the way up from dark brown, so this may end up being my standard army painting method for brown leather.

The power klaw was a good testbed for a unit I’ll have to paint at some stage: Mega-nobz! I painted this exactly like the rest of the yellow in the army, and to me that’s ended up with a nice level of separation between the plates, so I think it’ll work well for models that will end up being 90% armour plates!