The Streets

I’ve been working on a cyberpunk version of Masse d’Armes as I’m a fan of cyberpunk media and been wanting to play some miniatures games in the genre. There was a slight problem with that, which is that I don’t really have suitable models and terrain! The closest I do have is the terrain and models I made for This is not a Test, which is firmly in the post apocalyptic genre so not really appropriate. I therefore decided to start at the beginning and make a game board.

The finished product.

Rather than get a game mat, I decided to make my own, starting with a 900x400mm (~3x2ft) MDF board from the local hardware shop. I then cut out the shapes for the raised footpath areas using 5mm foam core panels.

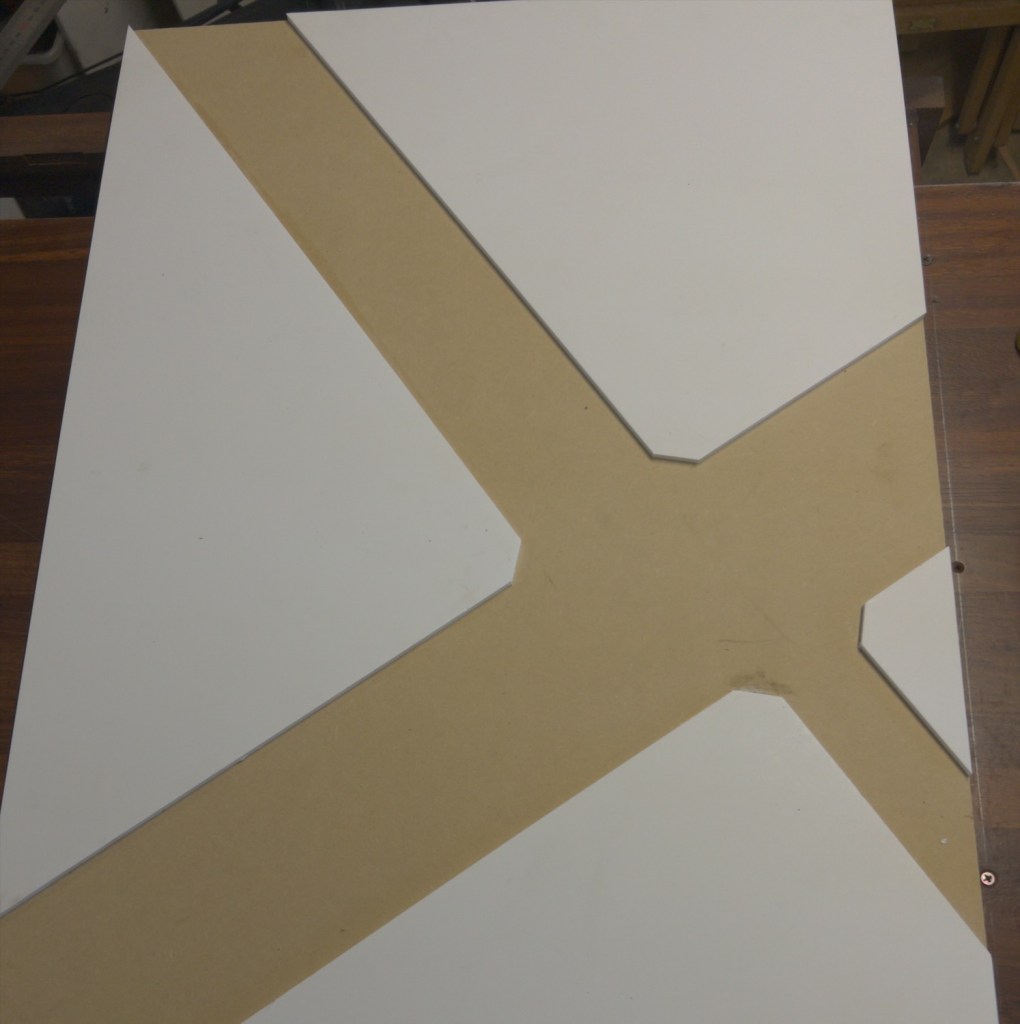
I glued these down with PVA glue and left them overnight weighted down.

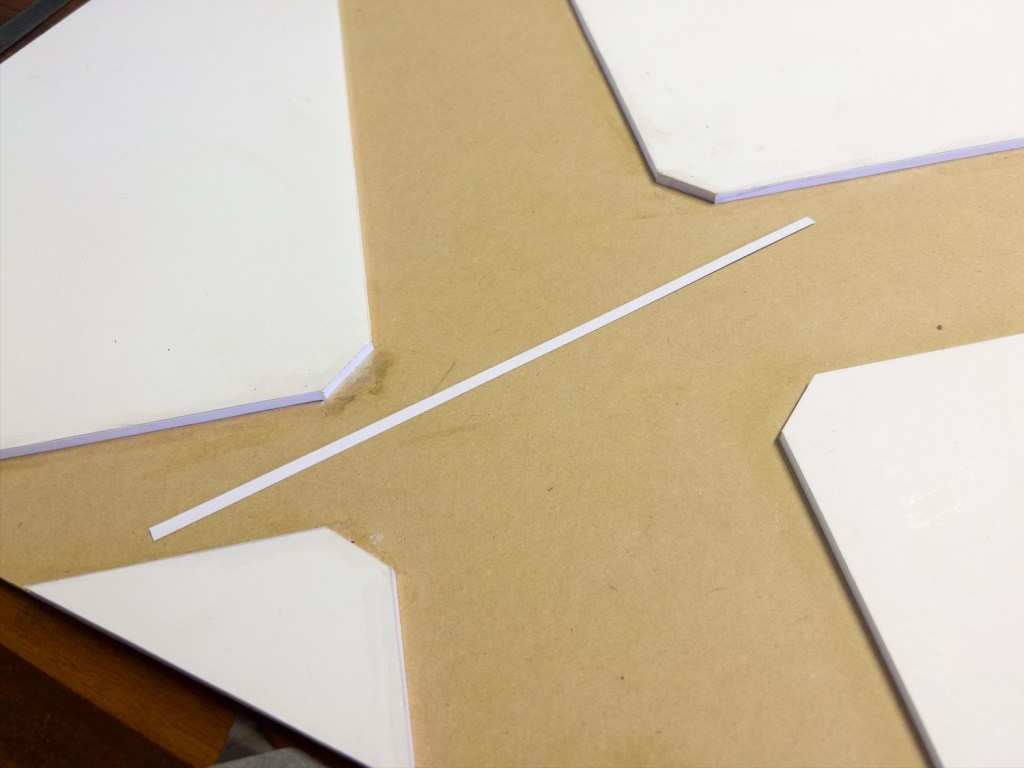
To cover up the exposed foam on the sides of the foamcore panels I cut 5mm strips of thick paper and glued them to the exposed edges.

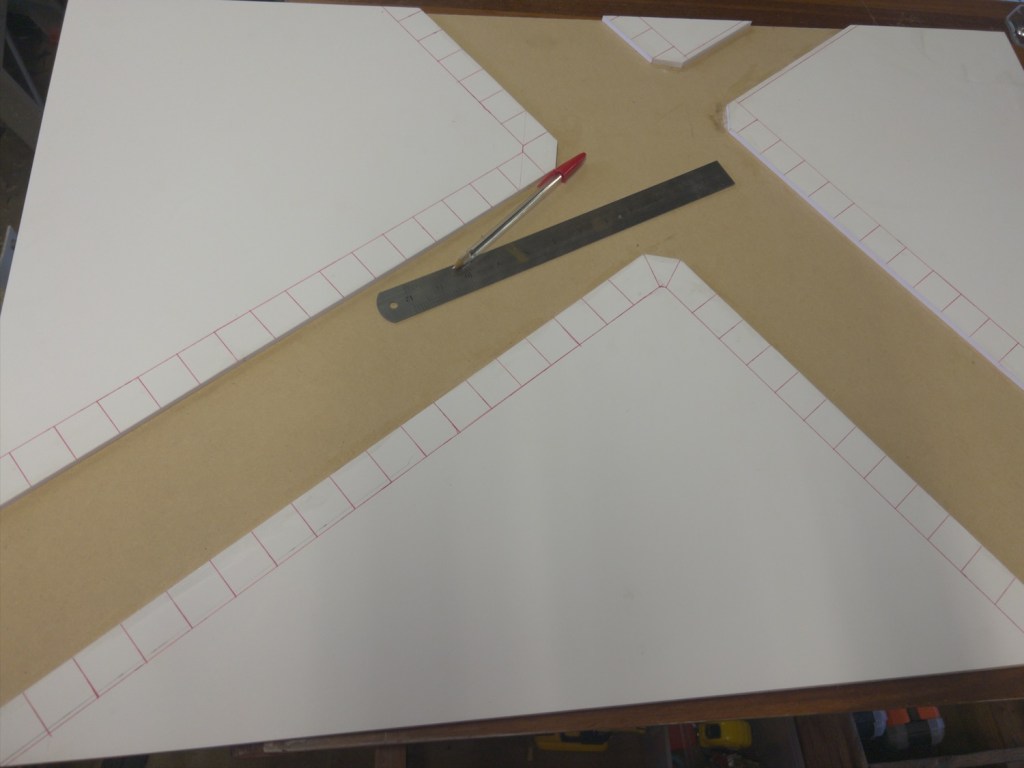
I used a ballpoint pen and a straight edge to mark some lines in the foam core to represent separate sections for the footpath. I tried to keep the pressure hard enough to mark the surface but not too hard so as not to tear through the outer layer of card.

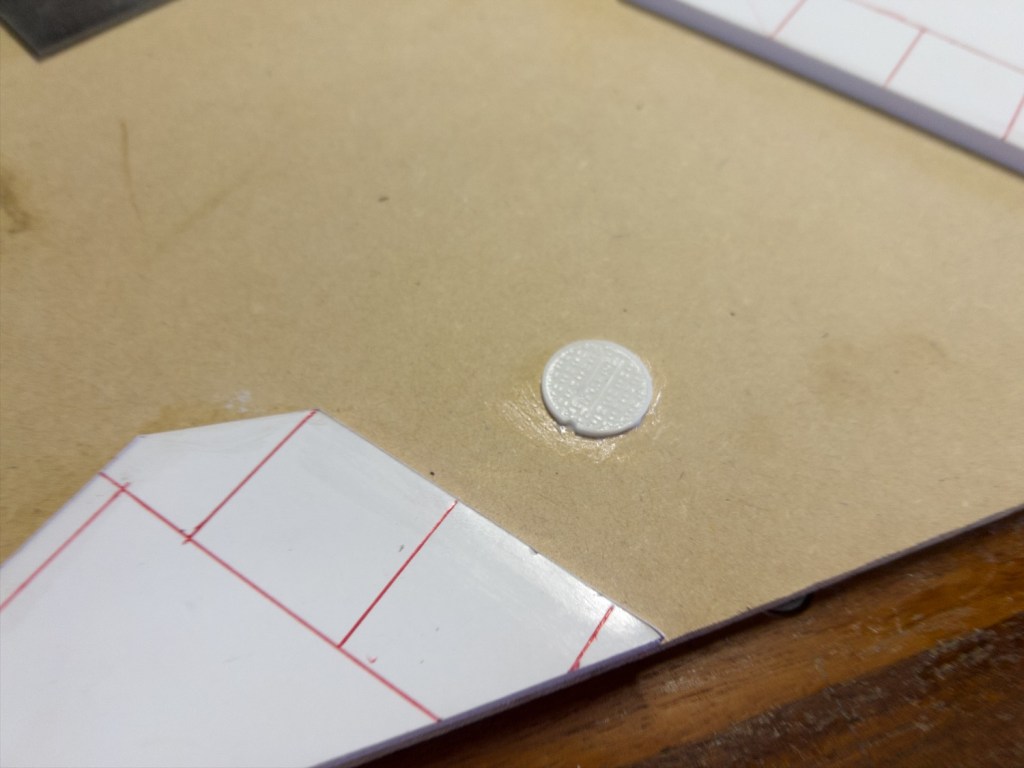
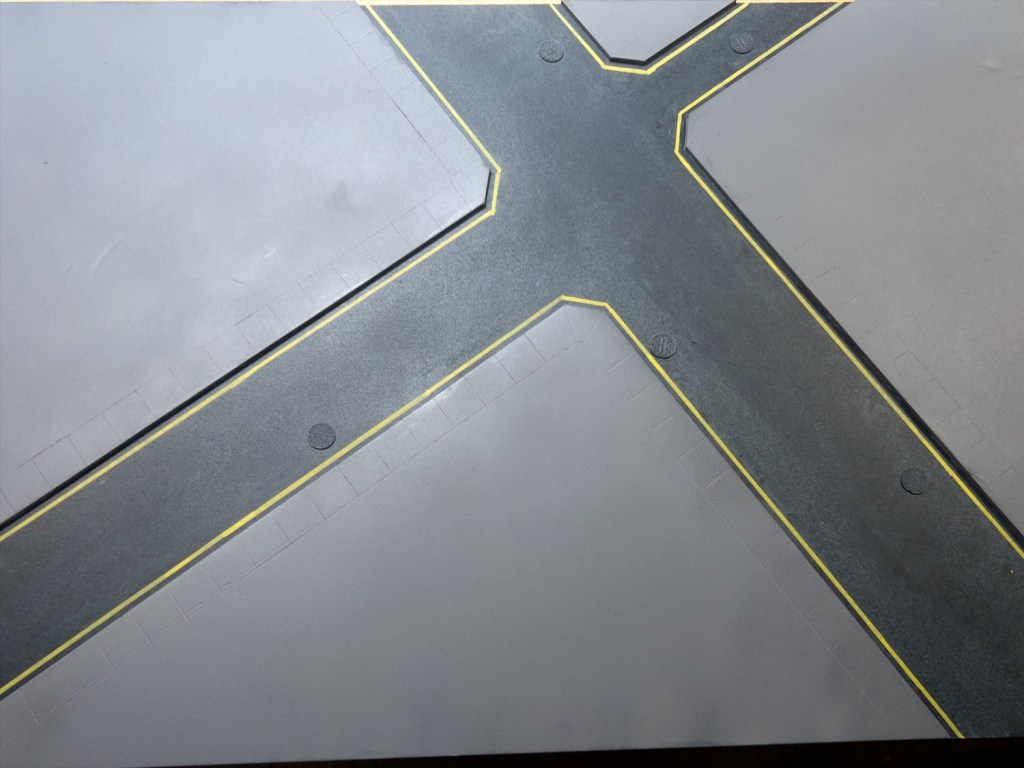
I 3d printed some manhole covers (https://www.thingiverse.com/thing:3246148 – shrunk to 20mm diameter) to add some details to the road sections. I glued these down using PVA.

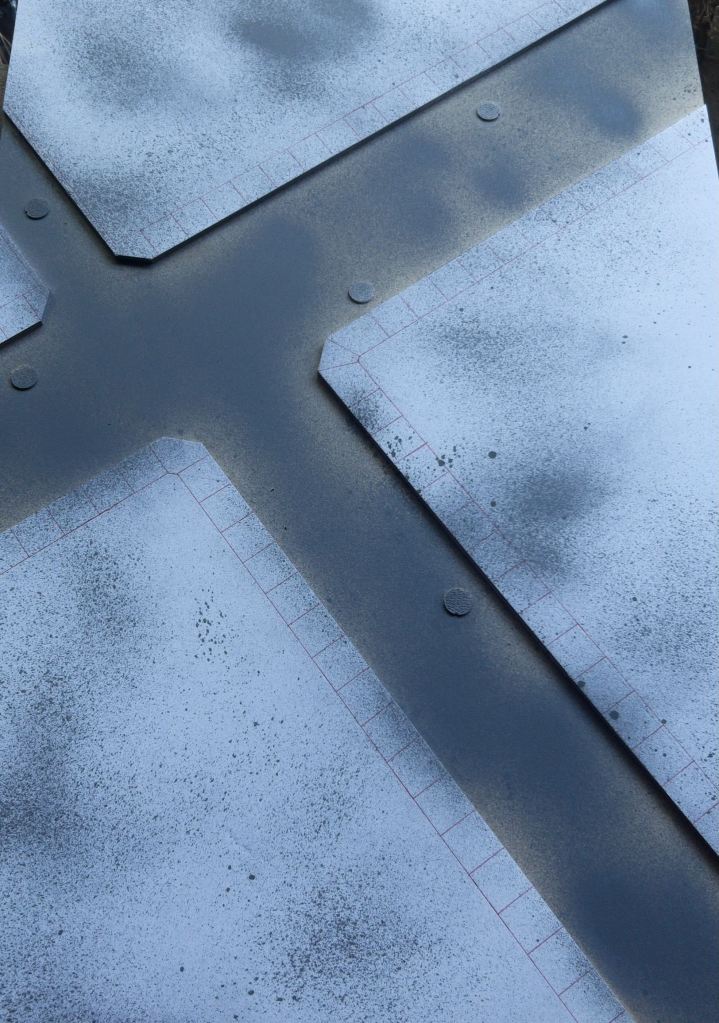
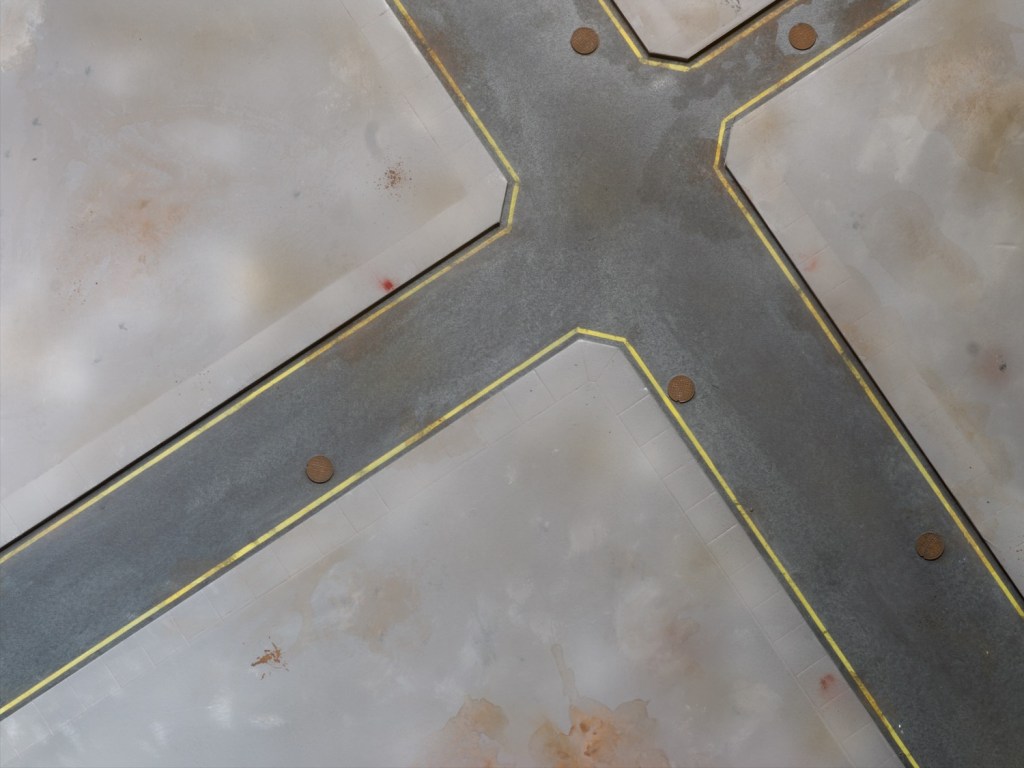
I had a little bit of Citadel Roughcoat left in an old can so I sprayed some in patches, concentrating on the road sections, but making sure to dust all areas. I then undercoated the whole board with some grey undercoat, painted the road sections over with a mix of black and blue paint, aiming for that asphalt colour.

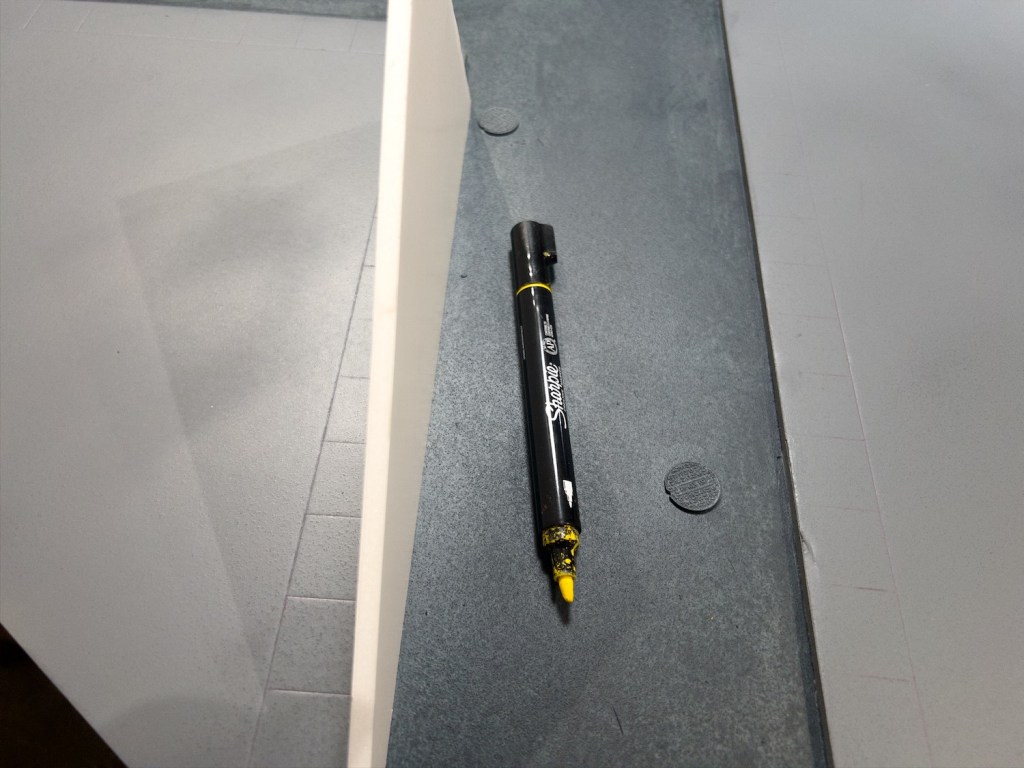
For the lines on the roads I used a Sharpie paint pen (Creative Marker I think is the name). I used some foam core offcuts to act as a spacer, pushing them against the raised edge. This worked really well and I’ll do this again if I have to paint road lines again in the future.

Fresh lines! Time to dirty this up.

I then got into weathering all this. No photos from this stage I’m afraid, was having too much fun to remember to take photos! I used quite a few washes of diluted acrylic paint, as well as some drybrushing and stippling paint using a torn sponge. Finally I broke out the airbrush and sprayed on some patches of browns and greys.

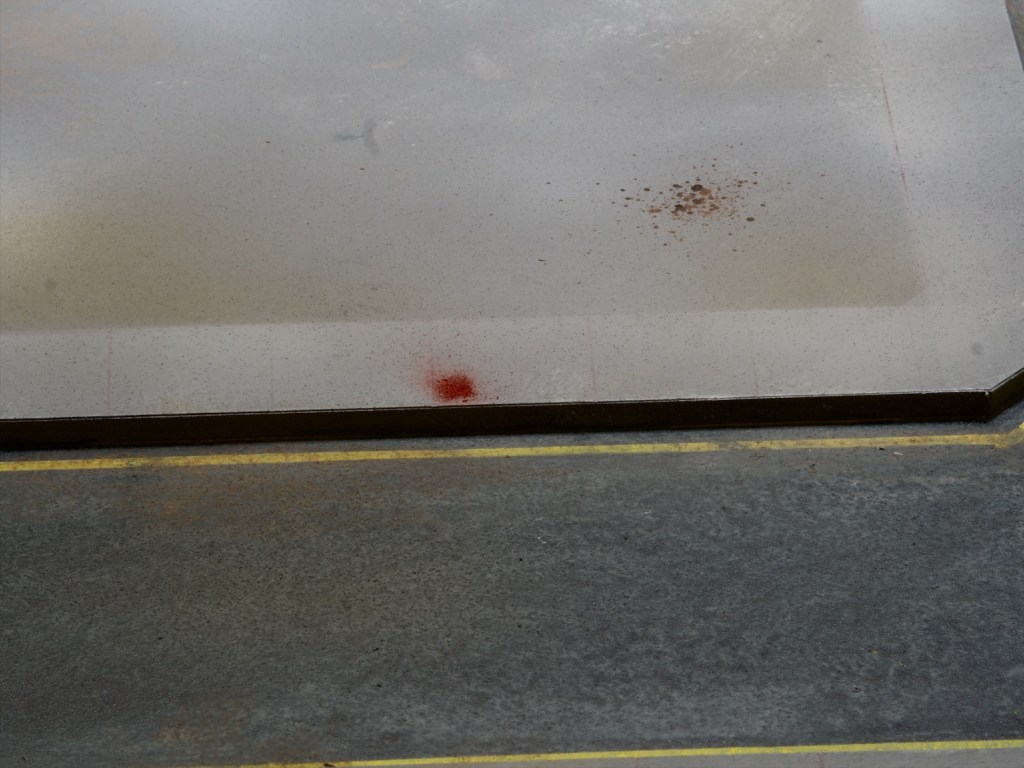
I also used the airbrush masked with a piece of paper to spray a mostly clean line along the paved area to separate it from the rest of the non-road sections.

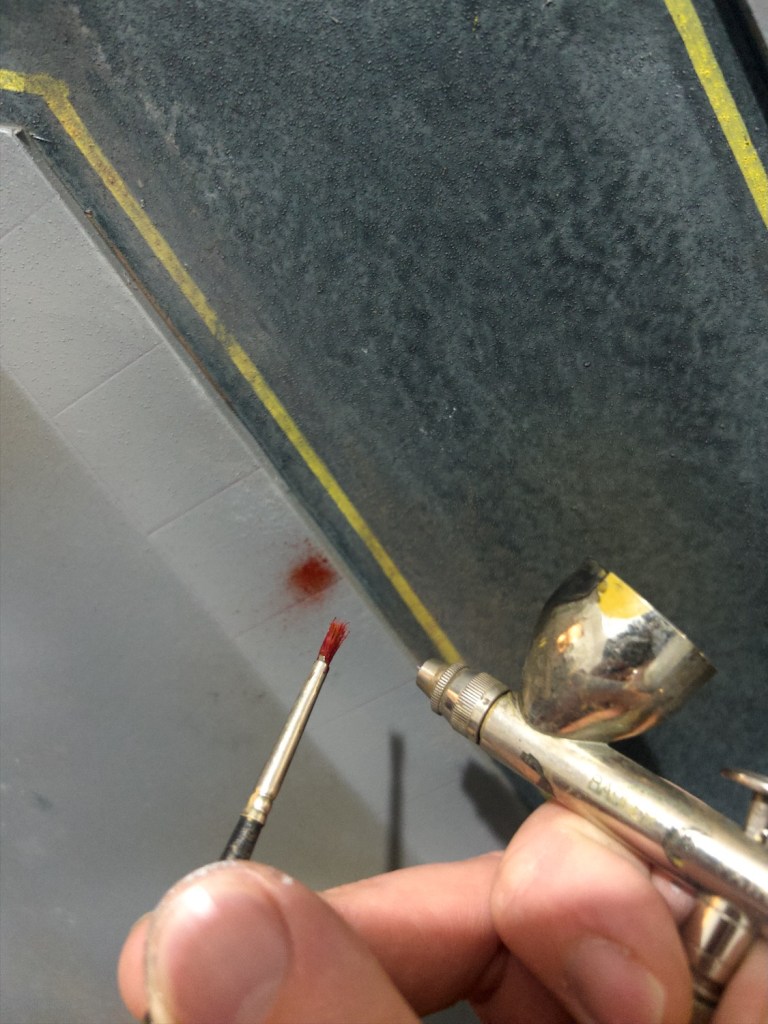
Finally I sprayed a few splatter effects with the old trick of loading up your brush with some paint/wash and using the air from the airbrush to flick it everywhere.

A few splatters. You can also see the effect of masking off the footpath area in this photo.

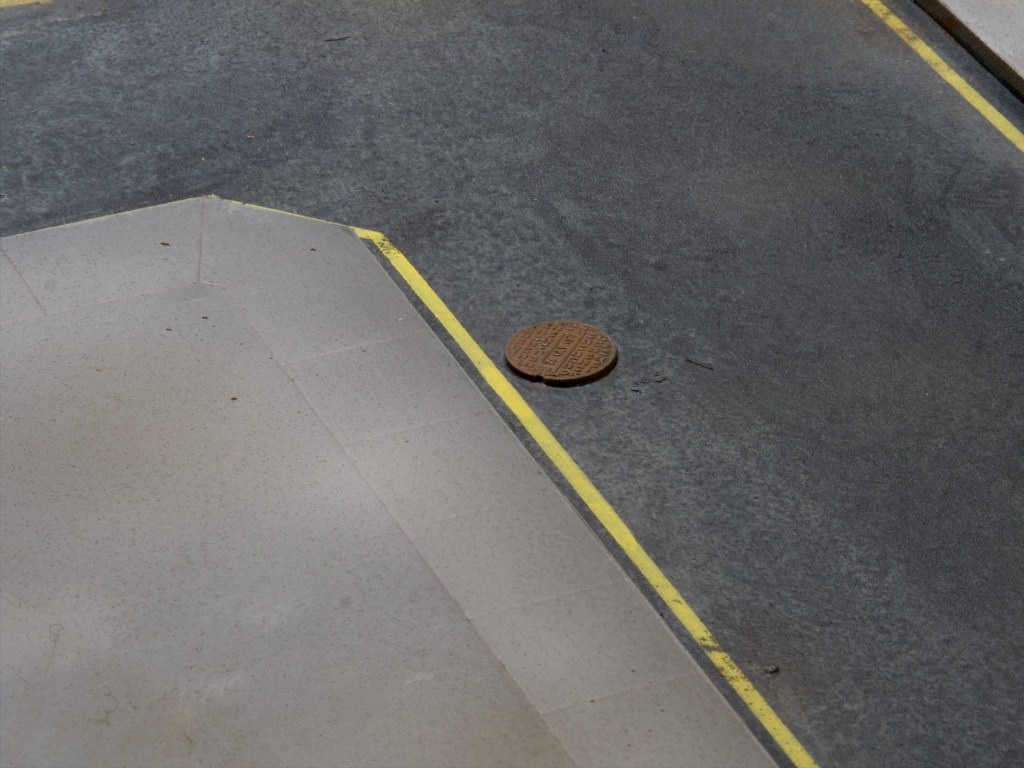
The manhole covers were just painted with a burnt umber and drybrushed with a gunmetal. These really should be level with the road surface, but I wasn’t keen enough to cut a recess for these to sit in.

I really enjoyed putting this together, and now need some terrain to go on top! Luckily enough I have some 3D printed buildings ready to go (ready for painting at any rate!) so should be able to get started on these.

This is likely my last post before Christmas, so for those of you that celebrate it I hope you have a lovely time (and lots of miniatures under the tree)!

Containers!

I quite enjoy painting terrain as a break from regular miniatures, I find it quite a different experience, and a nice way to relax between big projects. I’ve painted a fair bit of terrain this year and I’ll likely make some posts about that at some stage because I’ve never really shared any of it directly, they usually end up as backdrops for miniature photos.

I’ve had these containers and crates for quite a while now, they’ve been sitting mostly built for almost a year, and I finally made time to finish building them and get them painted. They’re an MDF kit from Krommlech/Tabletop Scenics (3 of that kit in fact), and I bought them for our This is not a test games, although I plan on also using them for other games (40k for example).

With my terrain painting I tend to go for speed as my primary driver, focusing on the overall feel of the pieces rather than the detail. Here as I was targeting a post-apocalyptic feel I knew I wanted the containers to be pretty beat up and covered in sand/dust. To get a nice chipped feel to the container paint I decided early on that I wanted to do the hairspray chipping technique, which produces very realistic results.

If you don’t know the technique, I’m sure you can find plenty of tutorials on youtube and the like, but for a quick summary here’s how it goes: 1) base coat the model in the colour you want you chips to be (here I used a grey-brown spray can from the hardware store), 2) liberally spray hairspray over the whole model, 3) spray the main colour of the model over the top (good to use an airbrush for this), 4) using a wet brush/toothbrush rub away at the paint. The layer of paint over the hairspray will reactivate and scratch away quite easily. It’s very important to varnish the model afterwards or you will continue rubbing the paint away as you handle the model.

I find it quite hard to control the amount of chipping you get (i.e. it’s really easy to get massive amounts of chipping), so I only tend to use this technique when I want to get something looking really beat up, which makes it perfect for a post-apocalyptic setting.

To weather the containers further, after the chipping was done I did a few washes of oil paints (payne’s grey for some darker staining, and yellow ochre to do dust marks), and sprayed some Vallejo Air Desert Yellow through the airbrush to get the dusty look you can see at the bottom of the containers and in splotches all over them.

Overall painting all of these took a coupe of hours of effort (not including drying time!), which is nice and quick for the result I think.

Rosa’s Ravagers

I’ve been playing the post-apocalyptic skirmish game This is Not a Test for a while now with a couple of friends, and decided it was time to paint up a new warband. I had a few old metal Escher gangers from Necromunda lying around that I thought could make really cool raiders for the game. Rather than make the full warband from those models, I decided to mix and match with other models I had around the place to get a nice eclectic look to the band.

Rosa’s Ravagers ready for a fight.

I challenged myself to paint the team with a variety of skin colours, to break away from the routine of painting skin the same on everyone. There’s a lot of variety in the real world, so why not in made up worlds too! Another challenge for me was the bases, I’ve been trying out various ideas to make desert bases I’m happy with for a while and I think these worked out really well.

I’ve taken individual photos of the members and will be talking about each below, starting with the leader, Rosa:

Rosa Salmón the Bandit Queen

Rosa is built out of an old Escher ganger, with the lasgun gut up and supplemented with Bren gun parts from the Warlord games WW2 British Paras set. Her hair is painted with Vallejo’s Salmon Rose, hence her name!

Butcher

Butcher was made from Games Workshop heavy stubber chaos cultist. I filled in the chaos star on his mask, and trimmed the chaos pendant back down to a simple ring.

Vasquez

Vasquez is a stock Escher ganger. This is Not a Test has rules for laser weapons so I decided to keep the pistol as is rather than replace it with a gunpowder equivalent.

Sawtooth

Sawtooth is also a stock Escher model. The game has chain blades as relics from the past. In our own version of the universe, the apocalypse was cause by MG, a megacorporation that had its fingers in all the pies. In this case I painted the housing of the chain blade orange as a callback to gardening tools. I see this particular relic is a repurposed chainsaw of some kind.

Ray, the Rage Sage

Ray was kit bashed from a GW marauder torso and arms, GW Catachan guardsman legs, a head from the GW Chaos Vehicle Sprue. In a past life Ray was a tech savant from the reclaimer faction, but unfortunately for him he tried on this mask, which he didn’t know was a Worker Focus and Resiliency Increaser also by MG (of course), which pumped him full of strength enhancing drugs and other drugs made to make workers compulsive about their jobs. Not being in a factory, the drugs pushed Ray to be compulsive about a job he couldn’t do, which made him very mad.

Old Man Ramirez
Old Man Parkes

Old Man Ramirez and Old Man Parkes are two old men in the band, I see them as ex-bikers, Both were built out of Warlord Games WW2 American Infantrymen, with old GW head from the empire militias set.

Darts

Rounding off the band is Darts, also a stock Escher ganger.

This was a very fun project, each model being very individual and requiring a new plan for painting. I’m looking forward to adding more models to it as the campaign progresses.