I’ve been running the Rime of the Frostmaiden Dungeons and Dragons campaign for my regular RPG group for quite a while now, and they’ve made a lot of progress, being somewhere close to resolving the main plot points. As I started seeing the campaign draw to a close, I had the compulsion to remember the player’s characters in the best way I know: build and paint miniatures for them!
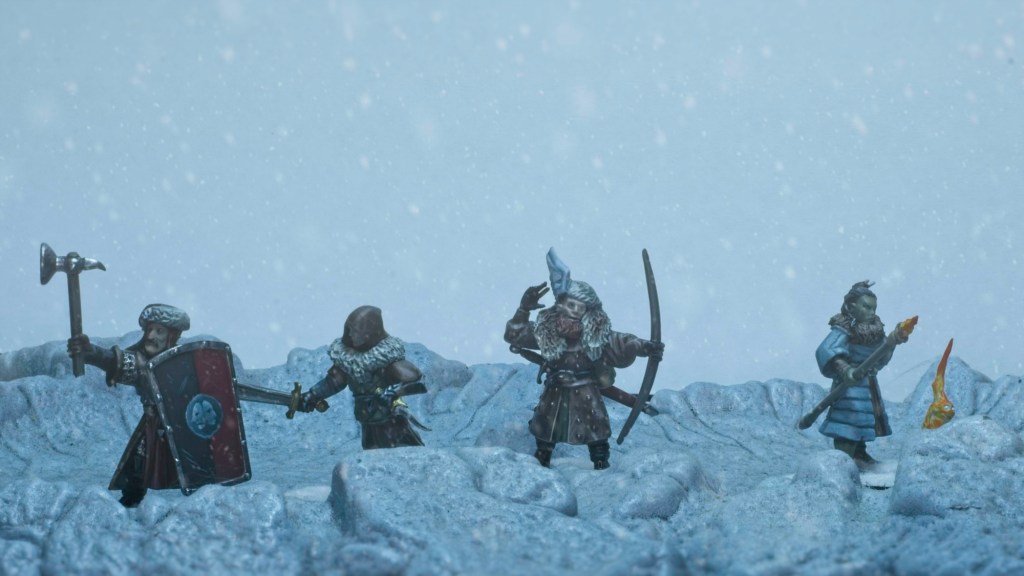
Caught in a blizzard, the party is attacked by unseen foes…
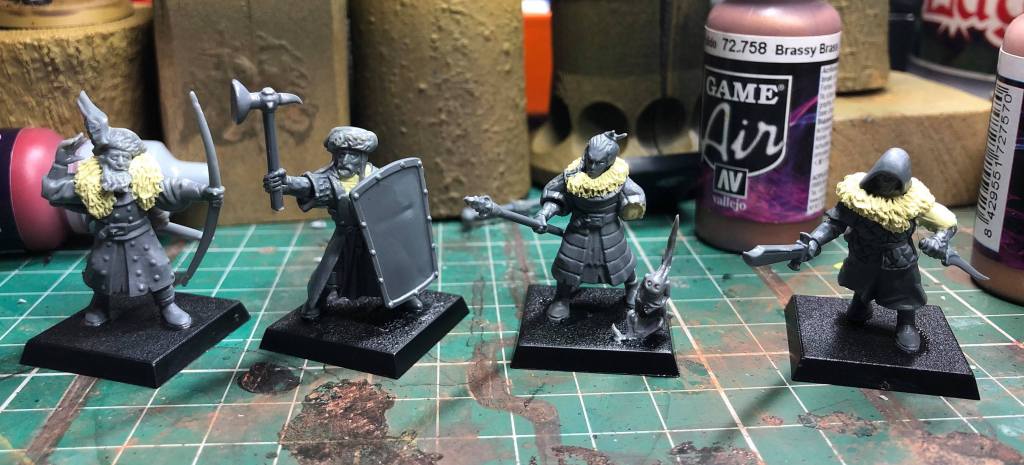
The campaign being set in the far north during a magically enforced winter (2 years long already and still going!), I wanted to use appropriate miniatures (i.e. no loincloth only barbarians!). I wanted them to be wearing heavy winter coats, which I struggled to find in many miniatures ranges. In the end I remembered the Bretonnian men at arms kit from the old Warhammer Fantasy range which featured padded full length coats. I figured with a bit of fur sculpted on they would look great as fantasy cold weather gear.
I scrounged through my bitz box to find suitable weapons and heads for each of the party members, and after some chopping of pieces and my first real attempt at sculpting fur ended up with models I was very happy with.
For the painting, I really wanted to continue the cold theme, so I mixed Vallejo Dark Sea blue in the shadows of every paint I used on the models. I did the same for highlights using Vallejo Ghost Grey. This was a bit of an experiment but I’m really happy with the outcome, to me the models look really unified, and more importantly, cold!
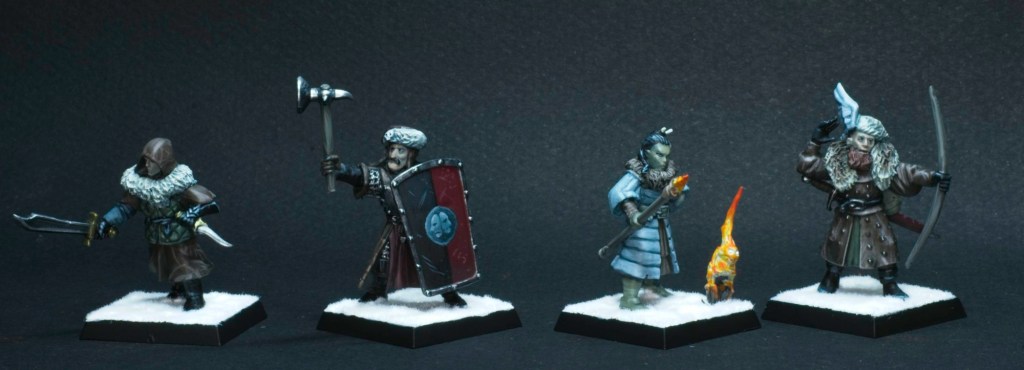
In no particular order we have:
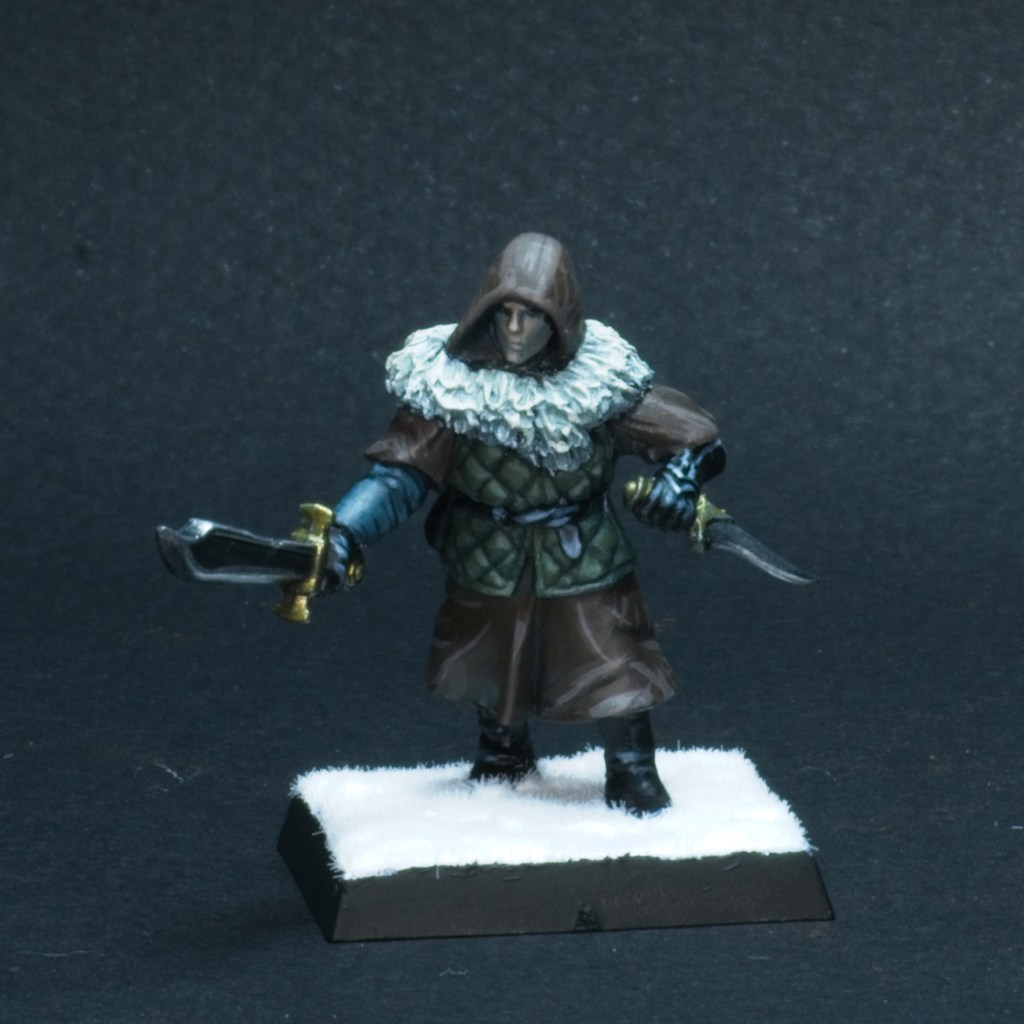
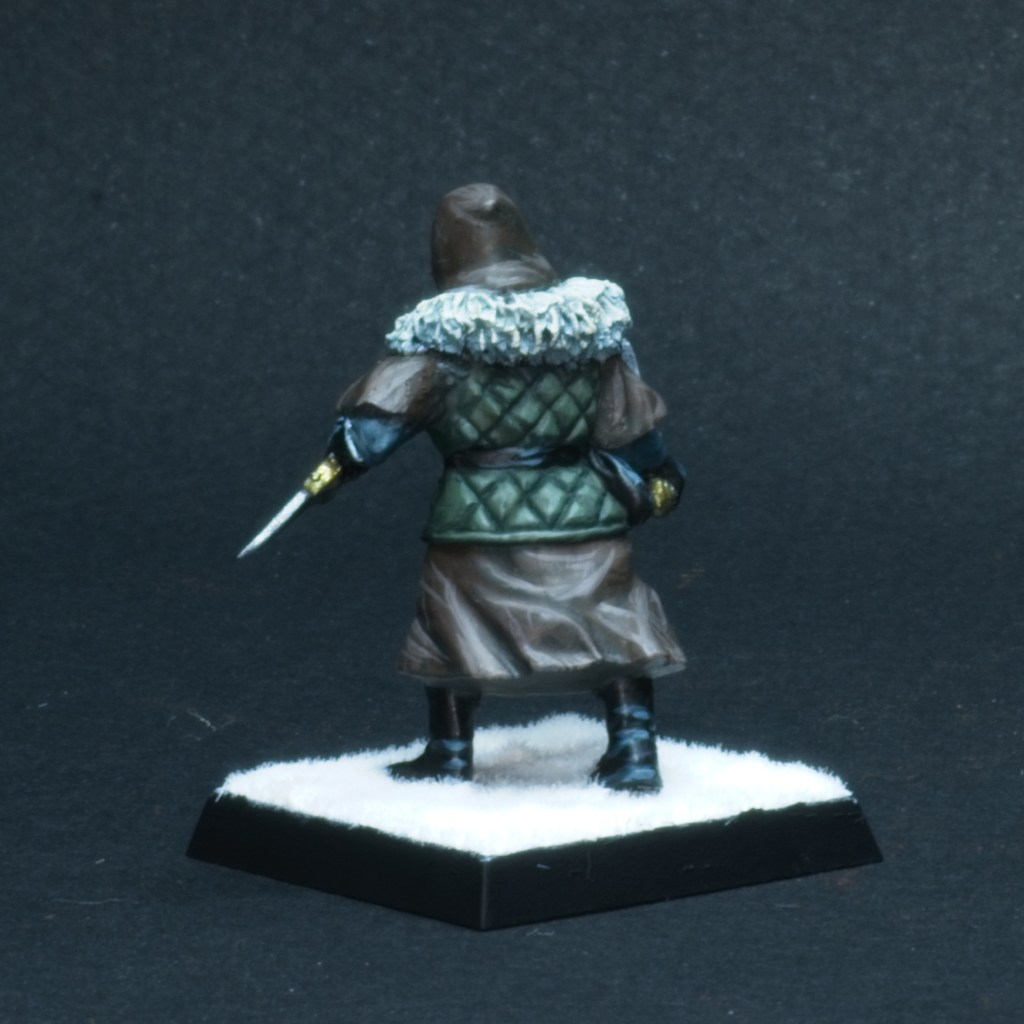
Lathariel, Elven Rogue
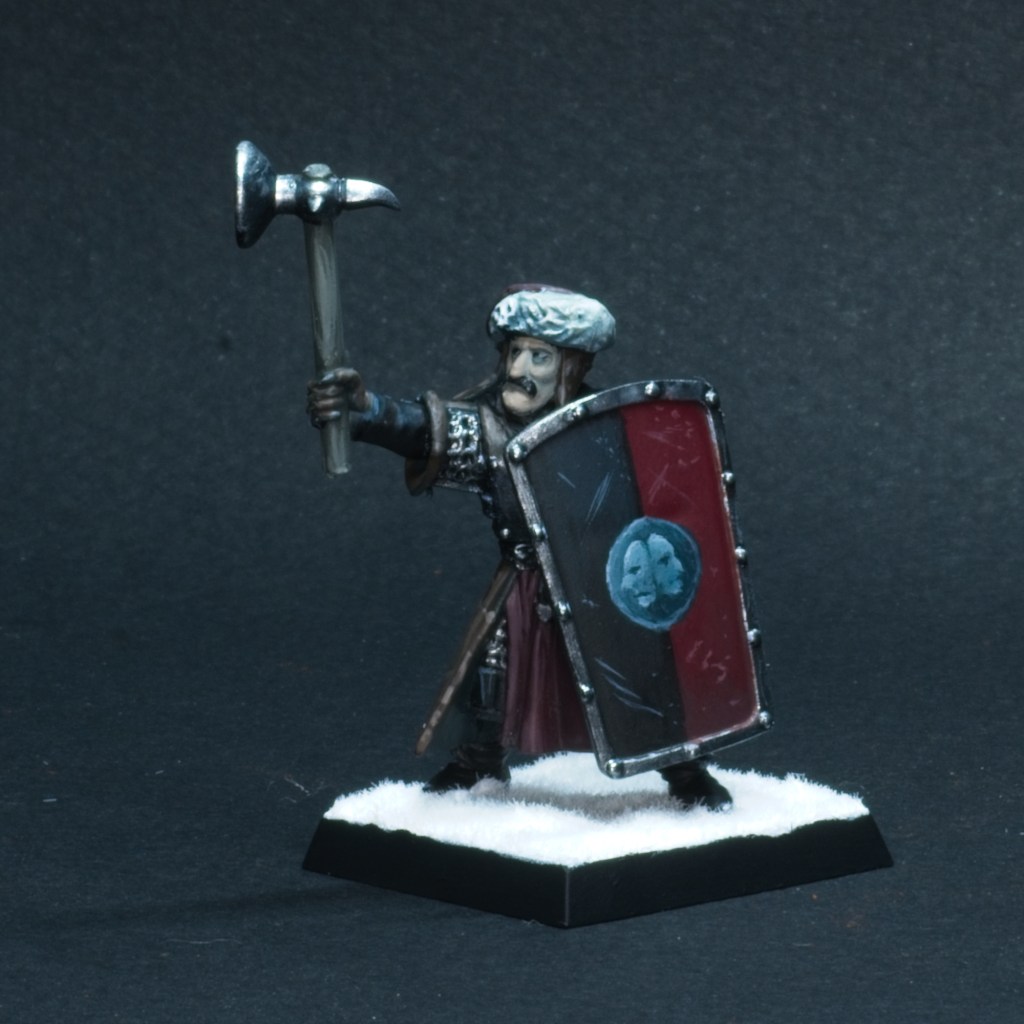
Mordecai, Human Paladin of Hoar (The symbol on the shield is the symbol of Hoar, a coin featuring a head with two faces)
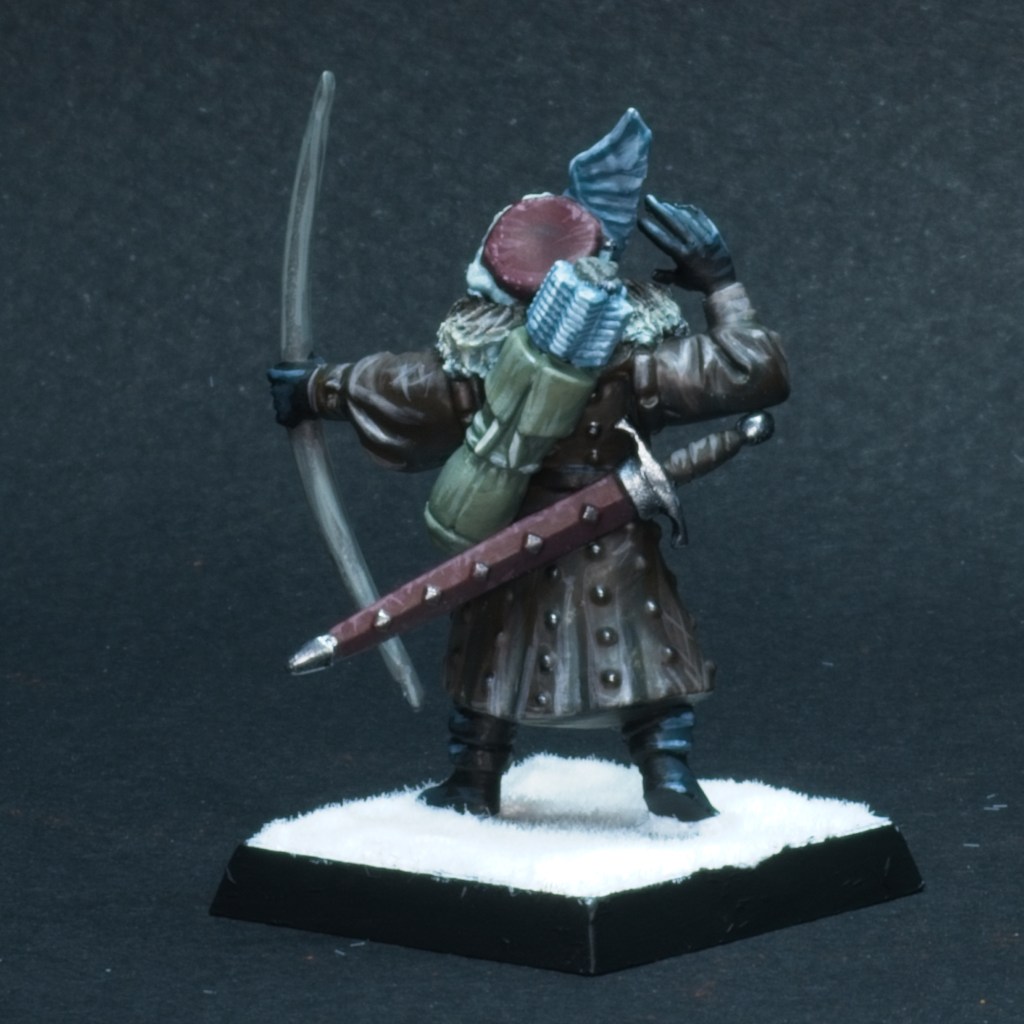
Geth, Human Ranger
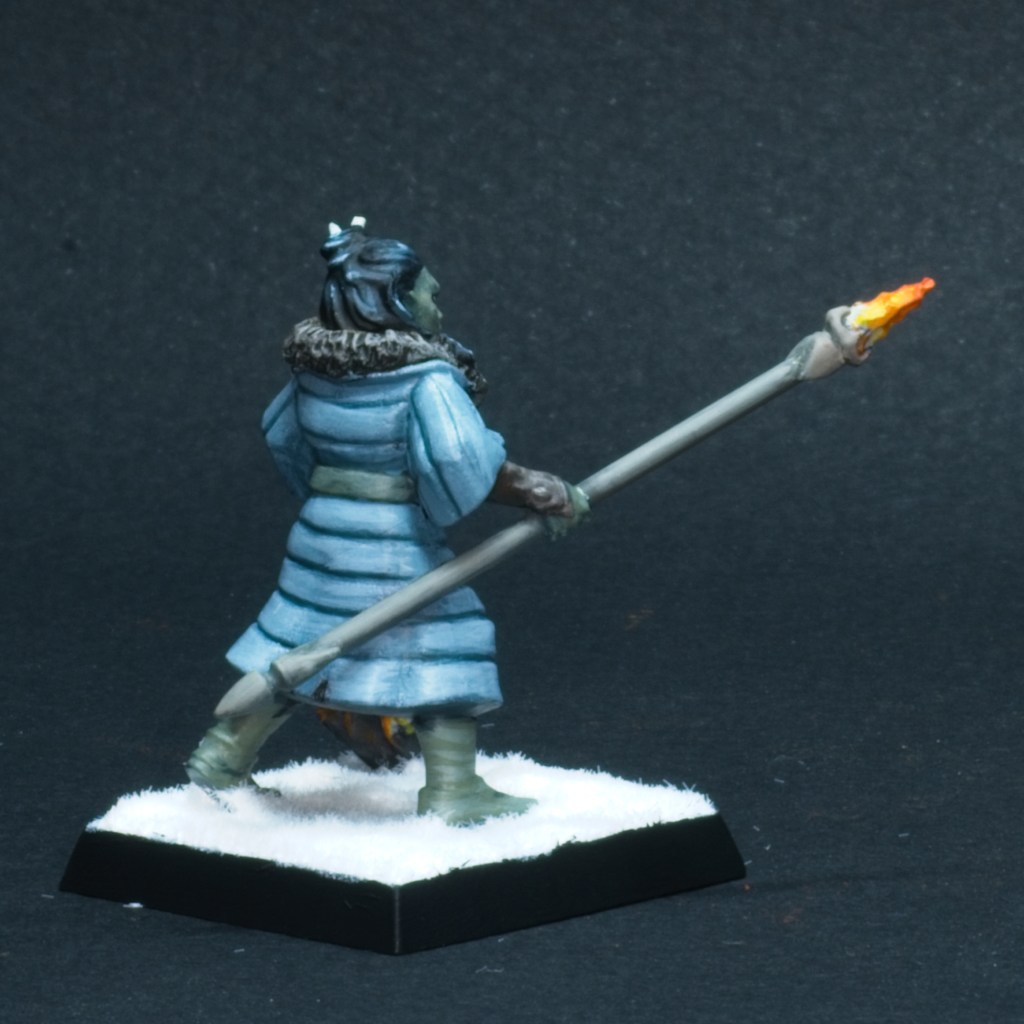
Tsuri, Human Wildfire Druid (With her fire totem), she lost an arm a few sessions ago hence the closed off sleeve.
This was a nice quick project (built the models yesterday, painted them today!), which provided a nice break from painting orks!
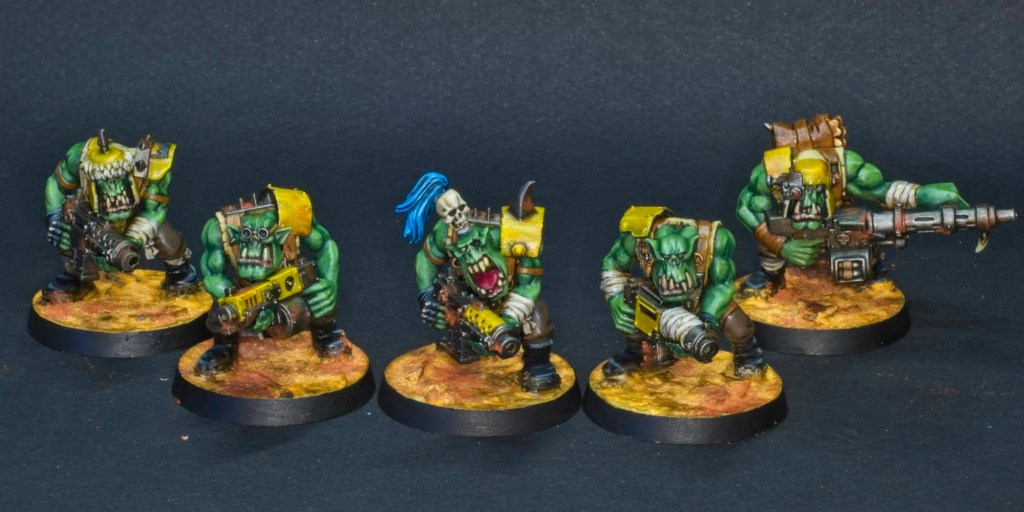
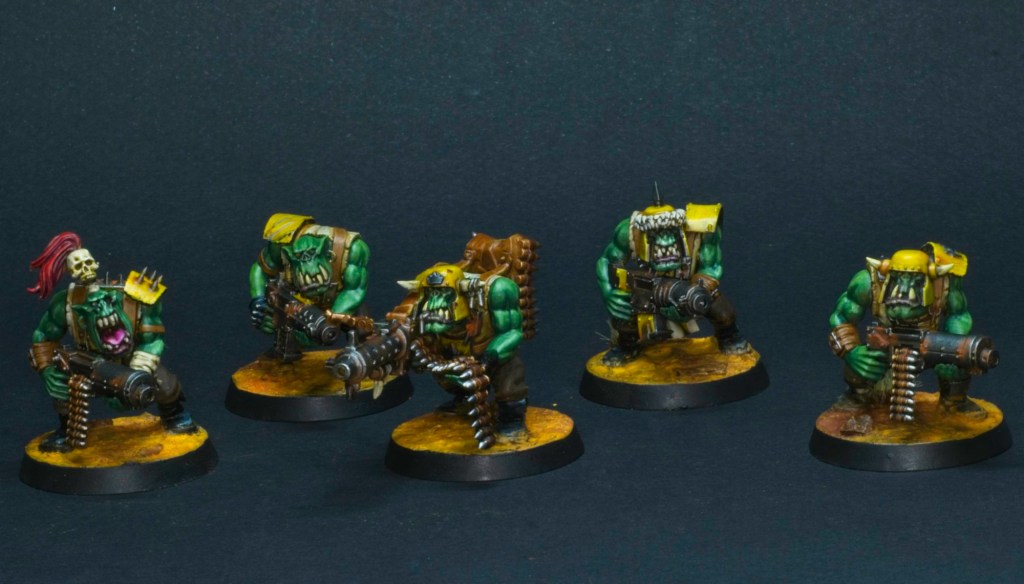
Good news on the injury front, I can see properly again! Over the last week my vision got much better to the point where I could paint miniatures again. I was so excited that I left my second terrain project half done and dived right back into the squad of Ork Boyz I was painting before my injury.
Not too much to talk about on the painting front, these were painted much as my original boyz squad was done. I have my recipe down for these Bad Moons and am sticking to it!
I’ve been able to see well enough to get back to work for a few weeks now, but mini painting still eluded me. Something about the close vision was hard for me, but that’s been slowly improving over time. With my return to the painting table my ork army challenge resumes, at the pace of one unit every two weeks.
I’ve written up some lists for a 2000 point army and there are a lot more models to paint before I reach that size. Slowly but surely I’ll get there!
Troops has been chosen again for the challenge’s next round and for me that means more boyz, but with a couple of twists this time. Happy to be painting miniatures again, and hope not to have to go through that ever again!
I’ve had a bit of a setback with my painting: a week ago I tripped and fell face first onto a wooden barrel and fractured my eye socket which has had quite the impact on my ability to see properly as you might imagine. Time will tell if I need surgery to fix any lingering issues, but in the meantime precision painting is right out, which means the army challenge I’ve been doing is on pause until I can regain the ability to see properly. I’ve found myself with a week off work so I thought I’d focus on a less demanding painting project: terrain!
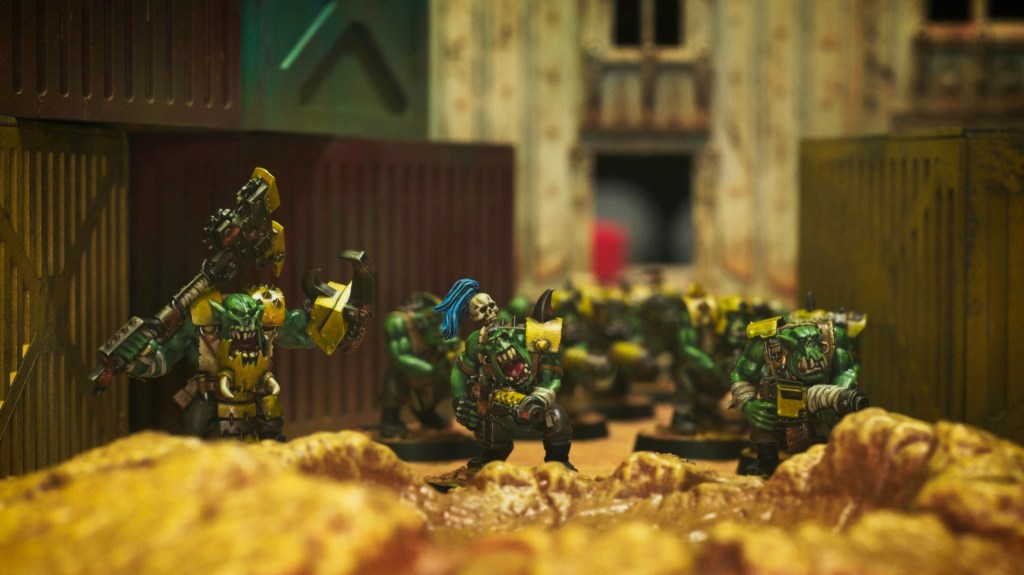
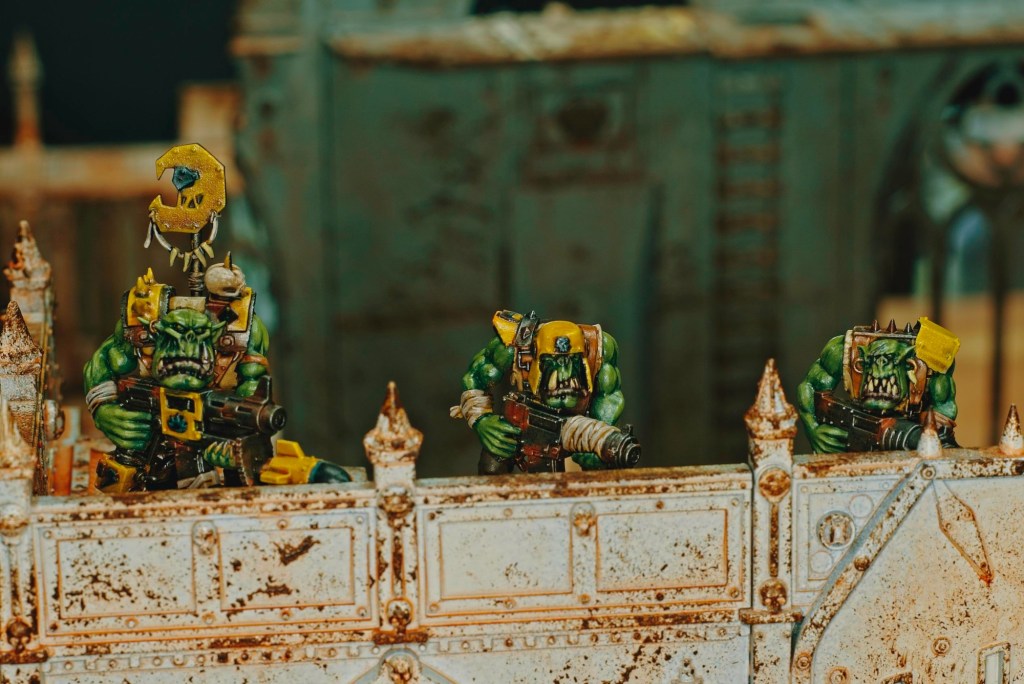
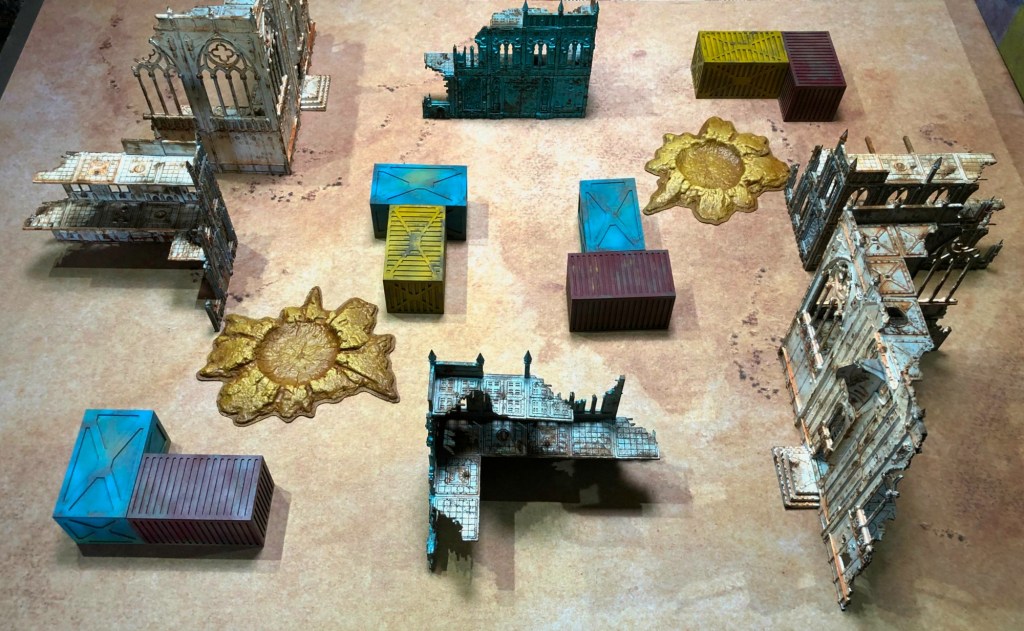
Bad Moon orks survey the battlefield atop imperial ruins
I had a fair amount of the previous generation of warhammer 40,000 terrain sets, the ruined imperial buildings that came out in the Cities of Death era, in my pile of long-neglected kits and this seemed to be a good time to put them together. No precision building required! I had in mind the following requirements: 1) the terrain needs to be playable (i.e. no crazy complex buildings with overhangs that make it hard to reach for models), 2) should support competitive play (most of my 40k playing friends are very into competitive play), 3) should be nice to look at!
Requirement 2 is the most demanding, but thankfully the current body behind the World Team Championships has a very clear document on how their tables are to be set up (check http://worldteamchampionship.com/wp-content/uploads/2020/09/WTC-2021-Terrain-Maps-9.31-Low-Res.pdf if you’re interested), and that seems to be the standard followed by events (locally anyway). I’m not a fan of the cardboard cutout-type terrain they use for these events, but I felt that the older 40k terrain kits would lend themselves pretty well to creating nice looking alternatives with close enough gameplay.
I picked one of the tables in the WTC PDF and went about recreating the pieces I would need:
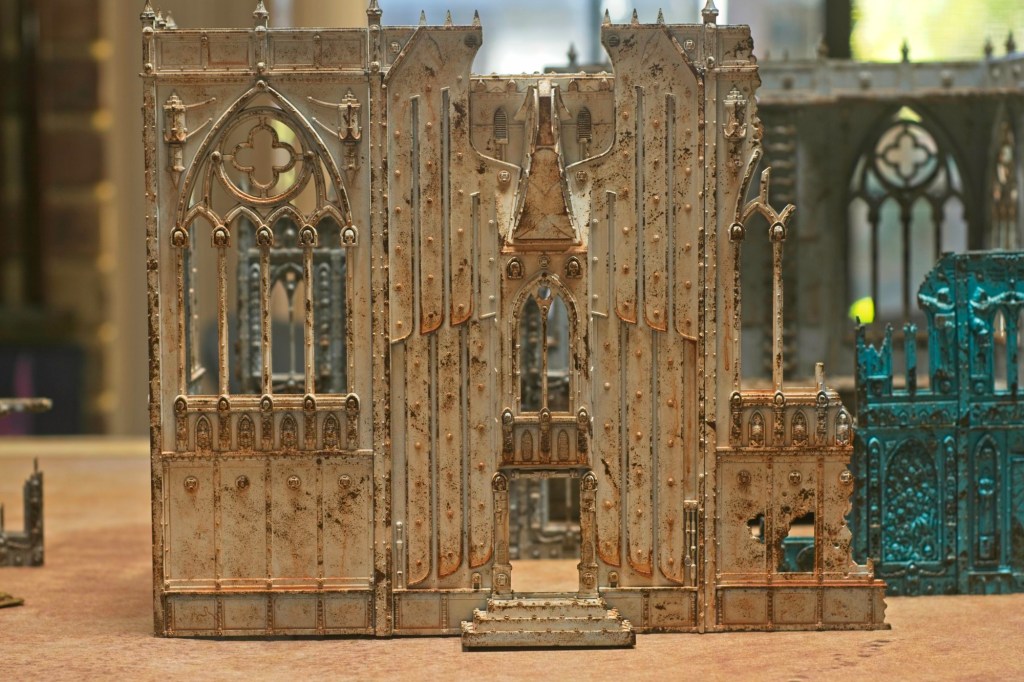
2 Large Buildings
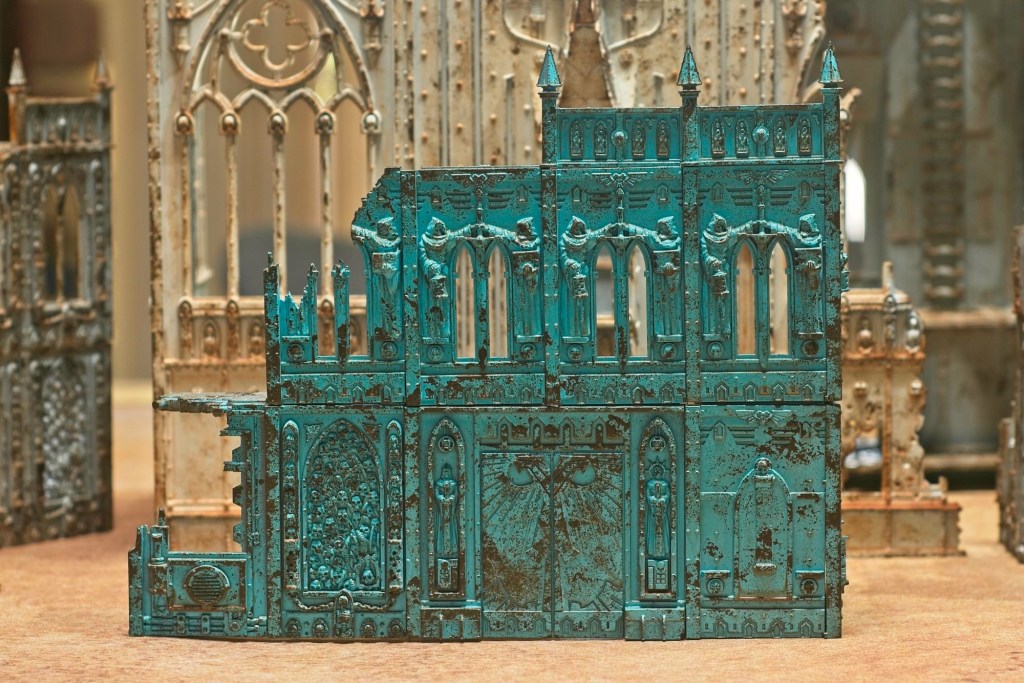
4 Smaller Buildings
12 Containers
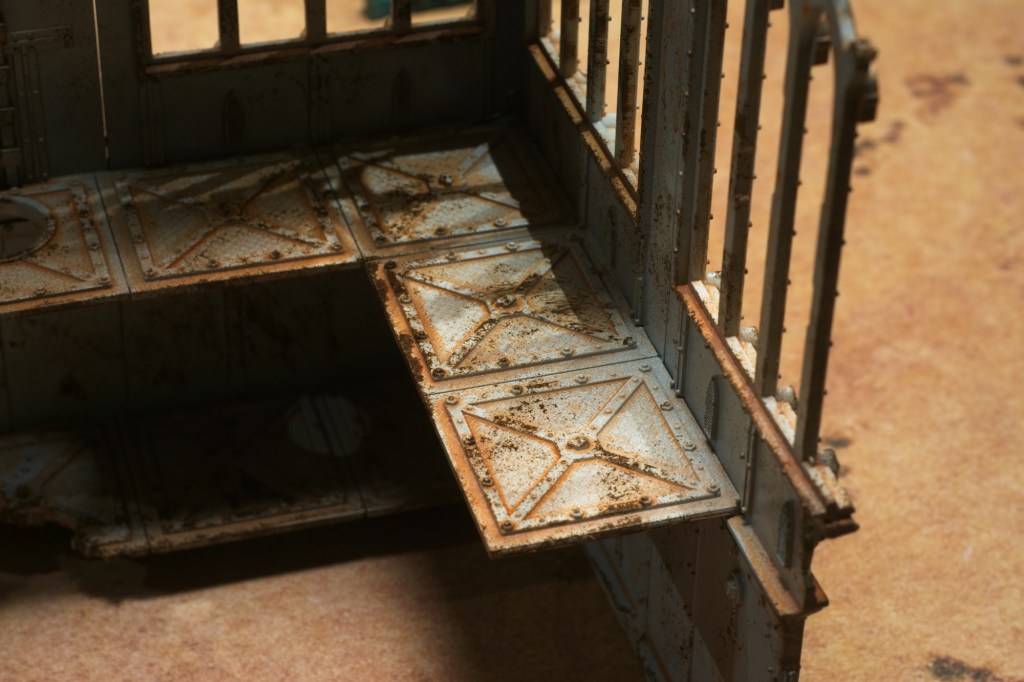
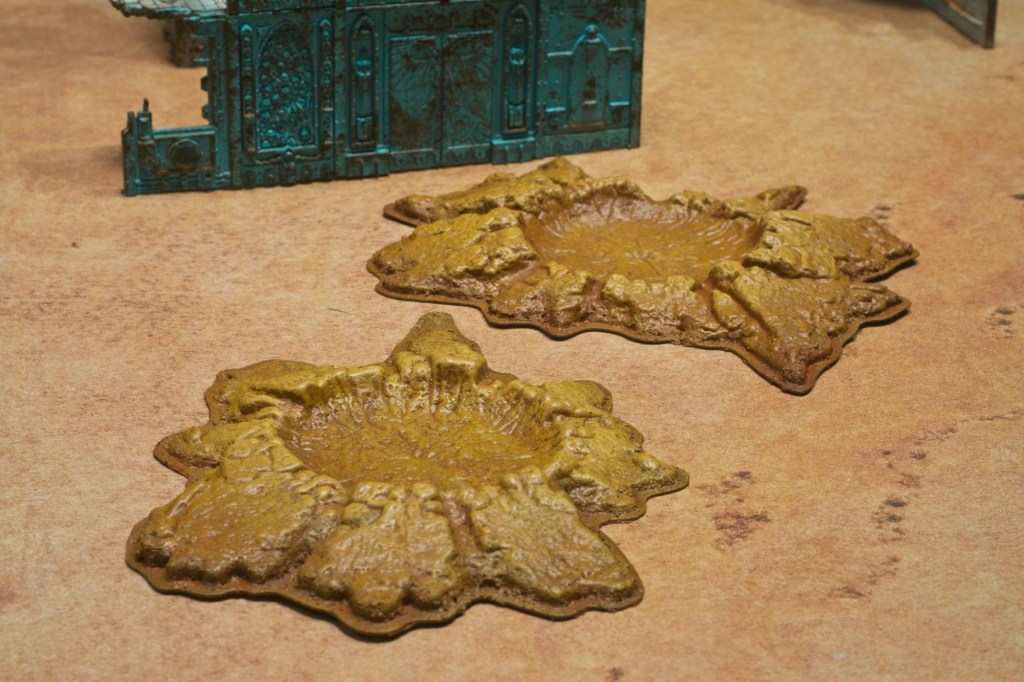
2 Craters
For the large buildings I used the Shrine of the Aquila kit, and for the smaller buildings I used the old Imperial Sector kits. For the containers I used the containers I’d painted for This is Not a Test (https://lairofthelagomorph.wordpress.com/2021/02/04/containers/). For the craters, I used the old GW craters.
Example Layout
I wanted to be able to use the terrain for less codified play too so I made sure to build and paint the 6 building sections in pairs so they could be combined into a bigger single building.
Large BuildingSmaller Building 1Smaller Building 2
The buildings were painted very simply in three steps:
Undercoat with coloured spray can (I chose three light colours at the hardware store, each building got a different colour inside and out)
Sponge some rusted chips (I used some acrylic burnt umber and old case foam)
Rust wash (I diluted some acrylic raw umber with water and dish soap, then covered all the buildings in it)
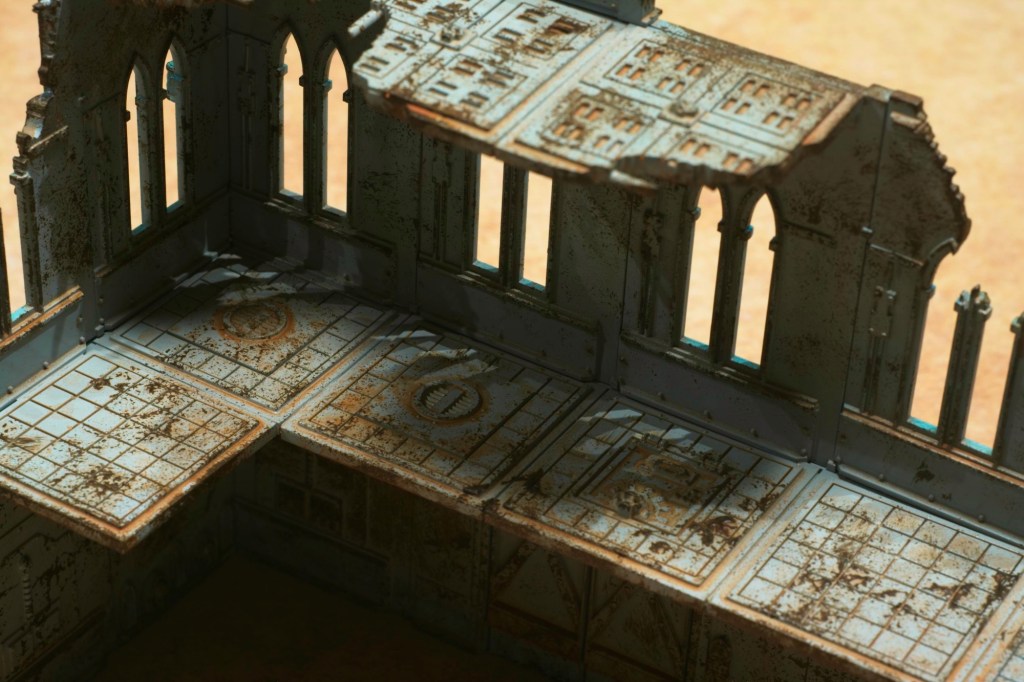
I’m very happy with how that rust wash settled and dried, that was a bit of an experiment but came out very good I think.
I want to go back over these at some stage in the future and paint in some of the more detailed areas (a lot of skulls for example!) but this will have to wait for the old eyesight to come back. For now they have a nice industrial or ship-like look to them that I don’t mind
Craters
The craters were simply done with a series of successively lighter drybrushes using Raw and Burnt Umber, Yellow Ocher, and White.
Overall a nice project to keep me busy this week, I think my eyesight is getting better (I’ve been able to type this post with not too much difficulty!) but it’s slow going so I may not be painting regular miniatures for a little bit. On the plus side I have a lot of terrain in dire need of paint, so that may just be my focus over the coming weeks.
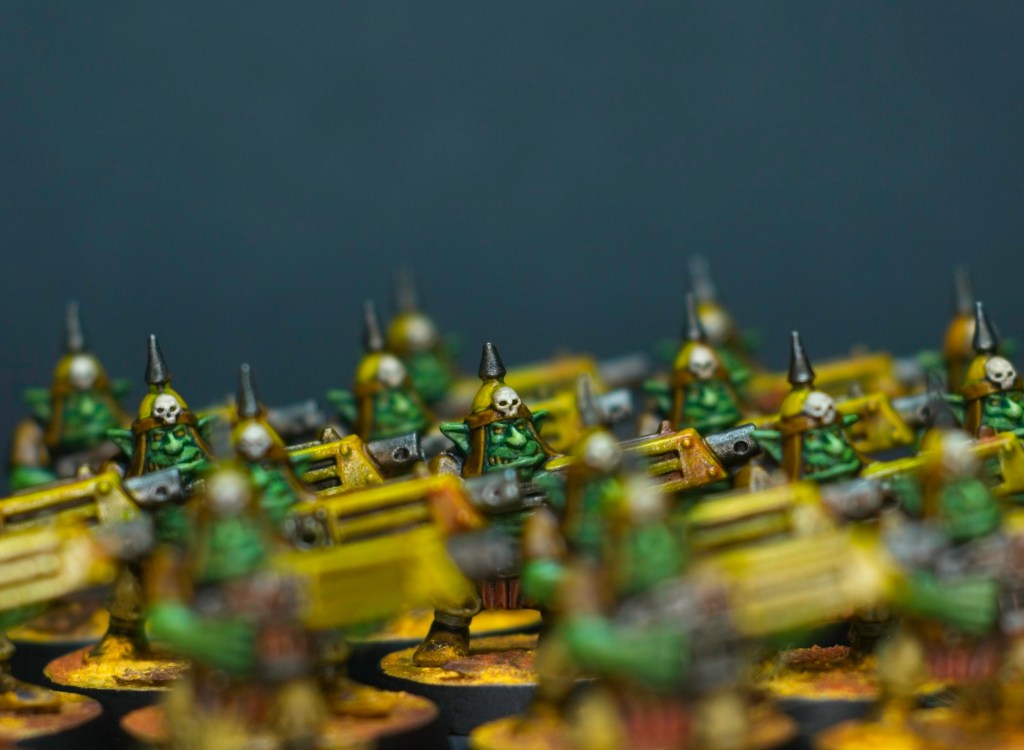
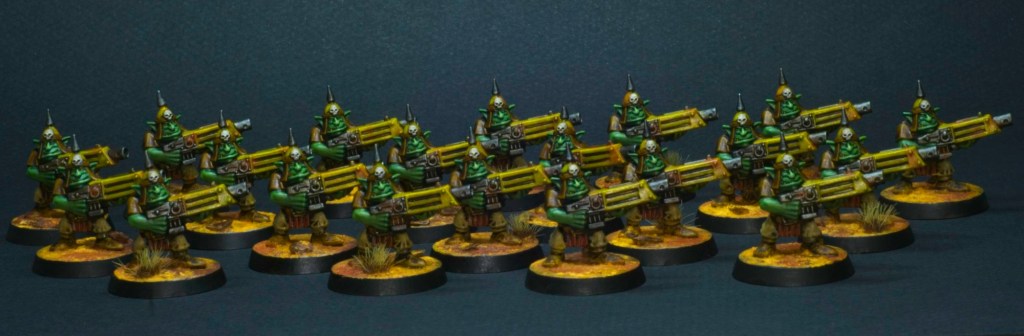
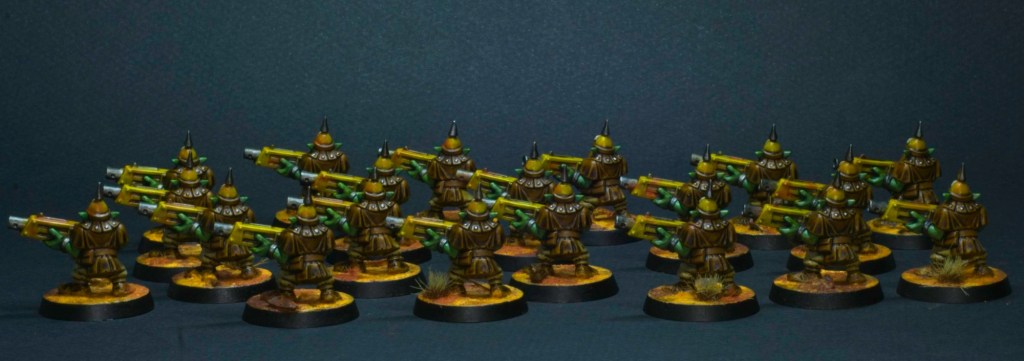
Here’s a blast from the past! For this round of the challenge we went back to troops, and I had the perfect unit lined up for the occasion: 20 gretchin from the second edition of Warhammer 40,000. These have been lying around boxes of ork bits as bare plastic for a very long time indeed!
How many times can you paint the same face without going mad?!
Painting 20 of the exact same model is a bit mind numbing but I do find it easier than painting 20 models that are all similar but not quite the same. At least in the same model case you can just get in a rhythm and you’ll find the same bits in the same place each time. Pick a colour and get through it!
These are really characterful models and were also fun to paint because of that. I tried to simplify the paintjob on some of the areas of the model to speed up the process, but I found I was having enough fun that I did quite a few stages on some areas. The skin is the same four green stages I do on the orks, only lacking the red wash I give the orks on their lips and around the eyes. For some reason these models felt they should stay all green!
From the back you can see the one real shortcut I took: their tunics. These were done with a single coat of GW’s Snakebite Leather over the Vallejo Dunkelgelb undercoat. I think that worked out ok. Juxtaposed with the more worked-on areas it looks less lazy than it might otherwise.
Overall a very fun round of the challenge, and I still have just under a week till the next round to fill with some other project. I have some more Riders of Rohan on the go, so they might get finished in that time, we’ll see!
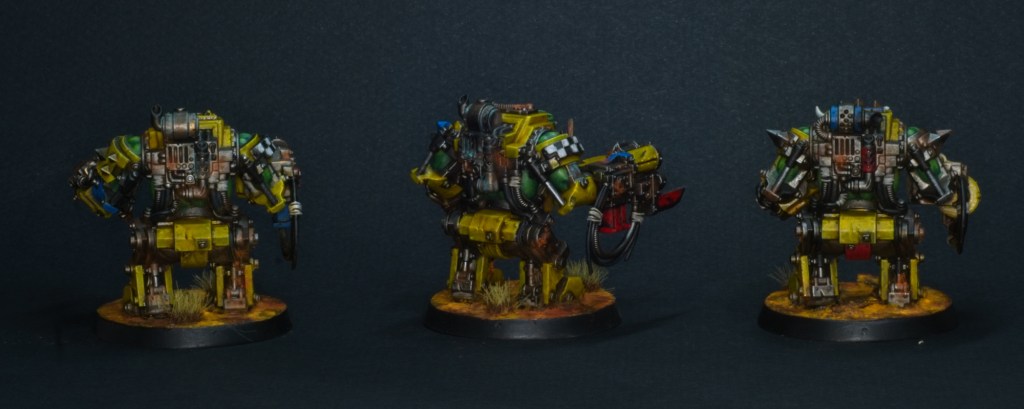
For this round of the challenge, we went back to elites and I chose to get started on the rather large pile of Meganobz in my possession. I had hoped to get more than this done, but sometimes life gets busy and painting time cut short! Still I got three done, enough to qualify as a legal unit!
These were interesting to paint, I wasn’t sure whether to undercoat them the ochre-yellow I’ve used for the rest of the army, or got to sliver to help with the amount of metal on the models. I settled on silver with the idea that painting in the metal plates yellow would be less work than picking out metal details in silver later. I think that decision worked out, so the next batch will also start from silver, and any vehicles I do for the army will follow the same method.
The large amount of metal aside, these were painted much like the rest of the army to keep things consistent. I like to keep my ork models looking different to each other to communicate the ramshackle nature of their engineering, so I tried to vary the colours of details as much as possible across these, especially when those details are from the same parts of the kit (for example the gun arm on the leftmost and center ork are the same piece)
Overall I’m happy with these and now I have a set method for approaching them I hope to get more done next time we pick elites!
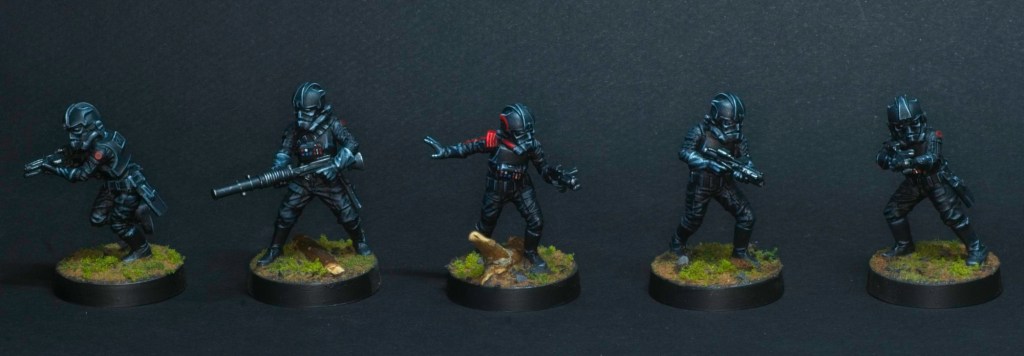
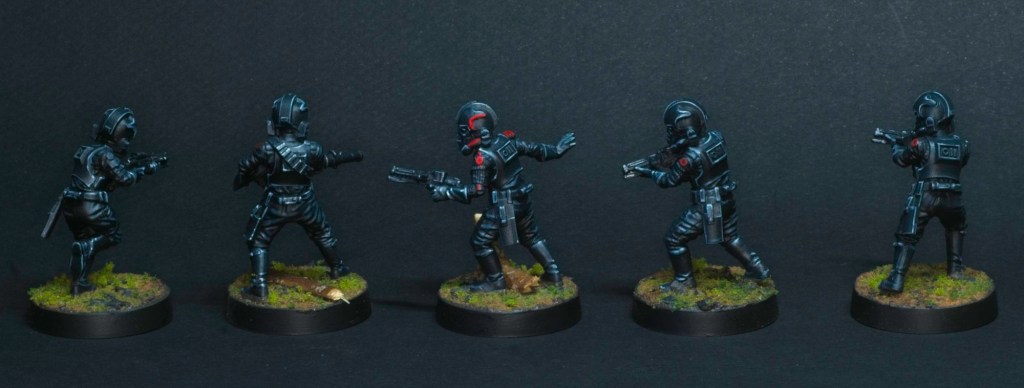
I had some spare time today so I decided to tackle one of my “built and ready for paint” units that has been sitting on the shelf of shame for a while now: the Star Wars Legion Imperial Special Forces Unit. These are the first hard plastic Legion models I’ve built and painted and they are much nicer than the soft plastic part of the range. They go together really well and provide nice crisp details for painting.
These were painted much like my Darth Vader, i.e. highlighted from black using Vallejo Dark Sea Blue and progressively mixing in more Vallejo Ghost Grey until pure Ghost Grey was used. The red is Kimera’s “The Red” which has insane coverage (These are all one coat over black).
From the box these came in I still have the two characters from Inferno Squad as well as Iden Versio herself. I’ll paint those up next time inspiration strikes!
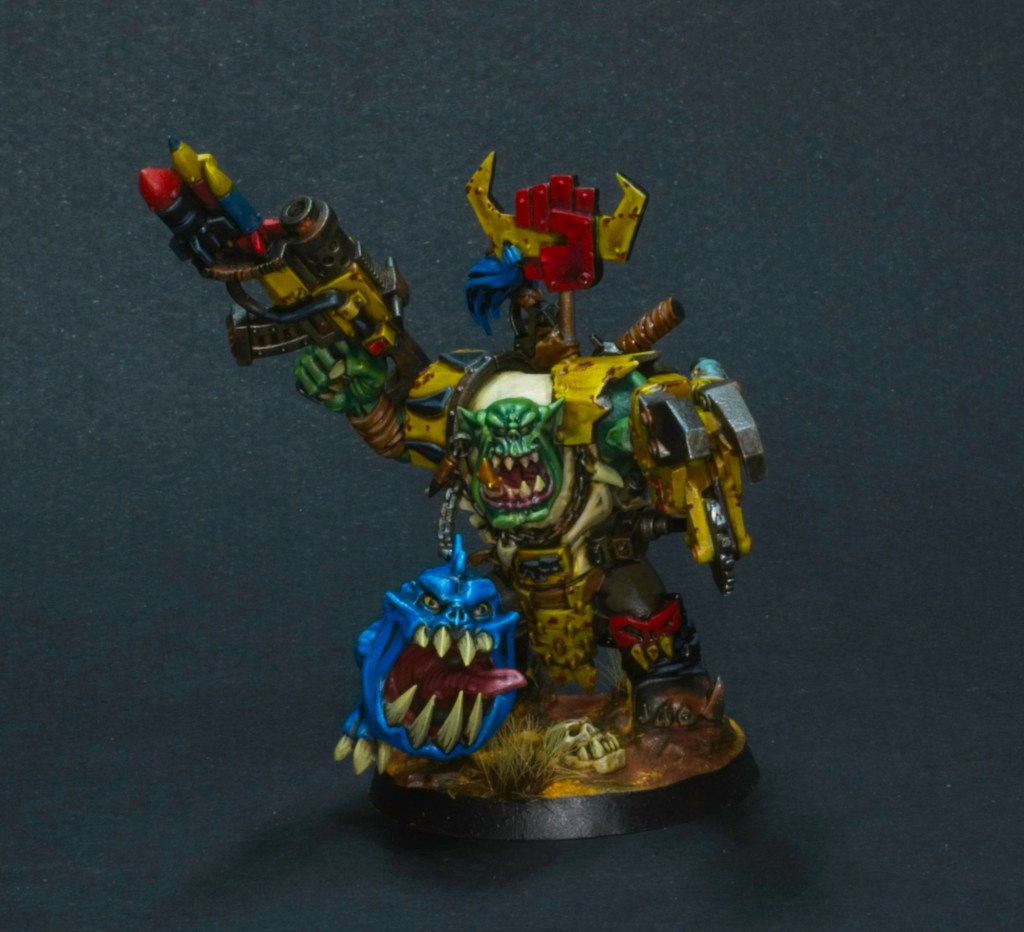
For this round of the challenge we chose the HQ slot, which I immediately knew I wanted to paint up this warboss for. I’ve had this model (like most of my Orks!) for many years, and been looking forward to painting it for a long time. I got him in the Stormclaw box (Orks vs. Space Wolves), but I’m pretty sure you can get him in another set these days. One of my first ever models was the old metal warboss with an attack squig on his arm, so I think one of the reasons I like this model so much is nostalgia!
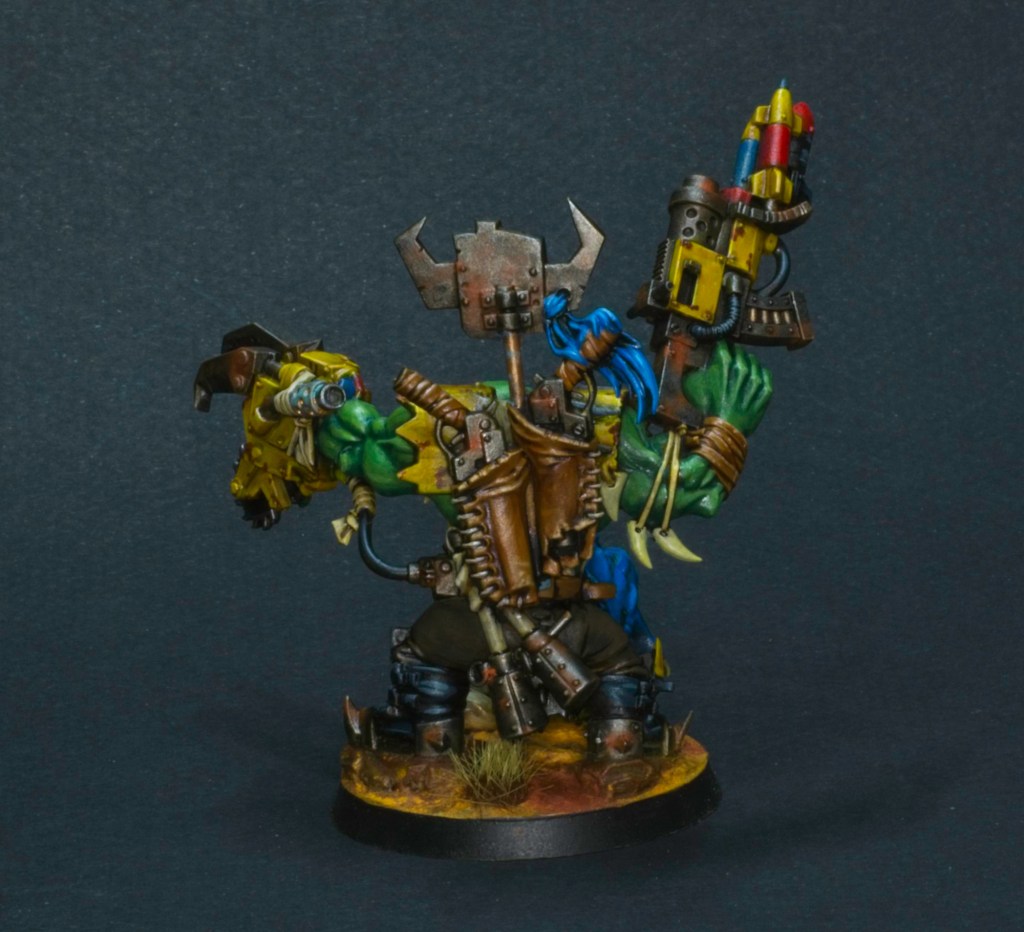
I painted this model much like the rest of the army so far. I don’t generally like to actively paint my characters to a higher standard, they just tend to get more details due to the fact I’m painting them alone rather than as part of a batch.
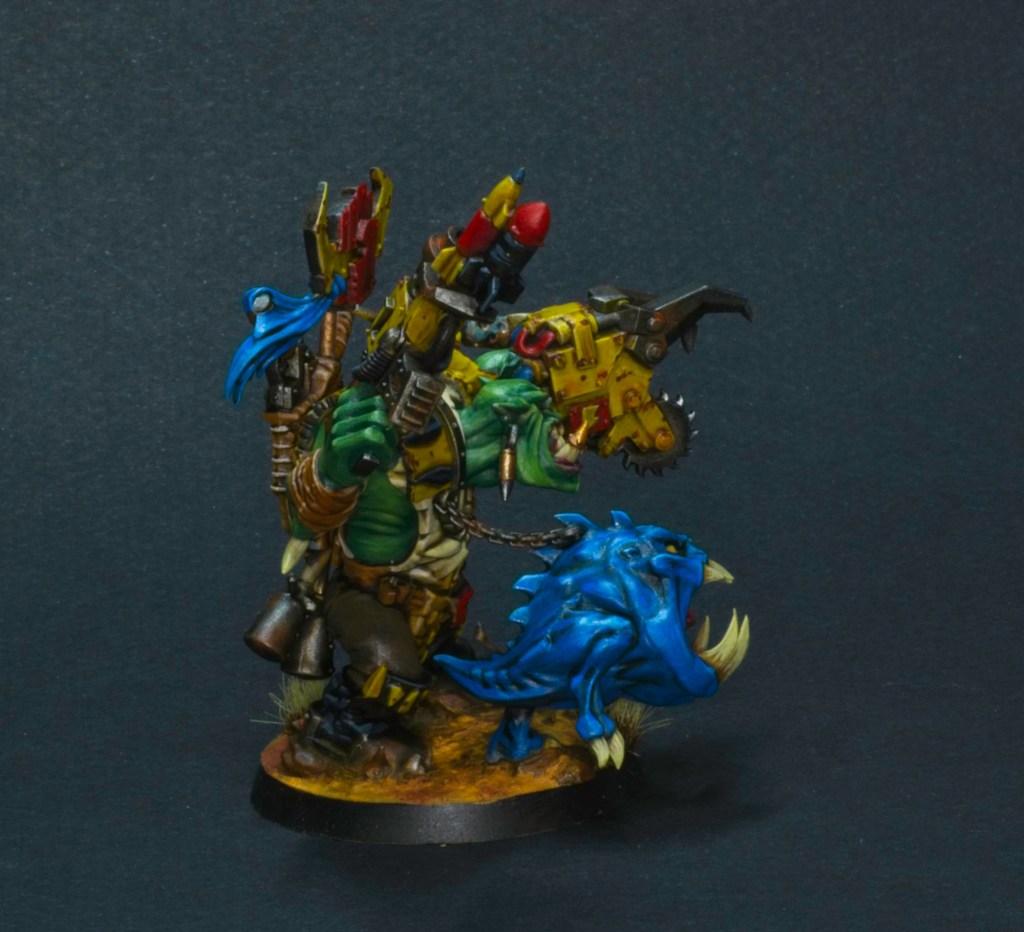
The first squig in the army was blue (on the Runtherd from last round), and I decided to make this one blue as well. Hadn’t quite decided if I was going to keep all of the army’s squigs blue, but it’s looking more likely now!
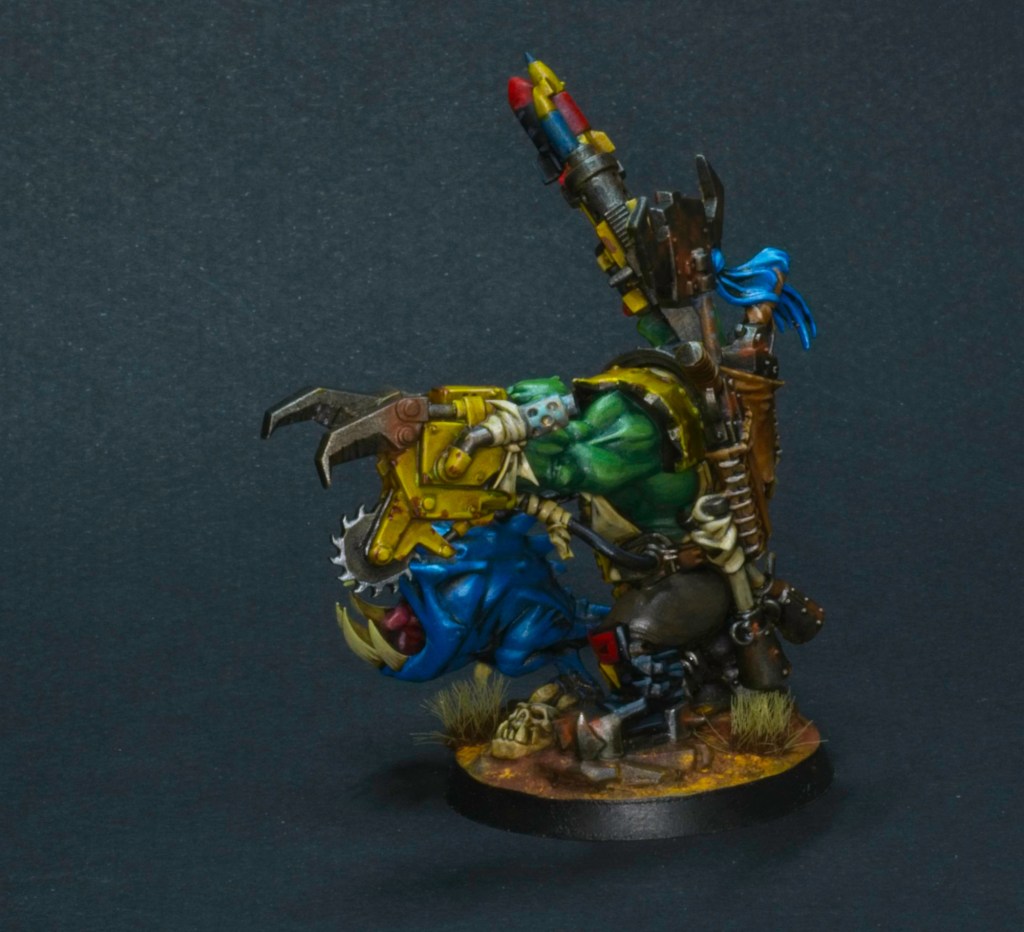
The rockets on the gun were an interesting challenge, I wanted them to stand out from each other, but not look too toylike even though I was going to paint them mostly straight primary colours. I think it worked out ok.
I really enjoyed painting those gun holsters, leather is one of those materials I find quite interesting to paint, you can add a lot of hard surface techniques like texture and scratches to this organic material. I usually paint leather from a dark warm brown all the way up to a bone colour for those extreme highlights. Here I tried something a bit different, by starting with my midtone (Vallejo Game Color Beasty Brown), and washing in the shadows with Agrax Earthshade. Then proceeded through with my usual steps up to bone. That felt like it lacked that richness I get from my usual process, so I glazed some Vallejo Game Ink Flesh Wash over the end result, which added that warmth back in. I think this ended up being a bit faster than layering all the way up from dark brown, so this may end up being my standard army painting method for brown leather.
The power klaw was a good testbed for a unit I’ll have to paint at some stage: Mega-nobz! I painted this exactly like the rest of the yellow in the army, and to me that’s ended up with a nice level of separation between the plates, so I think it’ll work well for models that will end up being 90% armour plates!
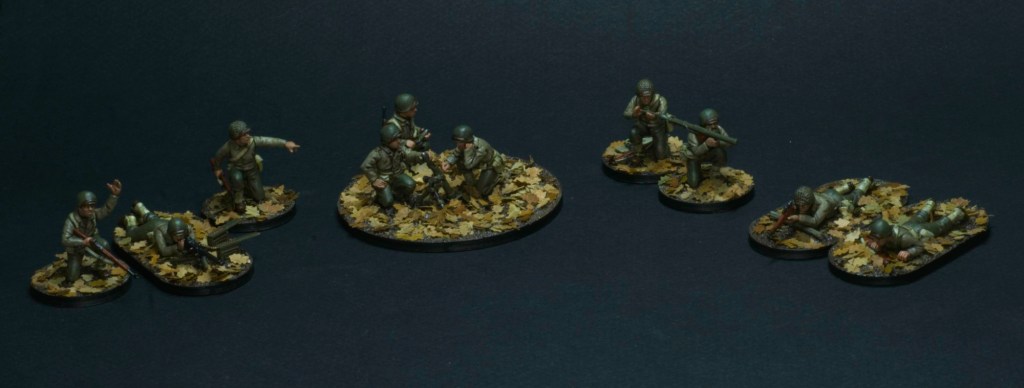
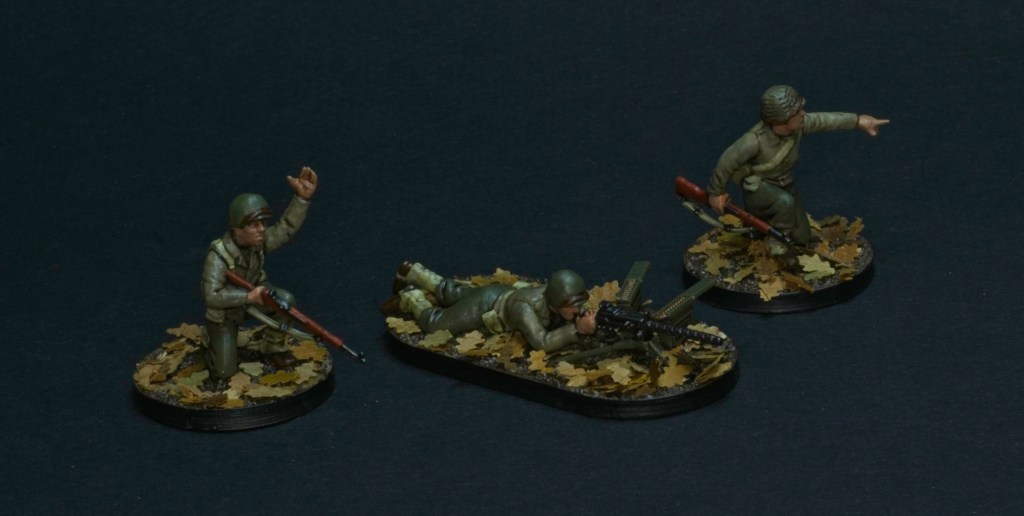
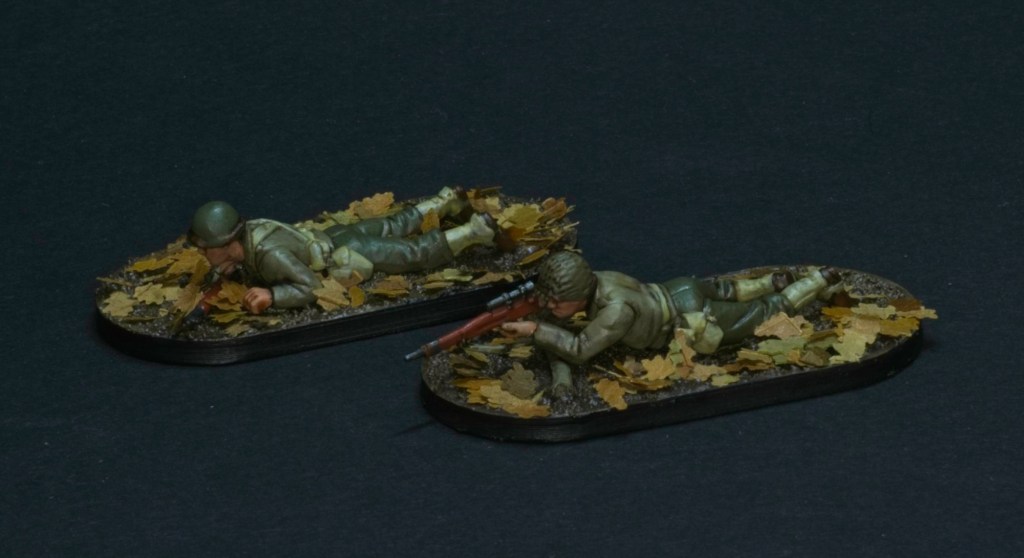
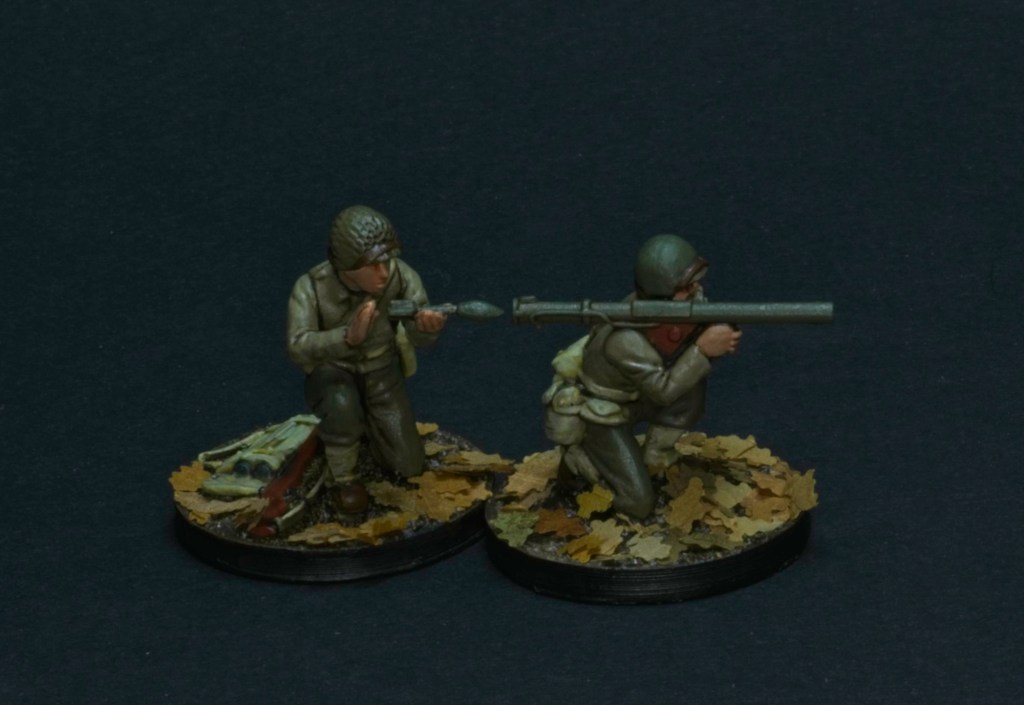
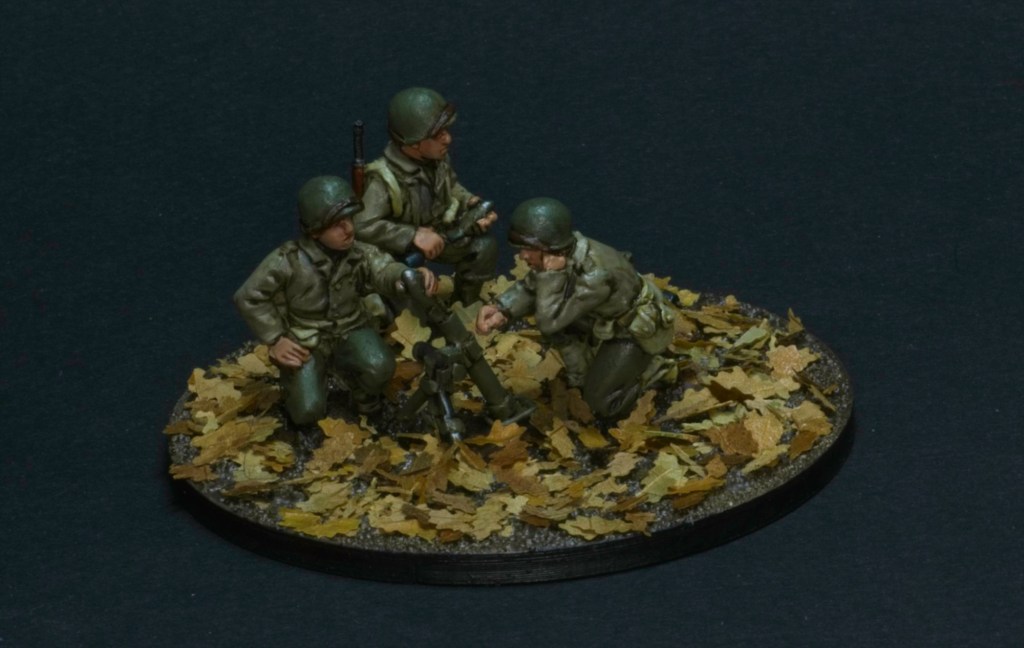
I’ve had plans to put together a Bolt Action army themed around the 2ème DB for quite a while now, and with renewed WW2 inspiration in the past few weeks I’ve made a bit of time to turn plans into reality. While painting my 6th airborne roughly a year ago I was listening to the audiobook version of Anthony Beevor’s “D-Day: The Battle for Normandy”, and his retelling of the liberation of Paris by the division struck a chord with me. Since then I’ve been gathering research materials and reading up what I can find on the history behind the creation and the actions of the division. The 9th company of the RMT (Régiment de Marche du Tchad) “La Nueve”, so called because it was home to many spanish revolutionary exiles, were first in Paris, and are who I’m going to mostly focus on in this army. This will mostly impact the vehicle painting, as most if not all of the vehicles in the 2ème DB were named, and had those names painted on them. In “La Nueve”, those names were based on important Spanish civil war battles and republican leaders. The division being mechanised there will be many vehicles to paint! I currently have 3 Half Tracks and an M8 Scott for the army, and I’m eyeing off some more vehicles.
These first models are the support weapons I’m thinking of including in the army. I assembled these first as they require the most specific poses. I’ll put together the regular infantry next without having to worry about whether I’m leaving the right parts for the support weapons!
The 2ème DB, as all late war Free French unit, were outfitted by the Americans so I used Perry Miniature’s late war US Infantry plastic set and their matching 60mm mortar metal kit.
The paintjobs are quick, done in two sittings, but should look good enough on the table. I’m mostly excited to get to the vehicles! I experimented with the bases some, trying out for the first time something else I’ve had for a while but never used: Green Stuff World’s Leaf Punches, specifically the oak leaf punch they make. I used dead leaves from the garden as the starting point, punching these small leaves out of them. These leaves are a bit out of scale for these models but I’m quite satisfied with the effect otherwise.
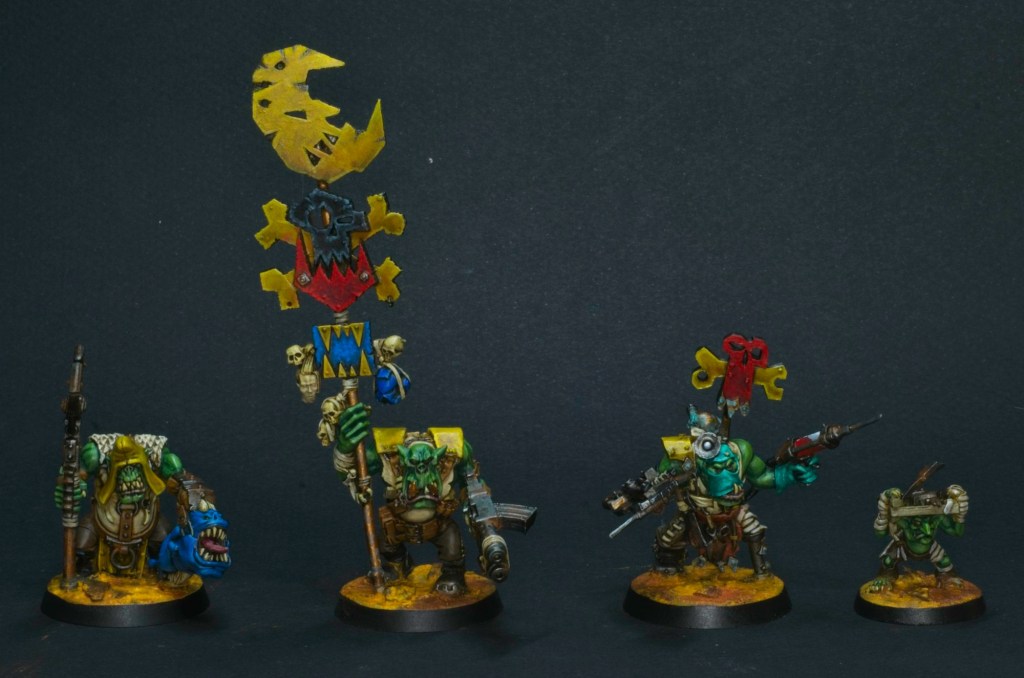
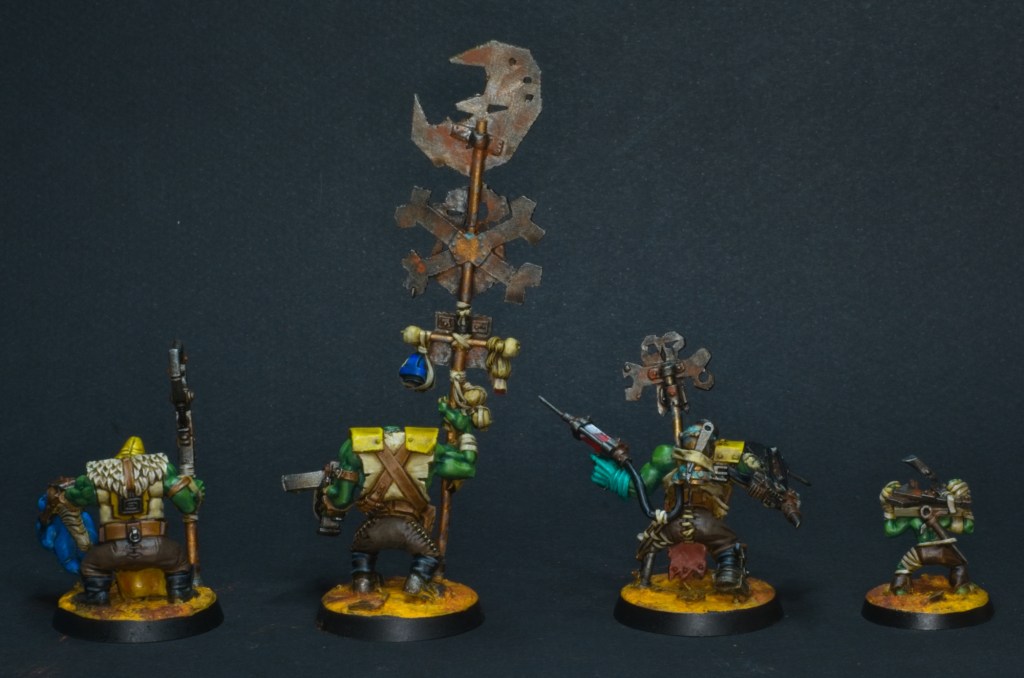
For round two of our army painting challenge, we picked elites as the unit type. I decided to paint up a collection of single character models Orks can take as elites choices: a nob with Waaagh! banner, a painboy, and a runtherd.
The nob with Waaagh! banner is a small conversion of one of the old metal nobs set. I just extended the banner pole and added the large moon symbol which I made out of plasticard.
The painboy and its grot orderly is the older metal version. Very fun model, love the idea of an ork wearing a surgical mask. I had a bit of fun painting the syringe to look like it’s filled with a red liquid, hopefully that comes across well.
The runtherd is simply the model from the grot kit, with a headswap from the old fantasy orc range. I like the idea of him having this yellow moon shaped bonnet to tie him in with the rest of the models.
As always with orks, these models are fun and characterful which makes them very enjoyable to paint!
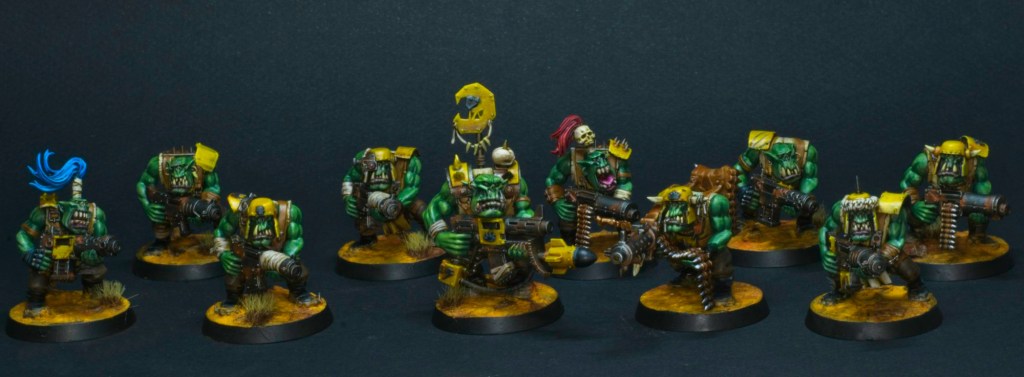
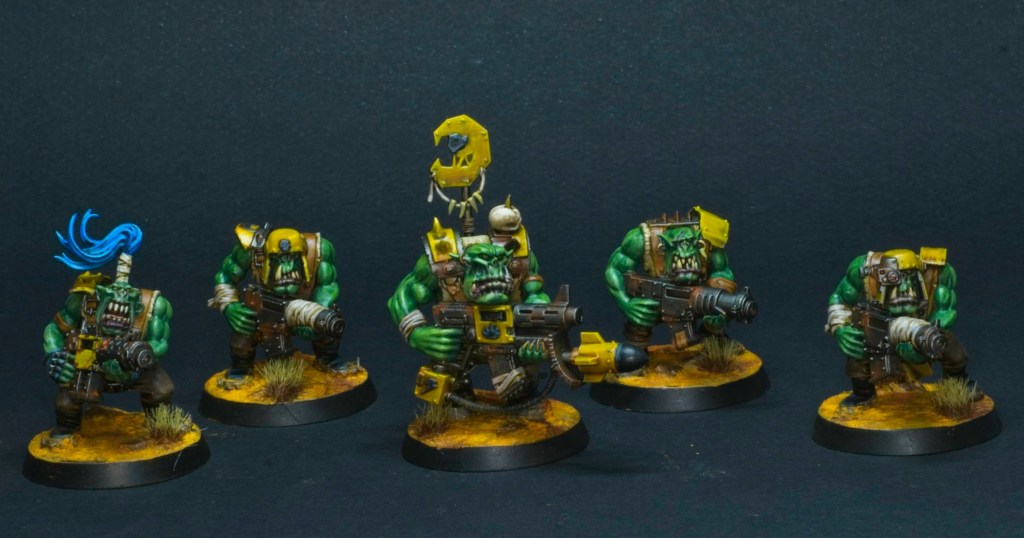
Just over a week ago I was asked to join into a tale of four warlords type challenge where every two weeks all the participants need to add and paint a unit to a Warhammer 40,000 army. I decided to use this as an excuse to get my first ever 40k army painted up: Orks!
This time around we had to paint a troops unit, which is a good place to start when testing out a colour scheme. I don’t know what the next unit type will be just yet, but I’m keen to find out and get cracking as these were very enjoyable to paint.
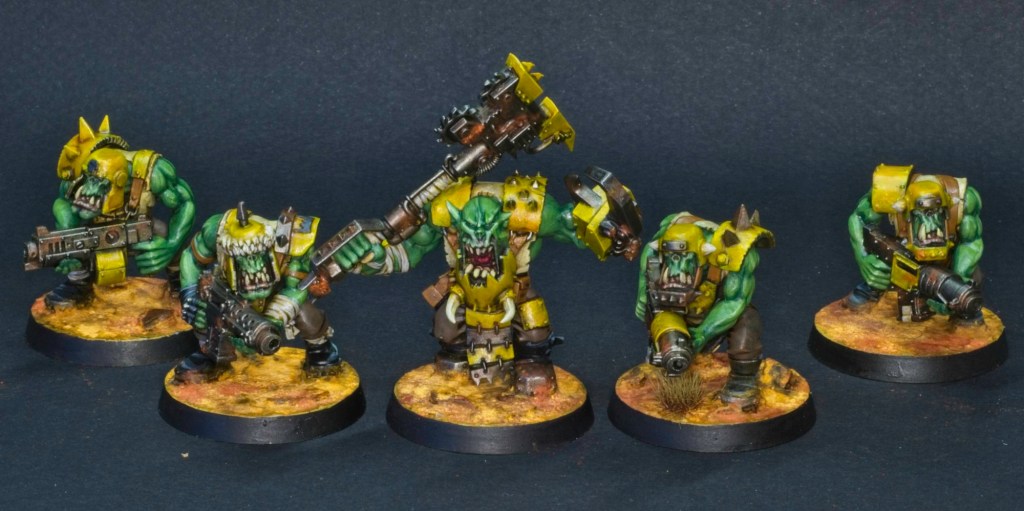
I’ve been collecting Orks on and off for a very long time (probably not far off 20 years!) so I have quite few models in my collection, and I’ve never really made a serious attempt to get an army painted, so most of them are bare plastic. These particular models weren’t even built! For a lot of others I’ll have to cut off the 25mm bases and replace them with 32mm bases as is standard for Orks these days, a task I’m not looking forward to, but want to do as the 32mm bases look much better on these rather big models.
I’ve always loved the look of Orks on desert bases, so that was an easy decision. I’ve been experimenting with using dry pigments for basing for a while now, and I pretty much replicated the scheme off of the bases I made for my Rosa’s Ravagers.
I spent a bit of time on the areas I think are most important to the models: the skin and the yellow armour that marks them out as Bad Moons. I’ve documented the steps for those in the image above.
Overall very happy with the scheme and keen to keep this challenge going!