Masse d’Armes

I’ve been thinking about game rules quite a bit over the past few weeks (which prompted my Midgard review last post!), and have been reading rulesets not so much to play them, but to think about wargaming rules in general. In so doing I came across a subset of wargaming rules written as pamphlets or zines published by individuals (mostly on itch.io), in the vein of some lightweight roleplaying games that have become fairly popular over the last few years. These generally seek to address issues they see with big rulebooks in the role-playing and wargaming worlds, which is that there are just too many rules in games, and they can be stripped down while keeping their essence. This lightweight approach to rules is quite compelling for me, as my game time is much reduced these days and I don’t really enjoy re-learning complex rules every time I do get to play. More importantly, I found seeing “regular people” produce their own rulesets quite inspirational and I decided to give it a shot myself.

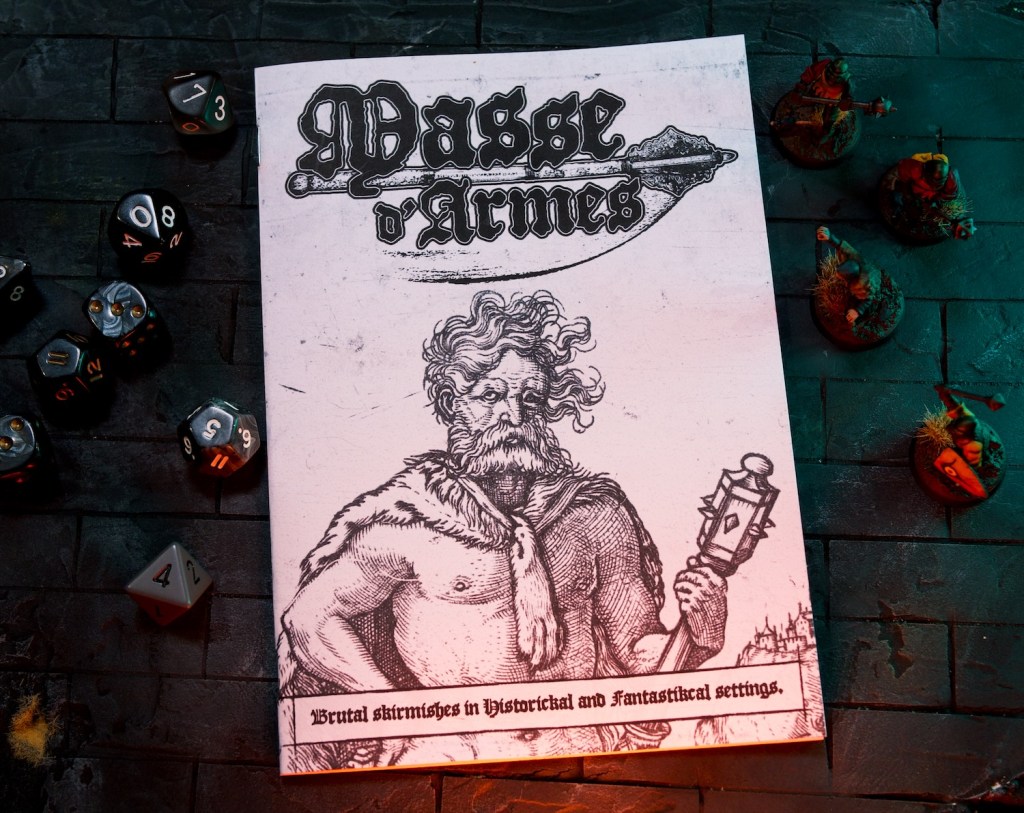
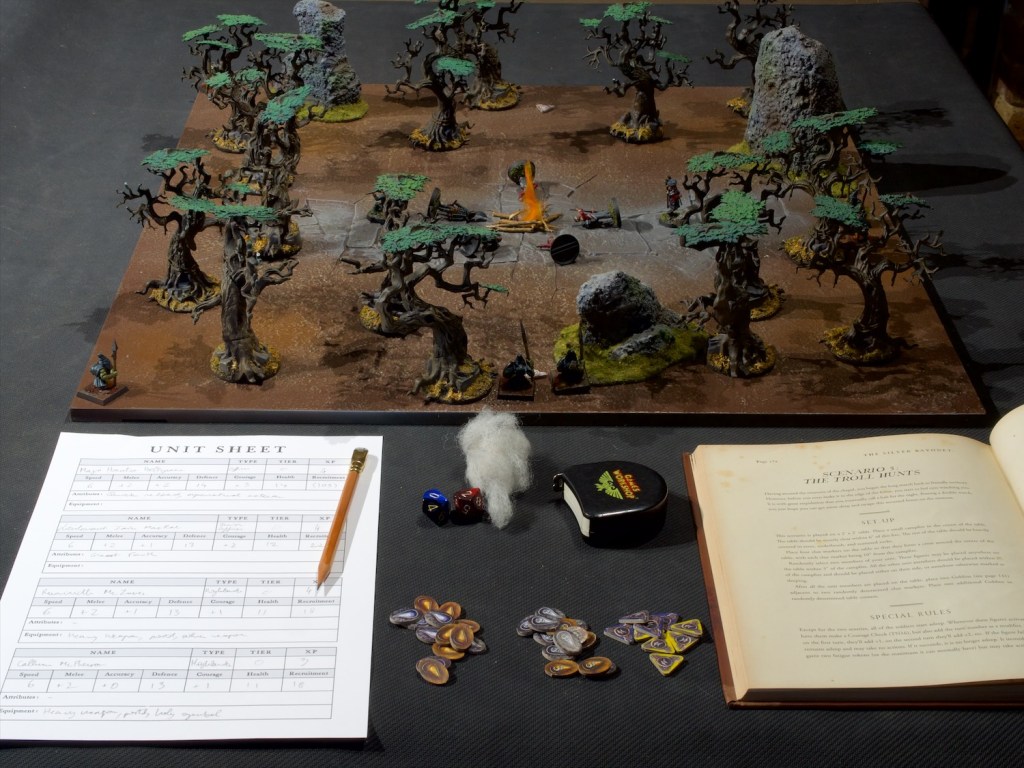
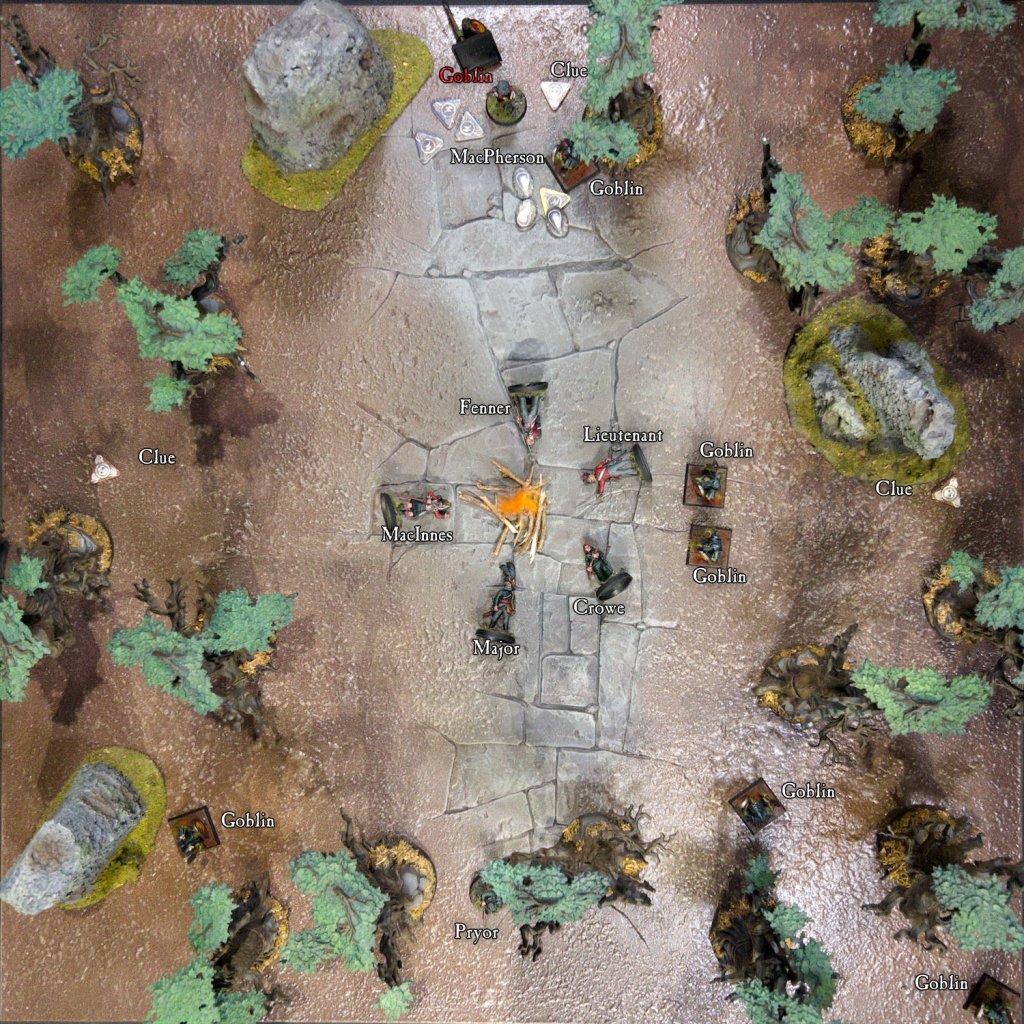
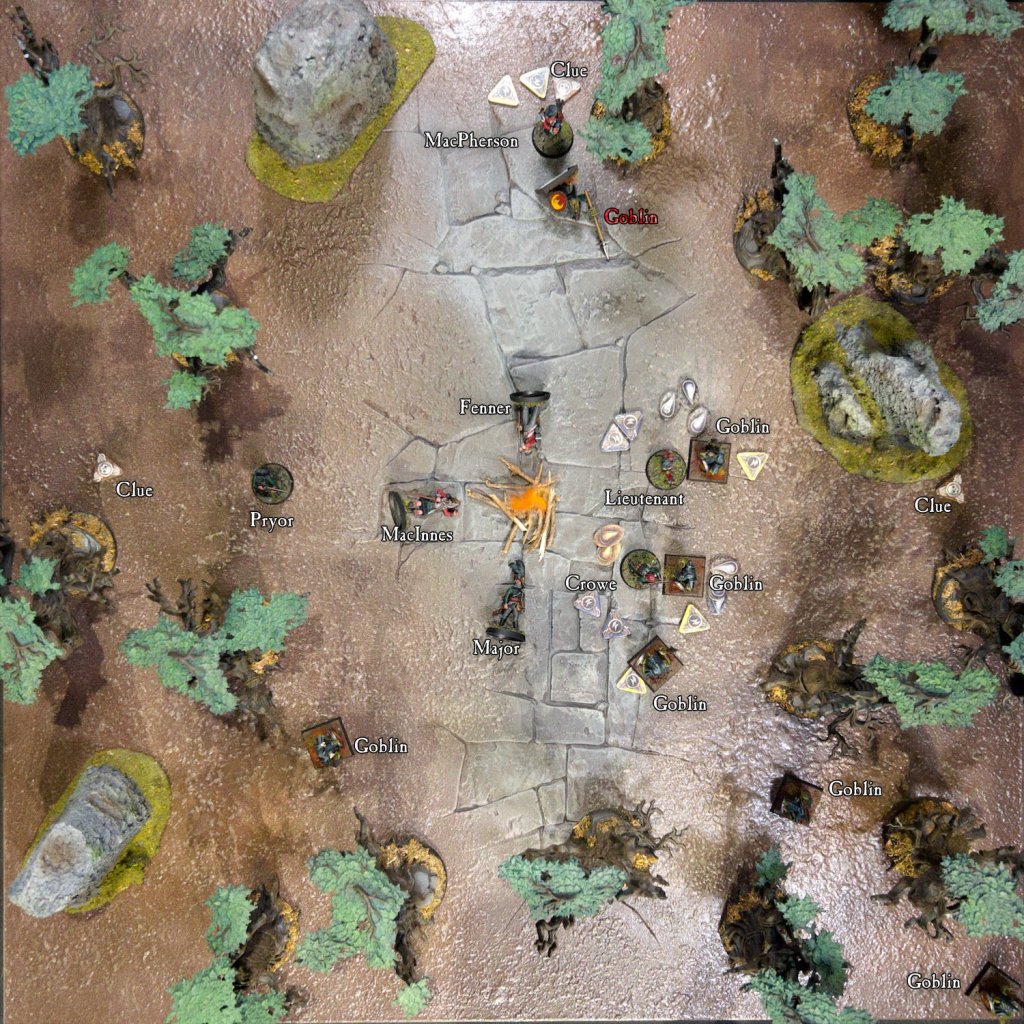
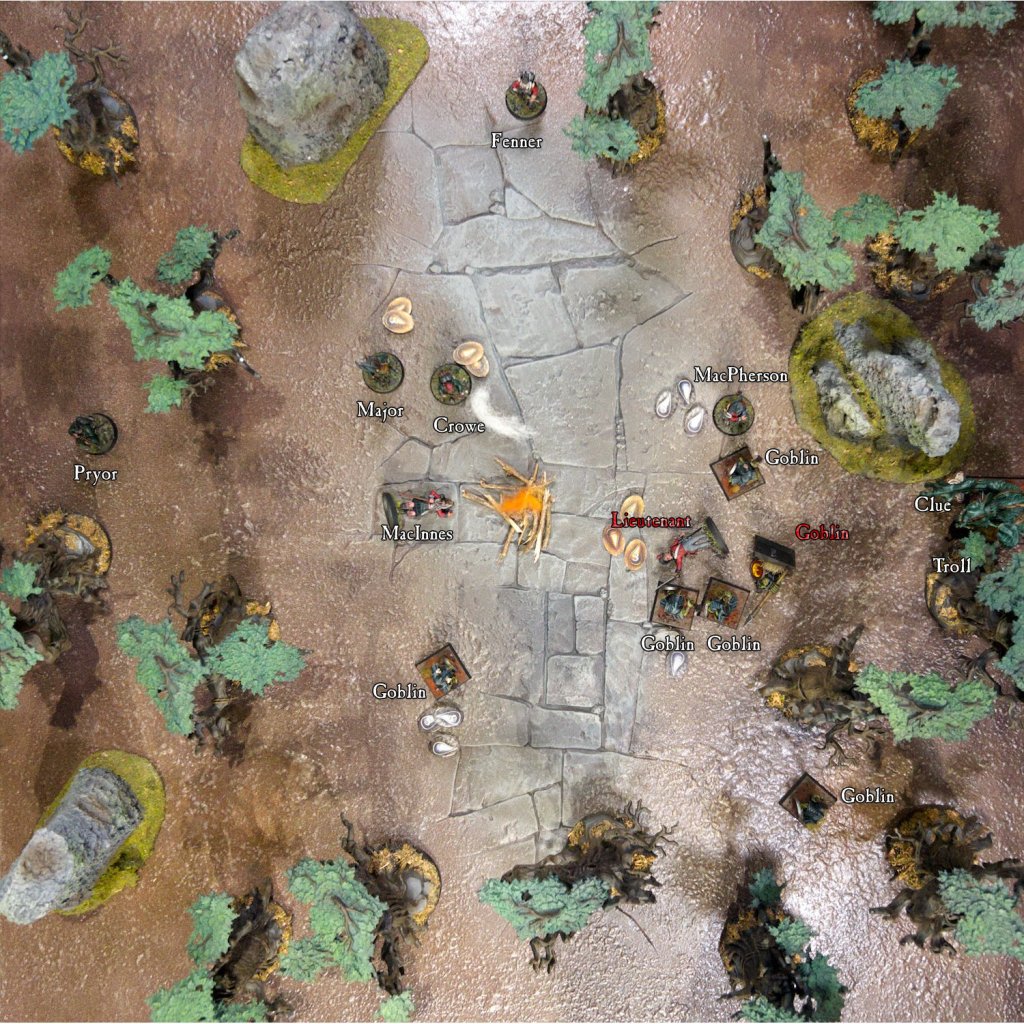
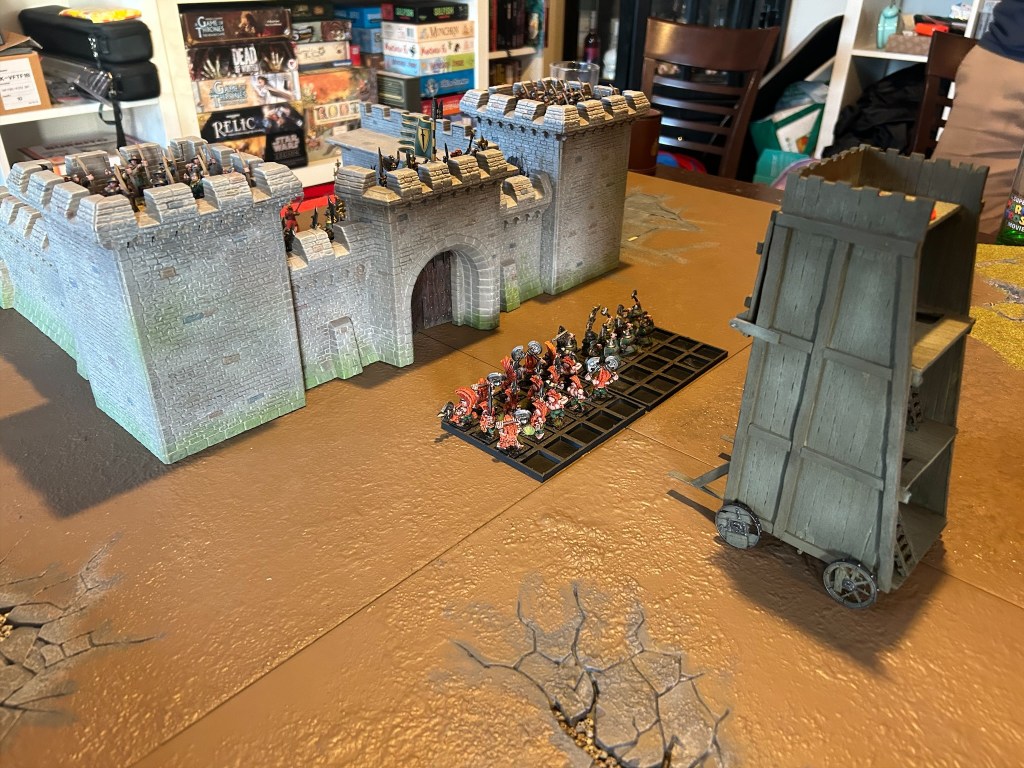
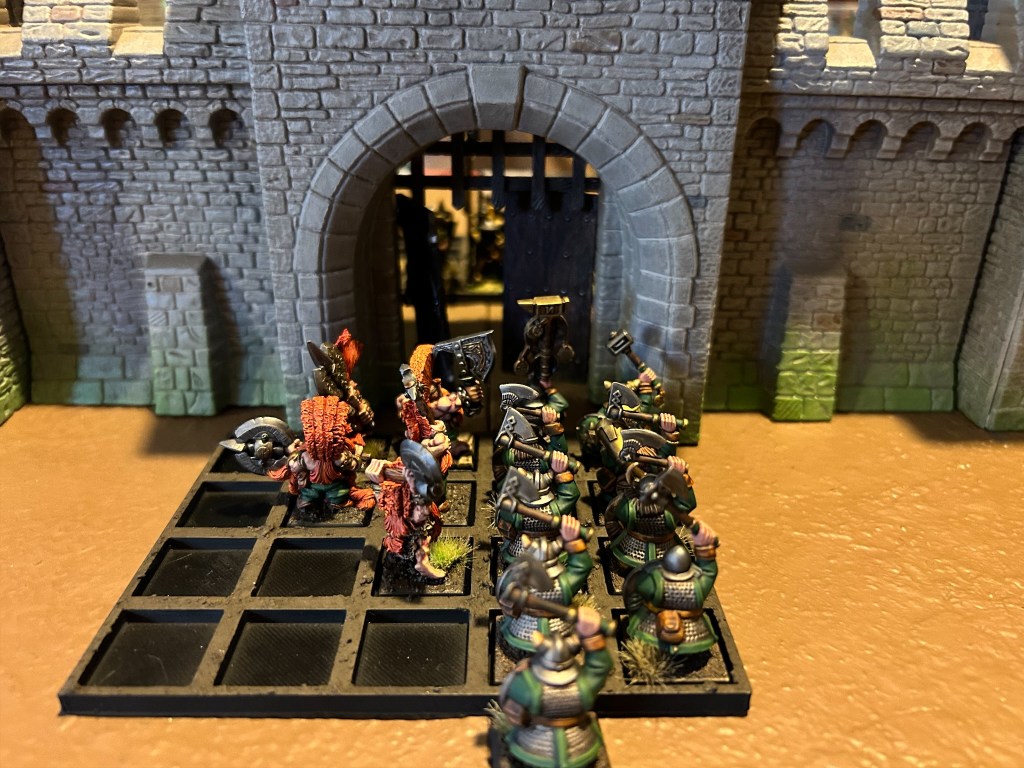
The result of this is Masse d’Armes, a small ruleset for playing out skirmish games (~4-8 models) in settings both historical and fantastical. It’s fine for any setting where the technology level is blackpowder era or below, and has rules for magic for more fantastical settings. I’ve put up the latest version of the rules over at https://lair-of-the-lagomorph.itch.io/masse-darmes as a free download, it’s likely to get updates sooner or later, but at least I’m past the constant tweaking phase.

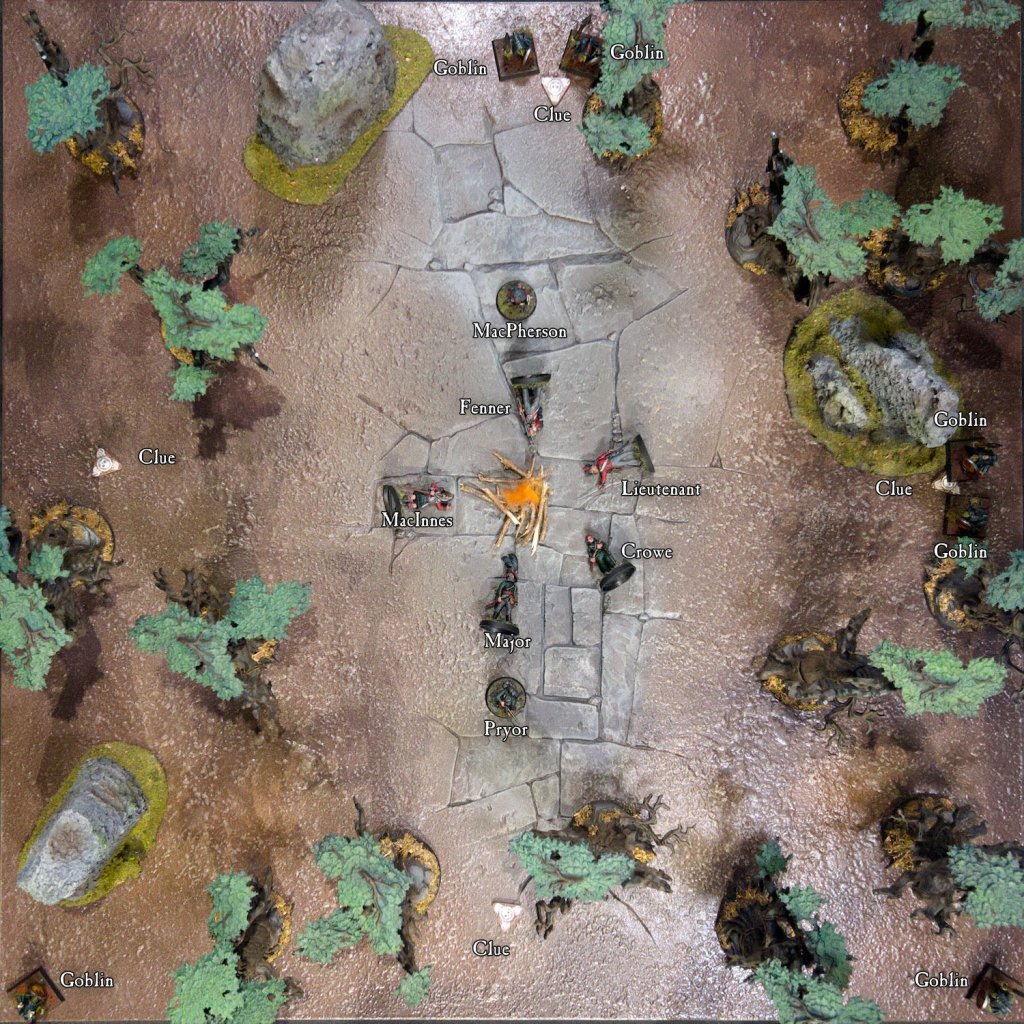
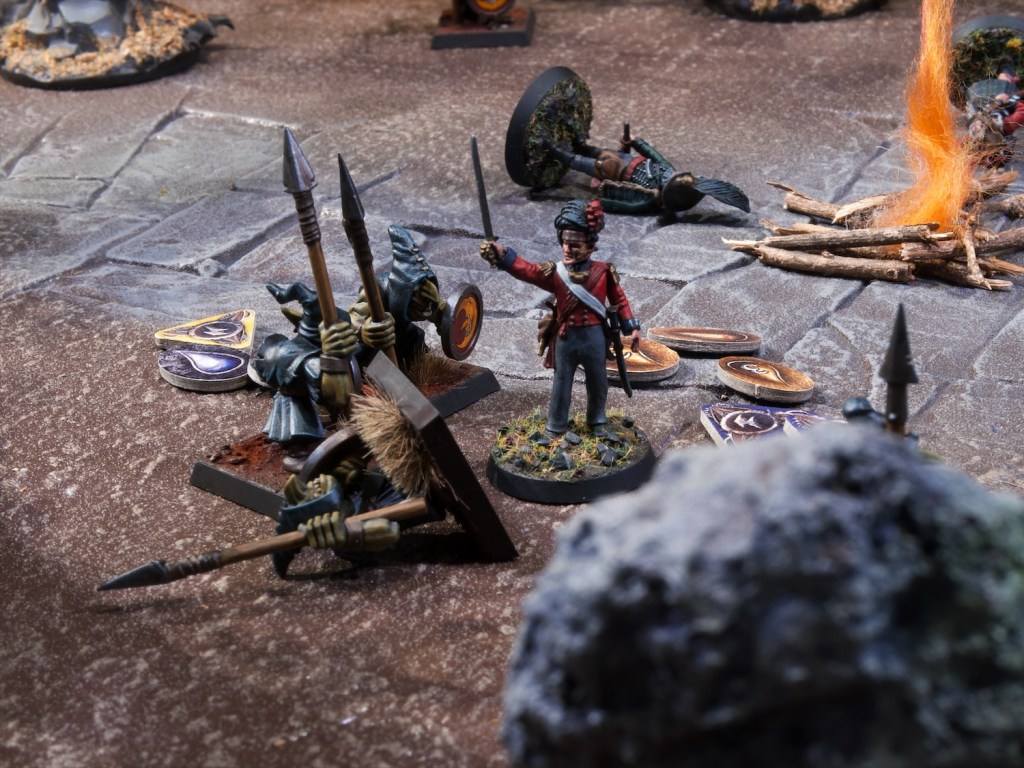
The game itself is derived from quite a few other games I enjoy playing, making use of mechanics or mechanics inspired by other wargames and role playing games. The basic concept is that of opposed rolls, where models add a characteristic die (d6 to d12 depending on skill level), to their weapon die (also d6 to d12). Highest roll wins, and the amount they win by determines the outcome. This means combat is resolved in a single roll and makes the game quite quick. Shooting and magic are variations on this theme.

Assembling warbands is quite straightforward too, there are no points, players simply add traits to their models to represent equipment/skill/abilities up to a maximum of 15 traits. Models must have at least one trait, so players can either have a few models with many traits or many models with fewer traits.

Overall I think the rules are simple and the games pretty quick. If you’re interested do check them out, I’d love to get some feedback from people outside my gaming group!

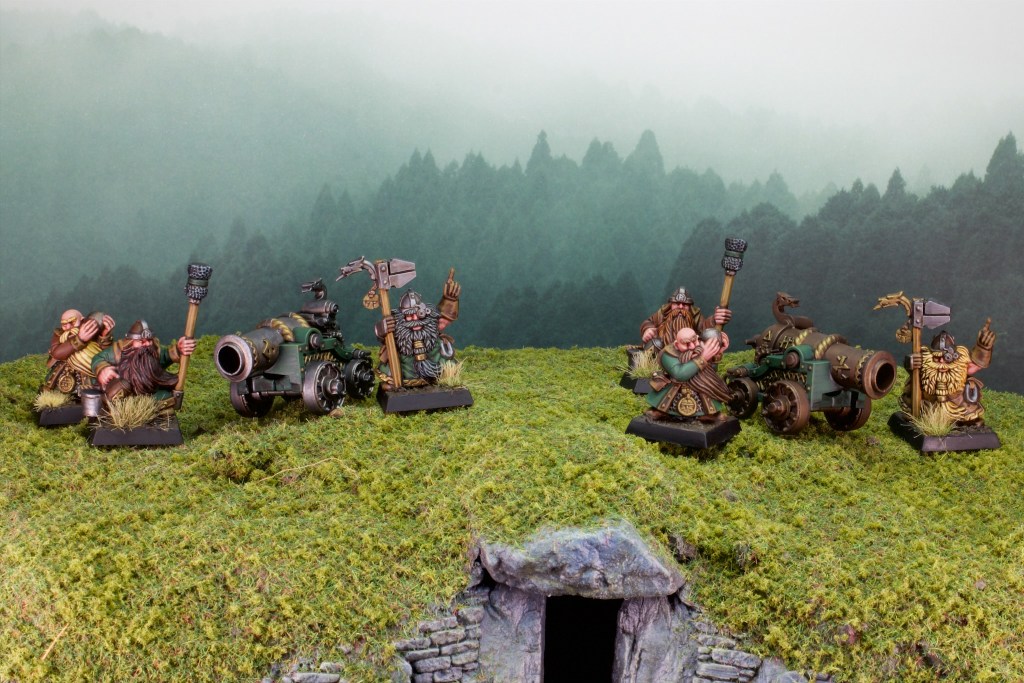
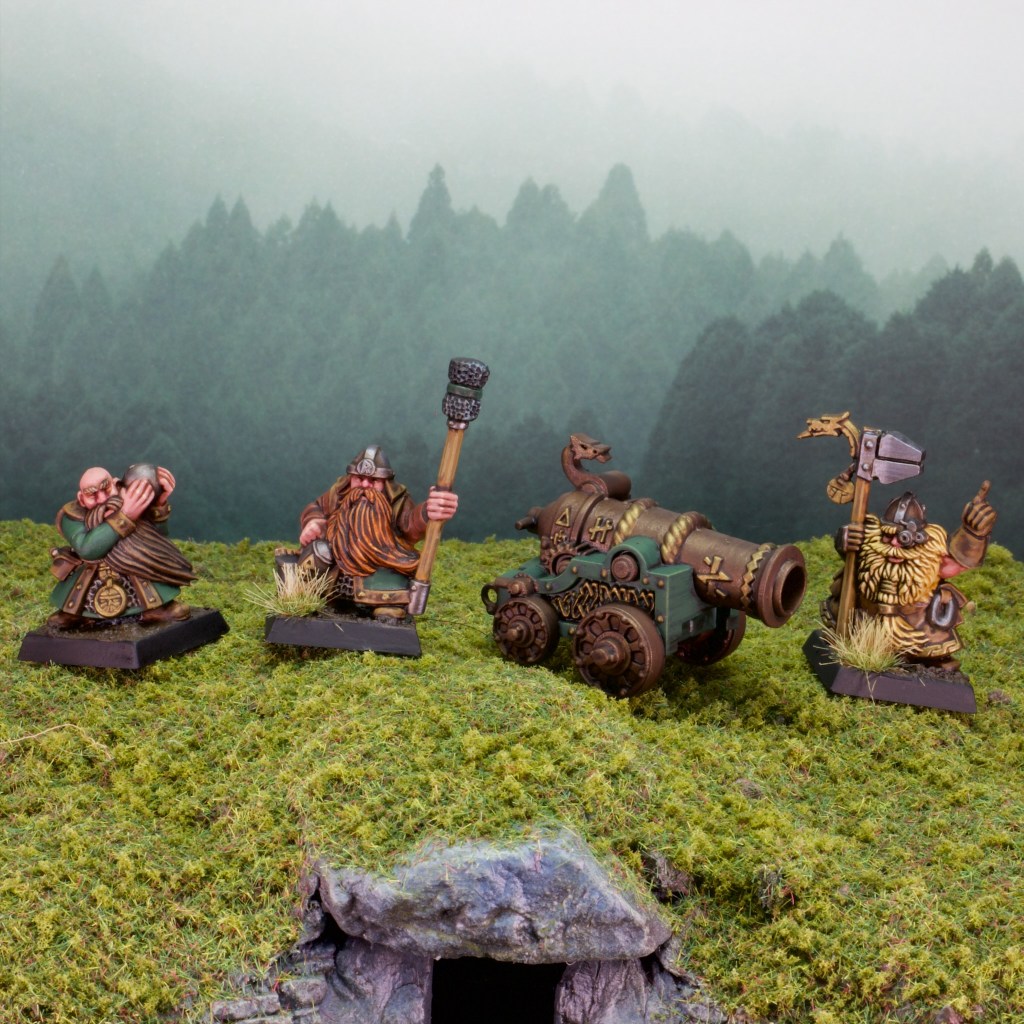
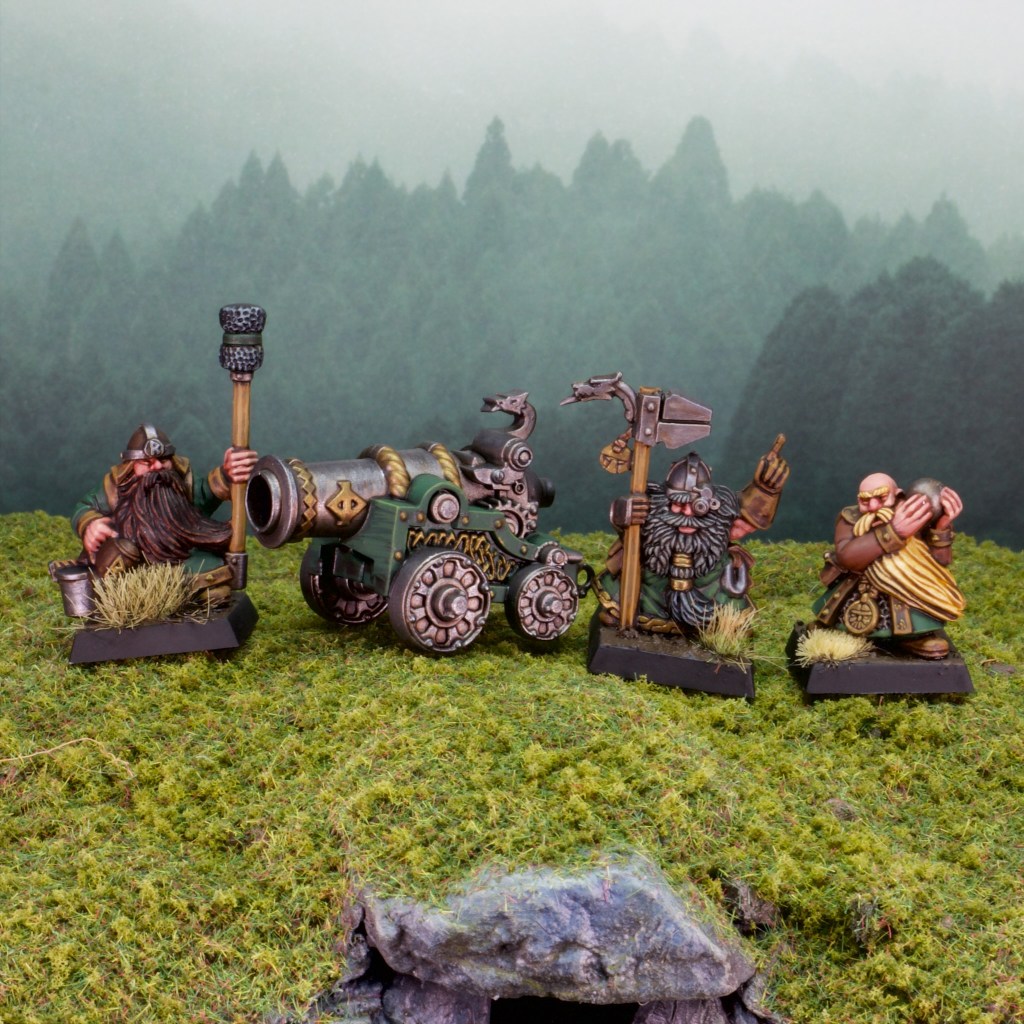
With the rules in place I decided to put a warband together as a fun small painting project. This warband is quite elite with only 4 models. The leader is the seer with Sorcery d10 (3 traits), then two heavily armoured knights with weapon die of d10 and great weapons (4 traits each), and a heavily armoured knight with weapon die of d8, hand weapon and shield (4 traits).

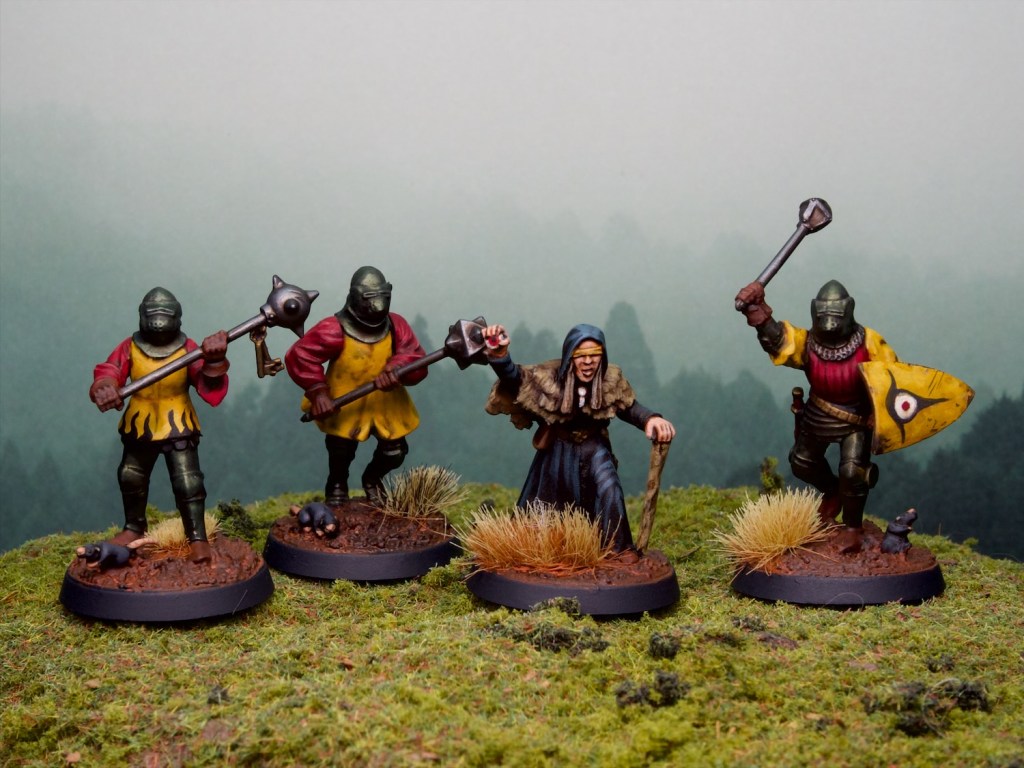
The Seer model is from Bad Squiddo Games which I’ve had for a little bit, and this seemed like a great time to use it. Yes that’s a giant’s eye she’s holding! The knights are Perry Miniatures, from their Agincourt French Infantry set, with some Warhammer mace heads (for the great weapons), and a mace from the Morannon Orcs from MESBG. The shield is from Wargames Atlantic’s Foot Serjeants set.

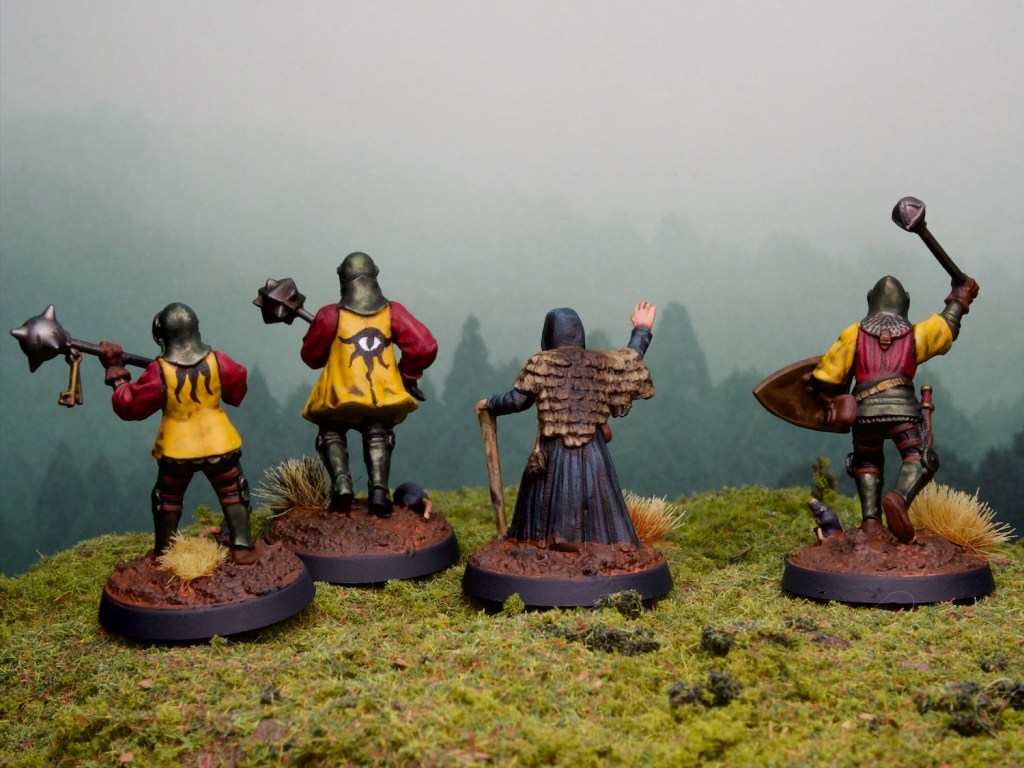
I decided that the knights are there to form the bodyguard for the seer and added some eye-related iconography to tie them all together. They were quite fast to paint, and I enjoyed myself throughout the process (kit bashing and painting!).

It’s been fun looking at other aspects of the hobby, and to think about how a game could work given my own preferences. I’ll keep working on Masse d’Armes, and might even try my hand at some other games in the future. If you do read the rules, let me know what you think!

Making Bases for Midgard Heroic Battles

I’ve been really enjoying Midgard Heroic Battles as you might have been able to tell from my last few posts. While I’ve been working on my Epic scale Punic War armies specifically for the game, I’ve really enjoyed the opportunity it has given me to break out some older models I’ve had painted for a long time that have not hit the gaming table in almost just as long. So far these models have mostly been Lord of the Rings/Middle Earth models, as they fit nicely in the War of the Ring movement trays that work quite well for Midgard. I’ve been wanting to use the rules to play with Warhammer models and historical models however, and those do not (generally) work with the War of the Ring trays.

The opportunity to remedy this problem came in an unusual form, when a large frame containing a cool fantasy map came off the wall and smashed itself on the ground. The frame itself was wrecked, and so was the glass, but the MDF backing on it was mostly OK (the map also survived unscathed!). This meant I had a mostly nice sheet of 60x90cm 3mm MDF on my hands, and realised it would be a good solution to my Midgard basing issue.

Midgard requires a common frontage for all units, but is pretty flexible on depth for models of greater size. This frontage is recommended to be 12cm for 28mm scale miniatures (you can change this, one of the really cool things that makes the game scale agnostic – for example my Punic Wars models are on 8cm bases), and the default depth is half the frontage. Most infantry units should fit on 12x6cm bases, while units with larger footprints should increase the depth (e.g. calvalry might be on 12x10cm, large monsters on 12x12cm etc.).

The good news for me is that 60 is nicely divisible by 12 and 90 by six, so I was able to plot a 12x6cm grid on my frame backing. I of course wasn’t able to fully utilise the board, as the hardware is anchored there (not that strongly clearly, you can see bottom left the spot where the other loop broke off leading to my frame mishap in the first place!). I used the marked bases with hardware on them to extend the 6cm depth of some bases to 10cm. In other areas you can see where I turned four 12×6 bases into three 12×8, and where I combined 2 12×6 bases into one 12×12 base. This gave me a nice spread off sizes, and more bases (I hope) than I could ever use!

I usually use a jigsaw for MDF, but these needed to be pretty straight cuts and I didn’t think I could manage them freehand with the jigsaw. I went back and forth considering a few other methods for cutting these, but I ended up settling on using a long metal ruler and a box cutter. I read online that you can cut through 3mm MDF most of the way with the cutter, then snap the board along the cut, much like you would with plasticard. That worked pretty well, giving mostly clean edges apart from the snapped section. That was easy enough to trim away though so in general I think this is a pretty good method. Note that MDF dust is nasty stuff so wear a mask whenever cutting or sanding it – have a look at Guru Pig’s thoughtful comment below for more detail. Left-to-right above you can see the stacks of 12-10-8-6cm deep bases.

I glued sand on the bases and painted them with a series of dry brushes of successively lighter brown tones (raw umber, yellow ochre, yellow ochre with a touch of white), followed by some light flocking with green and dry static grass around the rims where model bases would most likely not sit. Painting that many was a bit tedious I have to say, but the results are hopefully worth it! Let’s take a look at them in action.

In the photo above we have on the left the 12x8cm base – good for larger infantry such as these dryads, on the right the 12x6cm regular infantry tray, which comfortably fits eight 25mm square based infantry.

Left is the 12x12cm tray, big enough to fit this Verminlord, and right is the 12x10cm tray, good for cavalry models.

I painted and flocked the trays so they wouldn’t look too out of place on either of the mats I use for gaming the most, i.e. the green field and the desert you see in the photo above.

The Lord of the Rings miniatures also work fine on these, the cavalry bases with four models look better than the two you get on the War of the Rings bases.

Overall, these bases are pretty plain, and I think for armies that I build specifically for Midgard I’d like to use the opportunity to make proper scenic bases. These however have the advantage of being very flexible and letting me field a lot of existing armies in fun games of Midgard. I’m very much looking forward to that.

The Silver Bayonet – The Troll Hunts

My foray through the Silver Bayonet solo campaign continues and in this mission my hapless British unit tries to have a good night’s sleep after their close call in the ruined chapel. As all good horror fans know however, sleeping in the woods is asking for trouble and trouble indeed finds the sleepers!

This mission is played on a 2’x2′ table, and rather than marking off an area of my 6’x4′ mat as I’ve done for the last two games, I decided to break out a panel from my Citadel realm of battle board which doesn’t see much use these days (neoprene mats are just so convenient!).

The scenario setup has two randomly selected sentries standing guard while the rest of the unit is asleep around a campfire. There are four clue markers set up close to the outside of the table, two of which have goblins close to them with a further two goblins appearing at two randomly selected table corners. The sleeping figures need to roll each turn to see if they wake, or if a monster attacks them they automatically wake. Either way once a figure wakes it gains fatigue tokens which negatively affect its defense and melee ability for the turn.

The board at the start of the game.

Goblins are very tricky to deal with in the game, they have very high defense, they make mechanical devices fail when close, they are hypnotic meaning voluntarily attacking them is tough, and they have damage reduction (negated by cold iron). They are repulsed by holy symbols, which give them penalties to hit, so MacPherson’s bagpipes should help keep them at bay to some extent!

I didn’t have a campfire model on hand, so some twigs from the garden and some orange wool from Bolt Action vehicle damage markers did the trick!

Hopefully they’re sleeping lightly…

Turn 1

The sentries burst into action, with Pryor moving towards the closest clue and investigating it – finding a gold ring which allows me to add a skill or power die to my fate pool (I choose power). MacPherson tries to shoot the closest goblins but finds his pistol won’t fire. Clearly the creatures have some power over mechanical devices! He attacks instead and scores a solid hit. The goblin misses on its attack back, clearly disturbed by the bagpipes. The Major stirs but fails to wake. The goblins near MacPherson swamp him but his pipes affect them and they both miss. On the other hand he rolls amazingly and hits both with his attacks back, killing one.

Seems that they’re heavy sleepers…

The rest of the goblins close in on the sleeping forms which all fail to wake! At the end of the turn another goblin enters the table.

The board at the end of turn 1.

Turn 2

MacPherson and Pryor are still the only two awake at the start of the turn. MacPherson continues his rampage, disposing of the second goblin. Pryor sprints towards a second clue. The major keeps slumbering. The goblins next to the camp reach Lieutenant MacRae and Crowe and attack them, waking them. Very luckily for me (given both men are fatigued) the only goblin attack that hits only deals small amounts of damage. Even more lucky, MacRae hits his opponent back and Crowe hits one of the two goblins attacking him. The other goblins close in on the camp fire, and my sleeping figures all fail to wake. MacRae attacks on his turn, misses and the goblin strikes nastily, prompting me to burn a fate die to reduce the damage. Another goblin arrives onto the table, things are looking pretty grim.

The board at the end of turn 2.

Turn 3

MacPherson runs to the rescue of the Lieutenant and Crowe, charging the closest goblin. His attack misses, but so does his opponent’s strike back. Crowe is one of the only models in posession of cold iron shot so I really need him to be able to fire which he cannot do if he’s close to them due to their disruptive aura. For that reason he moves back and takes a shot but misses. The Lieutenant then dives in the gap and takes on Crowe’s attackers. He misses and so does the goblin.

Moments before disaster…

The goblin on MacPherson attacks, misses (those bagpipes!) and MacPherson misses right back. MacRae is in for a bloodier fight: the first goblin attacks, hits him for low damage, and MacRae’s strike back kills the goblin (after I spend my skill die re-roll). The second goblin hits him, dealing 10 damage, which would take MacRae out! I spend my second power die to reduce the damage – this keeps MacRae in the game. MacRae scores a solid hit back. The third goblin also hits MacRae and this time it’s too much for the brave Lieutenant and he collapses. The last goblin charges the Major, waking him by scoring a solid hit. The Major tries to strike back but misses, still bleary-eyed.

Pryor investigates the clue he was moving towards last turn and finds some nice dry wood which he lights up, never know when something will need to be set on fire! Fenner finally wakes up and moves to investigate the clue to the north. He finds a bag of iron nails that he promptly loads into his musket. The Major moves away from his attacker and fires his rifle at it, hitting and heavily wounding the goblin. MacInnes sleeps on.

A large troll walks onto the eastern edge of the table.

The board at the end of turn 3.

Turn 4

At this stage, the Lieutenant is down, a troll is approaching, and the goblins have been cleared from the North-West corner of the board. Time to clear out!

MacPherson sprints away from the goblins. Crowe walks away and reload his rifle with some cold iron shot. The Major does a quick reload and fires at the closest goblin but misses. He then also moves away. Most goblins are now out of range of attacking anyone so they just follow the unit members. One goblin is in range of MacInness and rushes him, waking him up with a close miss. MacInnes reads the room and moves back rather than attacking back. The troll approaches the campfire, picks up a rock and throws it but misses.

Time to get out of here!

Fenner moves back and fires his iron nails at the closest goblin but misses. McInnes legs it away from the goblin, fires his pistol and also misses. Crowe moves back and reloads.

Another goblin enters from the North East corner.

The board at the end of turn 4.

Turn 5-6

These turns are rather uneventful, the unit moves back and finally off the board, taking pot shots at goblins and the troll but no more real damage is done.

After the game I rolled on the injury table for Lieutenant MacRae and he picked up a permanent injury for his troubles, with a nasty leg wound that reduces his move by one.

The troll and the goblins enjoying their well-earned camp fire

This mission felt like the hardest by far, the goblins are really tough! I didn’t even brave tangling with the Troll, that felt like a good way of losing half my unit. This game is quite interesting, I achieved most of the objectives (investigating 3 clues, killing 3 goblins, getting 6 unit members off the table), but it still felt like losing as I unceremoniously scampered off the table. It’s a great bit of atmosphere through mechanics I think.

There’s one more solo mission left in the main rulebook which I’ll run through soon I think. As I mentioned last post I’ve been enjoying this game enough that I’m preparing a new unit for the Egypt supplement, so will continue solo missions in a different setting after that.

Goblin Archers

I’ve been chipping away at this small unit of archers for my Orcs and Goblins over the past few weeks. I have not been in any particular rush and it’s been quite nice painting at a sedate pace. I have a tendency to want to get things done fast, but with work quite busy lately it’s been good to do the fun things in life in a more relaxed fashion!

These are new casts of old models like much of the rest of the newly (re)released Orcs and Goblins models for Warhammer The Old World. These are pretty old sculpts now and were current when I started the hobby in the early 2000s. I’m absolutely the demographic for this nostalgia fueled set of releases!

I tried to make them look generally cohesive but in a haphazard manner, picking out their clothes in different colours. For my own future reference (I have plenty more of these to paint!) these are: Vallejo Model Color (VMC) German Fieldgrey WWII (also used for the fletching), VMC US Field Drab, VMC Black, and VMC German Camo Medium Brown (also used for the furs). The rest of the colours used are the same as for the rest of the army as detailed in my Orc Warboss post.

One nice discovery painting these was a new method (new for me at least!) for placing pigment powders on the bases in a much less messy way. So far I’ve been applying them dry, which tends to get them everywhere, and fix them using airbrushed varnish (at low pressure but still very messy). For these I experimented with mixing them with acrylic thinner before applying them in patches to the bases. I then dipped my brush in water and blended the patches into the uncovered section to get an uneven look. This method was much cleaner than dry application and was a lot easier to control. I’d recommend trying it out if you’re using dry pigments on your bases!

Night Goblins

After a few posts promising a unit of goblins as the next addition to my Orcs and Goblins army (and a few posts apologising for failing to deliver!) I’ve finally finished this large unit of Night Goblins!

With a cool 42 models in it it is one of the largest units I’ve ever painted, and took me quite a while to get through. With its rather sizeable footprint it was a bit awkward to photograph too, a lot like a large terrain piece.

I ended up batch painting the unit row by row (i.e. seven models at a time), except the shields and the basing which were done for the whole unit at once. Each row was relatively quick to do, but together this added up to a lot of work (Basing took me a whole evening!).

The banner was quite fun to paint, although I went in to it without a good idea of what to put on it. I decided a mushroom would be a good option given the Night Goblin moon was already represented at the top of the banner pole. I painted on a mushroom and then wasn’t sure where to go from there. I ended up taking a photo of the banner and doodling on the photo on my iPad to test out designs to add to my mushroom and I settled on what you see below. It was great to be able to experiment with designs without painting over and over again so I’ll do that again, a good lesson learned.

You might have noticed the shaman holding the green-headed staff on the right of the unit. This is one of the army’s characters, in fact the only wizard I have planned in there at the moment. This is a classic model that I picked up on eBay alongside the netters you see in the unit.

The night goblin models are the newly re-released plastics that were the standard kit back in 6th edition. There is a more modern night goblin box which is from the 7th edition era which is now marketed as an Age of Sigmar set. I really like the older plastics and I’d been looking for a second hand box when GW announced they were re-realeasing them. That made me and my wallet very happy, those second hand prices were getting sky high.

This new set came with a transfer sheet with a couple of designs for the shields. I loved the moon design on those transfers so that was an easy pick. I’ve never applied this many transfers in a single sitting!

I’m glad to see the end of this one, I’ve been painting it on and off for what must be a couple of months now (inter-spaced with a few other small projects such as the Fanatics I did a while back, which will be launched from this unit), and it took some determination (and a fair few hours) to get them finished this week. I love the look of these models as a massed unit and am chuffed with how they came out. I’m going to paint up a smaller scale project next I think!

Goblin Wolf Riders – Part 1

Back this week with more models for my Orcs and Goblins army: some Goblin Wolf Riders!

These are classic models (late 90s I believe!), which have been re-released as part of the current set of Warhammer Old World releases. This might be laziness on GW’s part, but I’m loving the fact you can buy some of these models without having to go through exorbitant eBay prices! These are the models that were current when I started the hobby, and couldn’t afford them at the time so this is very much an exercise in nostalgia for me!

I really enjoyed painting these, the goblin riders are so characterful and the old style “big” detailing is a joy to paint. For the wolves I tried something a little bit different. I really wanted a nice gradient on the furs so I basecoated them using the airbrush, starting with a cream colour all over then doing narrower and narrower bands of darker browns over their backs. I chickened out of doing highlights over this gradient so I decided to use oils to shade the furs so I could wipe them off of the raised areas. You can see the effect in the photo below.

I think that worked out pretty well, it’s not quite as clean as properly highlighting things, but it is much more expedient which is exactly what I’m after when painting army models. I have a second unit of these to paint up for the army, so I’ll be reusing the technique although I will be changing the colours to have some grey wolves for those.

For the Goblins themselves, I reused the recipes I laid out last post for the Warboss, so check that out if you’re interested!

Now I promised a couple of posts ago to post some photos of the first games of our Border Princes campaign and promptly forgot to include them in the last post, so here they are, better late than never!

If you remember the last update, my Dwarfs were attacking the Fortress at the center of the map, defended by the Bretonnian force I’d painted up for this purpose. As I was the attacker, one of the other players stepped in to play the defenders and we had a siege game!


The initial setup: two blocks of dwarf infantry pushing the siege tower and ranged units on the hill. On the defending side the walls are occupied by archers and men-at-arms, and surprising the attackers the unit of knights deployed outside the walls!
Cannons lining up the castle gate
The defenders look on as the attacking forces assemble.
The knights form up … outside the gates!

The cannons started shooting the gates, failing to do much and one of them misfired even with the engineer there to give it a re-roll! Luckily it only had to skip a turn, losing a war machine this early in the game would have been dreadful! The Siege tower was pushed forward by the dwarf infantry. On the defending side the knights advanced, resolved to chop that siege tower to scrapwood with their axes! On the walls the archers started shooting at the siege tower and managed to inflict some damage to it (presumably some critical ropes cut!). The following turn the knights managed to close in on the tower and almost destroyed it in combat!

The knights close in on the siege tower… and start hacking!

The dwarfs did not take kindly to this attempt to cut down their handywork and retaliated, closing in on the knights. The Demon Slayer and his rune axe made short work of the knights, but the damage was done, the siege tower on a single wound was more of a liability than anything else at this stag. The dwarfs abandoned it, taking a page out of the Knight’s book and deciding to use their own axes on the fortress gate.

The Dwarfs abandon their tower.

Under a hail of arrows the Dwarfs approached the gatehouse and got to work hacking down the gates. The cannons had finally started doing some damage to the gates and the rune axe of the Demon Slayer crashed through the wood of the gates soon enough.

The gates crash open!

Once inside the walls, a desperate melee started between the Dwarfs and the Men-at-arms led by the Baron started. The combat was inconclusive, but the last turn had arrived and the Dwarfs won the day, having taken the gatehouse and slain the knights for no full units of their own lost (although as you can see above those archers did a lot of work on those units!).

This battle resolves turn 4 and the map above shows the state of things as the turn ends.

The players made their moves for turn 5, and we have two battles lined up for this turn! Both feature the Ogres and the Beastmen, with the Ogres attempting to seize the starting location of the Beastmen, and the Beastmen trying to take the river section off the Ogres.

The defense of the Beastmen home territory has already been fought, although unfortunately I did not get to take many photos.

The battle was fought in a heavily wooded board, with the beast’s herdstone as the primary objective.
Things got very heated up in the area surrounding the herdstorne as both armies maneuvered to capture it.
Despite a desperate attempt by the beasts to reclaim their herdstone the Ogres won the day.

Hopefully you’ve enjoyed this longer than usual post! Plenty of gaming action in the coming months as this campaign gets played out, and I hope to be able to photograph most of it!

Siege Preparations

As I mentioned last week, we’re preparing for a siege game as the opening battle in our Border Princes campaign. Last week’s post covered the last of the defenders, and this week’s will cover the preparations I made to the attacking force: my Dwarfs!

As you can see in the photo above I decided that I needed more firepower! I painted two extra cannons this week to breach the gates of the fortifications, which is one of the main objectives of the scenario.

I painted the two cannons different colours to add a bit of variation to the models, considering this is the third of this cannon model I have in the army now. I picture dwarfs as being more artisanal craftspeople and therefore making the cannons as they see fit rather than follow a set pattern.

Of course the crews also being one piece models there is no variation in them, so once again I used colour to differentiate them, mostly through the beards but also by changing the colour of some of the clothes.

While the cannons attempt to breach the walls, I have another way to cross the walls: a siege tower!

I built this a while back and haven’t had the need until now to paint it. This siege game is the perfect excuse to get it finished and on the table!

The tower itself is built out of balsa wood, with the wheels from the Skaven warp lightning cannon kit. The ladders are 3D prints I did a long time ago for the This Is Not A Test games we were playing back in 2021. They ended up fitting rather nicely here!

I kept the tower rather faction agnostic so that it can be used for any siege game, it is probably less well constructed than Dwarfs would like, but much better constructed than Orcs could manage!

The platform at the front of course pivots, ready to come crashing down on some battlements and disgorge its occupants! I’m planning on filling it with dwarf Troll Slayers, so the above shot is probably a preview of the game to come!

The game is tomorrow and I’ll endeavour to take some photos that I’ll post here.

Dwarf Warriors

After all these diversions painting Wood Elves, I’m back in the realm of trusty axes with some more Dwarfs!

These are the old Battle for Skull Pass starter set models, which are quite basic one piece models (hence the flat poses!). The upside of this is detail on them is limited and they’re quite fast to paint.

Painting-wise there is nothing groundbreaking on these, still using the same recipe as the unit of Miners that kicked this all off. It’s quite a fast scheme and looks fine on the table!

A big part of the drive to get these models painted was to make this army legal under the newest ruleset. I was a bit light on core units, so a small block of warriors filled that void nicely.

You may notice these are on a spaced out movement tray, while my previous units were close together. The new edition of the game has dwarfs sitting on 25mm bases rather than the classic 20mm, so rather than rebasing all these, I knocked up some movement trays in tinkercad that add the missing 5mm around the models and printed them on my filament printer. I did this for all my current units, which means it’s a good time for an army photo!

Having all this painted up gives me far more than I need for the campaign which means I’m good to go on that front which is very exciting!

I should have some terrain for the campaign done up soon, so I’d expect that to be the next post!