Cold Forests

In what is the final post of my holiday-driven burst of activity we have quite a few trees!

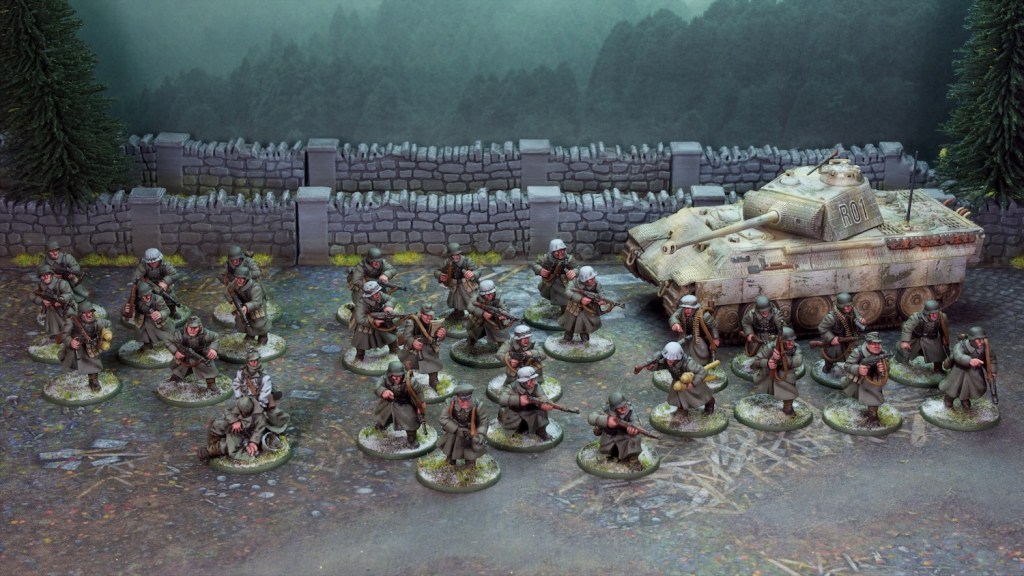
As I’ve mentioned a few times in the last few posts, I’m planning on running a game of Chain of Command for some friends in the coming weeks, and the setting is the Eastern Front, sometime in winter 1944. Having no winter terrain was going to make that a bit difficult, so I decided to paint up a few pieces to populate the table. The main thing I wanted was to have some nice pine forests, so I set about finding some suitable trees.

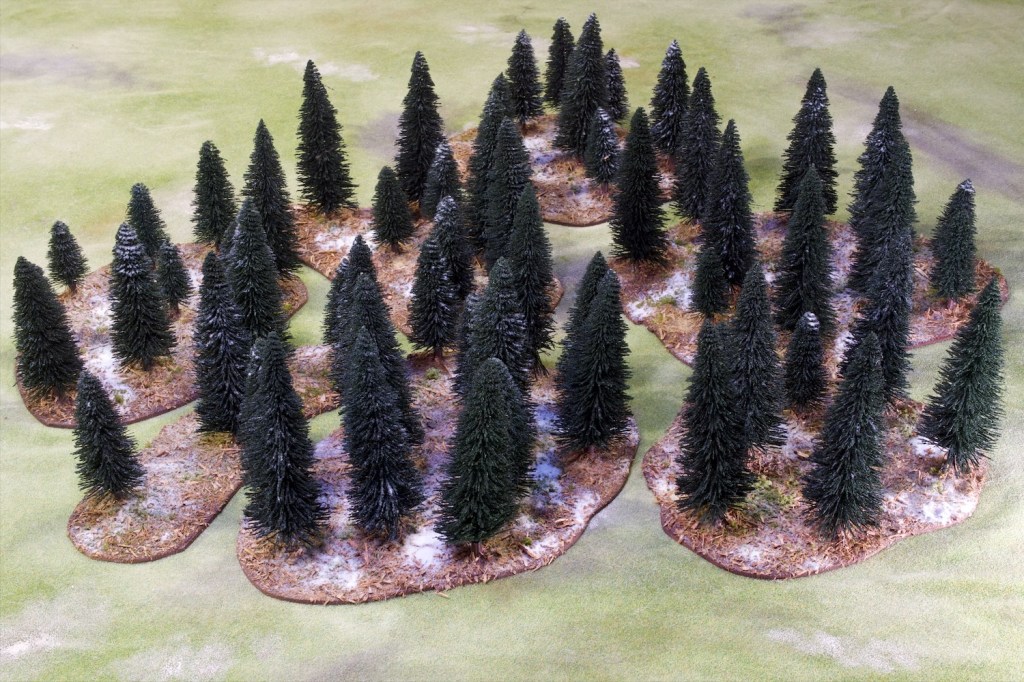
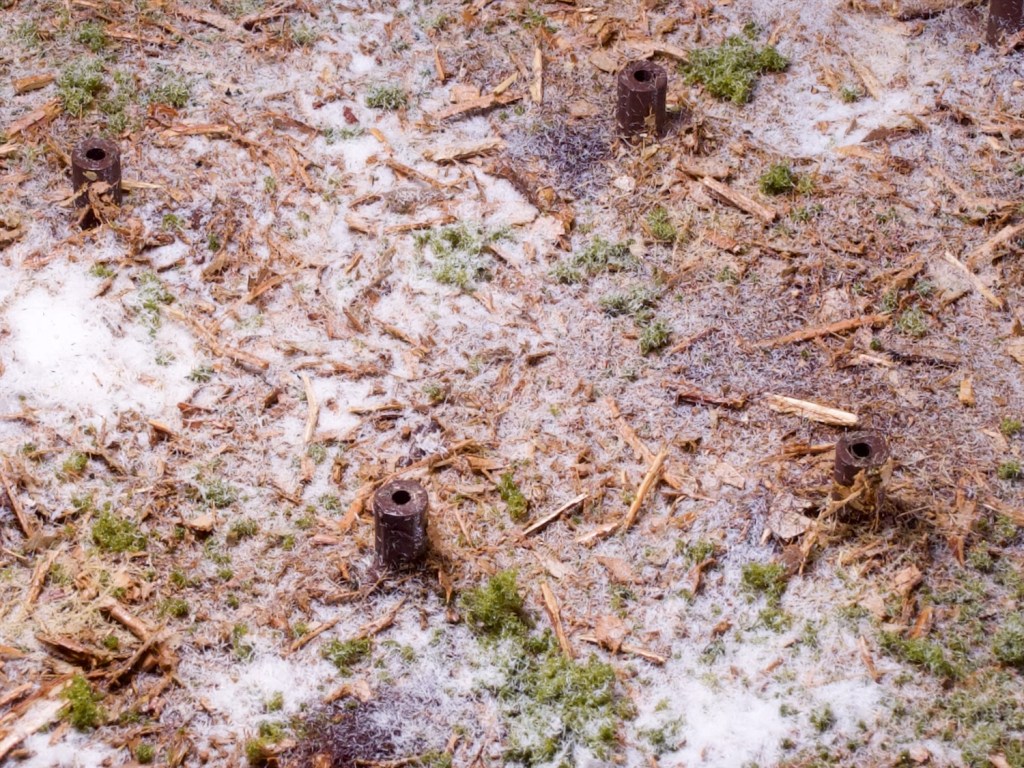
The trees you see above were cheap ones from Amazon which came in big batches with some variety in sizes which was quite nice. 60 of them cost me just below $60 (Australian dollars that is!) which seemed like a nice rate. They are a basic shaped and flocked bottlebrush style pine trees, nothing fancy but they do the trick. The flock was not glued on great but I knew I was going to spray them with varnish to get some snow on there too so was not too worried. The “trunks” of the trees were bare wire twists so I needed to make some holders for them, to make the trees more realistic and allow them to be removed for gaming and storage purposes.

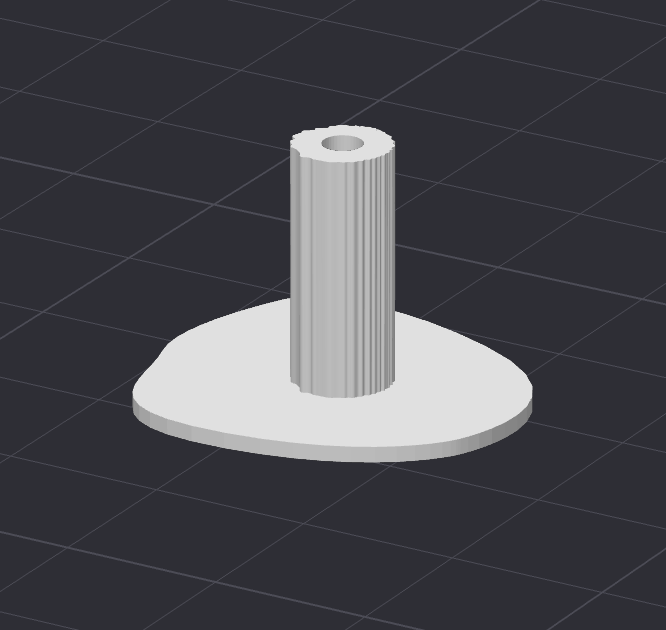
I made a very rough trunk shape in tinkercad and 3D printed the 60 I needed. I then glued them down in a semi-random pattern to some MDF bases I cut out of the back of an old bookshelf (never throw anything away!), and was ready for basing.

I wanted a forest floor look but wanted to stay away from a leafy look as befits a pine forest. As a result while I went my usual route of blending up some leaf litter as I did for these citadel woods and for my endor table I stayed away from soft leaves (european style!) and went for dried eucalyptus leaves which are much harder and blend down to a powder. That mixed with small twigs gave a nice finish that I think does a decent job of impersonating dropped branches and bark at the scale.

To finish the look I added some green foam from woodland scenics to represent small vegetation on the forest floor. I tried adding some dark and some dry static grass to look like dropped needles, but I don’t think they’re very visible. To top it off I sprinkled some snow flock over the trees and bases (over wet hairspray), then sealed the lot with some spray varnish.

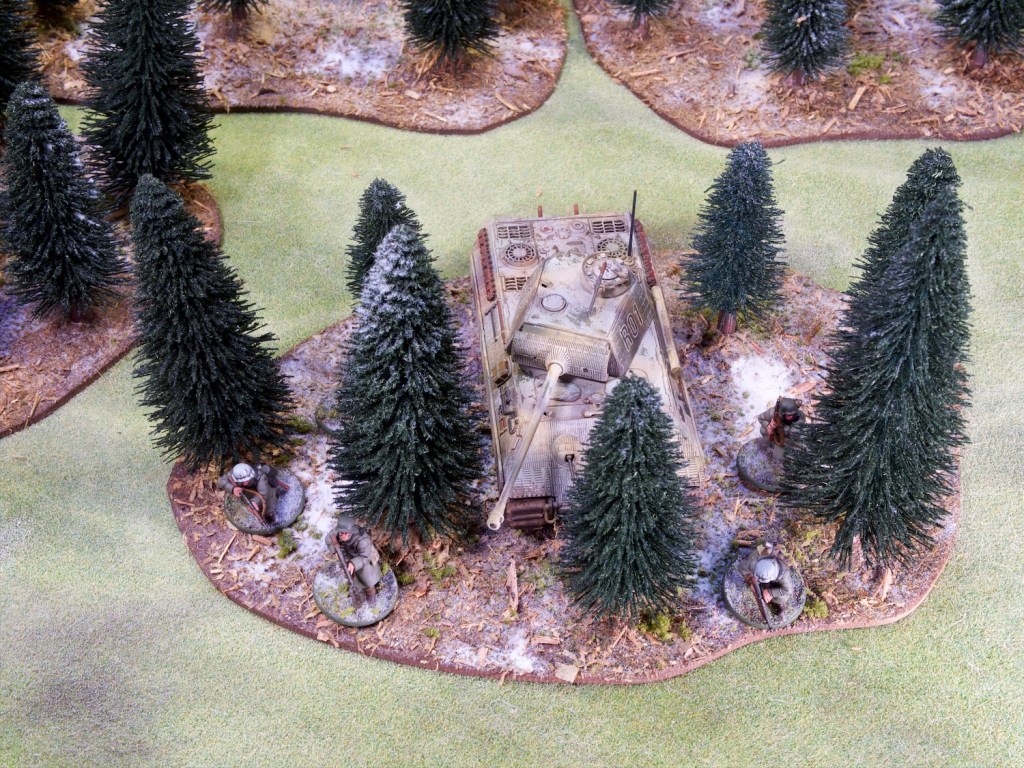
Keeping the trees removable is quite practical for gaming purposes, especially for those game systems that treat forests slightly abstractly as an area of terrain rather than individual trees.

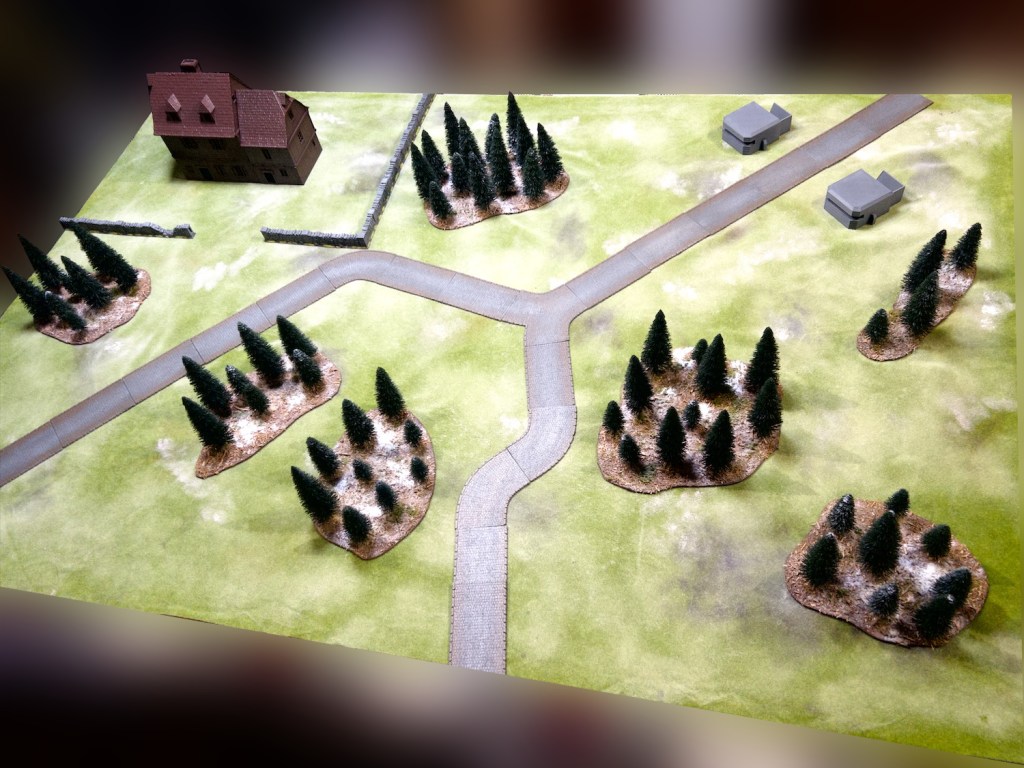
The trees make up most of the terrain I needed ready for this game as you can see from the layout I set up above. You get a sneak preview of the remainder of the terrain which is the large house in the left corner and the two small bunkers to the right.

You also get to see my attempts at repurposing my old Citadel grass mat, which has sat unused for years since I’ve move on to printed neoprene battlemats. It seemed a waste to not use it, so I decided to see if I could convert it for this cold setting. I hit it with patches of brown and white and then “frosted” it with a light pass of white spray paint to get that frozen grass look.

I wanted the table to have a frosty morning with some light snow look rather than a full on snow storm, hence the light use of snow flock on the forests and the light dusting of white on the mat. I’m hoping to communicate the cold through the mat and the tree stands only, allowing me to place terrain pieces I painted for my other settings over it and having them not look out of place. For example I’m planning on using the cobblestone road I painted for my Normandy games in this game as you can see above.

I hope you like the look of these, and I’ll be likely back onto my slower pace of posts as I head back to work next week!

Winter Germans

I’ve had some leave this week and have put it to good use by painting lots of models! I’ve now finished painting my Volksgrenadier platoon for Chain of Command (you saw the first section last post), as well as some extra firepower in the form of a Panther tank.

The platoon is made up of a command section, two assault sections (armed with STG44 assault rifles), and an LMG section (split into two LMG teams).

The command section, with an officer and four riflemen. I also painted up a medic model I had in cold weather gear, he’s not part of the command section but can be selected as a support in game.
The second assault section. You might have seen the first one last post.
The LMG section. In game this operates as two teams, one for each LMG.

I described the painting method for the infantry last post so I won’t repeat it here. The process is very quick, and this was a good test for it. I batch painted all three new sections (and the medic) at once (21 models all up), painting each colour on each model in a row. I got them to the wash stage in a few hours on Sunday, and did all the highlights on Monday. Not a bad rate I think! They’re certainly not my finest work, but they look effective on the table which is always the primary purpose for army models.

Onto the tank! This is a Warlord Games/Italeri plastic kit, and as with all the ones of these I have put together over the years it is a relatively simple build, if a bit light on detail (for example the tools on the side are basically flat). These are meant to be gaming pieces over display models however, and they paint up nicely.

I decided to go for a winter scheme on the tank, and tried my hand at a white wash look. To achieve this I painted the normal late war German camo pattern (yellow base with dark red/brown and dark green patterns – you can see it under the somewhat transparent white), then followed that up with a coat of hairspray on which I lightly airbrushed some white.

If you’re not familiar with the old hairspray method you may be wondering what that’s all about. Effectively, the hairspray allows for some great chipping patterns by providing a water soluble layer under the coat of paint in need of chipping (the white paint in my case). This paint can then be rubbed away by using a wet brush (ideally with somewhat stiff bristles, a drybrush is great for this). The water disolves the hairspray under the paint, which causes the paint to drop off in nice patterns. The tank needs a good coat of varnish after that so that the unstable layer gets locked away an no more paint rubs off.

I then finished the model with the usual oil washes, with a mix of browns and dark grey colours. I also added spots of rust (also using oils) which I streaked downwards, mostly from the spare tracks. I then finished the tracks using pigments. This is a new thing for me, I usually douse tracks in mud but in this case I figured if the ground is frozen there would not be any mud around!

I now have all the models I need for a game of Chain of Command I’m planning on running for some friends soon. What’s missing now (and you may have noticed from the photos!) is some appropriate cold weather terrain. Next up on the painting table will be said terrain, I have most of what I need now, it’s just a matter of painting it.

Dwarf Warriors

After all these diversions painting Wood Elves, I’m back in the realm of trusty axes with some more Dwarfs!

These are the old Battle for Skull Pass starter set models, which are quite basic one piece models (hence the flat poses!). The upside of this is detail on them is limited and they’re quite fast to paint.

Painting-wise there is nothing groundbreaking on these, still using the same recipe as the unit of Miners that kicked this all off. It’s quite a fast scheme and looks fine on the table!

A big part of the drive to get these models painted was to make this army legal under the newest ruleset. I was a bit light on core units, so a small block of warriors filled that void nicely.

You may notice these are on a spaced out movement tray, while my previous units were close together. The new edition of the game has dwarfs sitting on 25mm bases rather than the classic 20mm, so rather than rebasing all these, I knocked up some movement trays in tinkercad that add the missing 5mm around the models and printed them on my filament printer. I did this for all my current units, which means it’s a good time for an army photo!

Having all this painted up gives me far more than I need for the campaign which means I’m good to go on that front which is very exciting!

I should have some terrain for the campaign done up soon, so I’d expect that to be the next post!