A Busy Few Weeks!

As the title suggested, I’ve been busy the last couple of weeks, with some painting and some gaming to discuss in this latest post.

The Gaming!

I have a regular games night with some friends which is usually spent playing role-playing games or board games. The last few of these we had to change the program as a couple of us couldn’t make it, and we decided to get some wargaming in.

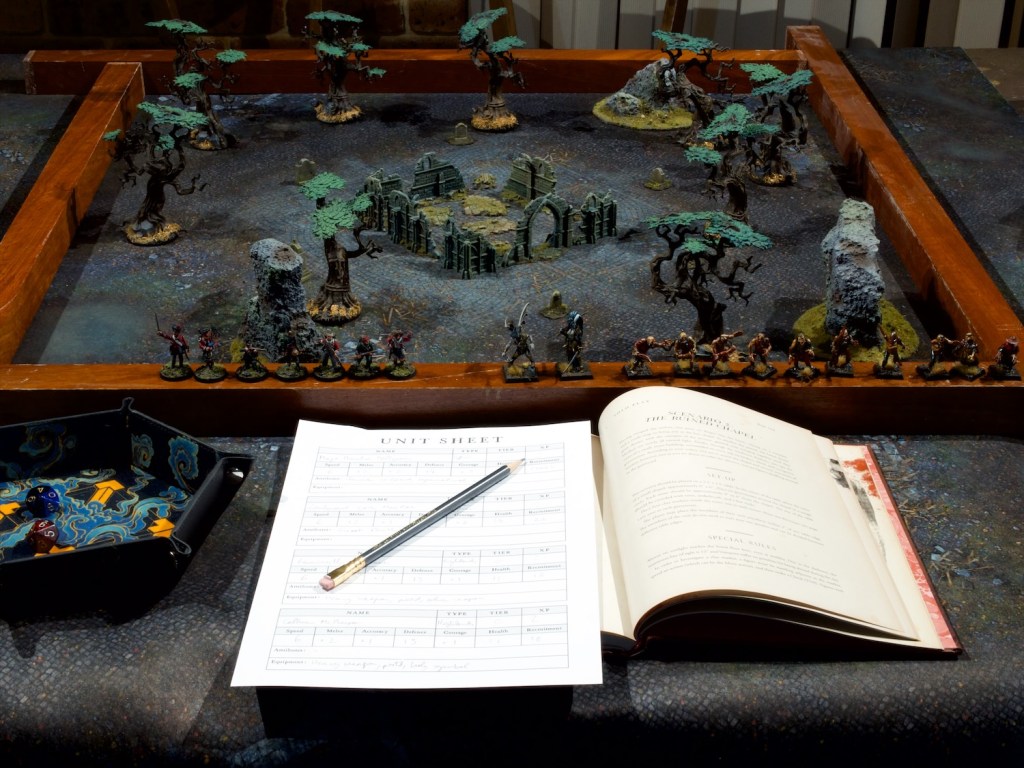
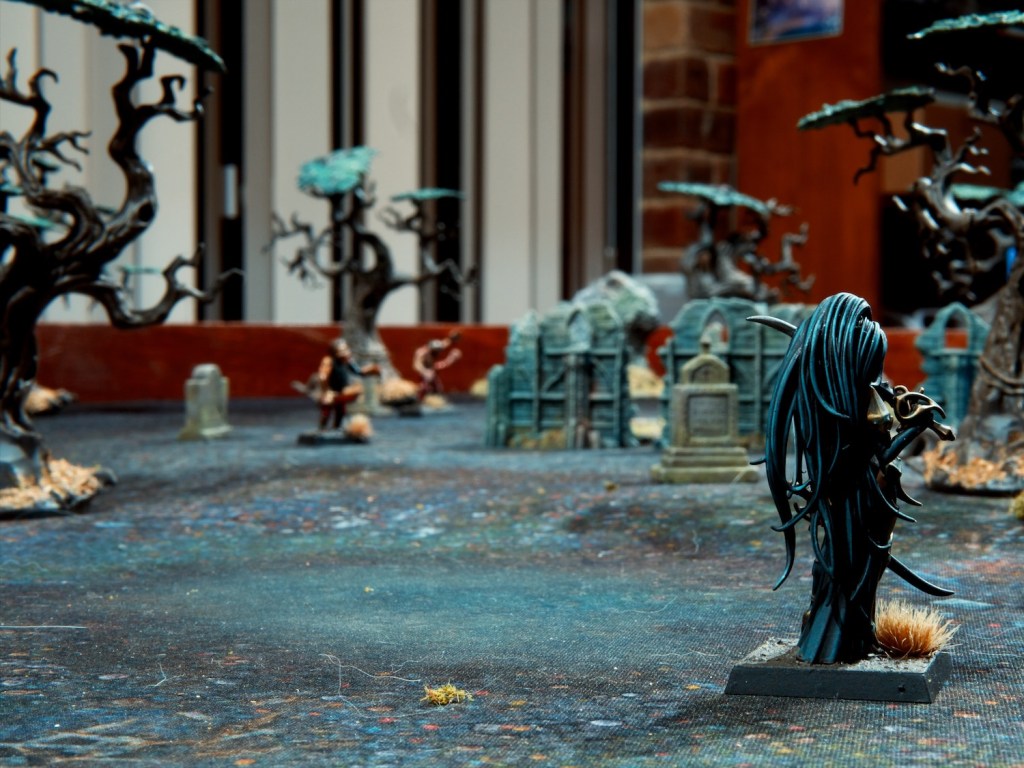
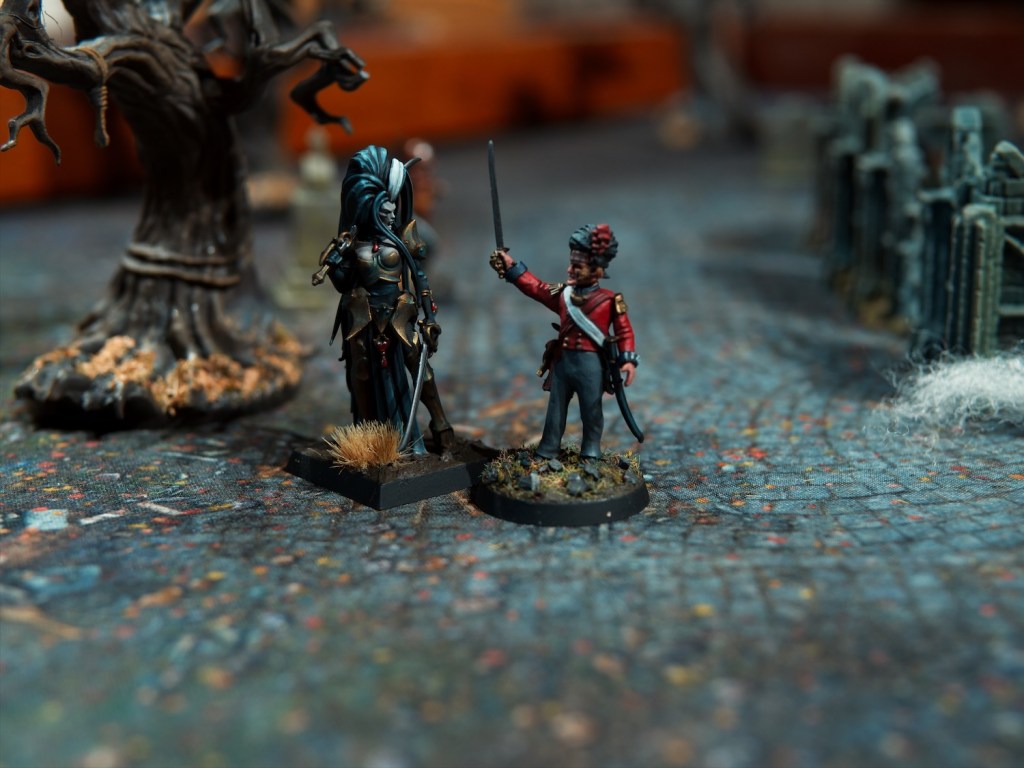
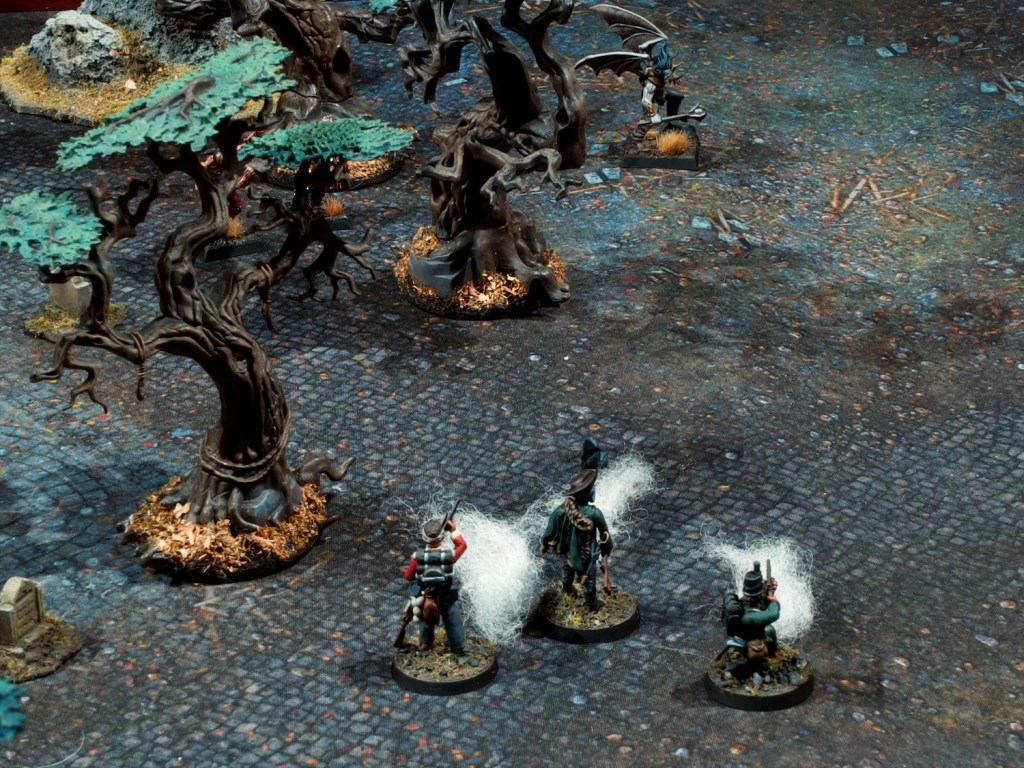
For the first one of these I introduced the group to Silver Bayonet and we played through the fourth solo mission of the main rulebook with my British warband.

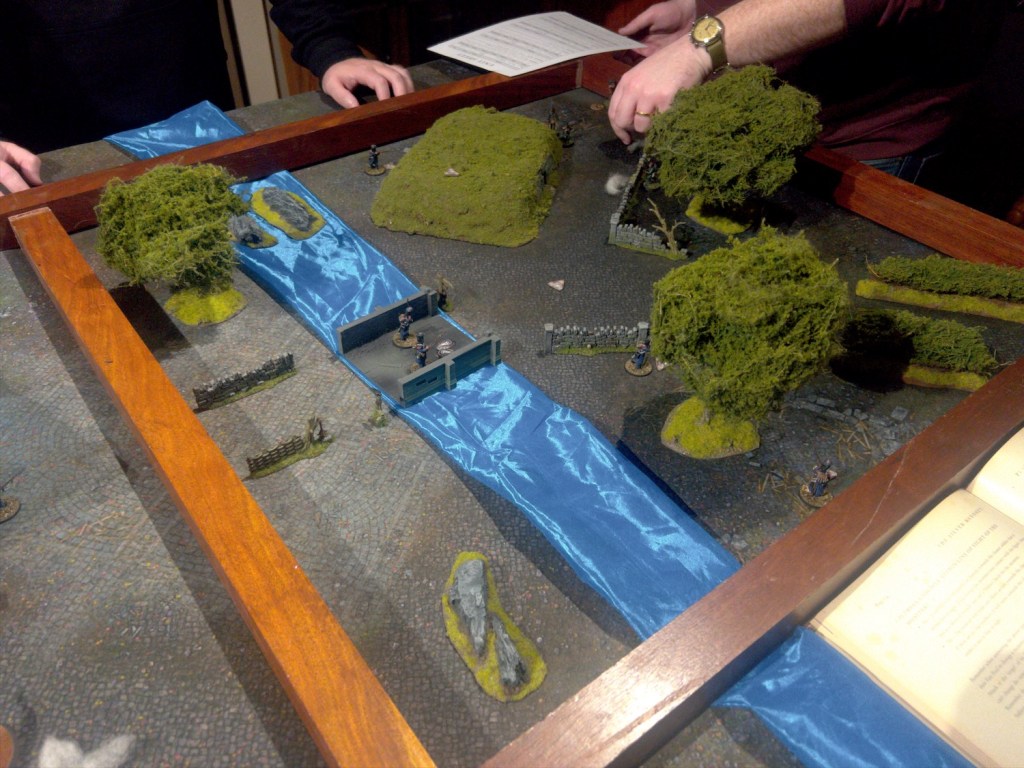
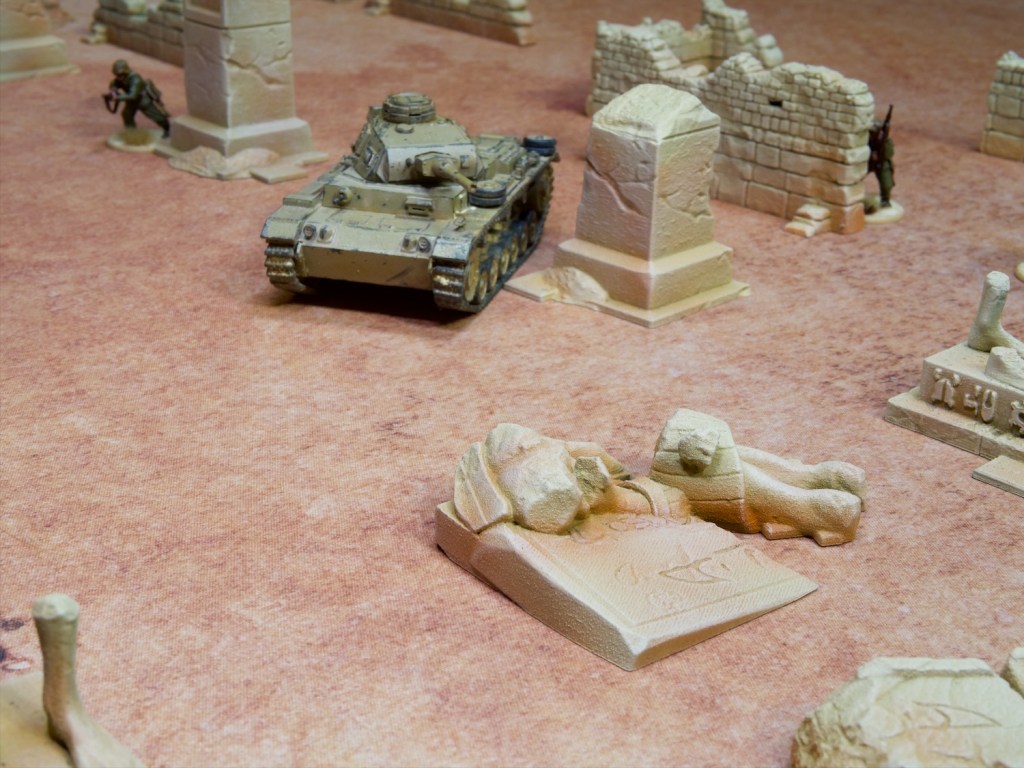
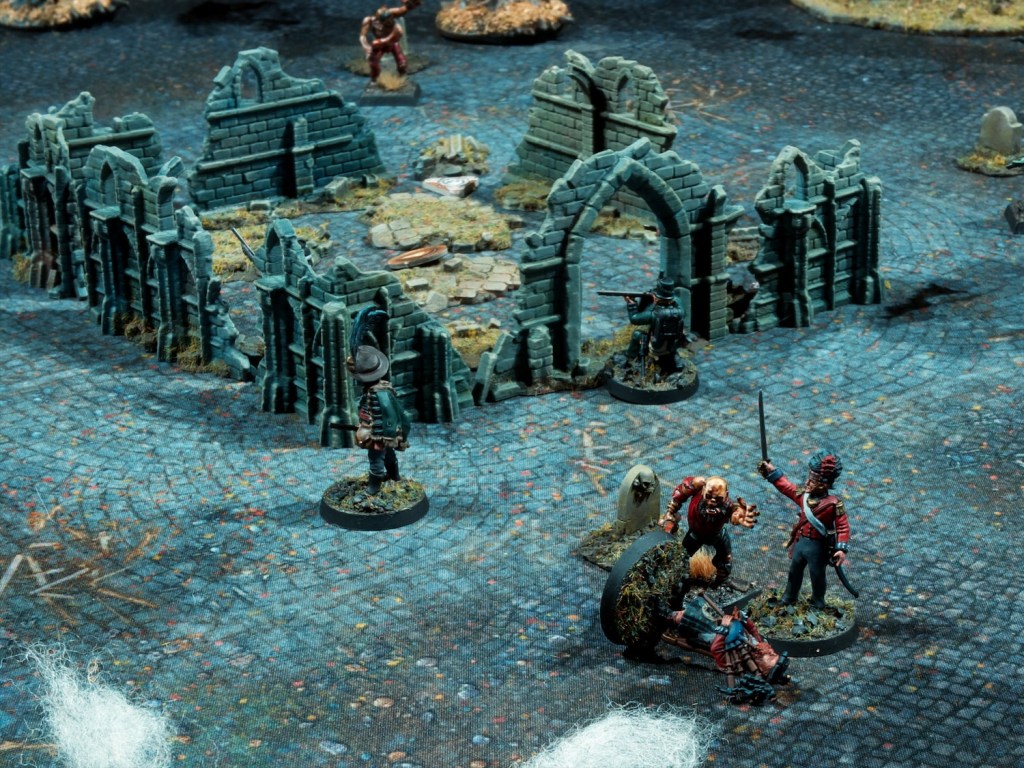
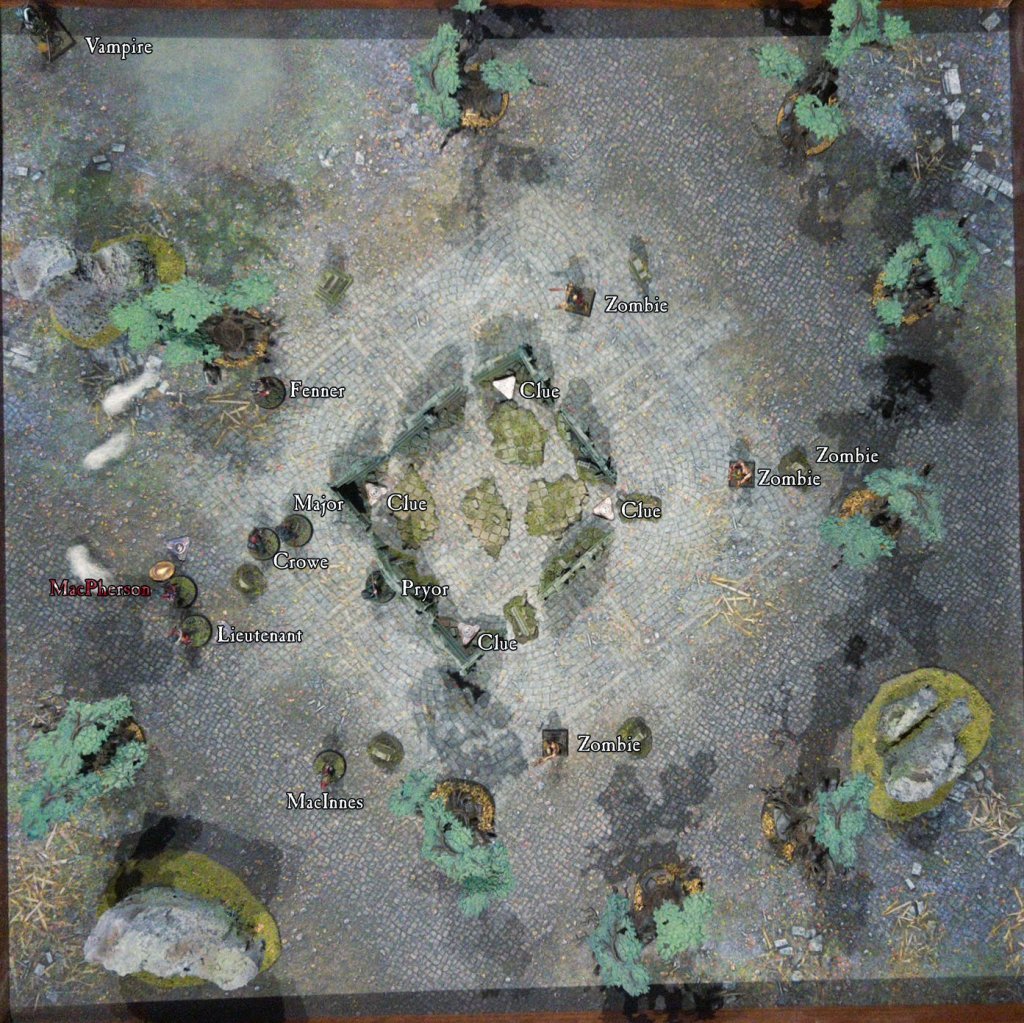
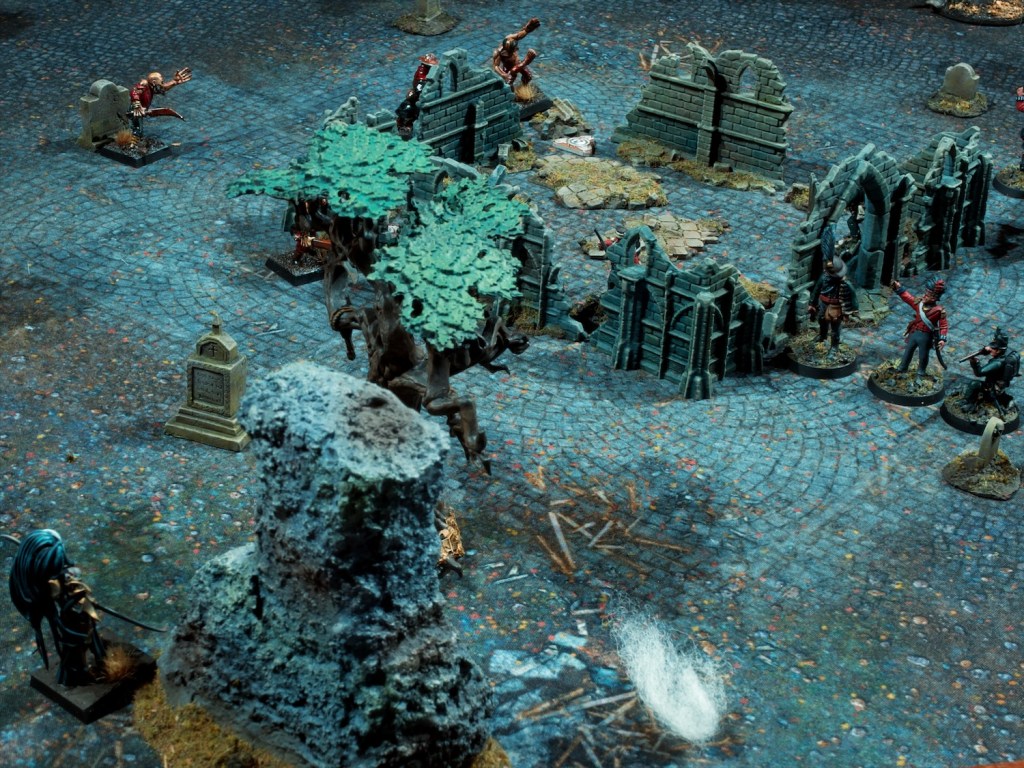
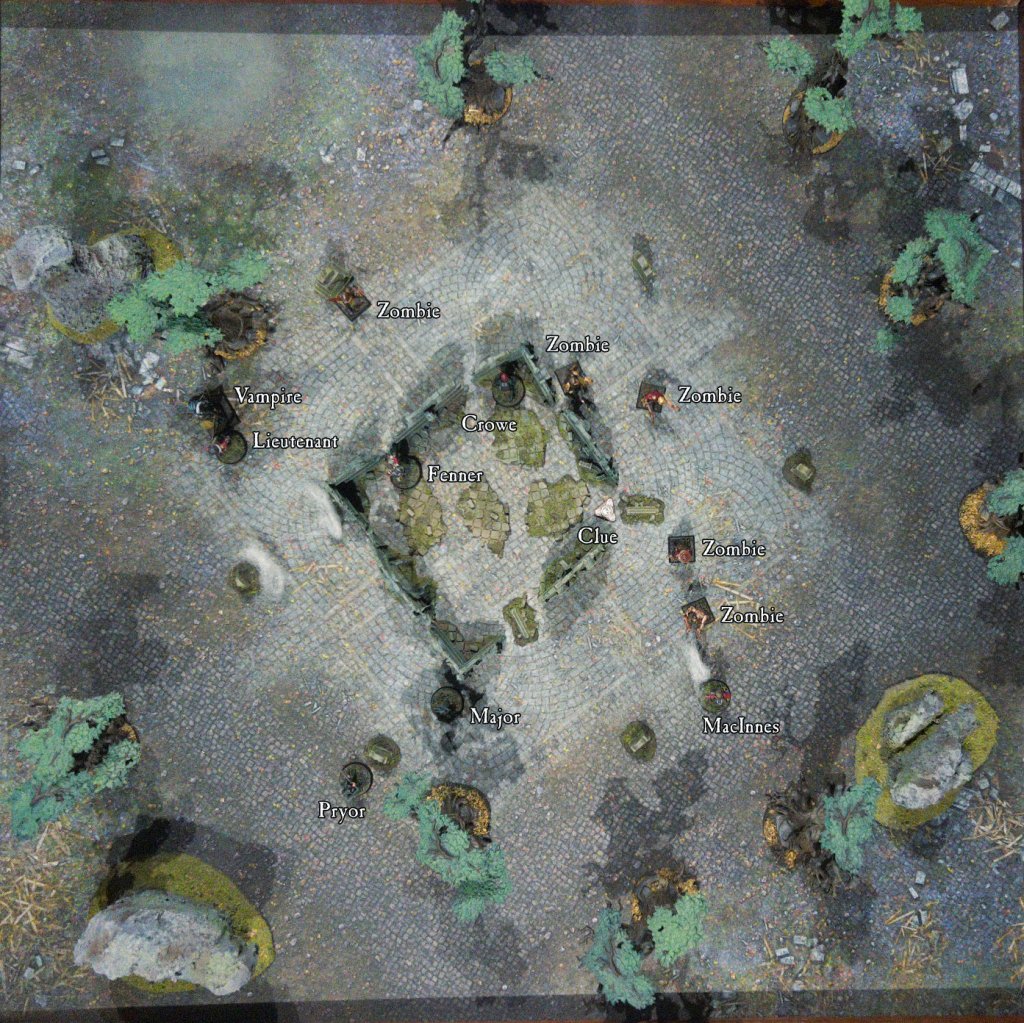
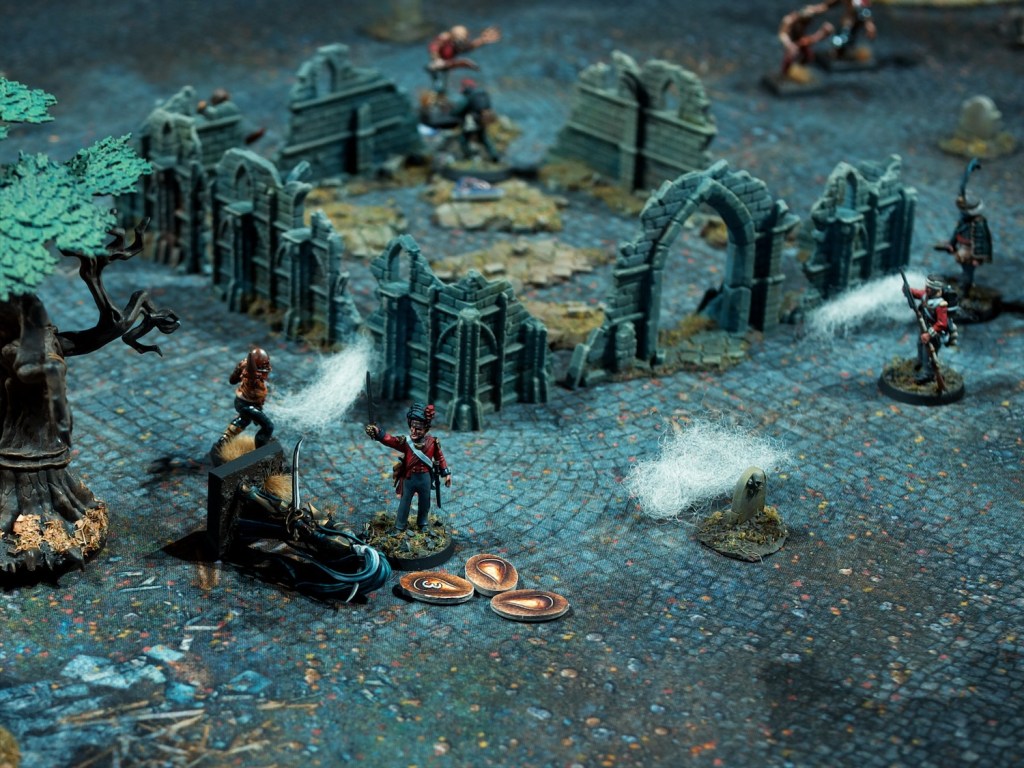
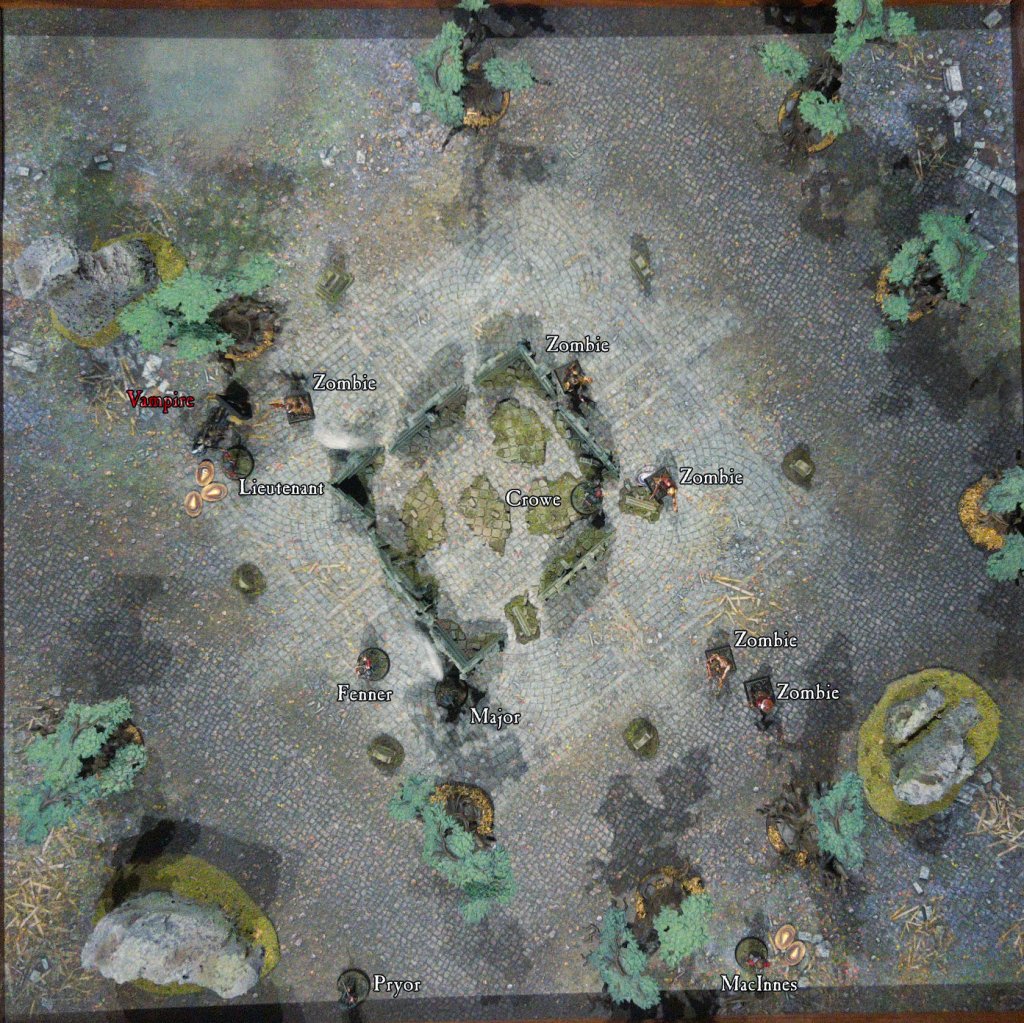
The scenario had the unit attempt to leave the wilderness after its encounters there in the past few missions, but finding their way home cut off by some bandits (role played by the French Imperial Guard unit I painted a few years back). I didn’t take very many photos as I was too busy running the game unfortunately, so no battle report for this mission. Playing the game was very last minute so I had to improvise some of the terrain as you can see in the photo above, with the river being represented by some shiny blue cloth, and the bridge is a section of a ruined church I used for WW2 games!

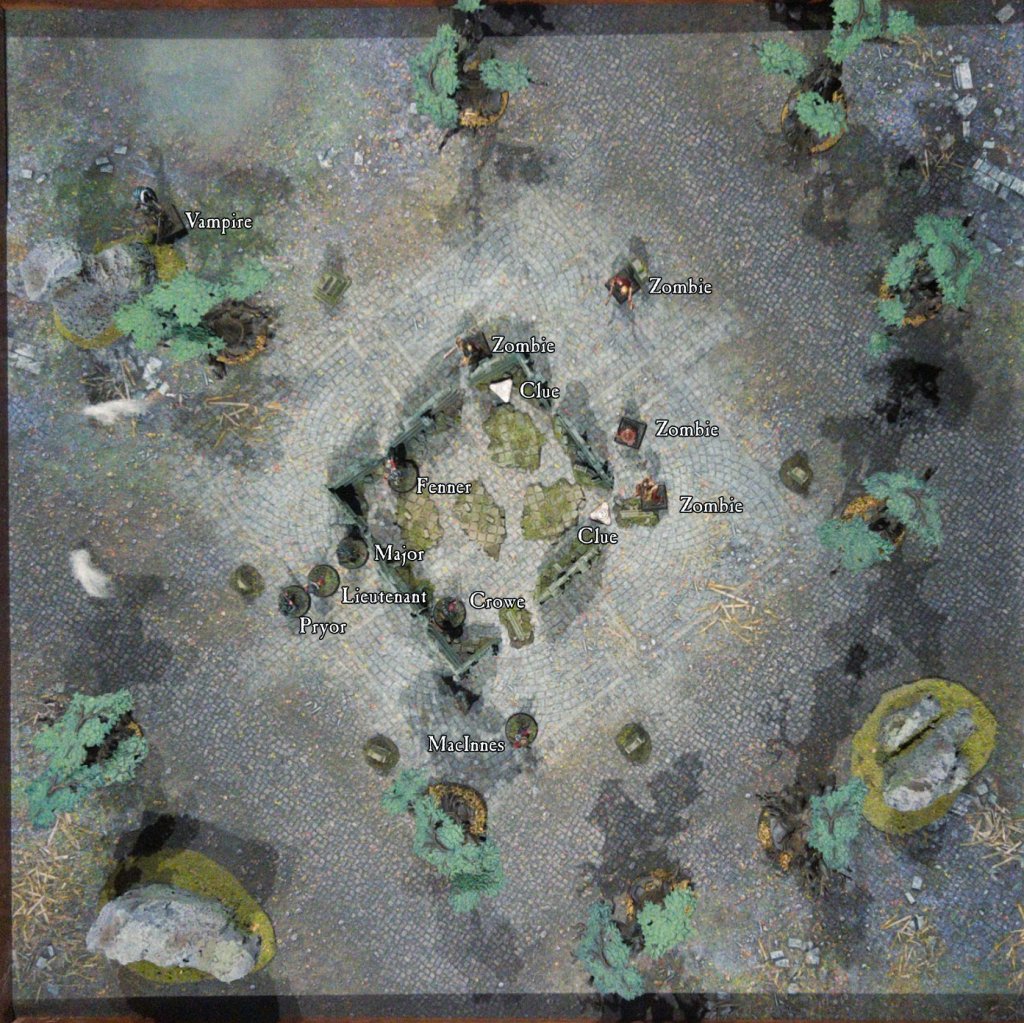
The game went very well, the two players were running the unit together while I was telling them the rules and taking the monster actions. They were much more aggressive than I usually play, but it paid off and they cleared the mission relatively easily. Both of them really enjoyed the game so that’s always a plus!

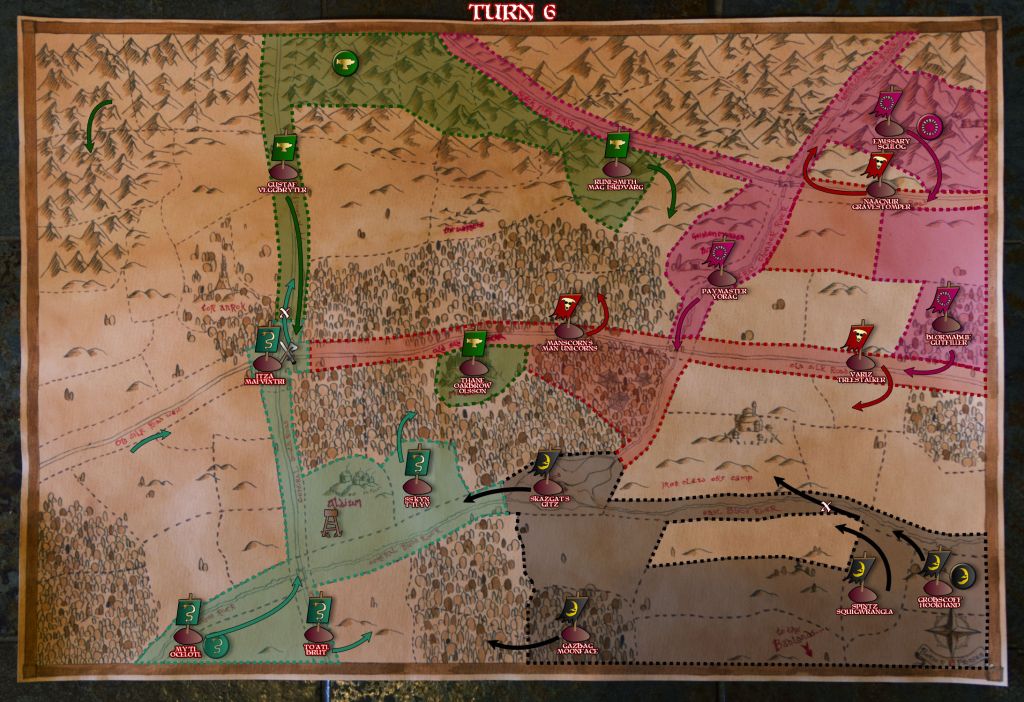
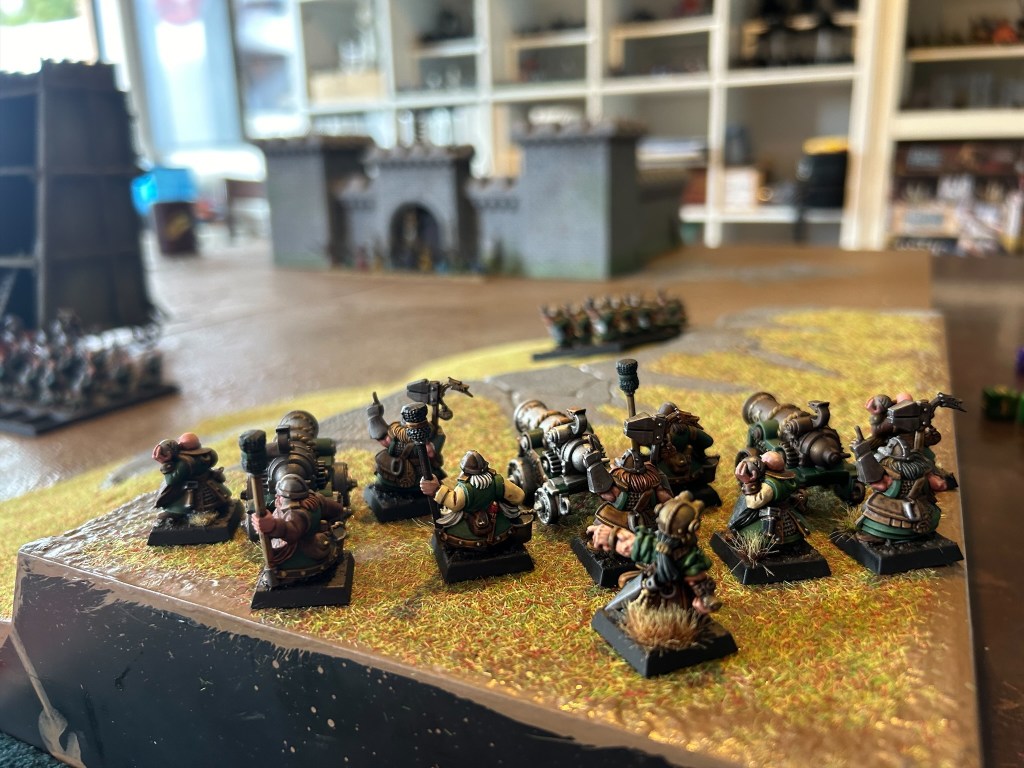
On the second week we decided to try out a new (to us!) ruleset for fantasy/historical battles: Midgard. Midgard is a game by James Morris (check out his blog, it’s very cool https://mogsymakes.net/blog/) which came out last year and covers quite a lot of ground. At its core, it’s a system for covering historical (and fantastical) battles where the heroic actions of army leaders can carry the day. This is suitable for covering periods all the way from antiquity to mid to late middle ages when commanders started running battles from a bit further back than the front lines. Midgard also caters for more mythological/fantastical battles, with rule for monsters and magic thrown in. I’ll be talking a lot more about Midgard in the future as it ticks a lot of boxes for me.

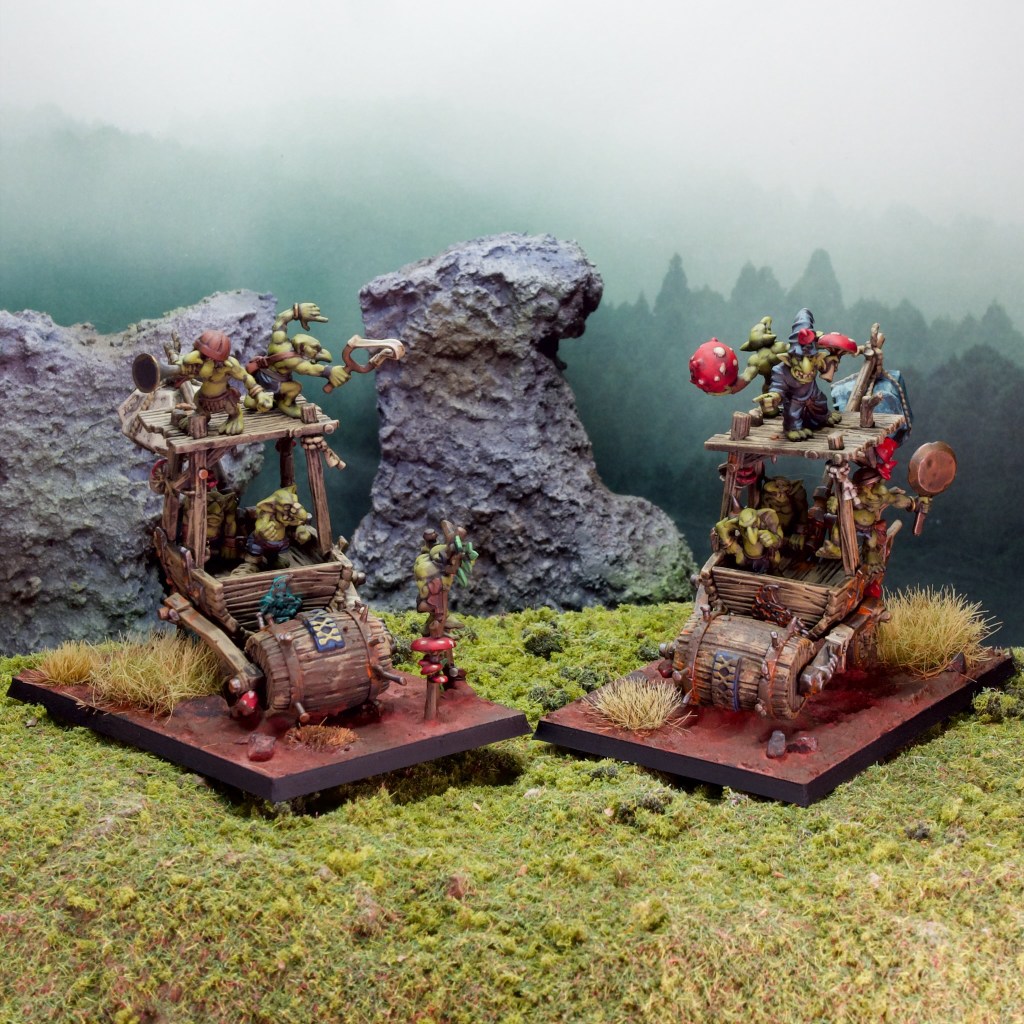
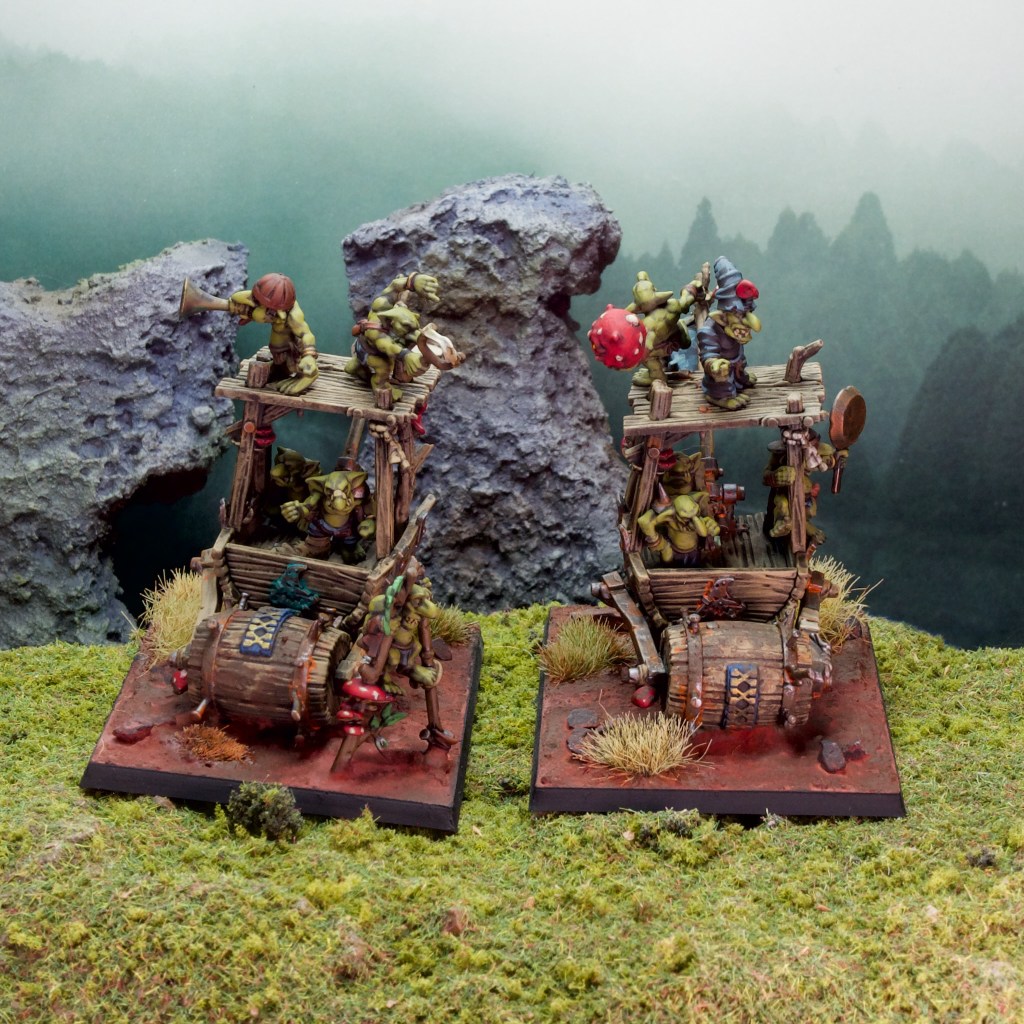
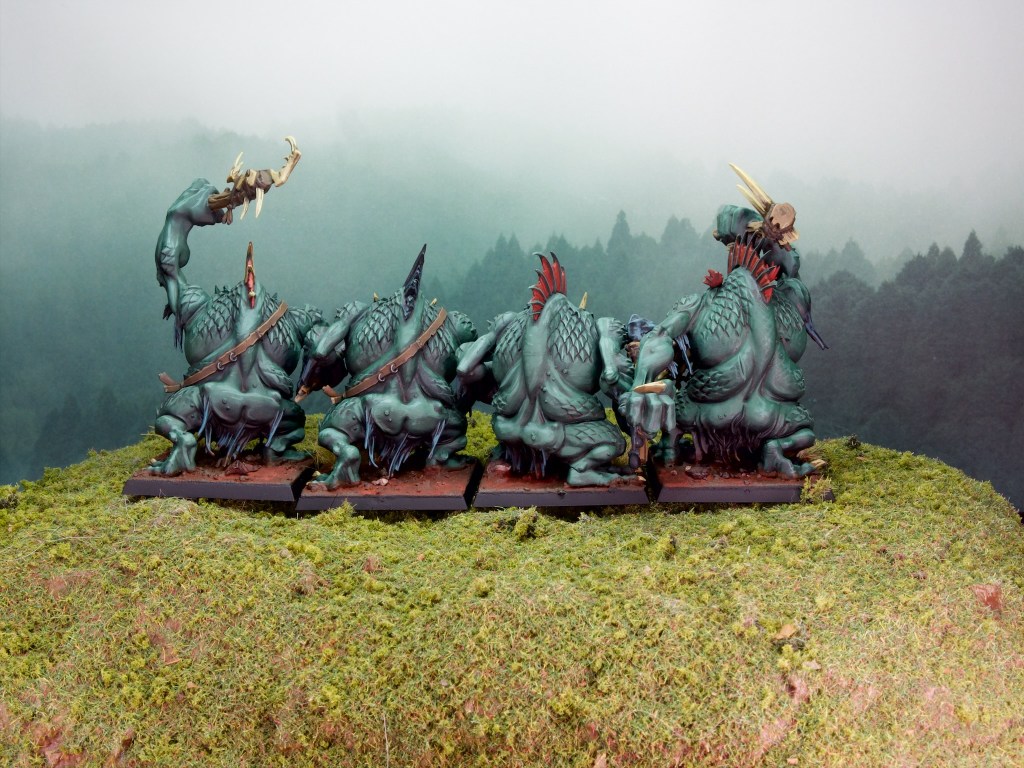
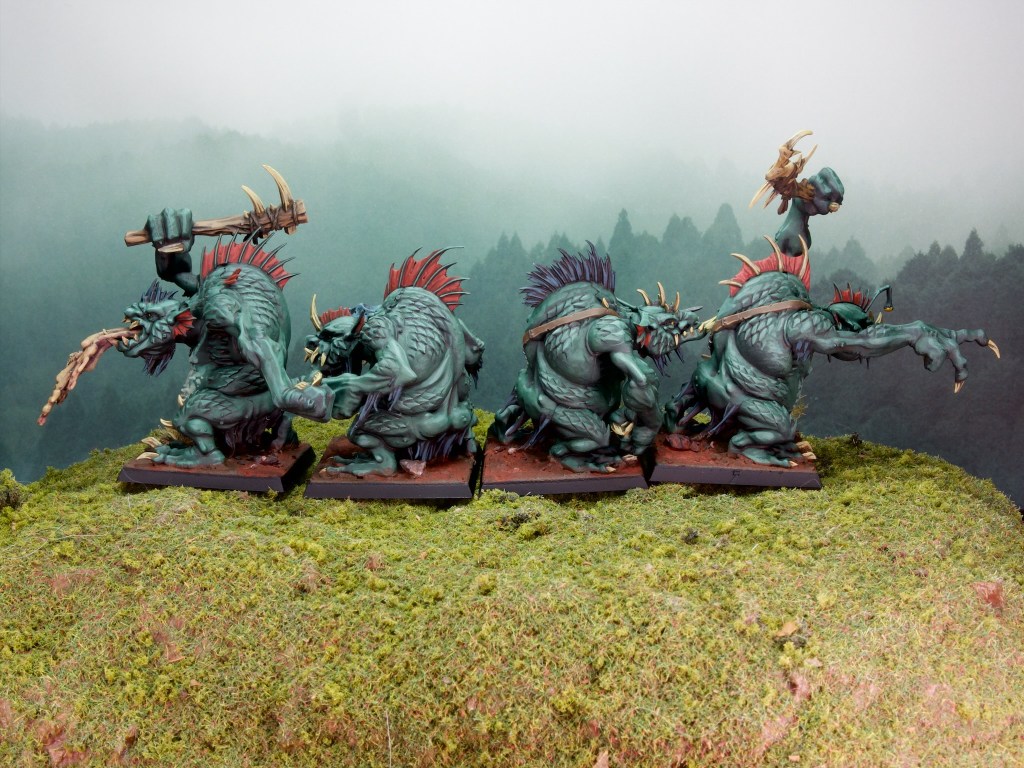
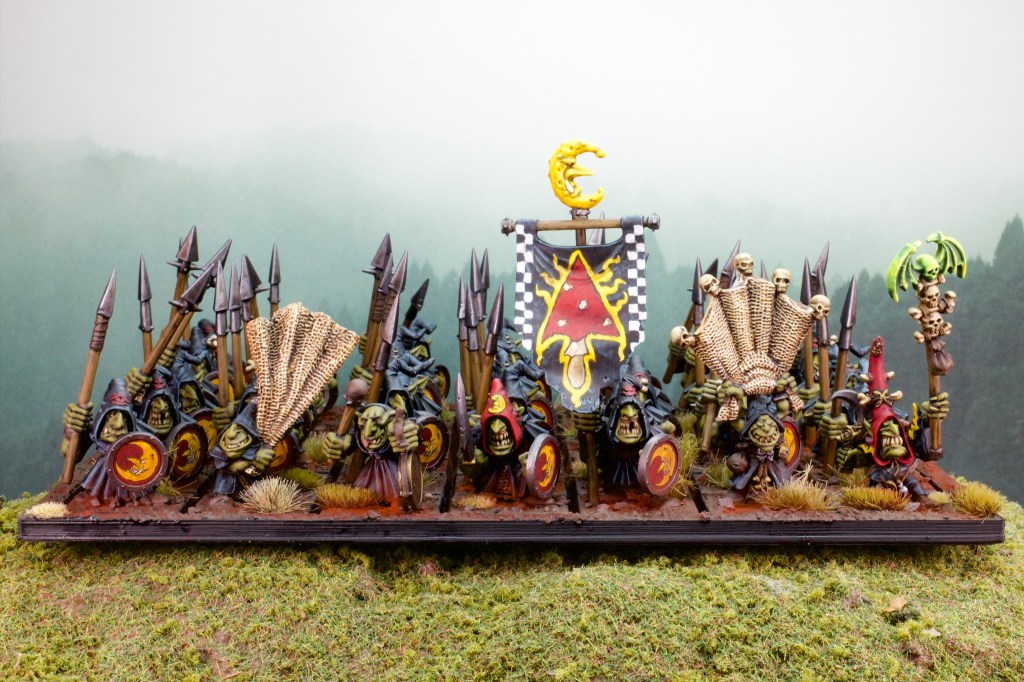
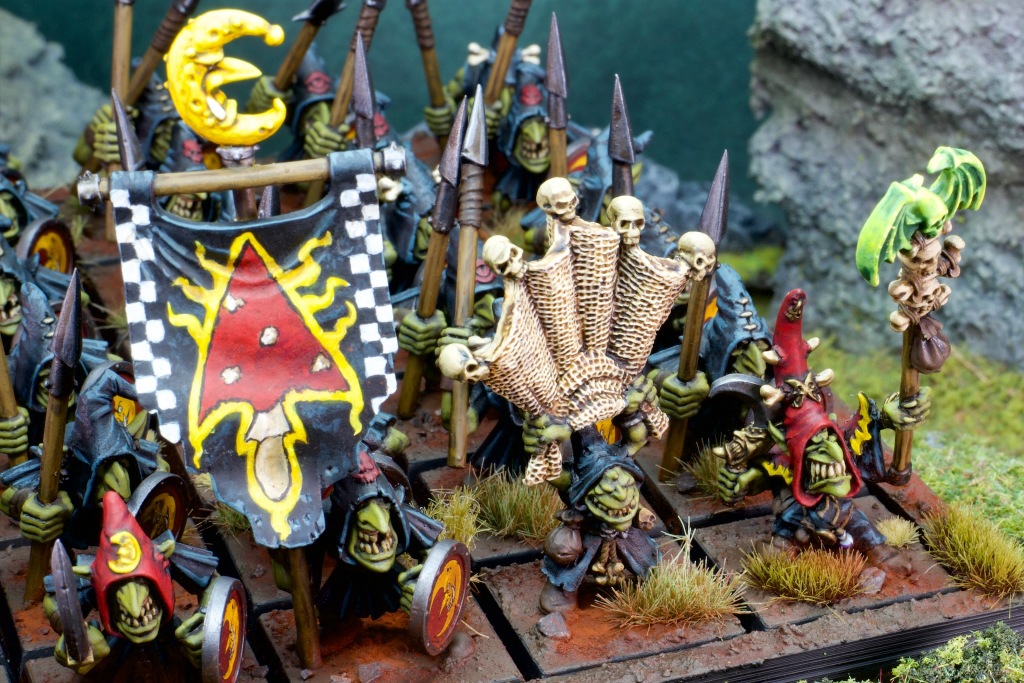
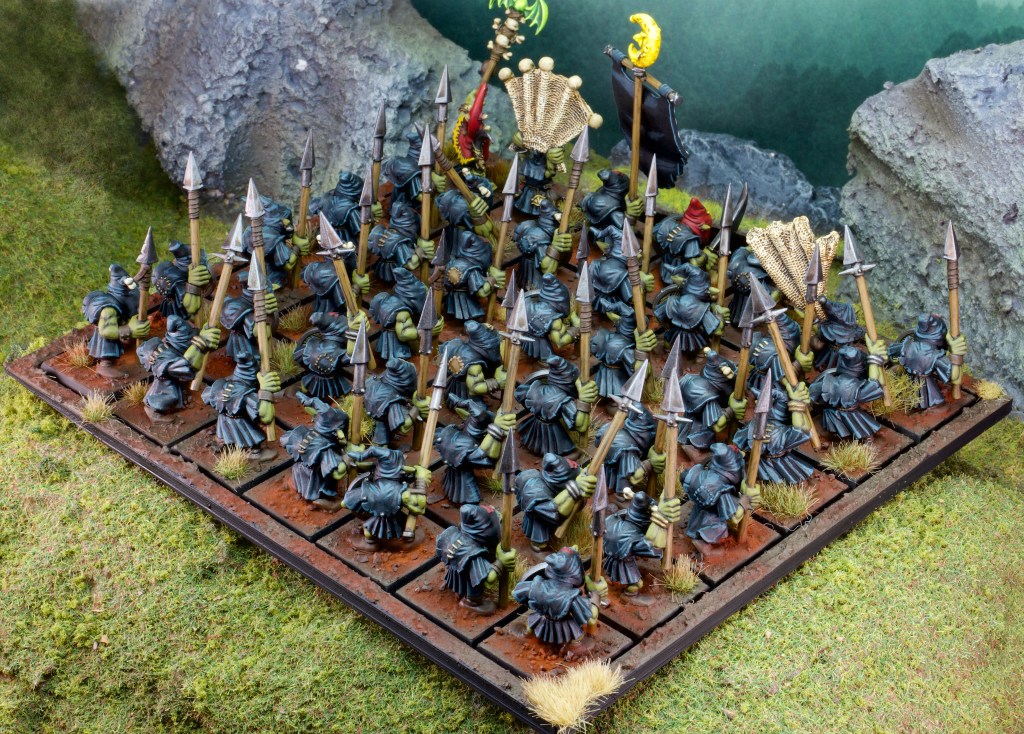
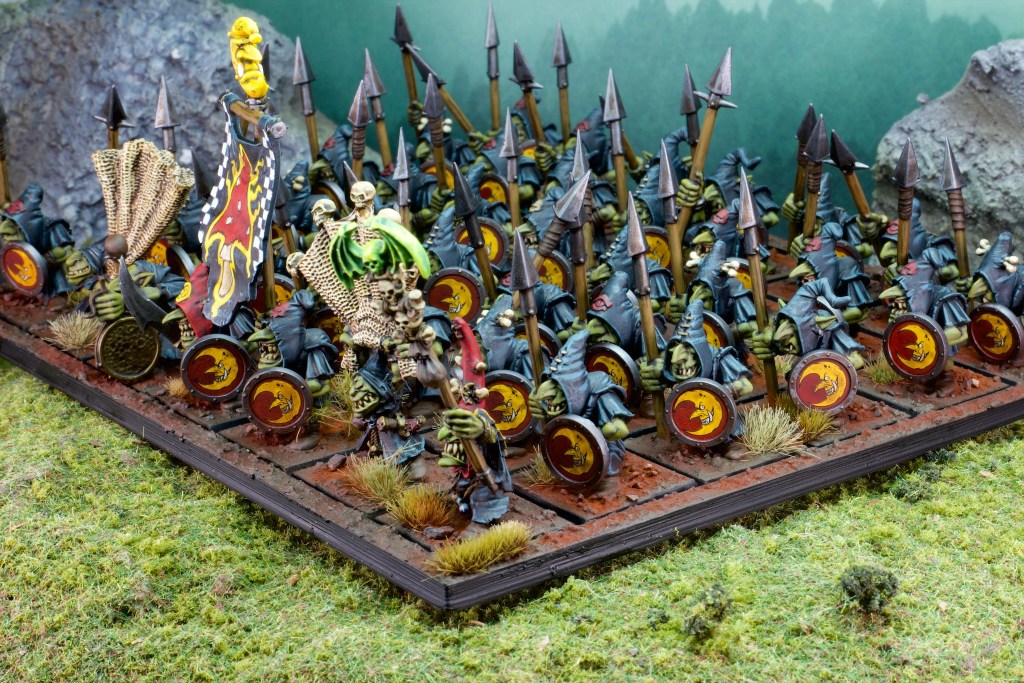
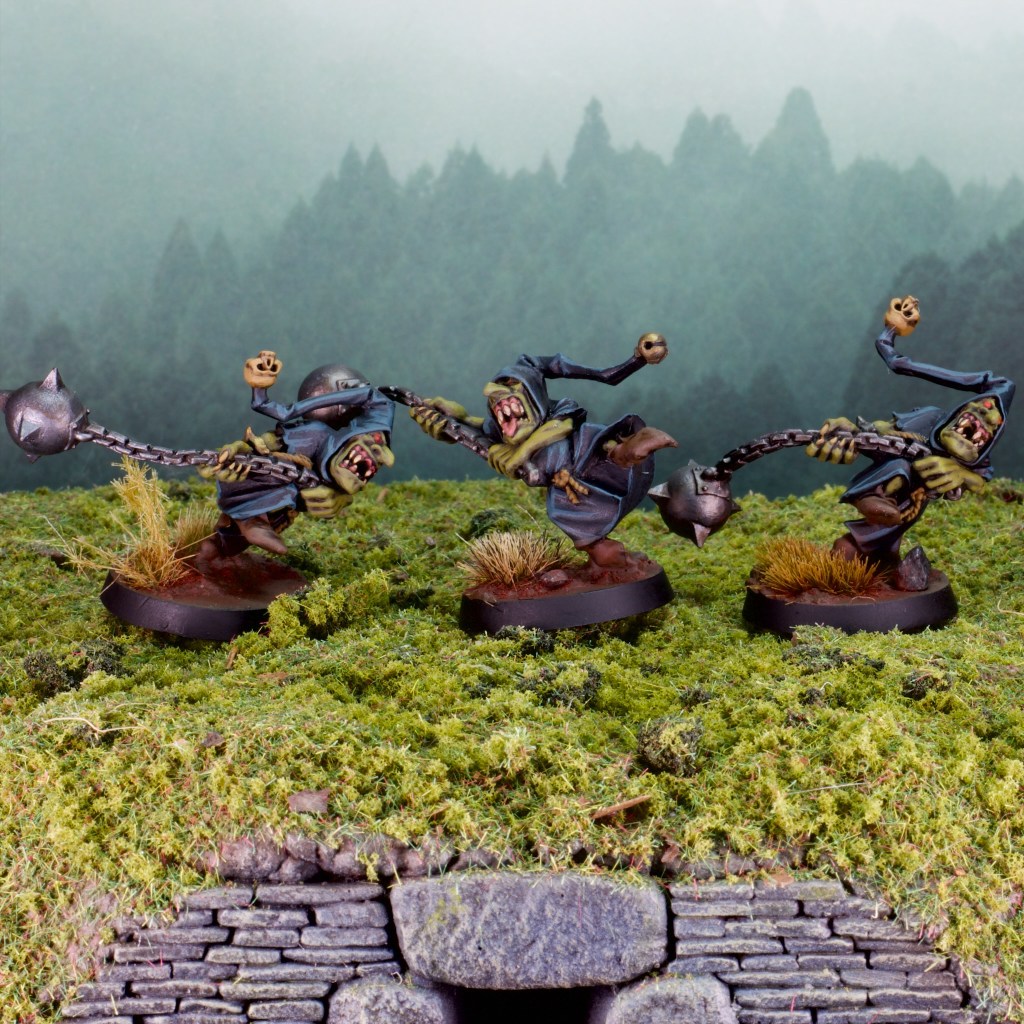
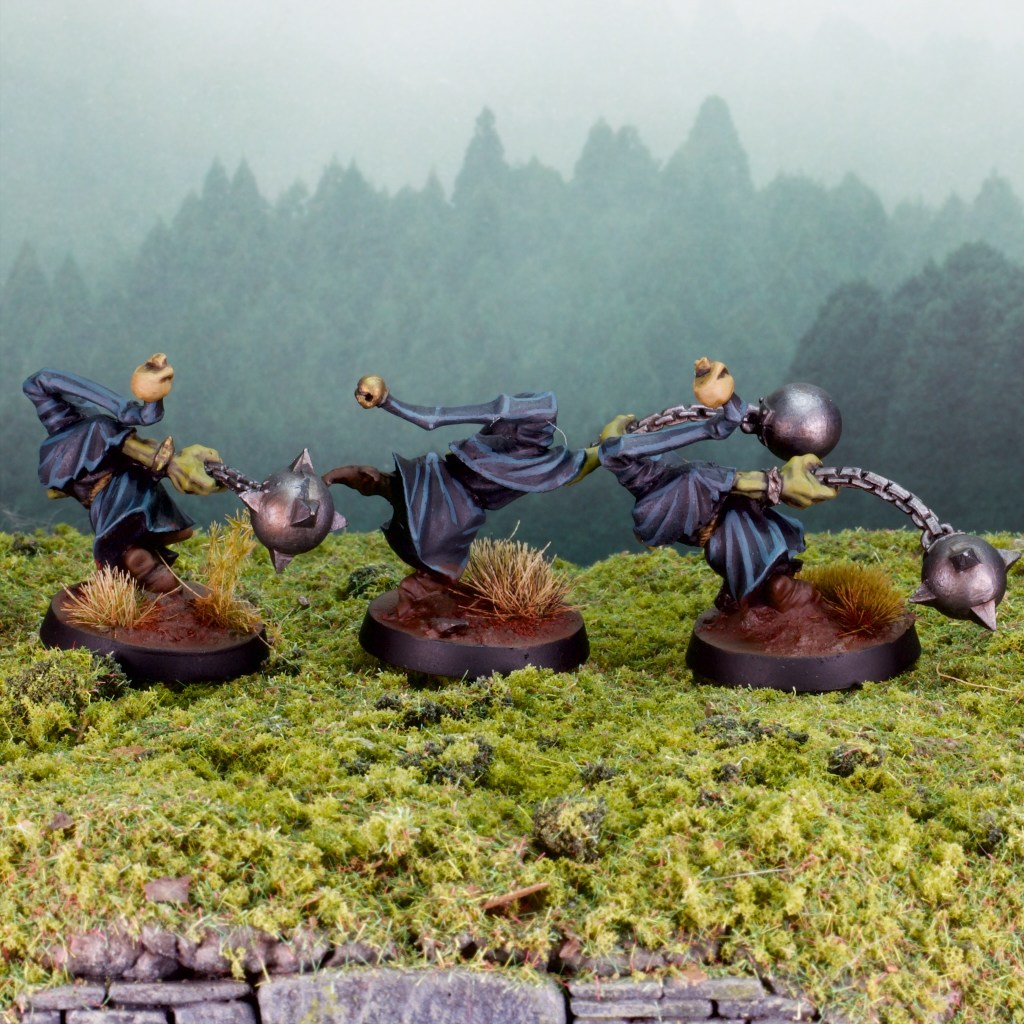
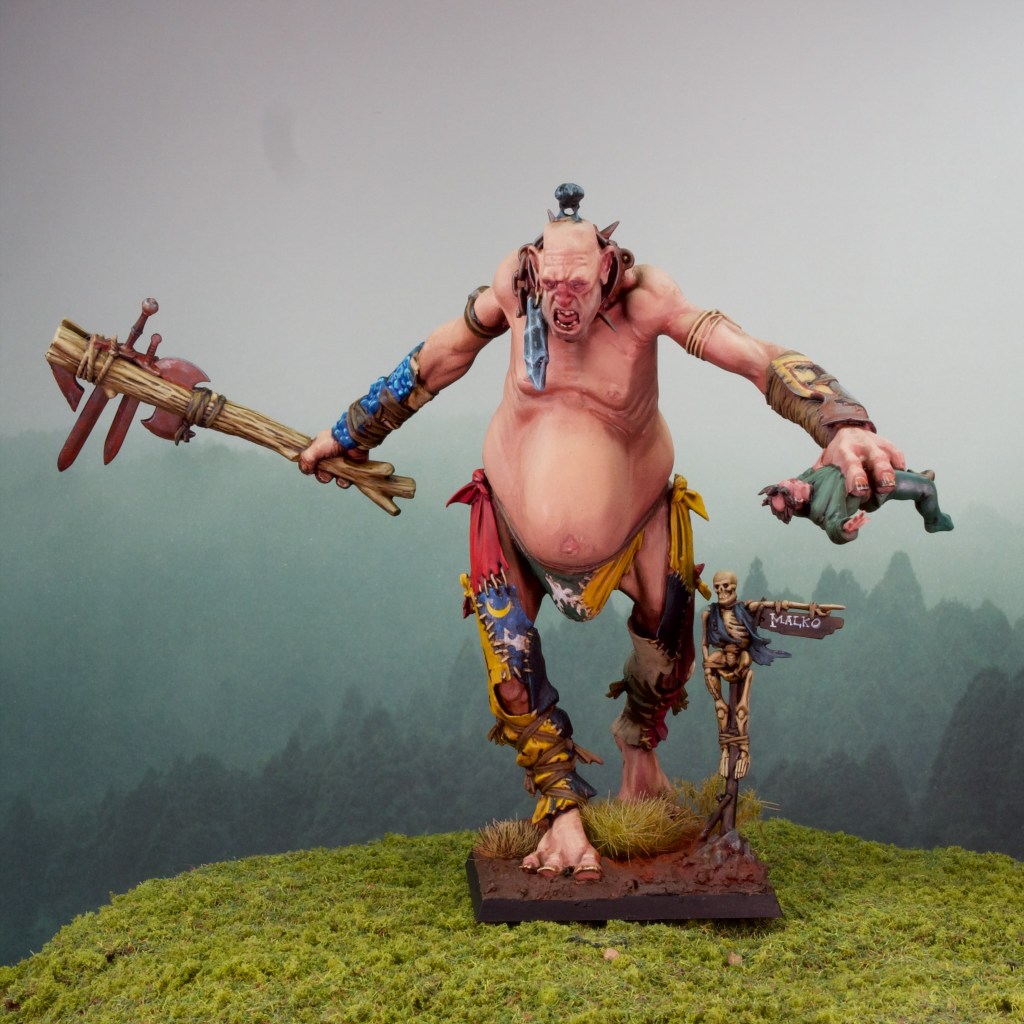
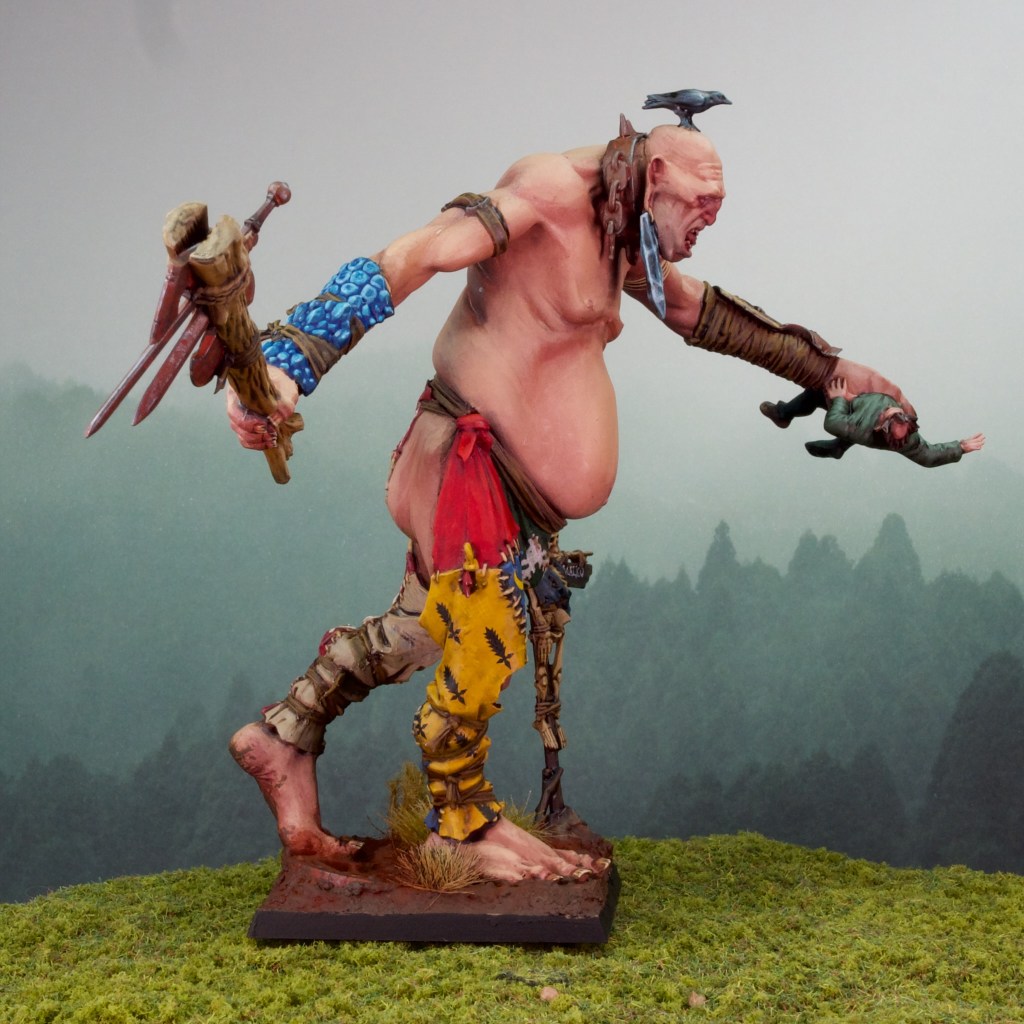
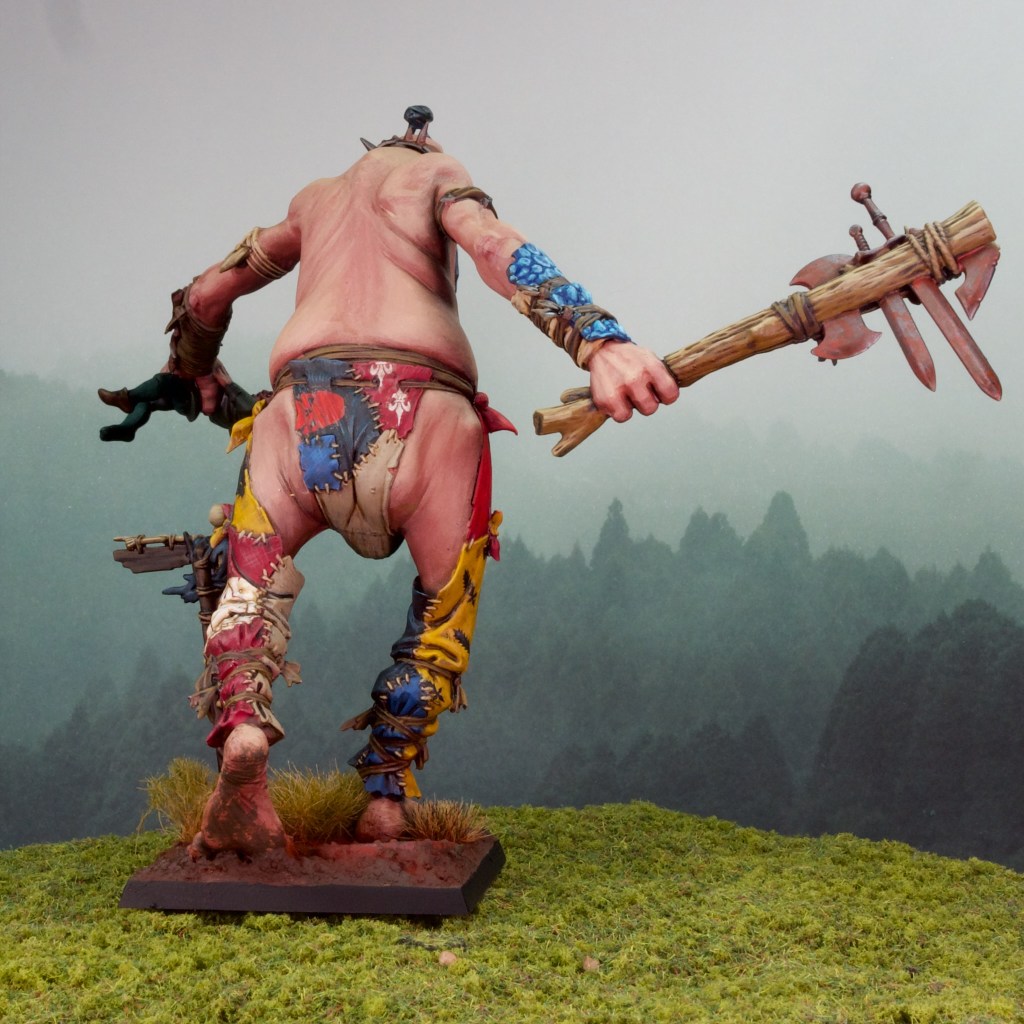
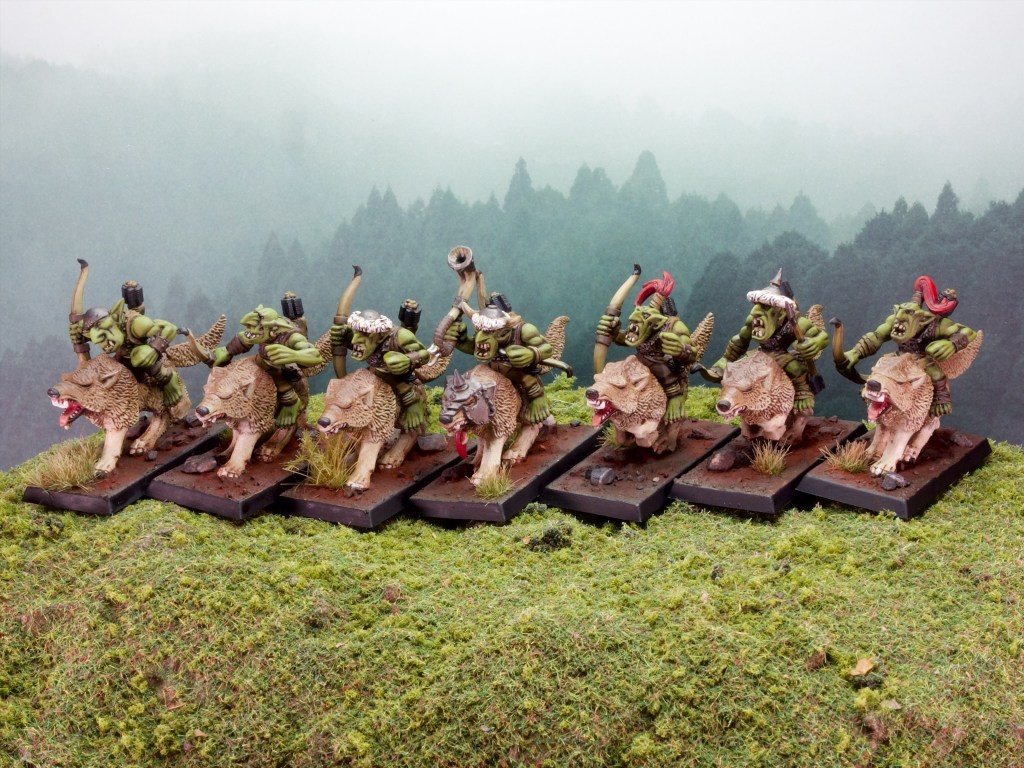
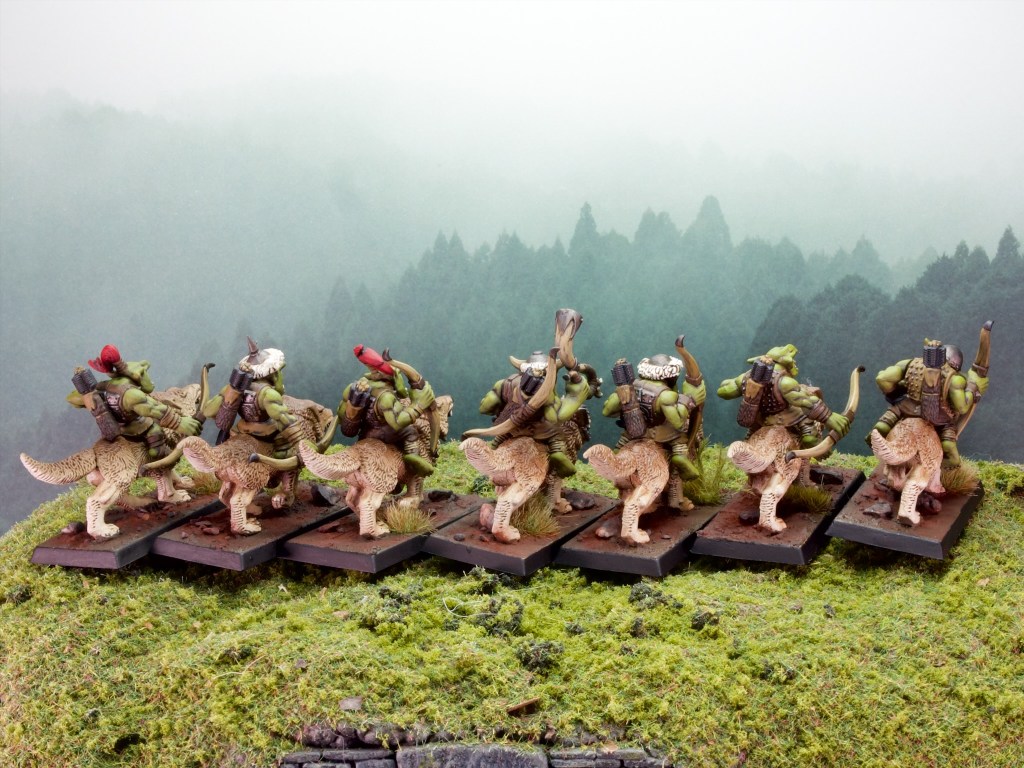
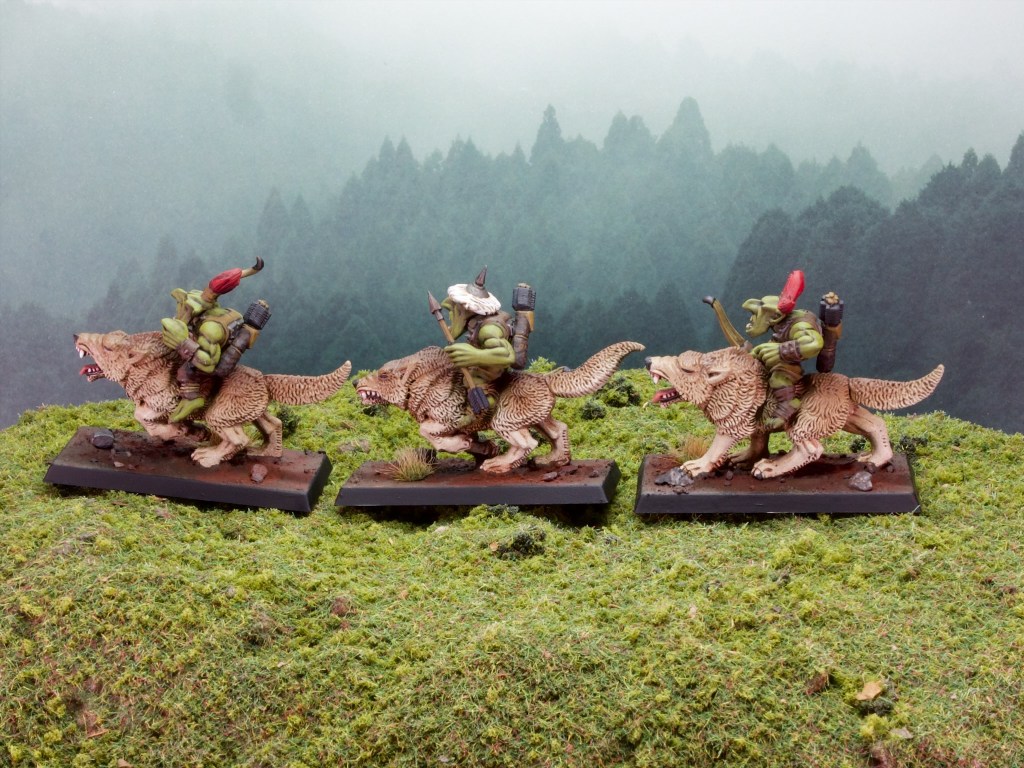
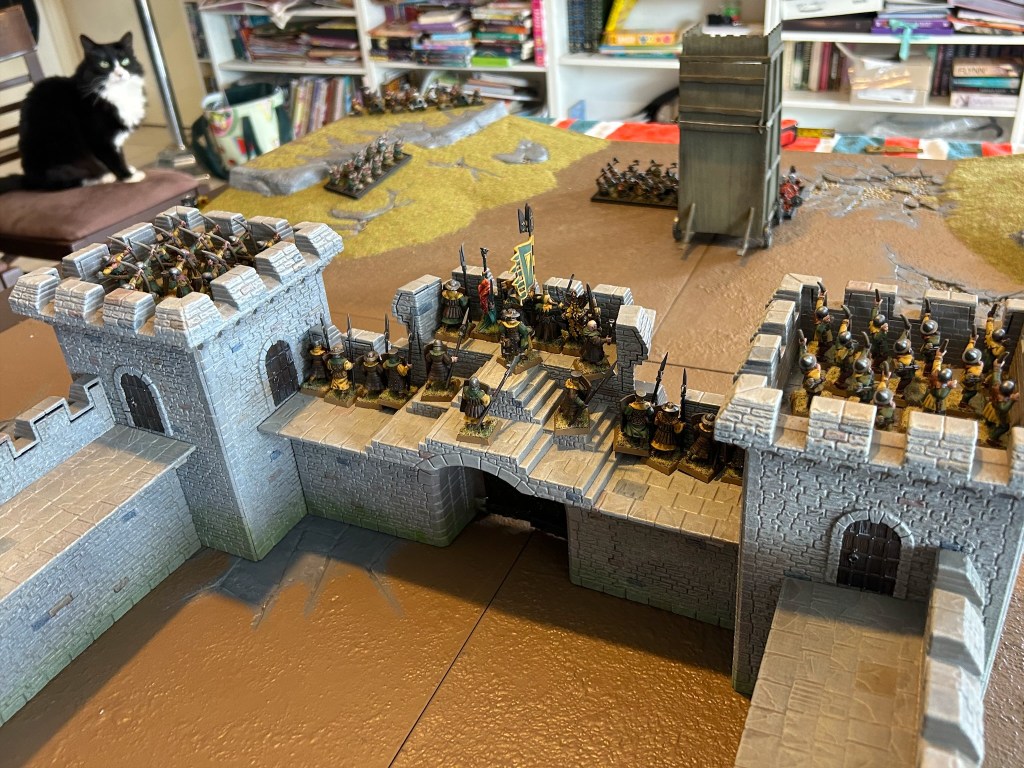
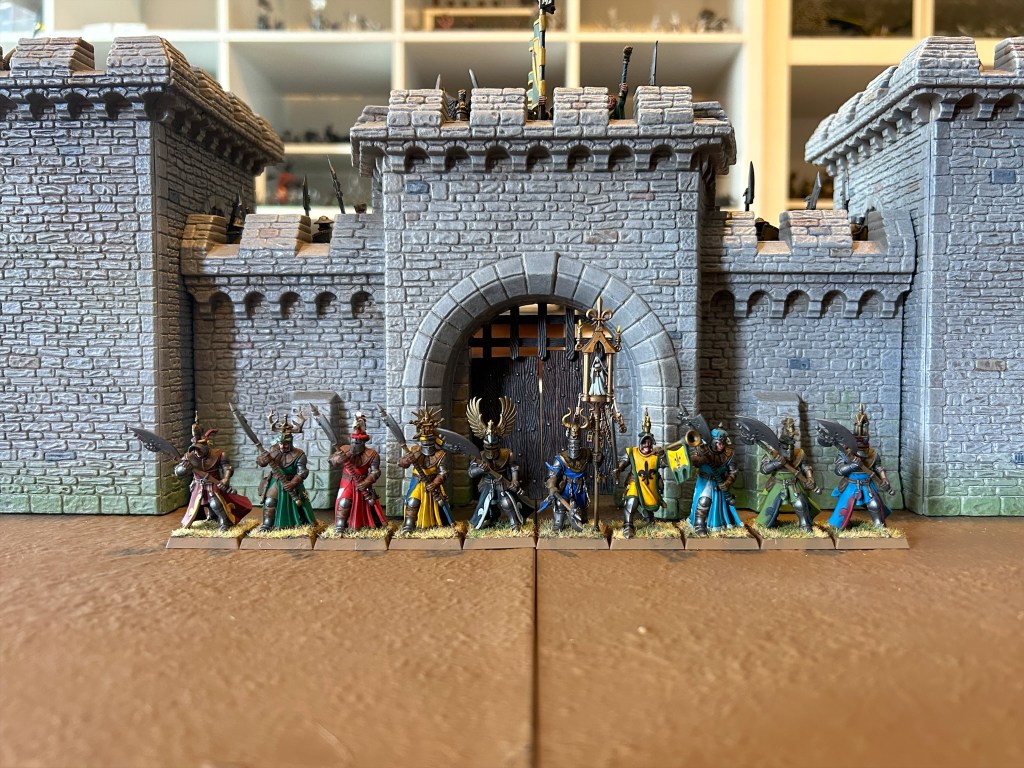
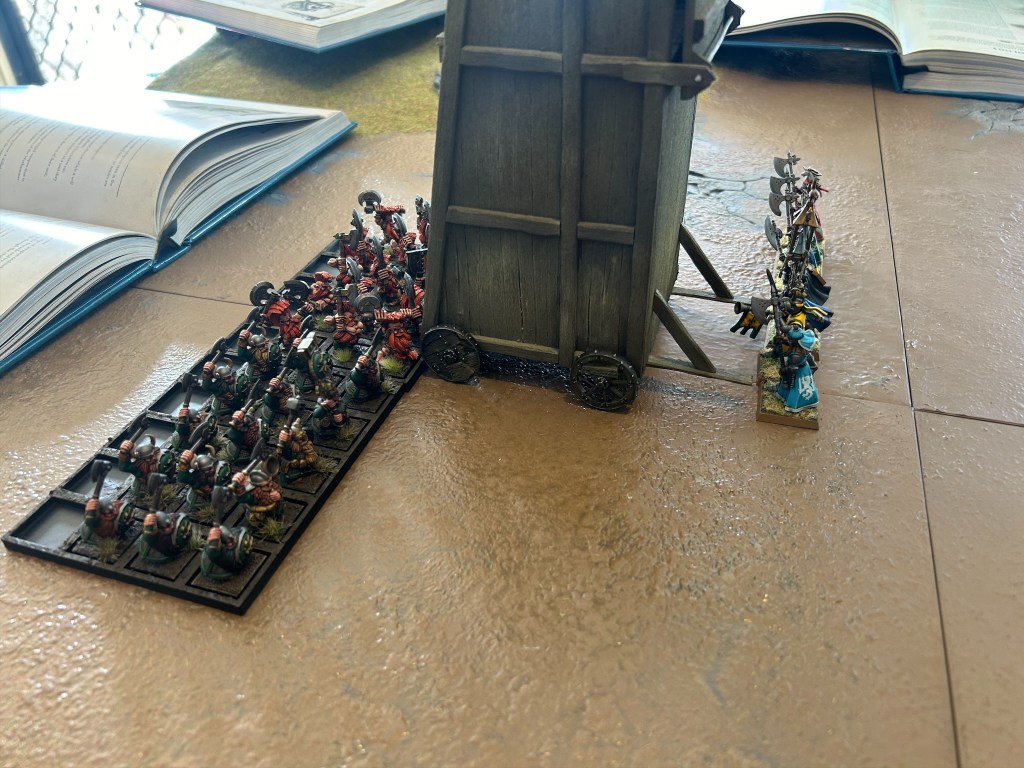
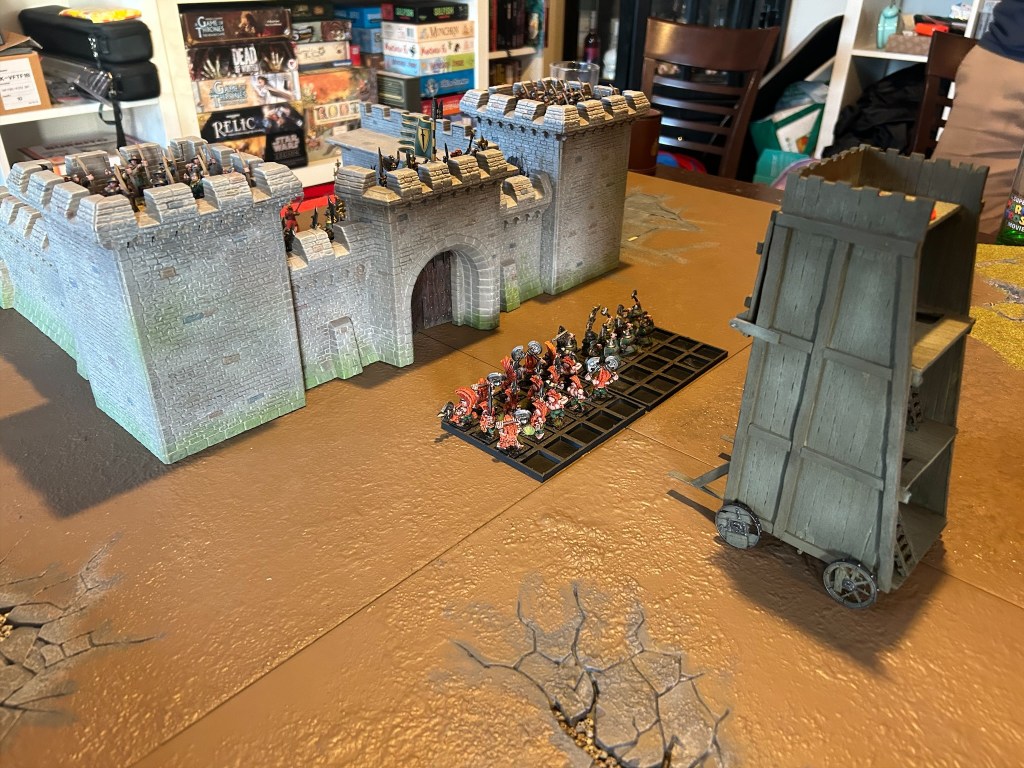
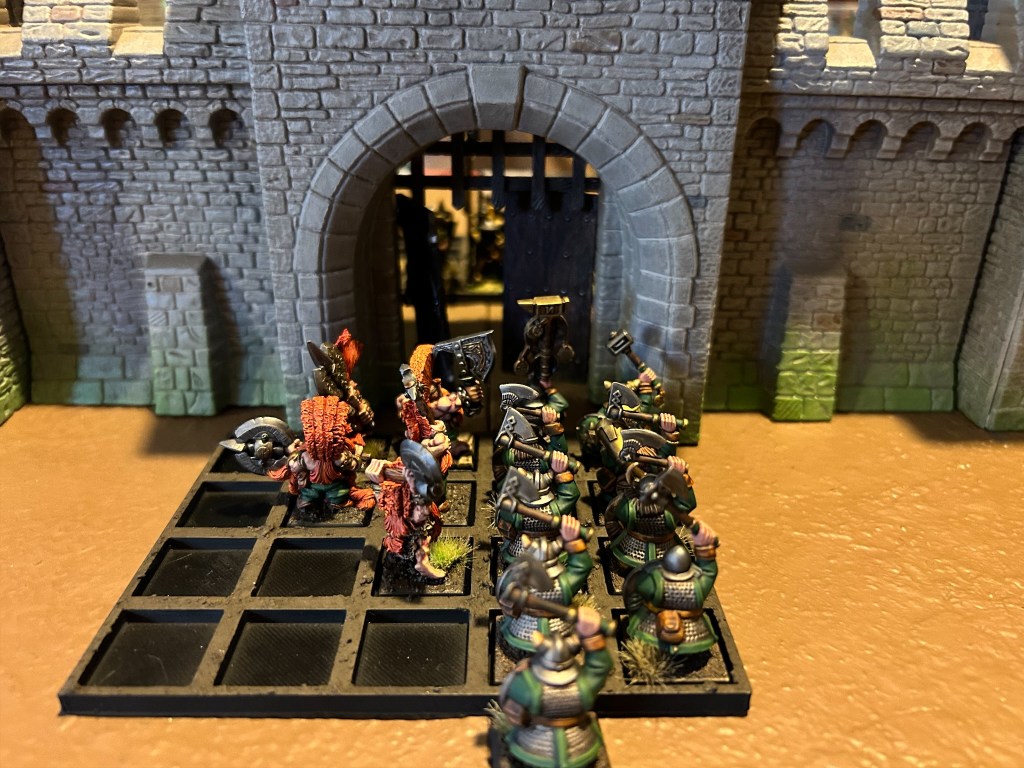
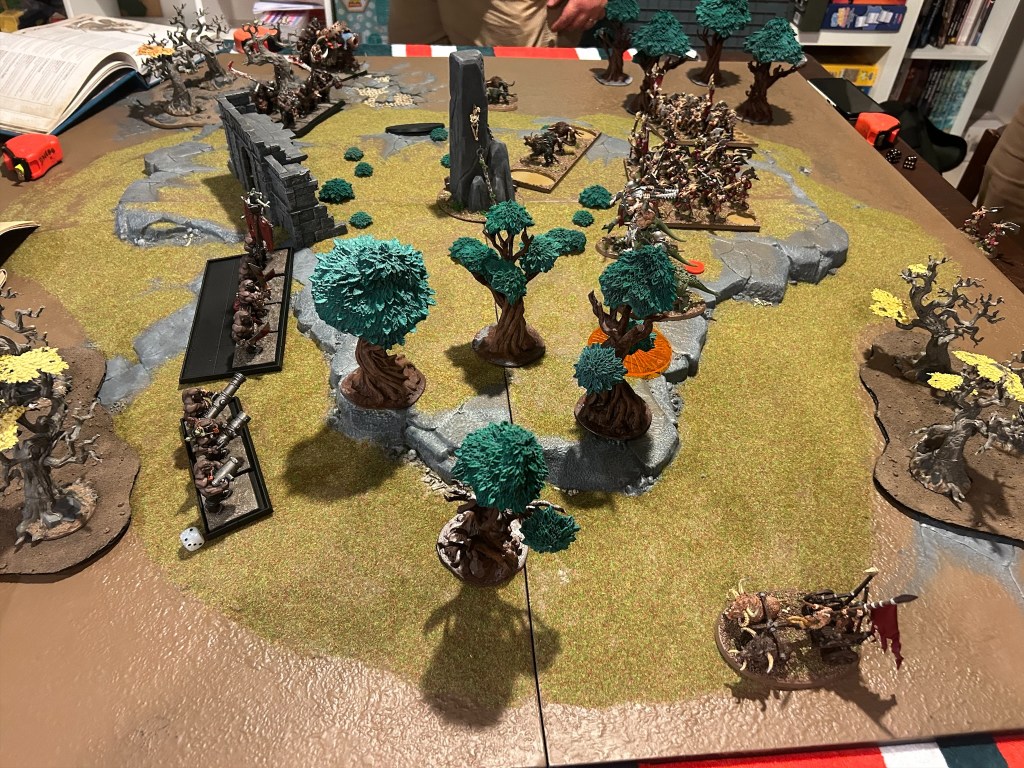
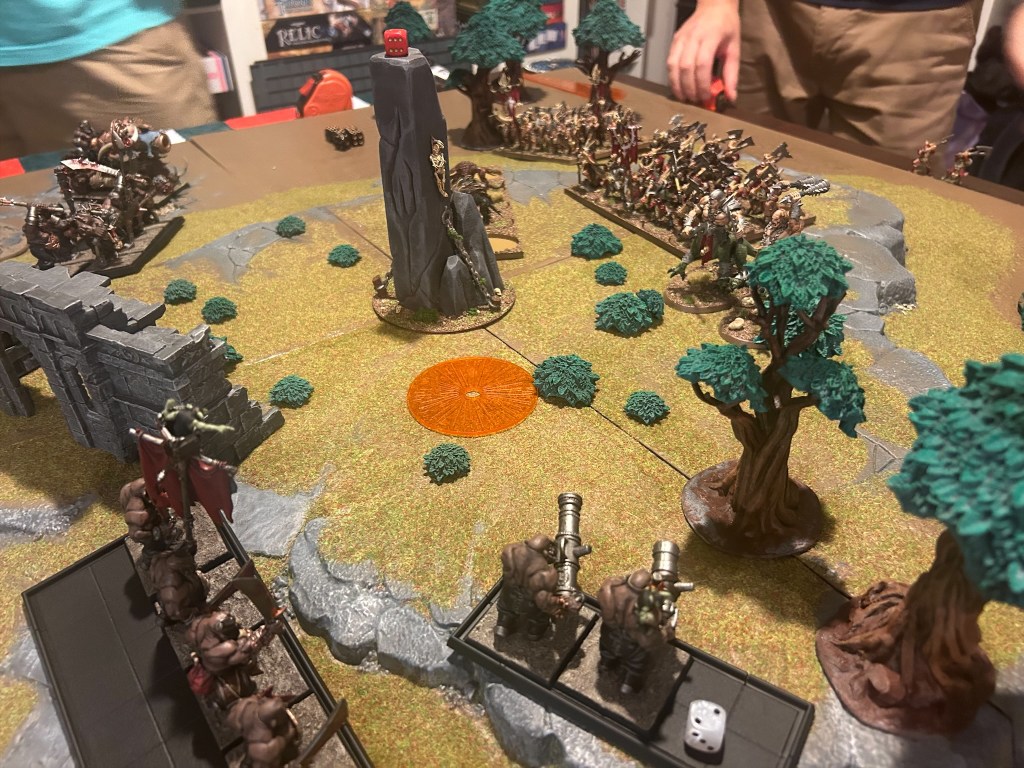
We decided to play the game with some Lord of the Rings armies, and I dusted off two of mine: my Cirith Ungol force, led by Shagrat and Gorbag to rival orc captains, and an amalgamation of Elves led by Legolas and Gildor Inglorion.

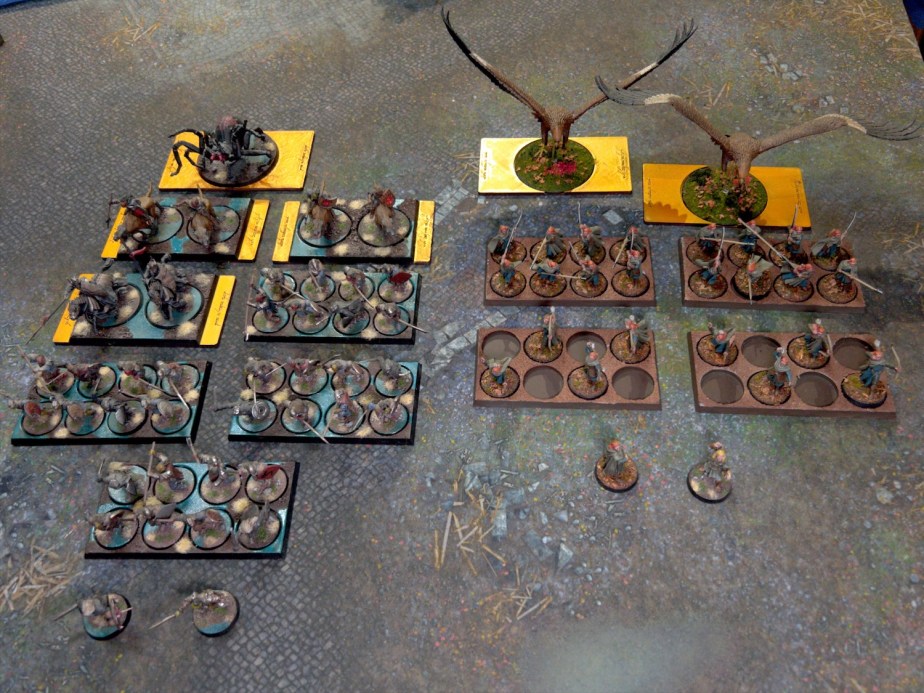
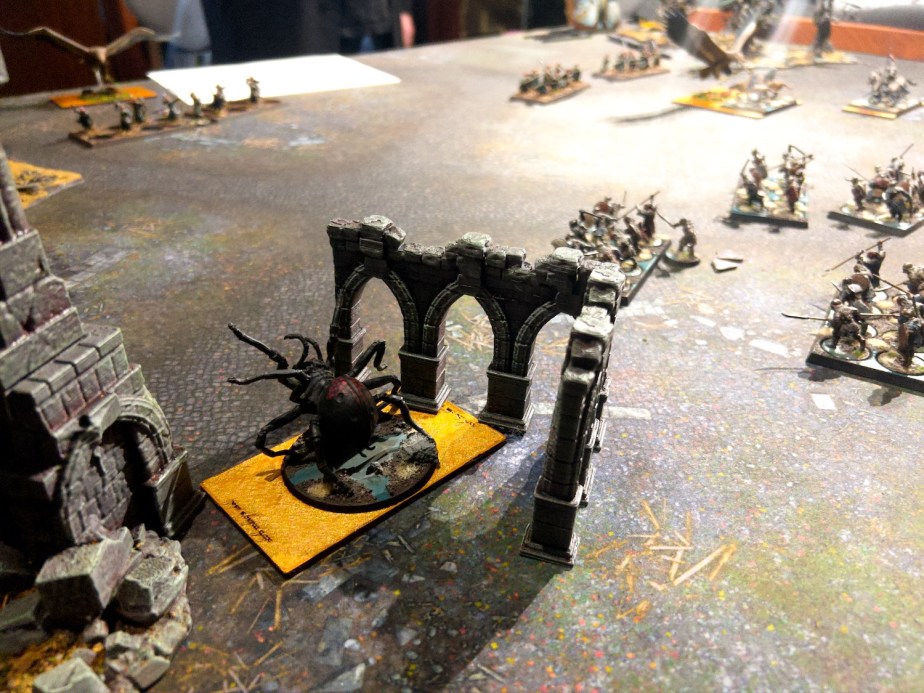
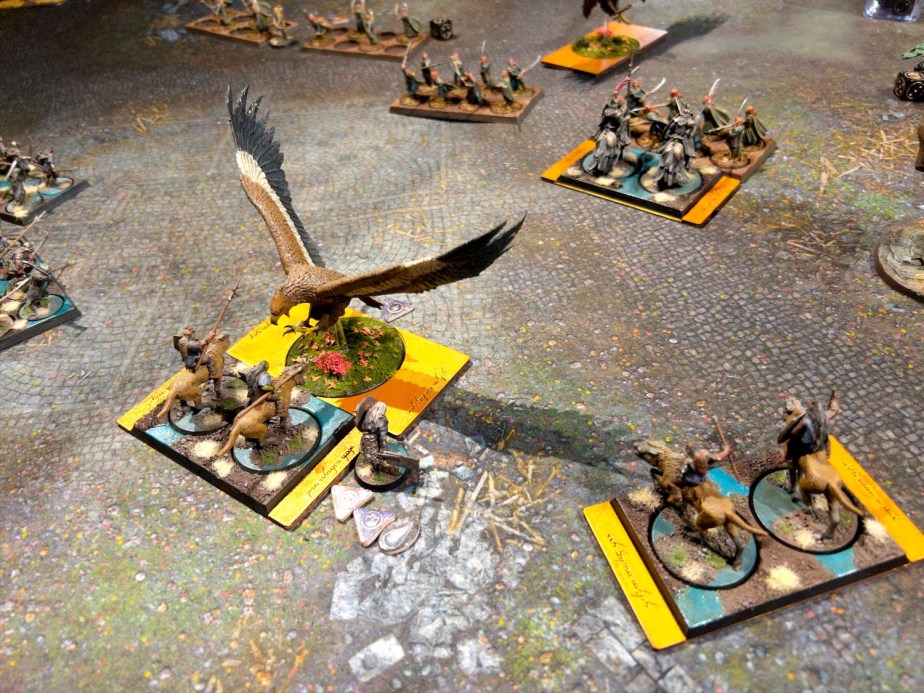
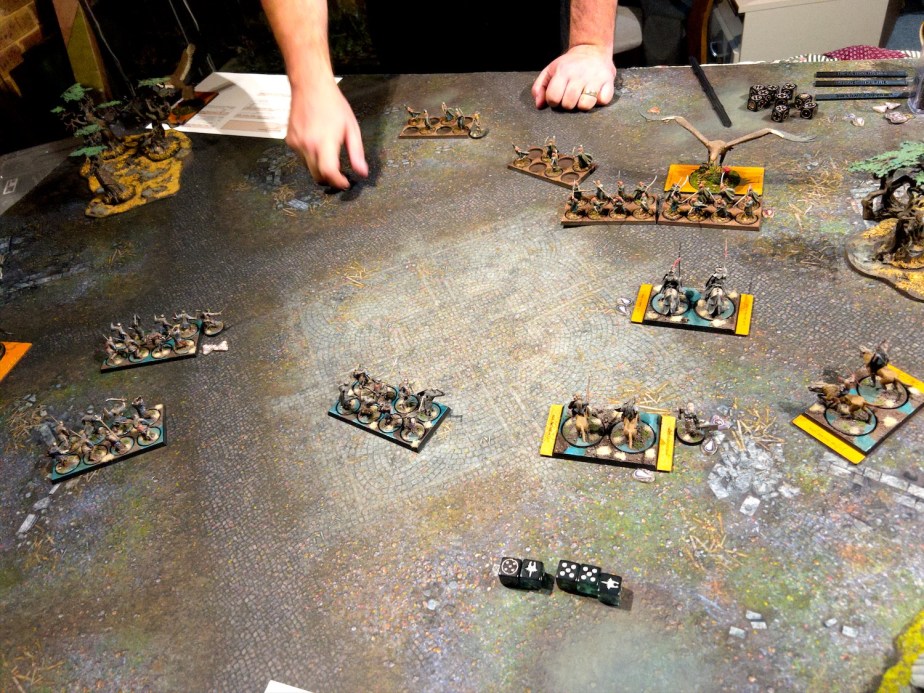
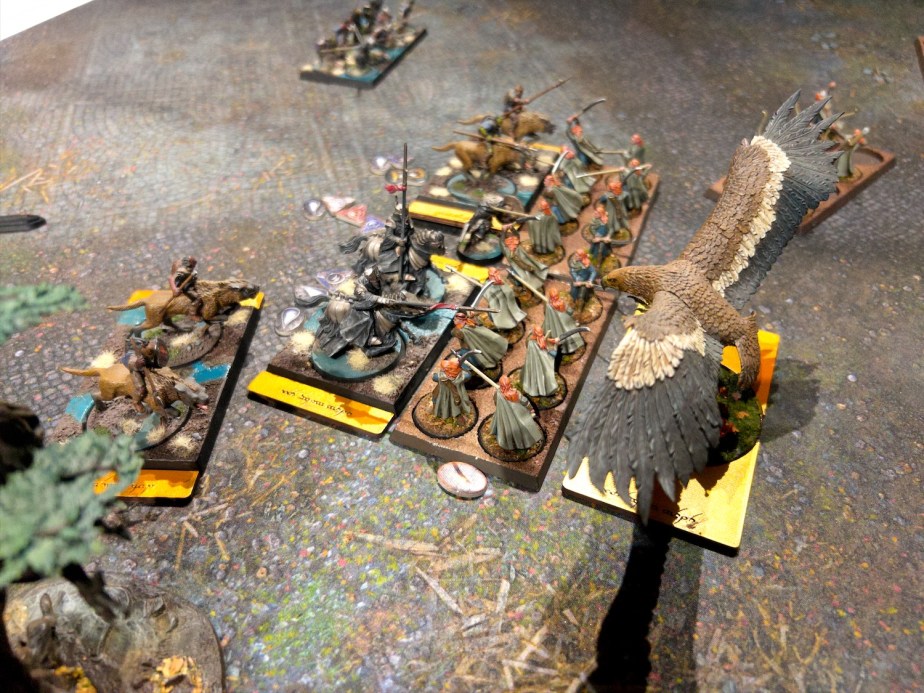
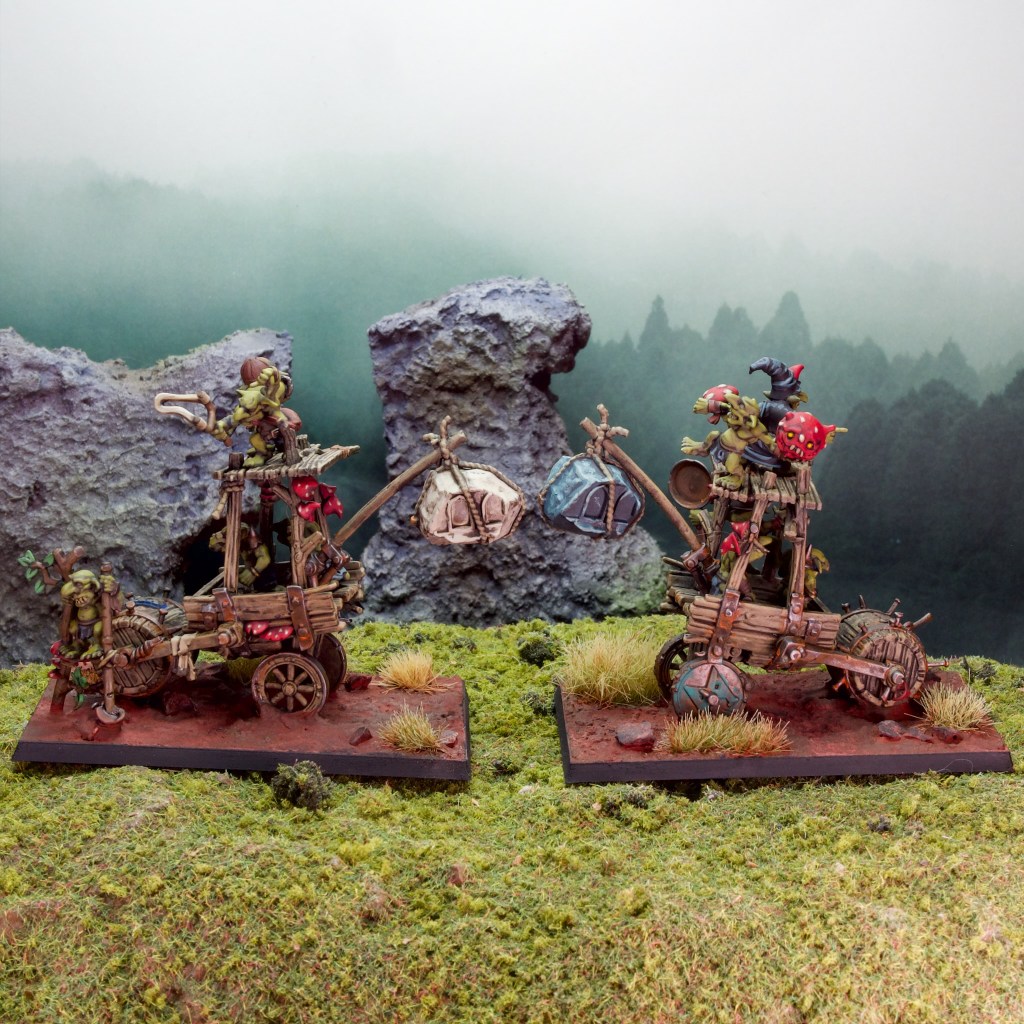
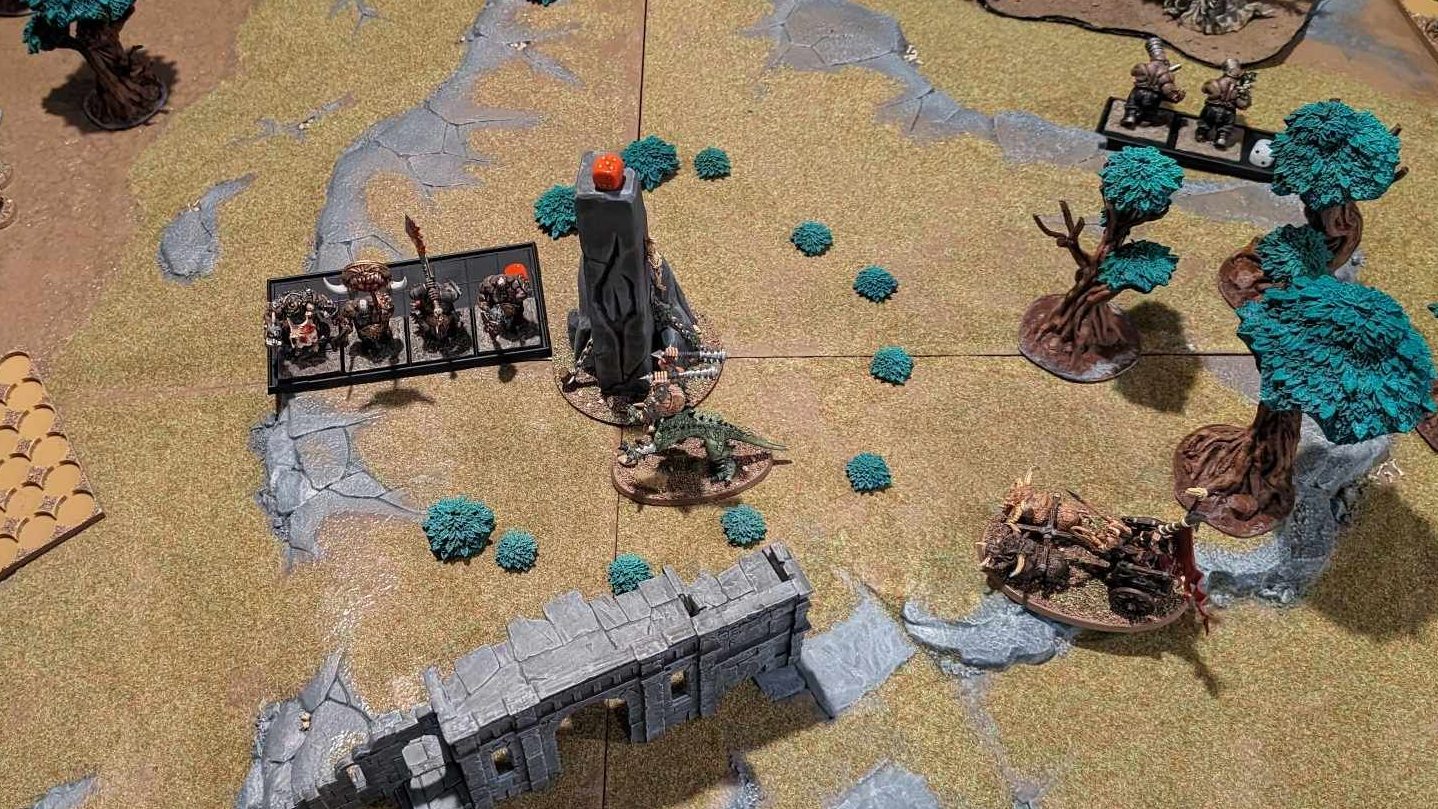
If you’re familiar with Games Workshop’s efforts in the Lord of the Rings space, you might recognise the trays they produced for the War of the Ring mass battle version of the game. As Midgard also uses trays they seemed like a great starting point. Midgard however requires all the unit base sizes to have the same frontage so I 3D designed and printed some adapters for the cavalry trays (which are narrower than the infantry trays) and for the monsters (who never had trays in the first place). As I did these adapters the day of the game I needed to go fast and decided to make them simple and to include a little joke – the elven script reads “One tray to adapt them all“.

The game was great fun even for a learning game, and everyone was very impressed with the rules. They are easy to pick up and the system puts pressure on heroes to go out and perform heroic acts in a way that leads to some excellent moments. I look forward to playing much more of the game.

The Painting

My painting table has had some form of WW2 models on it for quite a while now, as the build up of forces to get ready to play games of Chain of Command continues.

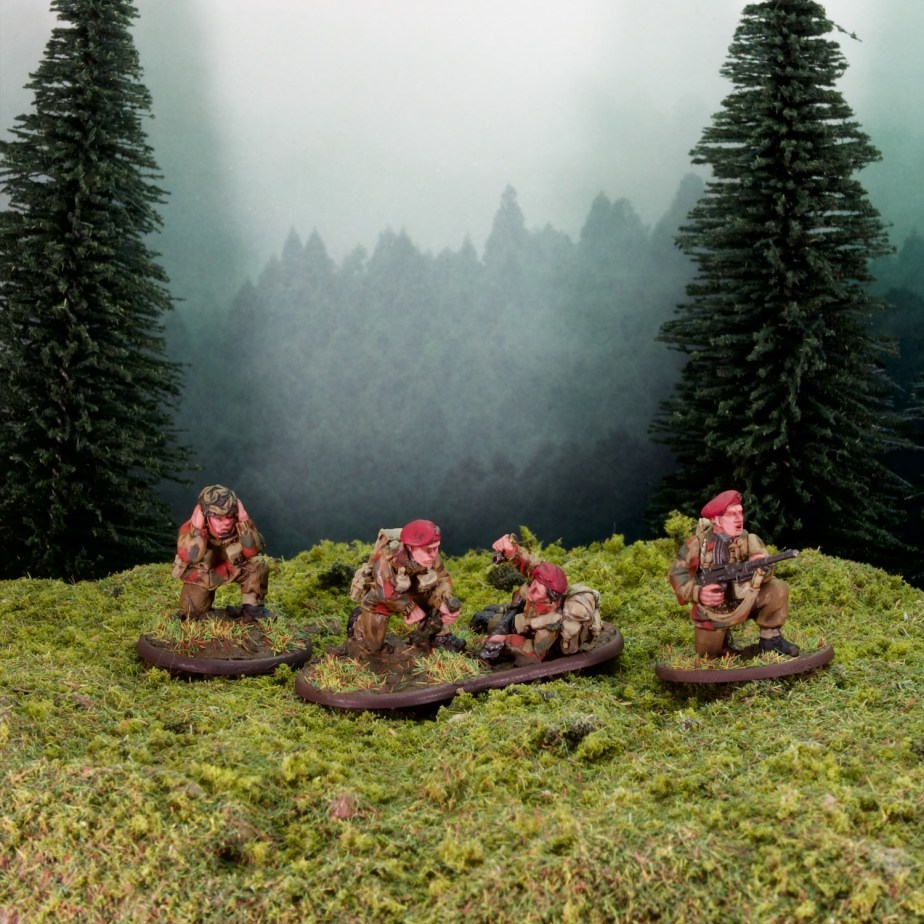
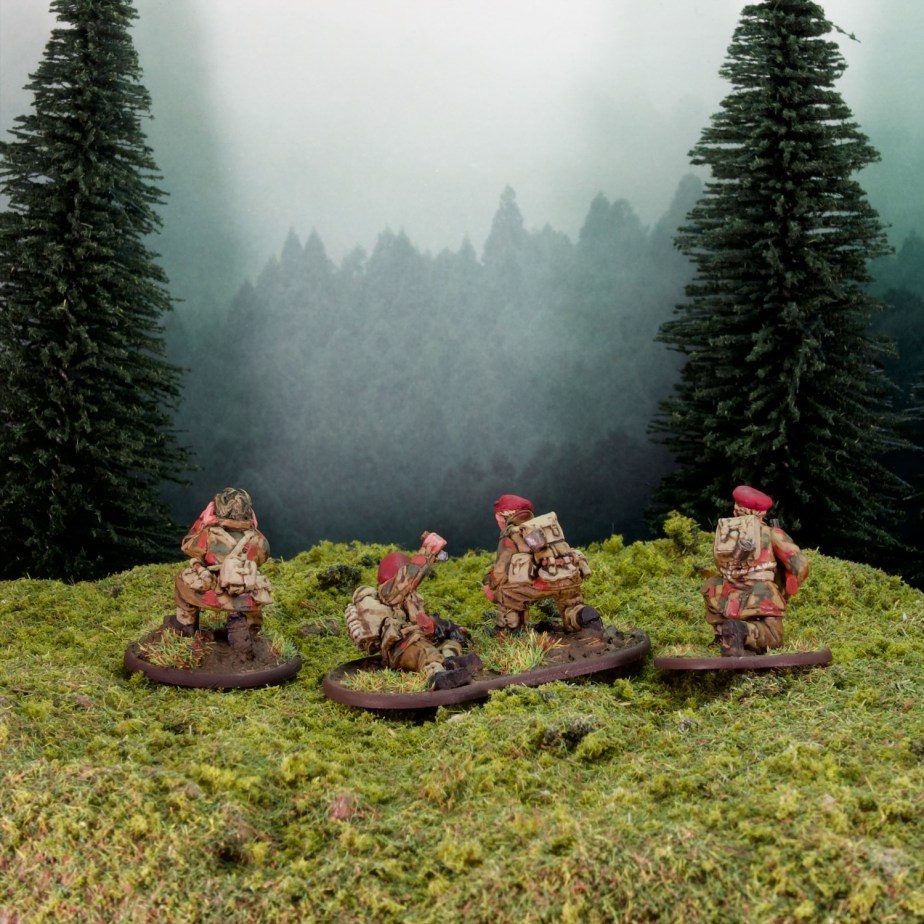
First up some British Paratroopers, with a Bren gunner and a 2-inch mortar team to bring my 6th Airborne up to strength.

Secondly we have the first unit of a new army (don’t I already have too many WW2 projects on the go? Yes, probably).

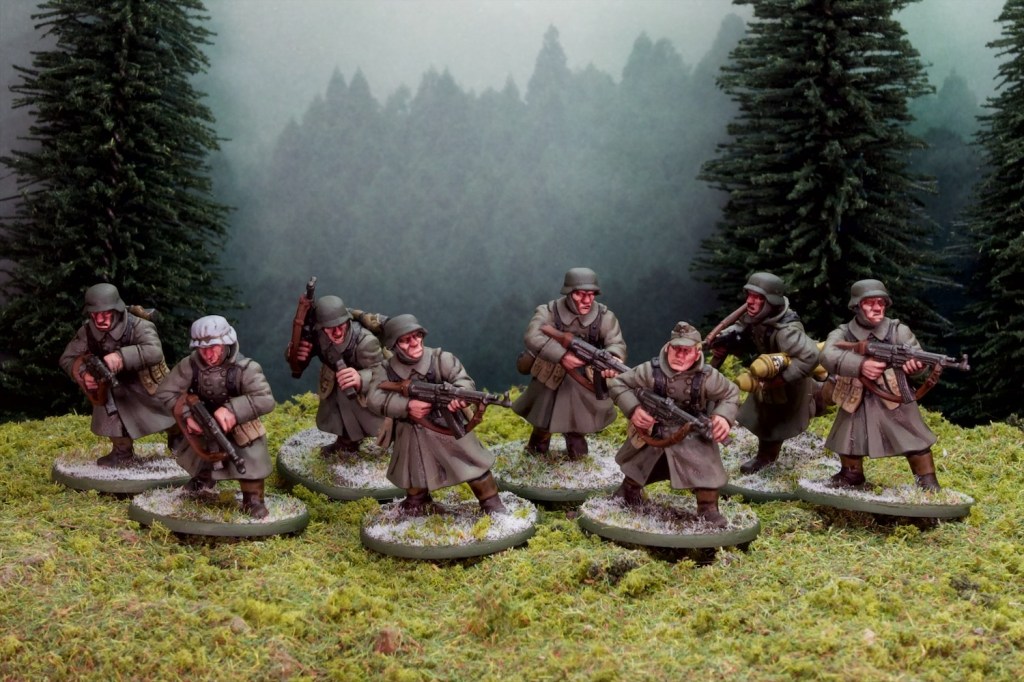
The models are from Warlord Games’ German Infantry (Winter) set, that I’ve built up as Volksgrenadiers for use in late war games on the Eastern Front or the Ardennes. I have a full platoon of these to paint for a game I’m planning soon, so this is just the tip of the iceberg.

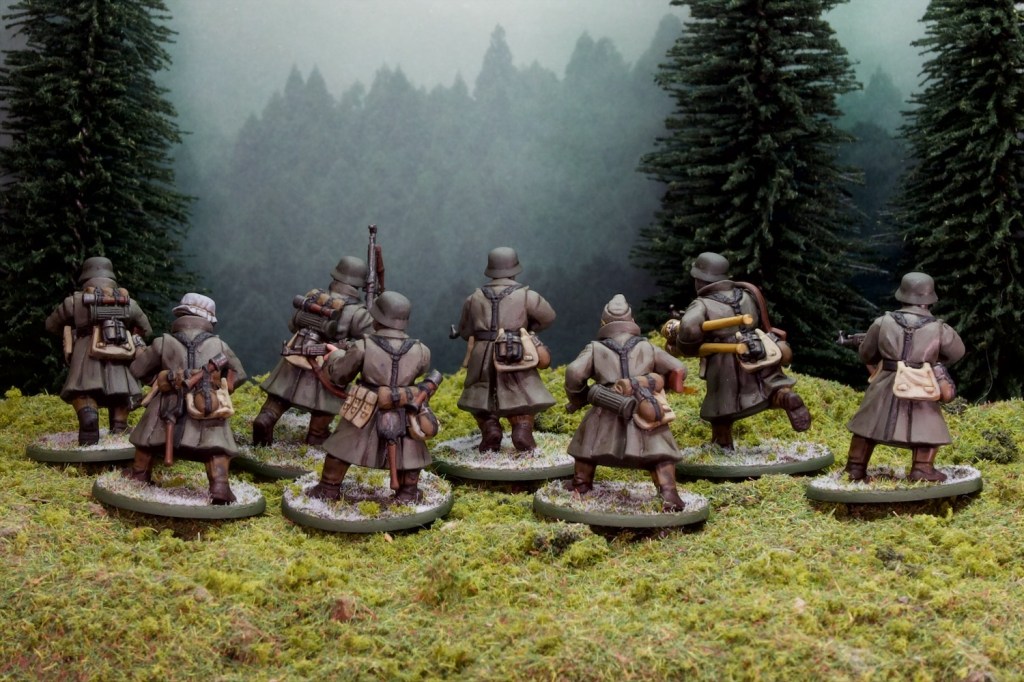
Painting-wise, these were quite straightforward as the greatcoats really simplify the models. I started with an all over airbrush of Fieldgrey, then got painting in the details. The process is my usual easy army painting one, with basecoat, wash, then highlight back up with the basecoat colour. The exception is the skin which uses a second highlight colour.

The colours are as follows:

  • Washed with Citadel Agrax Earthshade and highlighted with basecolour
    • Coats/uniforms – VMC German Fieldgrey WWII
    • Wood/leather – VMC Flat Brown
    • Waterbottle/blankets – VMC German Camo Medium Brown
    • Bags/Pouches – VMC German Camo Beige WWII
    • Helmets/Gas Mask Boxes – VMC German Camo Dark Green
    • Panzerfausts – Vallejo Surface Primer German Dark Yellow
    • Cloth Helmet Cover – VGC Heavy Bluegrey
  • Washed with Citadel Agrax Earthshade – no highlights
    • Guns – VGA Gunmetal
    • Other metallic objects – S75 Black Metal
    • Webbing – VMC Black
    • Boots bottom – VMC Dark Rust
    • Boots top – VMC German Camo Medium Brown
  • Skin
    • Basecoat – Pro Acryl Shadow Flesh
    • Wash – Citadel Reikland Fleshshade
    • Highlight 1 – Pro Acryl Shadow Flesh
    • Highlight 2 – 50/50 Pro Acryl Shadow Flesh/AK Beige Red
    • Pick out the nose – Citadel Carroburg Crimson
  • Bases
    • Texture paint – AK Muddy Ground
    • Flock – some mix of foams and static grass I made ages ago
    • Snow flock – Citadel Snow
    • Rim – S75 Ardennes Green (Seemed appropriate!)

This scheme is very quick, I just lay down the basecoats (including the skin), then wash the whole model (Agrax for everything apart from the skin, Reikland Fleshade for the skin – doesn’t matter if they bleed a bit into each other), then highlight.

I’m happy with the way they look, the basing works well for me as I didn’t want to go full snow but rather light snow/frost. I’m also happy with the speed at which I can paint them, these were done in an afternoon/evening with some distractions.

Anyhow this was a rather long post, but I hope it was enjoyable!

Desert Ruins

My 3D printer has been very busy these last two weeks, producing enough scatter terrain to cover a densely packed 3’x3′ area, or a more loosely covered 6’x4′ board. The theme: desert ruins, more specifically Egypt-like ruins.

The primary motivation for this effort has been the Silver Bayonet, I picked up the Egypt supplement a few weeks back and one of the North Star units for the game, and needed a nice set of terrain to play some of the missions. The good news is that I have a fair few other games that require desert terrain, such as Bolt Action for my North African forces, and Warhammer of course for my Tomb Kings.

The models I printed were from two sets: the ruined walls are by The Lost Adventures Co., and the Egyptian statues/columns etc are by Txarli Factory. I printed the walls at 65% scale to make them a nice size for my historical miniatures, allowing them to peek over the lower sections of wall.

I undercoated all the pieces with an old can of Citadel Roughcoat which is a spraycan-based texture paint (and long out of production, I’d love to find a good replacement). This had the dual effect of hiding the print lines on the models, and adding some nice grit for that sandstone look.

Painting-wise these were pretty straightforward. I sprayed Vallejo Primer German Dark Yellow all over, followed by a top down spray of Vallejo Model Colour Dark Sand through the airbrush. I then drybrushed Vallejo Model Colour Dark Sand, followed by another drybrush of Vallejo Game Color Bonewhite. At this stage I popped the pieces onto my desert mat and realised they looked out of place as the mat has quite a bit of red to it. To remedy this, I added patches of Vallejo Skin Wash Ink using the airbrush, followed by another drybrush of Vallejo Game Color Bonewhite. I would probably have skipped the first Bonewhite drybrush if I’d known I’d be doing another, but sometimes you find things out and need to go again!

I’m really pleased with how these came out, the roughcoat really did a nice job of making the 3D prints more stonelike. The reddish tones also really tie the pieces to the game mat. Here’s a few more closeups showing off the different pieces:

A nice quick update after the longer last few posts. I do enjoy panting terrain as a nice break from more involved models. I’m currently painting up my Egypt campaign unit for Silver Bayonet (guess what nation!), and looking forward to playing some game with this new terrain. The Egypt 3D model set also comes with a sphinx and a pyramid so if I feel like filling out a bigger table I have what I need!

The Silver Bayonet – Vampires in the Chapel

After last week’s fun with The Silver Bayonet I was keen to continue with more of the solo missons in the book. The second mission has the unit come across a ruined chapel and investigate it. Unfortunately for them, zombies have overrun it, and some more powerful undead are lurking about!

I was covered for the zombie miniatures, but needed some vampires that looked a bit less overtly warhammer-y, so I decided to paint up a couple of the less over the top miniatures out of the Crimson Court Warhammer Underworlds warband. I based them on square bases as I think I’m most likely to use them for Warhammer Old World going forwards.

I kept the colours very muted on these, with black cloth and the bronze dulled down. These models were really nice to paint, with nice crisp details but not too much going on. I love painting glass vials too so glad to see some on both these models, clearly they like carrying a top up with them!

I also needed a bit more terrain for the scenario, namely a set of tombstones and a ruined chapel. The tombstones are really nice resin models from Tabletop World except the one with a skull and crossbones which is from the old Warhammer Skeleton sprue. I painted these pretty quickly, with a grey undercoat, brown wash, some grey and cream drybrushes. All topped off with some nice mossy greens using some enamel washes.

Finally, the ruined chapel. This is a nice modular ruined church STL set by Vae Victis Miniatures, which I printed at 50% size to make into a reasonable size for a chapel. The scenario calls for a 6″ x 6″ footprint for the chapel which the pieces you see above fit nicely into.

I had a bit of fun painting this, starting with a grey undercoat, then spotting on varied colours of oil paint. I then used some thinner to spread the oil paint around and create some nice variation. You can see what I mean in the photo below.

I left the wet pieces dry overnight, then wiped off the oil from the raised areas. I then left that all rest for a few days, and once fully dry, did a few drybrushes to pick out the raised areas. Was all quite fast apart from the drying! With the terrain and the antagonists ready, I set the board up for the mission and got started!

Ready to go!

As I mentioned at the start, the premise behind the mission is that my unit is looking for a ruined chapel to investigate it, and at the mission’s start has just arrived at said chapel, but finds it swarming with undead. The unit needs to battle through revenants and investigate the clue tokens in the chapel and move anything they find off the table.

Initial setup.

The board is setup with the chapel at the center, a clue in each corner, a rough circle of grave stones around the chapel, with a zombie (these are called revenants in the game, but I keep forgetting!) at each grave stone. I was allowed to place my models within 2″ of any board edge, split up in as many groups as I liked. I remembered from the first game how useful it was to have backup so I decided to keep my full unit together, sacrificing searching power for increased survival chances. If you can’t remember the characters in the unit feel free to check out my earlier post. I also go into a bit of detail on how the rules work in that post so I would recommend reading it first if you’re interested in that.

Turn 1

Turn one starts very poorly, with MacPherson charging the closest zombie, hitting it with his claymore and dealing some damage, but the zombie’s return blow critically injures him and takes him out of the game. Lieutenant MacRae charges that same zombie and finishes it off with a blow from his sword.

MacPherson is taken out by the zombie’s blows, Lieutenant MacRae rushes in to avenge him!

Crowe fires his rifle at the next zombie, only dealing a small amount of damage as they are not particularly bothered by ranged attacks. MacInnes then finishes off that same zombie with a strike from his massive axe. All the while the zombies are coming closer.

The Major fires his rifle at the next closest zombie, injuring it. Fenner then fires his musket at that same zombie, misses, charges it with his bayonet and takes it out (after I used a skill re-roll). Pryor sprints towards the chapel doorway.

A mysterious form walks onto the battlefield…

At the end of the turn a vampire arrives, and another zombie springs up from a random gravestone.

The state of things at the end of turn 1.

Turn 2

Fenner moves into the chapel, finding something of interest in the closest corner: a bag of silver shot! Crowe heads for another promising area of the chapel and scrounges up a silver knife. Both men feel a little bit more equipped for the horrors that await them outside of the chapel walls. Meanwhile, MacInnes continues his zombie hunt, charging the next closest and scoring a solid hit. The zombie’s strike back misses completely. The zombie then attacks MacInnes, but misses again, giving MacInnes the opportunity to finish it off with his own strike back. The rest of the zombies shamble forwards. In the far corner, the vampire approaches the Major and the men surrounding him.

The unit prepares a silver-filled volley for the approaching monstrosity.

The major spots the shape coming towards him, loads silver shot into his rifle and backs away, closer to the chapel entrance. The Lieutenant and Pryor both line up next to the Major, ready to greet the new arrival with a well-timed volley. Another zombie claws its way out of a shallow grave…

The state of things at the end of turn 2.

Turn 3

Fenner loads one of his newfound silver bullets into his musket and sights through a crack in the chapel wall. Crowe keeps on searching the chapel and finds a small icon which gives me an extra power die in my fate pool (i.e. an extra re-roll!). To give the members of the team searching the chapel some more time, MacInnes fires his pistol at the zombies, misses, then rushes out towards them, drawing them away.

MacInnes draws the zombies away from the chapel.

The vampire moves closer to the Major and his two sidekicks. All three open fire, but only the Lieutenant hits with his pistol. The Lieutenant is not equipped with silver shot, but his great faith means his attacks are blessed, which allows him to injure the Vampire. Bolstered by his success, the Lieutenant charges in, but locks eyes with the Vampire and its hypnotic powers freeze him in place.

Lieutenant MacRae might have bitten off more than he can chew…

With a groan, another zombie emerges from the soft ground.

The state of things at the end of turn 3.

Turn 4

Fenner now has a clear shot on the vampire and takes it, but misses. He rushes out the the chapel, time to sound the retreat! Crowe takes the time to investigate the last corner of the chapel and finds a strange candelabra. He packs away the relic and makes ready to leave the chapel. The Major quickly reloads his rifle and shoots at the vampire but misses.

On the far side of the chapel, McInnes is caught by one of the zombies he’s been baiting and suffers a nasty hit. He backs away to stay out of reach of the second zombie, but in so doing exposes Crowe who is attacked in turn. The zombie misses, and Crowe sticks his bayonet into the Zombie almost taking it out. MacInnes moves away from the zombies and reloads his pistol.

The Vampire attacks the hypnotised Lieutenant and scores a nasty hit, which causes the Lieutenant to have to take a terror test which he fails spectacularly and is paralysed with fear as a result.

Lieutenant MacRae fights off his fear and the hypnotic powers of the vampire to strike at it. After the judicial use of a re-roll, his sword finds its target and the silver of his blade finishes off the vampire.

Lieutenant MacRae triumphant.

Fearing the arrival of another vampire, Pryor reloads his rifle and moves away from the chapel. Another zombie erupts out of the ground.

The state of things at the end of turn 4.

Turns 5 and 6

With the vampire slain and the chapel thoroughly searched it’s time to leave the area before the unit gets overwhelmed. MacInnes leaves the board first, with the rest of the unit moving towards their closest board edge and reloading their blackpowder weapons. At the end of turn 5 another vampire arrives right next to where MacInnes left the board (close call!).

Turn 6 sees the unit unloading a volley into the newly arrived vampire, and this time did not miss, killing it before moving off the board.

If they’d missed at least they’d have a nice cloud of smoke to cover their escape!

This mission felt a lot more tense than the first one, I came really close to losing more than just MacPherson, and I spent a lot of time retreating from fights. Last time, musketry was quite powerful, whereas in this mission the zombies were resistant to it, and the vampires completely immune if the musket wasn’t loaded with silver. MacPherson survived his injuries, but now has the shakes permanently, making his aim with his pistol much less good. Luckily for me he’s more of a close combat character!

Overall the mission was tremendous fun, and I’ll happily play through the rest of the solo missions in the book. Painting a few models and some terrain and getting to use them in a game immediately was very rewarding.

I tried to improve my battle report style with changes to how I wrote the action up and with the extra annotations on the top down photos. Keen to get any feedback on how you feel this reads compared to last week or if you have any idea how to improve it!

Snotling Pump Wagons

After last post‘s detour into card gaming, back this time with some more usual fare for this blog, models! I’m still pottering away at my Orcs and Goblins army and just finished these two extremely fun models: Snotling Pump Wagons!

For the non-initiated, Snotlings are what Orcs and Goblins call their even smaller cousins, which are even tinier goblins (The models are quite small as you might imagine!). Pump wagons are weird contraptions that are built, crewed, and powered by Snotlings, and as a result barely hang together but can surprisingly effective in the game … if they reach their target.

These models are actually the Blood Bowl Pump Wagons, which I much prefer to the proper Warhammer ones. Even though they’re plastic, they’re surprisingly fiddly to put together (to the extent that I think it’s on purpose to ensure they end up as rickety as if they’d been built by Snotlings!). They come as part of the Snotling Blood Bowl team which is packed full of characterful Snotling models, which meant I could cram them full of different sculpts.

While the models are the same model twice I tried to add some variety to them, mainly through the addition of different Snotlings as I mentioned, but also with some painting differences. The kit is also relatively flexible and lets you add pieces in a few different ways which is nice.

These were a lot of fun to paint as you might imagine. I had all the Snotlings separate for painting to make things a bit easier for myself, and gluing them to the pump wagon once everything was painted was very satisfying.

I’ve just embarked on a “small” side project which has my son very interested in miniature-related gaming so expect to see some (all?) of that next post!

River Trolls

With some leave over the Christmas break I’ve had a bit more time to paint (and game!) and have managed to get through a unit that I’d applied a basecoat to back in September-ish: River Trolls!

I’ve had these models for quite a while. I originally bought them to make Chaos Trolls back in the early 2010s and instead left them unbuilt for 10 years. It’s therefore nice to have them done for this latest project.

The models themselves are quite fun to paint as they have a decent amount of detail, much of which is quite characterful (including the infamous troll vomit!).

For units that are relatively unique in armies (i.e. that I won’t have to paint again) I like to experiment a bit with my painting. In this case I played around with oil washes in a slightly different way than I usually do. Normally I dilute my oils heavily with thinner, apply, blast with the hairdryer for a minute and get wiping the raised areas away with a sponge. I’ve had issues in the past with oil washes looking but not actually being dry by the time I varnish the models and found a few months later that the model has gone a bit tacky. Luckily this is easy to fix with a fresh coat of varnish. Here instead I went for a heavier wash (less diluted) and let it sit for a day or so before touching it. I was a bit worried that would limit my ability to wipe off the excess wash, but those fears were unfounded, and in fact I found it easier to get nice gradients with the wash in this way. To make sure the wash was dry before continuing, I left the models for another day or so, monitoring the areas where the wash had pooled the most. It’s a time consuming process but the results are worth it. Luckily for me I had something else to paint while I was waiting, which I will show later!

I wanted a cold green for these models to match their “riverness”, so I went for a basecoat of Vallejo Game Color (VGC) Heavy Blackgreen, and progressively mixed in more and more Vallejo Model Color (VMC) Pastel Green. The red fins are VMC Mahogany Brown, highlighted with a mix of the same brown and VGC Dead Flesh. The hair/fur is a mix of VMC Dark Sea Grey and VMC Black, highlighted with a mix of VMC Dark Sea Grey and VMC Pastel Green. The teeth/nails were a basecoat of VMC English Uniform, highighted with VGC Dead Flesh. The leather was VMC Chocolate brown, highlighted with a mix of the same and VGC Dead Flesh. All of these received the oil wash discussed above, which was a mix of Abteilung 502 Midnight Blue and Brown Wash oil paints.

Overall I’m very happy with these, nice addition to my Orcs and Goblins army.

As I said in the opening lines, I got some gaming in too this break, with a campaign game for our Border Princes campaign. The campaign was on a bit of a hiatus after the back end of the year got very busy for most of us (including a few weeks where 3 of us were out of the country!). The next match due was my Dwarfs against the Lizardmen, battling over a major crossroads. The game was a lot of fun and as a result I completely forgot to take photos! The outcome was our first draw of the campaign so far, which results in both armies retreating from the area. Here’s the campaign map at the end of Turn 6.

We’re currently planning our moves for the next turn, so hopefully I should have some updates soon.

One thing that happened during the game is I tried out the new engineer rules from the Dwarfs Arcane Journal. These allow you to take a Sapper Engineer, which allows all kinds of things such as entrenching your artillery, and booby trapping the battlefield. I equipped said engineer with a handgun inscribed with some of the new ranged weapon runes also found in the book. He then proceeded to cause more damage single-handedly than most of the other units I had in the game! I decided that meant he deserved a proper model and set about to making one as there is no Sapper Engineer model in the range.

I used an old metal dwarf handgunner (one of the first models I ever bought!) which has a really cool dragon head muzzle on his handgun. This looked appropriate as a runic handgun, and I also liked the practical attire he was wearing. One thing that was missing was anything that screamed “sapper”. The distinguishing mark for a sapper in the Napoleonic era (at least for the French army) was the carrying of a great big axe, but a dwarf carrying an axe just blends in so I went for a spade instead.

I wanted to accentuate the digging aspect so I tried to make it look like he’s taking potshots while digging a trench. Hopefully that comes through!

Really Tiny Space Marines

Back after what must have been the biggest break this blog has seen! I’ve been traveling for work and as such have had pretty much no time to paint in October between the trip itself and preparation for said trip. I’m back at home now, and started something I’ve been eyeing off for a while now: Legions Imperialis – the revamp of the old Epic 40,000 game system.

As I mentioned above, I’ve been thinking of getting started in Legions Imperialis since it launched – something about the scale of the battles really appeals to me (For the same reason, I’ve also been eyeing off Warlord’s epic scale offerings). What prompted actually diving in was a couple of happy occurrences: I was lucky enough to stumble on someone selling all of the books second hand for a steal, and my local game store had a sale a few weeks later during which I picked up the Battle Group box for the marines.

While I was travelling I re-read Legion, which might well be my favourite Horus Heresy novel, and (re-)enjoyed it so much that I decided these marines should be painted as Alpha Legion.

When I popped open the box I finally realised how tiny these models actually are. Looking at pictures online isn’t quite the same as holding the models in your own hands and as you can see from the comparison shot with the 28mm marine above, this is quite a departure from what I’m used to painting!

I often see Horus Heresy era Alpha Legion painted in a metallic blue/green colour. I decided to stray closer to blue here, with the markings in a minty green. The painting (by necessity!) is really simple. I started with a black undercoat and airbrushed some Ammo Mig Warhead Metallic Blue all over the models. The exhaust covers on the rhino and the boltguns on the marines were then picked out in Vallejo Model Color Black, and the bare metal details were painted in Scale 75 Black Metal. The markings were painted in Army Painter Kraken Skin. The models then got an all over wash of Ammo Mig Deep Brown Panel Line Wash, which was wiped off the raised areas to keep things clean.

The models come with these nice textured bases that I wanted to use rather than cover up, so I decided to go for an overgrown ruins look. I basecoated the surface with Vallejo Game Color Heavy Bluegrey, followed by the same panel liner as the models. I then applied a wash of heavily diluted AK Muddy Ground texture paint (a tip I picked up from the Cult of Paint youtube channel) all over the base. This adds a bit of texture and a nice gradient brown to the base while not hiding the texture modelled into the base. I then glued on a few bits of foam turf from Woodland Scenics, and applied some light washes of AK Slimy Grime Dark and Slimy Grime Light to add some green colour in patches. I’m satisfied with the outcome, it looks in scale to me, keen to hear what others think.

Overall these were fun and quick to paint, I think the metallic paint does a lot of work here, and makes the models pop despite their size. Unlike pretty much all my other models I did not varnish these as I didn’t want to lose the shine contrast between the marines and the base. I have a whole lot more of these to paint now, but I’m happy with the scheme so can safely proceed from here!

Night Goblins

After a few posts promising a unit of goblins as the next addition to my Orcs and Goblins army (and a few posts apologising for failing to deliver!) I’ve finally finished this large unit of Night Goblins!

With a cool 42 models in it it is one of the largest units I’ve ever painted, and took me quite a while to get through. With its rather sizeable footprint it was a bit awkward to photograph too, a lot like a large terrain piece.

I ended up batch painting the unit row by row (i.e. seven models at a time), except the shields and the basing which were done for the whole unit at once. Each row was relatively quick to do, but together this added up to a lot of work (Basing took me a whole evening!).

The banner was quite fun to paint, although I went in to it without a good idea of what to put on it. I decided a mushroom would be a good option given the Night Goblin moon was already represented at the top of the banner pole. I painted on a mushroom and then wasn’t sure where to go from there. I ended up taking a photo of the banner and doodling on the photo on my iPad to test out designs to add to my mushroom and I settled on what you see below. It was great to be able to experiment with designs without painting over and over again so I’ll do that again, a good lesson learned.

You might have noticed the shaman holding the green-headed staff on the right of the unit. This is one of the army’s characters, in fact the only wizard I have planned in there at the moment. This is a classic model that I picked up on eBay alongside the netters you see in the unit.

The night goblin models are the newly re-released plastics that were the standard kit back in 6th edition. There is a more modern night goblin box which is from the 7th edition era which is now marketed as an Age of Sigmar set. I really like the older plastics and I’d been looking for a second hand box when GW announced they were re-realeasing them. That made me and my wallet very happy, those second hand prices were getting sky high.

This new set came with a transfer sheet with a couple of designs for the shields. I loved the moon design on those transfers so that was an easy pick. I’ve never applied this many transfers in a single sitting!

I’m glad to see the end of this one, I’ve been painting it on and off for what must be a couple of months now (inter-spaced with a few other small projects such as the Fanatics I did a while back, which will be launched from this unit), and it took some determination (and a fair few hours) to get them finished this week. I love the look of these models as a massed unit and am chuffed with how they came out. I’m going to paint up a smaller scale project next I think!

Fanatics!

It’s been almost two months since the last post, probably the biggest gap in a while! It’s been a rather busy period family-wise (lots of birthdays in my family in July/August) and work-wise so I haven’t gotten much painting time lately. I’ve also chosen this period to paint a rather large unit of night goblins for my Orcs and Goblins army, so rather than wait another month to post something I decided to take a break from the big unit and paint up some supporting models, namely these fanatics!

For those of you unfamiliar with these rather fun models, fanatics are Night Goblins that have consumed a concoction of “special” mushrooms that give them the strength and willpower to twirl about while wielding oversized flails. They are hidden in Night Goblin units and get released when enemy units get close.

These models are older metal versions that I’ve had for quite a while now, so nice to get some paint on them. They are painted much like the rest of the army, although with more black cloth! For the recipes, check the first post on the army, which featured a Night Goblin perched atop an Orc Warboss!

That’s it for painting updates, but some campaigning happened since the last update on that so here is where things stand.

We had a win each for the Beastmen and Ogres in Turn 5, with the Ogres capturing the Beastmen’s home territory as a result of the first battle, but the beasts held their own in the second battle, scattering the Ogre army back to its own home territory.

The moves for turn 6 have been planned and we have one battle this round: my Dwarfs against the Lizardmen encroaching on my territory from the south!

Here’s hoping I can get through this busy period soon and resume more frequent posting!

Giant!

It’s been a little while between updates, but I’ve been slowly chipping away at the miniature I’ll be showing today over the past month. Slowly because it’s getting chilly here down under and my hobby table is in a cold part of the house (and therefore is being visited much less often than usual!) and slowly because I’ve been really enjoying the process on this model!

The model as you probably realised from the post title is a giant! This is the plastic Warhammer giant from the mid 2000s, which is still current in the range. I got mine during 8th edition for my Ogre army, and like many other models from that era it has sat mostly unpainted since then. I rebased that army for Age of Sigmar so this model was transplanted onto an oval base, before being cut off that and put back on a square base for the return to classic Warhammer.

As I mentioned above, I thoroughly enjoyed myself painting this model and I went probably above and beyond what I would usually do for an army model, although I always do tend to try to spice up centerpiece models!

I really wanted to make it look like his pants were made from banners he’d collected over the years, so I painted them in a patchwork of colours, and applied transfers from all kinds of sheets I’d collected over the years to add some interesting patterns to the patches. From memory there are transfers from the Bretonnian, Eldar, Imperial Knights, and Space Wolf ranges on his pants.

Another detail I enjoyed painting because of the scale of the model was the nails, I tried to go for a dirty nail look with some muck caught under there. This might be a bit hard to see in the photos though, I think the best example is in that top photo on the hand that is holding the hapless man.

I spent a bit of time on his face, I don’t get to paint large scale heads very often given my usual subjects, so this was a fun new thing for me to do. I tried to go for the classic pale/red/blue zones on the face which I think worked out nicely, but I’m keen to see how you find it.

Overall I had a great time painting this giant, but it’s time to move on to smaller models again! I have the largest unit in the army lined up next, a big unit of night goblins which will likely keep me busy for quite a while so the next post may also be a bit further away than usual!

Goblin Wolf Riders – Part 1

Back this week with more models for my Orcs and Goblins army: some Goblin Wolf Riders!

These are classic models (late 90s I believe!), which have been re-released as part of the current set of Warhammer Old World releases. This might be laziness on GW’s part, but I’m loving the fact you can buy some of these models without having to go through exorbitant eBay prices! These are the models that were current when I started the hobby, and couldn’t afford them at the time so this is very much an exercise in nostalgia for me!

I really enjoyed painting these, the goblin riders are so characterful and the old style “big” detailing is a joy to paint. For the wolves I tried something a little bit different. I really wanted a nice gradient on the furs so I basecoated them using the airbrush, starting with a cream colour all over then doing narrower and narrower bands of darker browns over their backs. I chickened out of doing highlights over this gradient so I decided to use oils to shade the furs so I could wipe them off of the raised areas. You can see the effect in the photo below.

I think that worked out pretty well, it’s not quite as clean as properly highlighting things, but it is much more expedient which is exactly what I’m after when painting army models. I have a second unit of these to paint up for the army, so I’ll be reusing the technique although I will be changing the colours to have some grey wolves for those.

For the Goblins themselves, I reused the recipes I laid out last post for the Warboss, so check that out if you’re interested!

Now I promised a couple of posts ago to post some photos of the first games of our Border Princes campaign and promptly forgot to include them in the last post, so here they are, better late than never!

If you remember the last update, my Dwarfs were attacking the Fortress at the center of the map, defended by the Bretonnian force I’d painted up for this purpose. As I was the attacker, one of the other players stepped in to play the defenders and we had a siege game!


The initial setup: two blocks of dwarf infantry pushing the siege tower and ranged units on the hill. On the defending side the walls are occupied by archers and men-at-arms, and surprising the attackers the unit of knights deployed outside the walls!
Cannons lining up the castle gate
The defenders look on as the attacking forces assemble.
The knights form up … outside the gates!

The cannons started shooting the gates, failing to do much and one of them misfired even with the engineer there to give it a re-roll! Luckily it only had to skip a turn, losing a war machine this early in the game would have been dreadful! The Siege tower was pushed forward by the dwarf infantry. On the defending side the knights advanced, resolved to chop that siege tower to scrapwood with their axes! On the walls the archers started shooting at the siege tower and managed to inflict some damage to it (presumably some critical ropes cut!). The following turn the knights managed to close in on the tower and almost destroyed it in combat!

The knights close in on the siege tower… and start hacking!

The dwarfs did not take kindly to this attempt to cut down their handywork and retaliated, closing in on the knights. The Demon Slayer and his rune axe made short work of the knights, but the damage was done, the siege tower on a single wound was more of a liability than anything else at this stag. The dwarfs abandoned it, taking a page out of the Knight’s book and deciding to use their own axes on the fortress gate.

The Dwarfs abandon their tower.

Under a hail of arrows the Dwarfs approached the gatehouse and got to work hacking down the gates. The cannons had finally started doing some damage to the gates and the rune axe of the Demon Slayer crashed through the wood of the gates soon enough.

The gates crash open!

Once inside the walls, a desperate melee started between the Dwarfs and the Men-at-arms led by the Baron started. The combat was inconclusive, but the last turn had arrived and the Dwarfs won the day, having taken the gatehouse and slain the knights for no full units of their own lost (although as you can see above those archers did a lot of work on those units!).

This battle resolves turn 4 and the map above shows the state of things as the turn ends.

The players made their moves for turn 5, and we have two battles lined up for this turn! Both feature the Ogres and the Beastmen, with the Ogres attempting to seize the starting location of the Beastmen, and the Beastmen trying to take the river section off the Ogres.

The defense of the Beastmen home territory has already been fought, although unfortunately I did not get to take many photos.

The battle was fought in a heavily wooded board, with the beast’s herdstone as the primary objective.
Things got very heated up in the area surrounding the herdstorne as both armies maneuvered to capture it.
Despite a desperate attempt by the beasts to reclaim their herdstone the Ogres won the day.

Hopefully you’ve enjoyed this longer than usual post! Plenty of gaming action in the coming months as this campaign gets played out, and I hope to be able to photograph most of it!