
In my last post (Dwarven Cannon) I mentioned that my friends and I were thinking of embarking on a map-based campaign for classic Warhammer (6th/7th edition era). Enthusiasm has not waned and we’re tentatively up to four players interested! We’re still likely to want to have 6 factions involved to flesh things out so it’s likely a couple of us will play 2 factions. What the factions are is likely to be decided over the next few weeks, so an update on that will happen at some stage! To play a map-based campaign one needs a map, and I turned my attention to that this week.
One of the lingering questions after the initial discussions last week was whether to play the campaign presented in the book as is or to use the rules to create our own campaign. In the end we decided to play the Border Princes campaign from the General’s Compendium with a few tweaks. The map locations are really nicely fleshed out and we thought we could learn from it to allow us a good chance of creating a good campaign of our own in the future. While the book originally came with a poster map of the region to use for campaigning, the second hand copy of the book I got did not have the map with it (lost a long time ago presumably!), and I set about replacing it.
I tried scanning the small version of the map shown in the book with a view of printing it on a few A3 sheets to make a map large enough to hold models. Unfortunately while my scanner has high enough resolution to provide images that would work blown up to that size, the source image was to small and scaling it up just made the printing dots very visible. SO I decided to do the next best thing: draw my own version of the map!
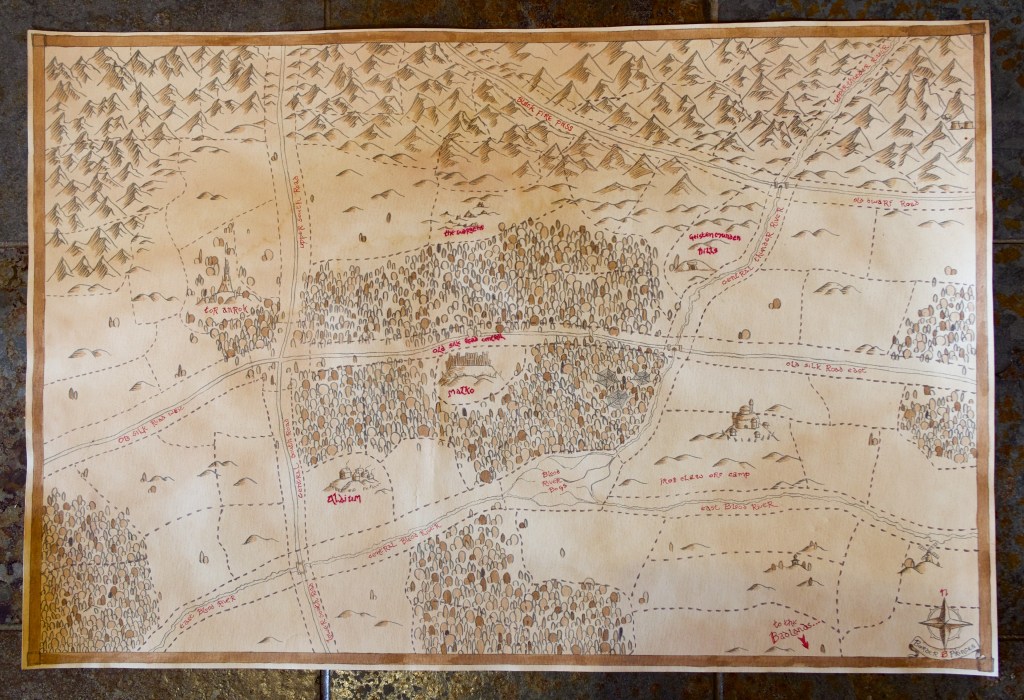
This then is a bit of an unusual post, not about model painting by about map making! I spent most of my spare time over the last week putting this together, thoroughly enjoying the process. The General’s Compendium actually provides pretty good instructions on how to draw your own maps and I mostly followed that process supplemented by helpful advice from my wife who is an artist.

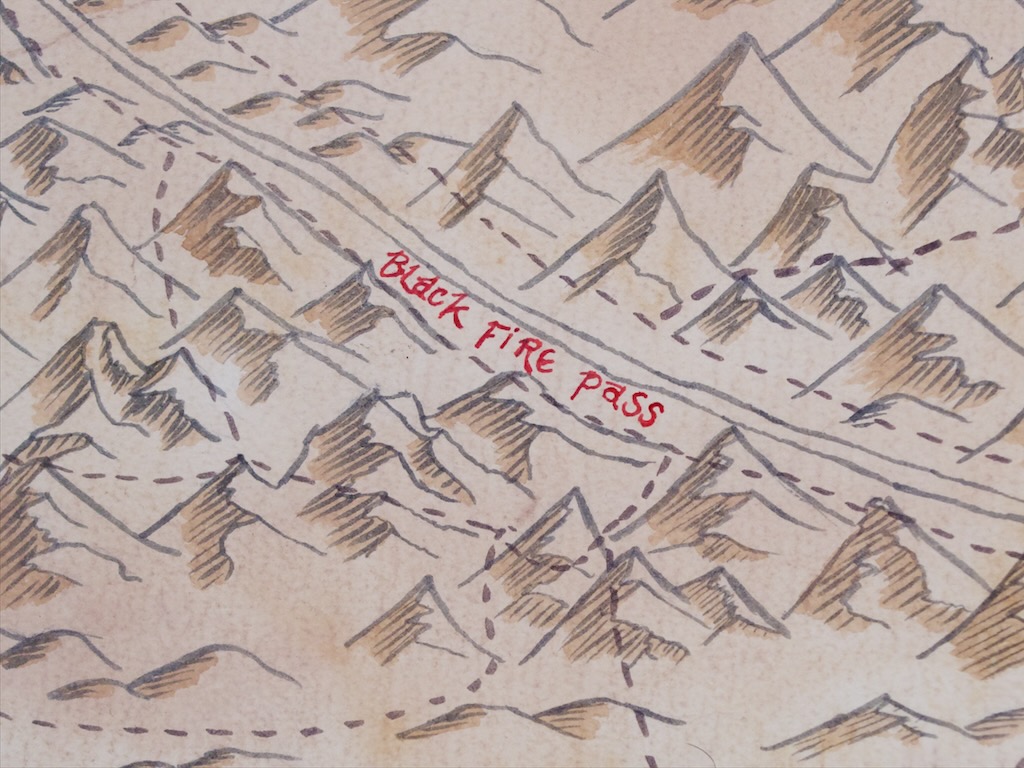
I started by drawing a grid on the map, and overlaying a matching grid on the scan I’d taken of the map in the book. This let me roughly copy the layout of the original which I pencilled in using an HB pencil (the book recommends using a light pencil to avoid smudging – HB was the lightest I had but the book suggests 2H!). With the layout marked out (I mostly just drew the roads and river sections to get my bearings) I started adding details. I started with the mountain sections, as there was a lot to fill out. I generally tried to replicate the style displayed on the original map but ended up making it my own by adding shading in the line work. At this stage I was pencilling in sections of mountain and then tracing that pencil line with a the grey Uni pin brush marker you see in the photo above. These are pigment based and water resistant once dry, very important for a later stage!
I tried to keep an eye on where the original map had place location names to make sure I left space for them. I made a few mistakes there and decided to write place names before drawing detail to avoid doing that again! I initially used a permanent marker to write location names, but that ended up bleeding in the paper a bit and generally looking a bit icky so I switched over to the red Uniball pen you see in the tools photo.
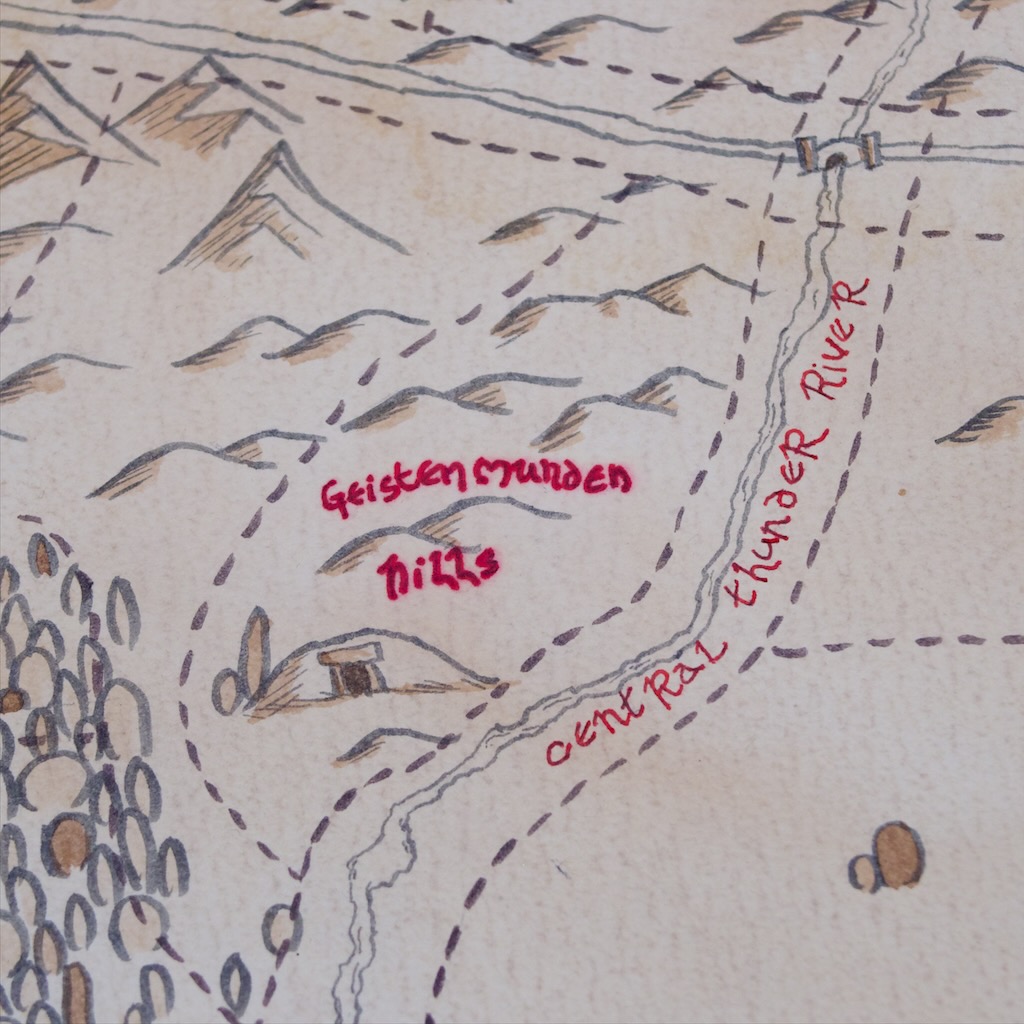
The photo above shows the difference between my two pens. The uniball pen ended up much cleaner and I wish I’d done some trials before diving in … but what are you going to do, this project was powered by enthusiasm and enthusiasm has no time for trials! The lettering was based on the original map, I tried to copy the letters best I could, and am ok with the outcome. Anyone who knows me in person knows I have dreadful handwriting, so the fact these are mostly legible is a good outcome!
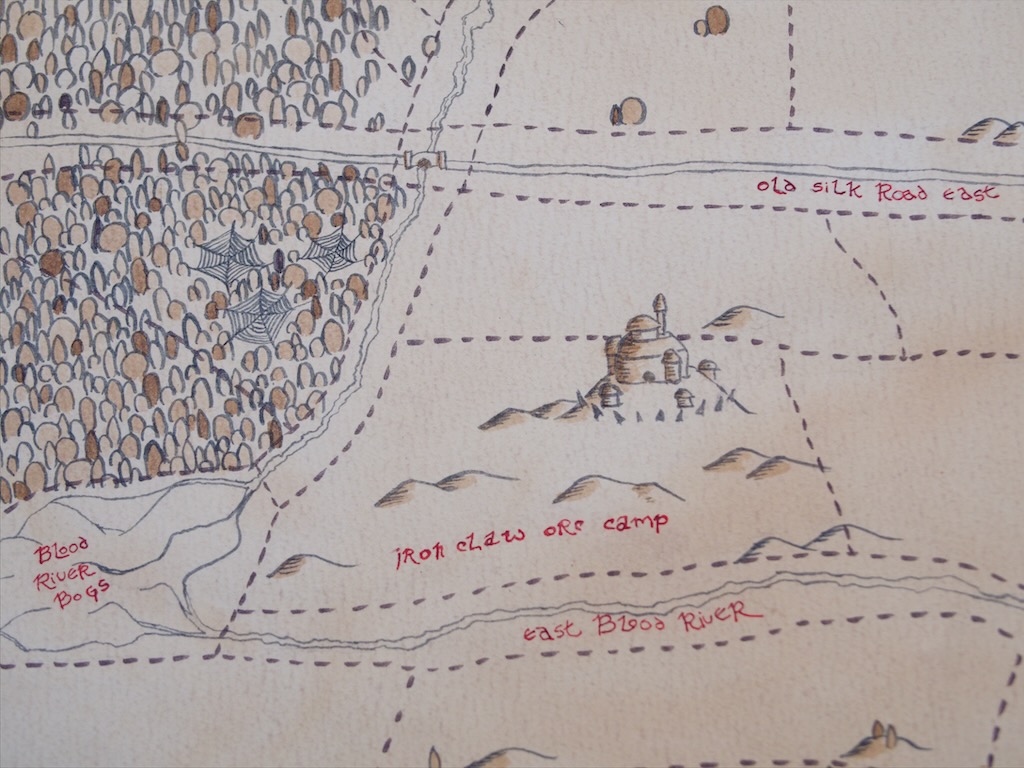
I’m also no illustrator, and I tried best I could to replicate the illustrations that were on the original map. They’re a bit crude but they’ll do! The original map had forests as collections of roundish shapes and I went for a similar look which was quite the effort. That was a lot of repetitive drawing which given my recent bout of RSI meant frequent breaks and lots of stretches.

Once all the line art was done, I sponged on a large amount of tea water (hence the need for water resistant ink!) and let the map sit overnight. The book suggested using water colour paints for this step but I’m a veteran of a great many childhood pirate maps and knew I could get a good outcome out of the humble tea bag. This gave that nice creamy-brown base all over the map, which provided the first stage of colour. The next day I used Burnt Umber ink to paint in the shading on all the details. I did this in multiple passes with different dilutions of ink, with the forest sections getting the most variations in intensities. The original map did this for its forests and I thought the look was very effective.
Overall I’m very happy with the outcome, we’ve ended up with a very practical map and I really enjoyed myself making this. I’ll have to try map-making again.

Fantastic work on the map, Nic! I really appreciate the time and thought you put into it. I also have to say your handwriting is very nice and looks Tolkien-esque. I have excellent handwriting (if I’m allowed to brag!) though mine is very bubbly and cartooning inspired so I really appreciate the style you used on the map. I couldn’t pull it off and I think its perfect for this project.
LikeLiked by 2 people
Thanks Jeff, glad you like it! Tolkien definitely has a very large influence on fantasy maps. Having spent many hours staring at his handiwork over the years it’s more than likely I’ve been influenced by it and clearly so has the person that drew the map I based this off!
LikeLiked by 2 people
That is a real piece of art well done!
LikeLiked by 2 people
Thanks a lot!
LikeLiked by 1 person
That’s an impressive map, Nic! 🙂 Very nicely done! The real question though – does it get your wife’s seal of approval? 😉
LikeLiked by 1 person
Thanks John! Yes she did like it, and had some rather excellent suggestions throughout.
LikeLiked by 1 person