Thunderers Part 2

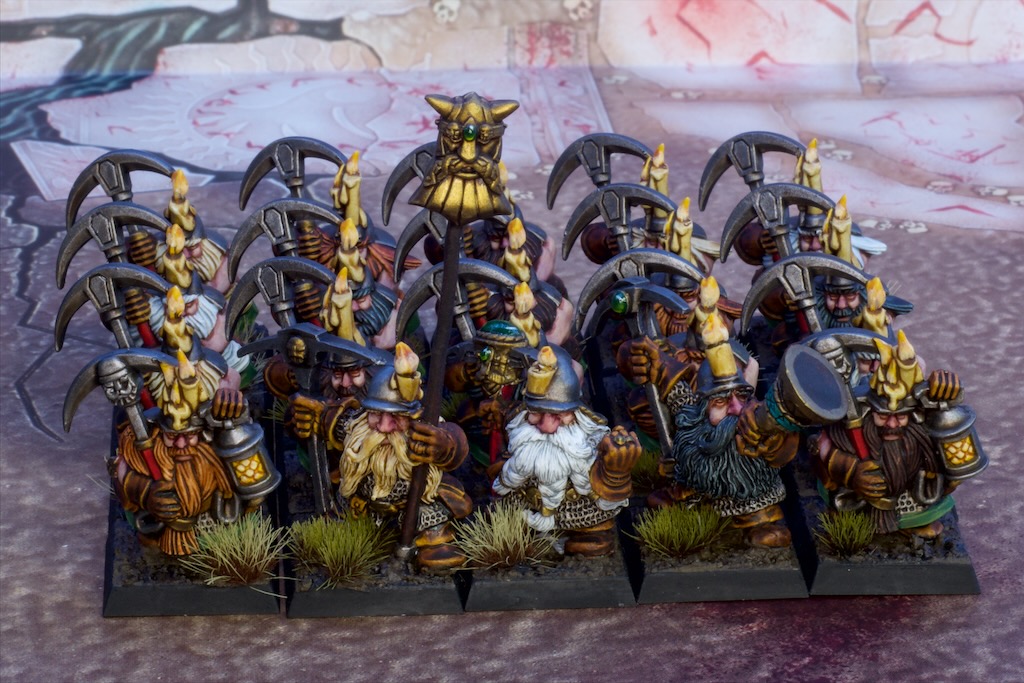
As I implied in Thunderers Part 1 I had some more Thunderers to paint for this Dwarf army, and that’s what I painted over the last week.

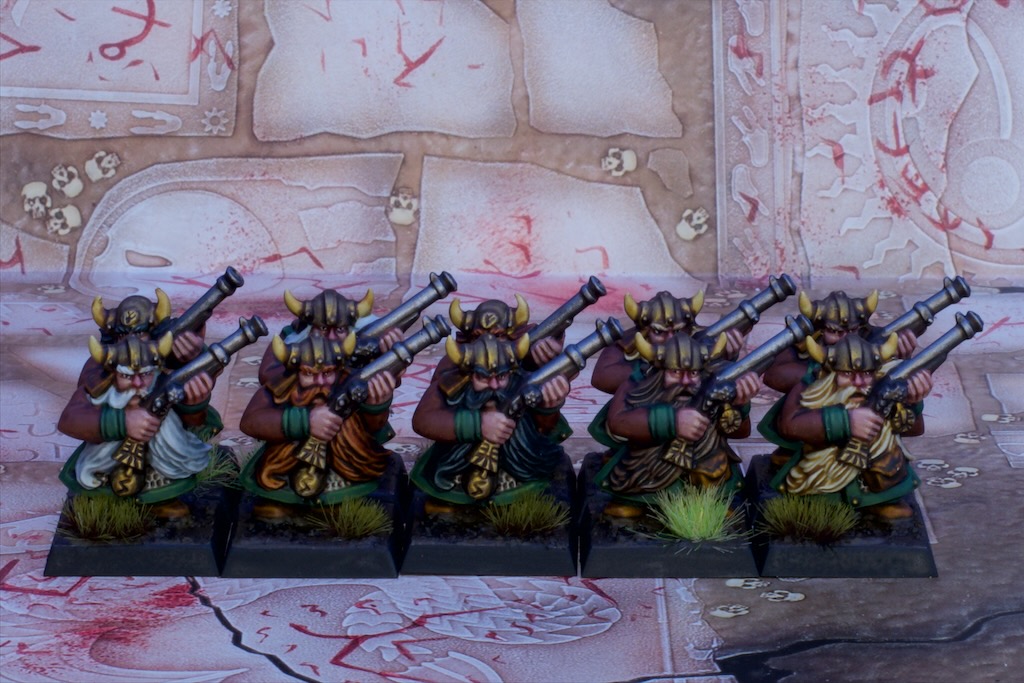
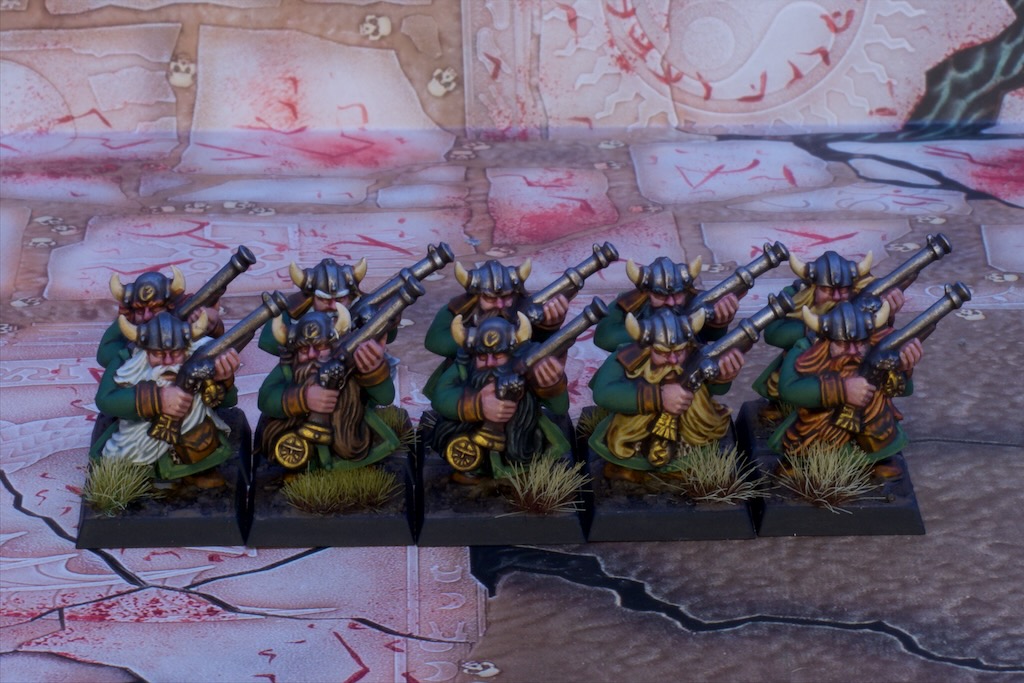
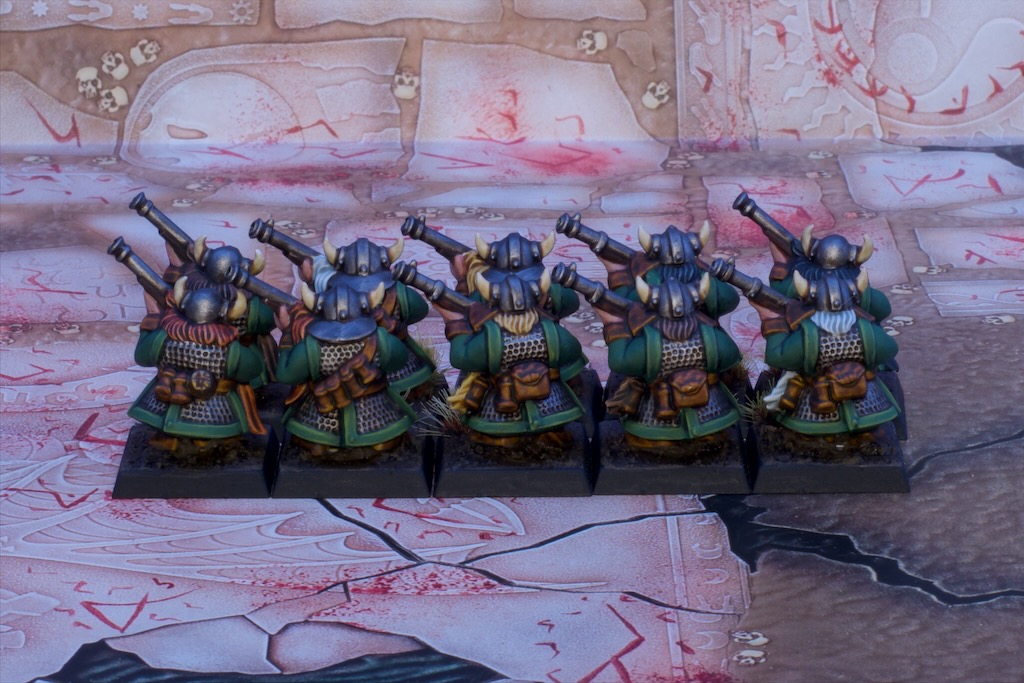
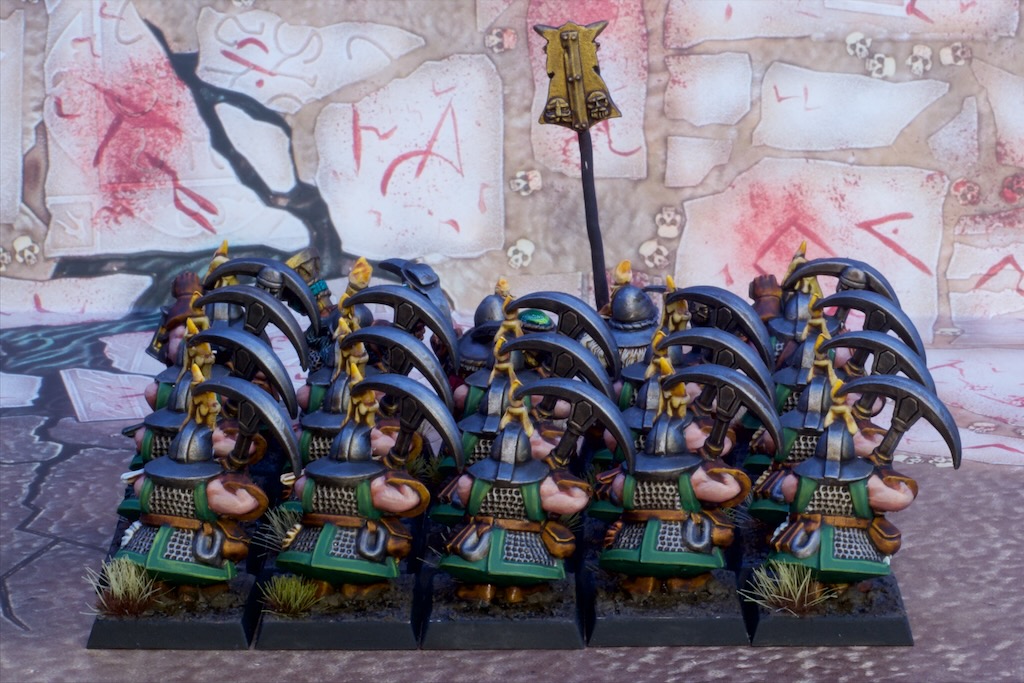
These are the same models as the first unit, the single piece plastics from the Battle for Skull Pass starter set for 7th edition Warhammer. As such there’s not much new to discuss so this will be a bit of a shorter post!

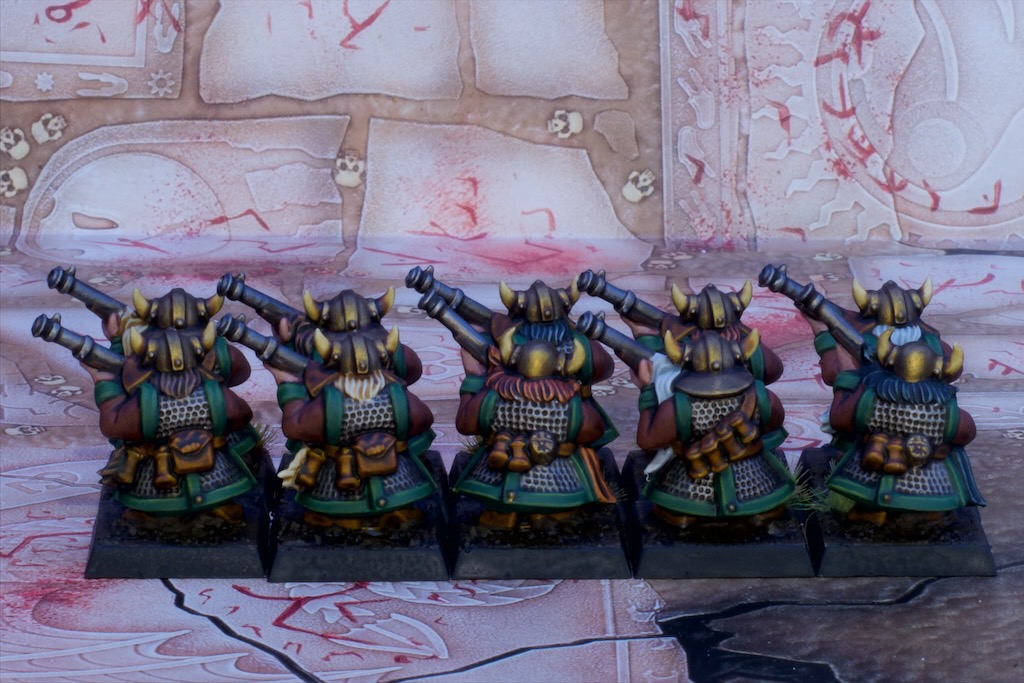
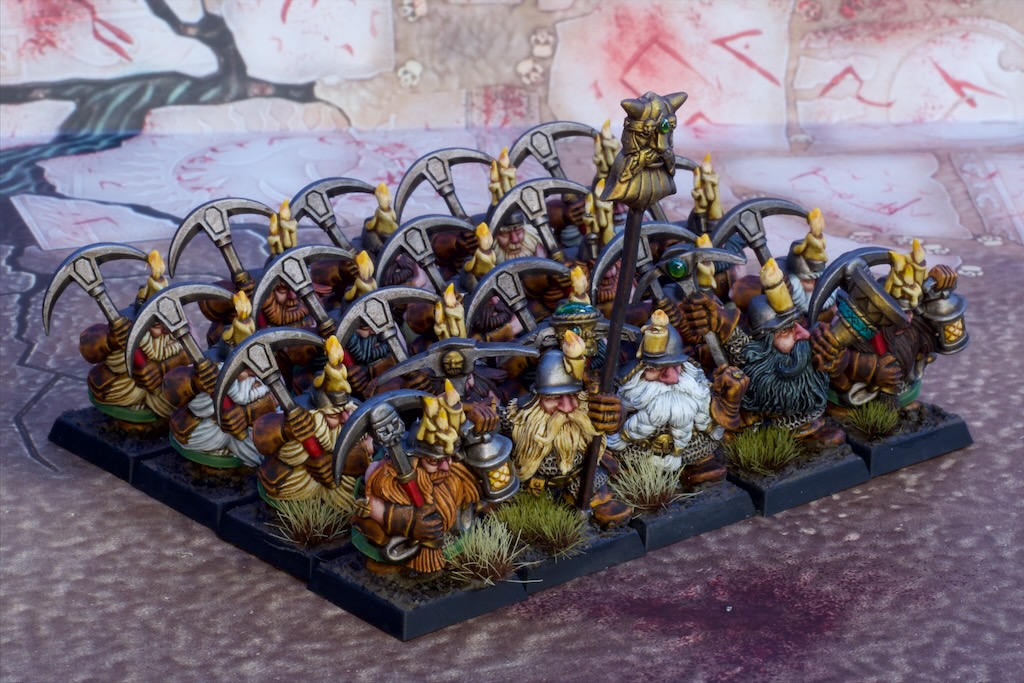
To keep things interesting, I decided to paint them slightly differently to the last batch, keeping the same colour palette but placing a few colours in different places. While these Dwarfs are from the same Hold as the other regiment, they might come from a different clan for example. I want to experiment with varying colours within armies some more, especially for fantasy and pre-modern historical games. These are not uniformly outfitted armies, they’re likely to be wearing what they brought from home!

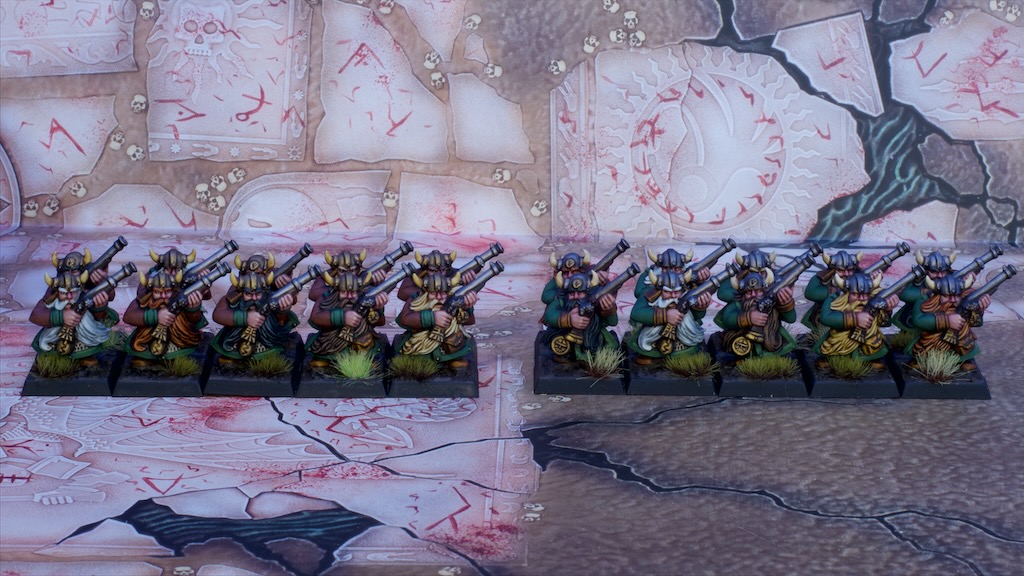
Here is this new unit next to the previous unit I painted. I think they fit in well together even when standing apart. Of course matching the bases helps a lot to tie them together.

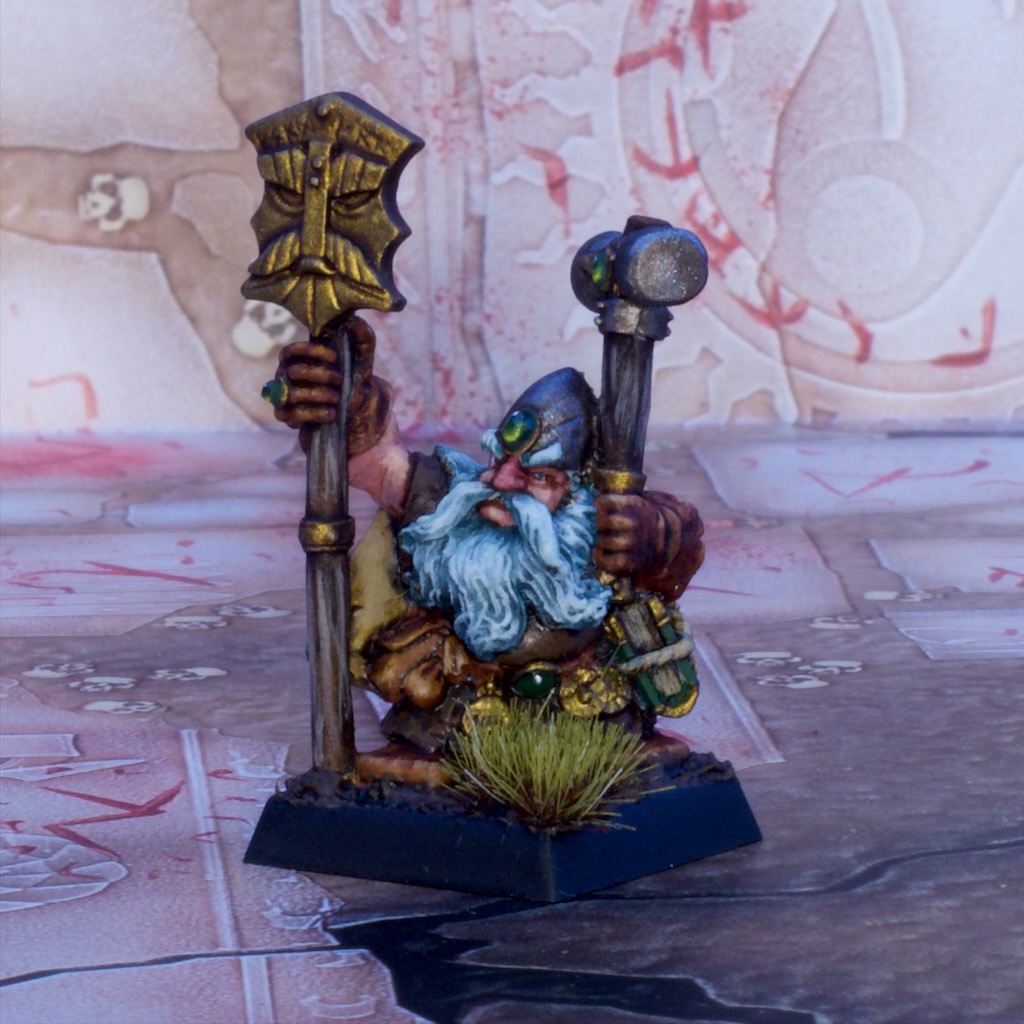
The more eagle eyed amongst you may have noticed that I painted the eyes on this unit but not on the previous one. I’ve been a bit lazy with these Dwarfs so far and skipped that step, but for some reason felt like painting these in. Unfortunately for me I now feel like the Dwarfs I painted before this unit are missing something and I may have to go back and give them something to look with!

That’s it painting-wise, but there’s been an interesting development collecting-wise in the last week. A friend of mine sold me his collection of old (6th edition era for the connoisseurs) metal Dwarfs for a steal so I’m the proud owner of a lot more Dwarfs, three full blocks of infantry and quite a few characters. Before that I’d been scouring eBay for some of these older models and one unit I managed to get for a good price also arrived this week, so I’m inundated with new models to paint. Expect many more Dwarf posts in the near future!

Poltergeists!

The dead are back once more, this time less corporeal than the last few times! For this post we have a collection of ghastly ghosts, for my Border Princes Campaign Vampire Counts army. There are two units here, a Banshee and a unit of Spirit Hosts. I painted them both at the same time as I wanted them to match.

First up let’s take a look at the Banshee! She’s a relatively old model, still being metal and from a few editions of the game ago, but quite a cool one I think.

I quite enjoyed painting the folds in all the cloth she’s wearing, although the blends look a bit smoother in person than they do in the photos I think (or at least they’re smoother when not being lit properly!).

The Spirit Hosts are much newer models, and are plastic (hence the crazy top heavy poses!). I do love the story these models tell, with the hosts pouring out of skeletons. Very cool models.

Painting-wise, both the Banshee and the Spirit Hosts were painted in much the same way. I started with my usual very light grey undercoat, followed by an all over spray of GW Akhelian Green Contrast through the airbrush. The contrasts through the airbrush go on as a translucent but relatively even coat, so this gave me a nice blue green colour all over the models. I then misted some very dilute Vallejo Model Air White over the models to starts the highlighting process. This gave me a slightly lighter blue layer to start brush highlighting over. A handy first step that also gives the areas on the models that are hard to reach with a brush (plenty on these as you can tell!) some highlights so I could lazily ignore them later. I then worked through highlights of the appropriately named Vallejo Game Air Ghost Grey, followed by highlights of fairly dilute Scale75 White.

These were nice and quick, painted in two sittings just how I like it!

A Runesmith Walks Into a Graveyard

Back again with some more Border Campaigns updates! This time around with a character each for my Dwarf and Vampire Counts armies, and some troop reinforcements for the latter. I decided to paint a couple of character models to break up all the infantry I’ve been painting lately, and settled on a Runesmith for my Dwarfs and a Necromancer for my Vampire Counts.

First up let’s cover the dwarf as the rest of this post is firmly focused on the undead!

This Runesmith model is a classic one, and one of the first Warhammer models I ever bought. I’ve made a few attempts at painting him over the years, but like most of my early models he’s ended up in a box and battered! He gets a fresh paint job for this campaign and it’s nice to see him finished after all these years. What a cool model and a joy to paint.

At the same time as the Runesmith I painted this necromancer model (I like painting more than one model at once so I have something to do during drying times!). This is one of the first modern plastic characters to come out if memory serves, maybe alongside the 7th edition release?

Great model as well, although much more modern looking. I had fun painting him too, especially the eyes. He’s ended up with a bit of a crazy look which is spot on for a necromancer I think!

Following on from the necromancer are a horde of Skeletons (rather appropriate!). I didn’t paint all these in the last week, that would be a bit much, but I did finish painting them after having not touched them for a good 4-5 years!

You’ll notice that these are on round bases unlike every other model I’ve show for this army so far. These were at one time on square bases, Vampire Counts being one of my Main armies during the 8th edition of the game. When the Old World blew up and Age of Sigmar was born I rebased these skeletons onto round bases to suit the game (well 20 of them at any rate, I built 20 more straight onto round bases at a later date!). I couldn’t face rebasing them a second time, and with the recent announcement that 20mm based infantry are moving up to 25mm bases in the new edition of the game I decided that I could just rank them up as is and make trays to have them neatly arranged.

As I said above, while I didn’t fully paint these in the last week, I did do some painting to finish them. The 20 skeletons that were added during the Age of Sigmar era were done so for a tournament and I did not have time in the lead up of that event to fully highlight them to match the original twenty. This week I finished those 20, highlighting them to match the originals and I repainted the bases on all 4o to match this latest incarnation of my vampire counts.

The trays you see them on I designed in Tinkercad (great for these simple jobs!) and printed on my 3d printer. I also designed and printed a second set of trays.

This second set is for 20mm square bases, taking them up to the same frontage as 25mm base infantry, so they’ll match my skeletons. You’ll notice the big slot in one of the bases, and if you read my The Living Dead! post you’ll know what that’s for!

Zombies!

After I decided to not rebase my skeletons, I wanted my zombies to match them so made them a set of trays to match so the army would look somewhat cohesive. The round bases do stand out somewhat, but I think it’s not too bad and the two units look like they belong together. I’m keen to get impressions on this so feel free to let me know what you think in the comments.

That’s it for this update, I’ve also been working on some terrain for the campaign, but I’ll show that at a later date when it’s all done!

Thunderers Part 1

I got a few good painting sessions in this week and got to add this 10-strong unit of Thunderers to my Dwarfs for our Border Princes campaign.

These, just like the majority of the Miners I painted a few weeks back, are from the Warhammer 7th edition starter set: Battle for Skull Pass. This means they’re one-piece plastics and therefore are quite limited in their casting as a result. I think they look fine for army models however and as an added bonus they’re very easy to paint due to the complete lack of overhangs brought on by those casting limitations.

They were painted in the exact same manner as the Miners I mentioned above so feel free to go see that post for a detailed guide. In short, the beards and leather are done with contrast paints (two coats of Snakebite Leather for the leather, and a single coat of Gore-Grunta fur, Wildwood, Black Templar, Apothecary White, or Skeleton Horde for the beards). The metallics are Scale75 paints (silver: S75 Black Metal, Bronze/Brass: S75 Necro Gold), washed with GW Agrax Earthshade and highlighted with their respective basecoat colour. The green is the most involved process with a base coat of Vallejo Heavy Black Green followed by successive highlights of the same base colour with more and more S75 Sherwood Green mixed in all the way up to the line highlights done in pure Sherwood green. For the sleeves I stopped a few steps into this highlight process to differentiate them from the green on the armour (maybe 60% Heavy Black Green to 40% Sherwood Green).

Nice and simple and very quick to paint, I finished these in two sessions which is a nice pace. I have another unit of 10 to paint for the army, and I’m currently planning on how (or if!) to differentiate them from these ones painting wise.

Still plenty more to paint for this campaign so expect more Warhammer models to come this way soon!

The Living Dead!

If you read my last few posts you’ll know I’m preparing to play in a map based campaign set in the Border Princes with some friends. For this campaign I’m fielding a Dwarf army and a Vampire counts army. After painting some of the Dwarfs last time around I decided to switch over to my Vampire Counts to keep things fun. The zombies seemed like a good place to start so I painted up a nice big batch of them. All up there’s “35” zombies there (32 really but the ogre counts as 4!), giving me enough for a unit of 20 and 15 summons.

I actually built these models a long time ago, during the 8th edition of Warhammer, so somewhere around 10 years ago. They were built by mashing together a zombie box and a Bretonnian men-at-arms set, as well as the addition of a spare ogre from my Ogre Kingdoms army. It’s about time these got some paint on them!

Painting wise I knew I wanted to go fast, the goal being to paint the 32 models in the time it would normally take me to paint a unit of 10 models. That meant leaning heavily on contrast paints, aiming for as many parts as possible to be done in single coats of contrast paints.

The skin was done with a 50/50 mix of Plaguebearer Flesh contrast and Fyreslayer Flesh contrast. I tried to mix these somewhat unevenly to get a bit of variation when applying the paint. The skin then got a patchy application of Carroburg Crimson wash to add a bit of red to some sections for even more variation.

The cloth, leather, and bone areas were done with a variety of contrasts including Flesh Tearers Red, Cygor Brown, Wyldwood, Black Templar, Aggaros Dunes, Skeleton Horde, and Snakebite Leather. These non flesh areas then got an all over wash of brown enamel (MIG Brown Panel Wash) for an easy dirtying.

The metal areas were painted with Scale 75 Black Metal, then covered in Khimera Red Oxide and Khimera Orange patchily and wiped away somewhat messily to get a worn rusty look.

The blood you see on the models was done after my usual coat of Matte Varnish to retain the glossy look. The blood was done using an old technique I picked up from one of the more successful Australian display painters back in the day. The technique makes use of Tamiya Clear Red acrylic paint mixed with some regular black acrylic (in this case I used Vallejo). The clear red is alcohol based and dries very quickly into a pretty tacky substance that can be applied to models in a quite realistic way, giving some nice texture as well as colour for the blood effect. By varying the amount of black mixed in you can go from a nice fresh blood all the way to coagulated blood. Lots of fun!

These were tremendous fun to paint. Much like Nurgle models they are very freeing in that it’s possible to go a bit crazy with washes and get something reasonable looking at the other end. They won’t win me any awards, but they look nice and icky and grimy and I don’t think I can ask more of zombies!

Off to work we go!

Planning is proceeding for the Border Princes campaign, armies have been selected and painting underway! I’ll be fielding Dwarfs and Vampire Counts, with the remainder of the forces in the campaign being Lizardmen, Beastmen, Orcs and Goblins, and Wood Elves. Additionally we’ve decided to have a small Bretonnian force defend the central town to make it a bit more challenging to take that important location. I’ll be painting that up took so expect some photos as I start getting getting around to that.

First up though is more progress on the Dwarfs. This unit of miners is probably the largest unit that I’ll be including in the army, so it was nice to get it done. The models are a mix of the old metal miners for the command and of the Battle for Skull Pass plastic models. They’re actually quite different looking but I think with the matching paintwork they work together well enough.

Painting-wise these were pretty straightforward. I used contrast paints a fair bit, with the beards being just a single coat of contrast: Gore-Grunta Fur for the red beards, Black Templar for the black beards, Skeleton Horde for the blonde beards, Cygor Brown for the brown beards and Apothecary White for the white beards.

The leather was done with Snakebite Leather with a coat of Burnt Umber Ink over the top to darken it. The candles are a single coat of Aggaros Dune, with the flames done with a coat of Nazdreg Yellow with some highlights of Nazdreg Yellow mixed with white.

The metallics are all Scale75, with the silver sections done with Black Metal and the bronze sections with Necro Gold. In both cases I base coated with the metallic paints, gave them a wash of Agrax Earthshade and highlighted back up with the paints.

The green on the armour is Vallejo Heavy Black Green followed by successive highlights mixing in Scale 75 Sherwood Green.

Overall I’m pretty happy with the look of these considering they were painted relatively fast. Hopefully I can get these Dwarves done up relatively quickly and move on to the other armies for the campaign!

Campaigning in the Border Princes

In my last post (Dwarven Cannon) I mentioned that my friends and I were thinking of embarking on a map-based campaign for classic Warhammer (6th/7th edition era). Enthusiasm has not waned and we’re tentatively up to four players interested! We’re still likely to want to have 6 factions involved to flesh things out so it’s likely a couple of us will play 2 factions. What the factions are is likely to be decided over the next few weeks, so an update on that will happen at some stage! To play a map-based campaign one needs a map, and I turned my attention to that this week.

One of the lingering questions after the initial discussions last week was whether to play the campaign presented in the book as is or to use the rules to create our own campaign. In the end we decided to play the Border Princes campaign from the General’s Compendium with a few tweaks. The map locations are really nicely fleshed out and we thought we could learn from it to allow us a good chance of creating a good campaign of our own in the future. While the book originally came with a poster map of the region to use for campaigning, the second hand copy of the book I got did not have the map with it (lost a long time ago presumably!), and I set about replacing it.

I tried scanning the small version of the map shown in the book with a view of printing it on a few A3 sheets to make a map large enough to hold models. Unfortunately while my scanner has high enough resolution to provide images that would work blown up to that size, the source image was to small and scaling it up just made the printing dots very visible. SO I decided to do the next best thing: draw my own version of the map!

I uploaded this photo at a higher resolution than I usually do, should let you zoom in if you feel like it!

This then is a bit of an unusual post, not about model painting by about map making! I spent most of my spare time over the last week putting this together, thoroughly enjoying the process. The General’s Compendium actually provides pretty good instructions on how to draw your own maps and I mostly followed that process supplemented by helpful advice from my wife who is an artist.

Tools of the trade!

I started by drawing a grid on the map, and overlaying a matching grid on the scan I’d taken of the map in the book. This let me roughly copy the layout of the original which I pencilled in using an HB pencil (the book recommends using a light pencil to avoid smudging – HB was the lightest I had but the book suggests 2H!). With the layout marked out (I mostly just drew the roads and river sections to get my bearings) I started adding details. I started with the mountain sections, as there was a lot to fill out. I generally tried to replicate the style displayed on the original map but ended up making it my own by adding shading in the line work. At this stage I was pencilling in sections of mountain and then tracing that pencil line with a the grey Uni pin brush marker you see in the photo above. These are pigment based and water resistant once dry, very important for a later stage!

I tried to keep an eye on where the original map had place location names to make sure I left space for them. I made a few mistakes there and decided to write place names before drawing detail to avoid doing that again! I initially used a permanent marker to write location names, but that ended up bleeding in the paper a bit and generally looking a bit icky so I switched over to the red Uniball pen you see in the tools photo.

The photo above shows the difference between my two pens. The uniball pen ended up much cleaner and I wish I’d done some trials before diving in … but what are you going to do, this project was powered by enthusiasm and enthusiasm has no time for trials! The lettering was based on the original map, I tried to copy the letters best I could, and am ok with the outcome. Anyone who knows me in person knows I have dreadful handwriting, so the fact these are mostly legible is a good outcome!

I’m also no illustrator, and I tried best I could to replicate the illustrations that were on the original map. They’re a bit crude but they’ll do! The original map had forests as collections of roundish shapes and I went for a similar look which was quite the effort. That was a lot of repetitive drawing which given my recent bout of RSI meant frequent breaks and lots of stretches.

Just in case we forget where we’re campaigning!

Once all the line art was done, I sponged on a large amount of tea water (hence the need for water resistant ink!) and let the map sit overnight. The book suggested using water colour paints for this step but I’m a veteran of a great many childhood pirate maps and knew I could get a good outcome out of the humble tea bag. This gave that nice creamy-brown base all over the map, which provided the first stage of colour. The next day I used Burnt Umber ink to paint in the shading on all the details. I did this in multiple passes with different dilutions of ink, with the forest sections getting the most variations in intensities. The original map did this for its forests and I thought the look was very effective.

Overall I’m very happy with the outcome, we’ve ended up with a very practical map and I really enjoyed myself making this. I’ll have to try map-making again.

Dwarven Cannon

With my newly refound ability to paint, I’ve been looking for things to paint (which I’m not short of) and where better to direct that energy than at a new project rather than work towards finishing one of the many existing ones I have!

I got a book in the mail last week I’ve been looking for for a while, and said book triggered a flurry of conversation between my regular gaming partner and I about campaigns in the Warhammer world. The book in question is The General’s Compendium, a book published during the 6th edition of the game which contains a lot of ideas for what we now call narrative games, including a whole three ways to run wargaming campaigns. I read the book cover to cover over the last few days, and I really want to run a campaign now!

One of the map-based campaign systems in the book has the factions involved in the campaign have “banners” on the map, each representing an army. Rather than tracking army composition, the players just pick a game size they want for the campaign and each time enemy banners meet on the map, a game of Warhammer is played at the size specified at the start. The players are free to alter their army lists between games, that being rationalised away by reinforcements and units being shuffled between banners.

The details are still fuzzy, but the leading idea for our campaign is to each have a number of factions under our control. As we are just two and that will be a lot of games and a lot of painting, we decided to keep the point size for the banners to 1000 points. The opportunity to paint multiple small armies is one that I very much welcome, and here’s the start of that:

This cannon and its crew are models from the Battle For Skull Pass starter set which was released for the 7th edition of the game. I’ve had these dwarves for quite a long time now, and in fact dwarves were my first ever Warhammer models way back when (over 20 years ago)! It’s one of my biggest Warhammer regrets to not actually have a painted dwarf army considering how long I’ve owned some of these models. Time to fix that!

I decided to go with the Karak Hirn colour scheme (i.e. green), as that was the studio army that was done up in the army book back then, and I have fond memories of looking at those pages back in the day. It’s also the scheme that I used for that first box of Dwarf Warriors I got at the time.

Most of the painting was done using contrast paints as a base coat, with the exception of the green tunics which these models acted as a testing grounds for. I wanted to make sure I matched the green of the studio paint job back then, and luckily for me the army book had a nice guide on how to paint it … with 20 year old paints. Luckily I was able to match the paints with some in my collection, and it’s quite simply Vallejo Heavy Black Green as a base coat followed by successive highlights of that same colour with more and more Scale75 Sherwood Green. I’ll do up a proper painting guide when I paint up the first block unit and have finalised how all of this is going to look.

Anyhow that’s it for this update, these models were very quick to paint, upside of their relative lack of detail due to being ~15 year old single piece plastic models. I have plenty more from that starter set to get through, so expect some more stiffly posed dwarves to grace these pages soon!