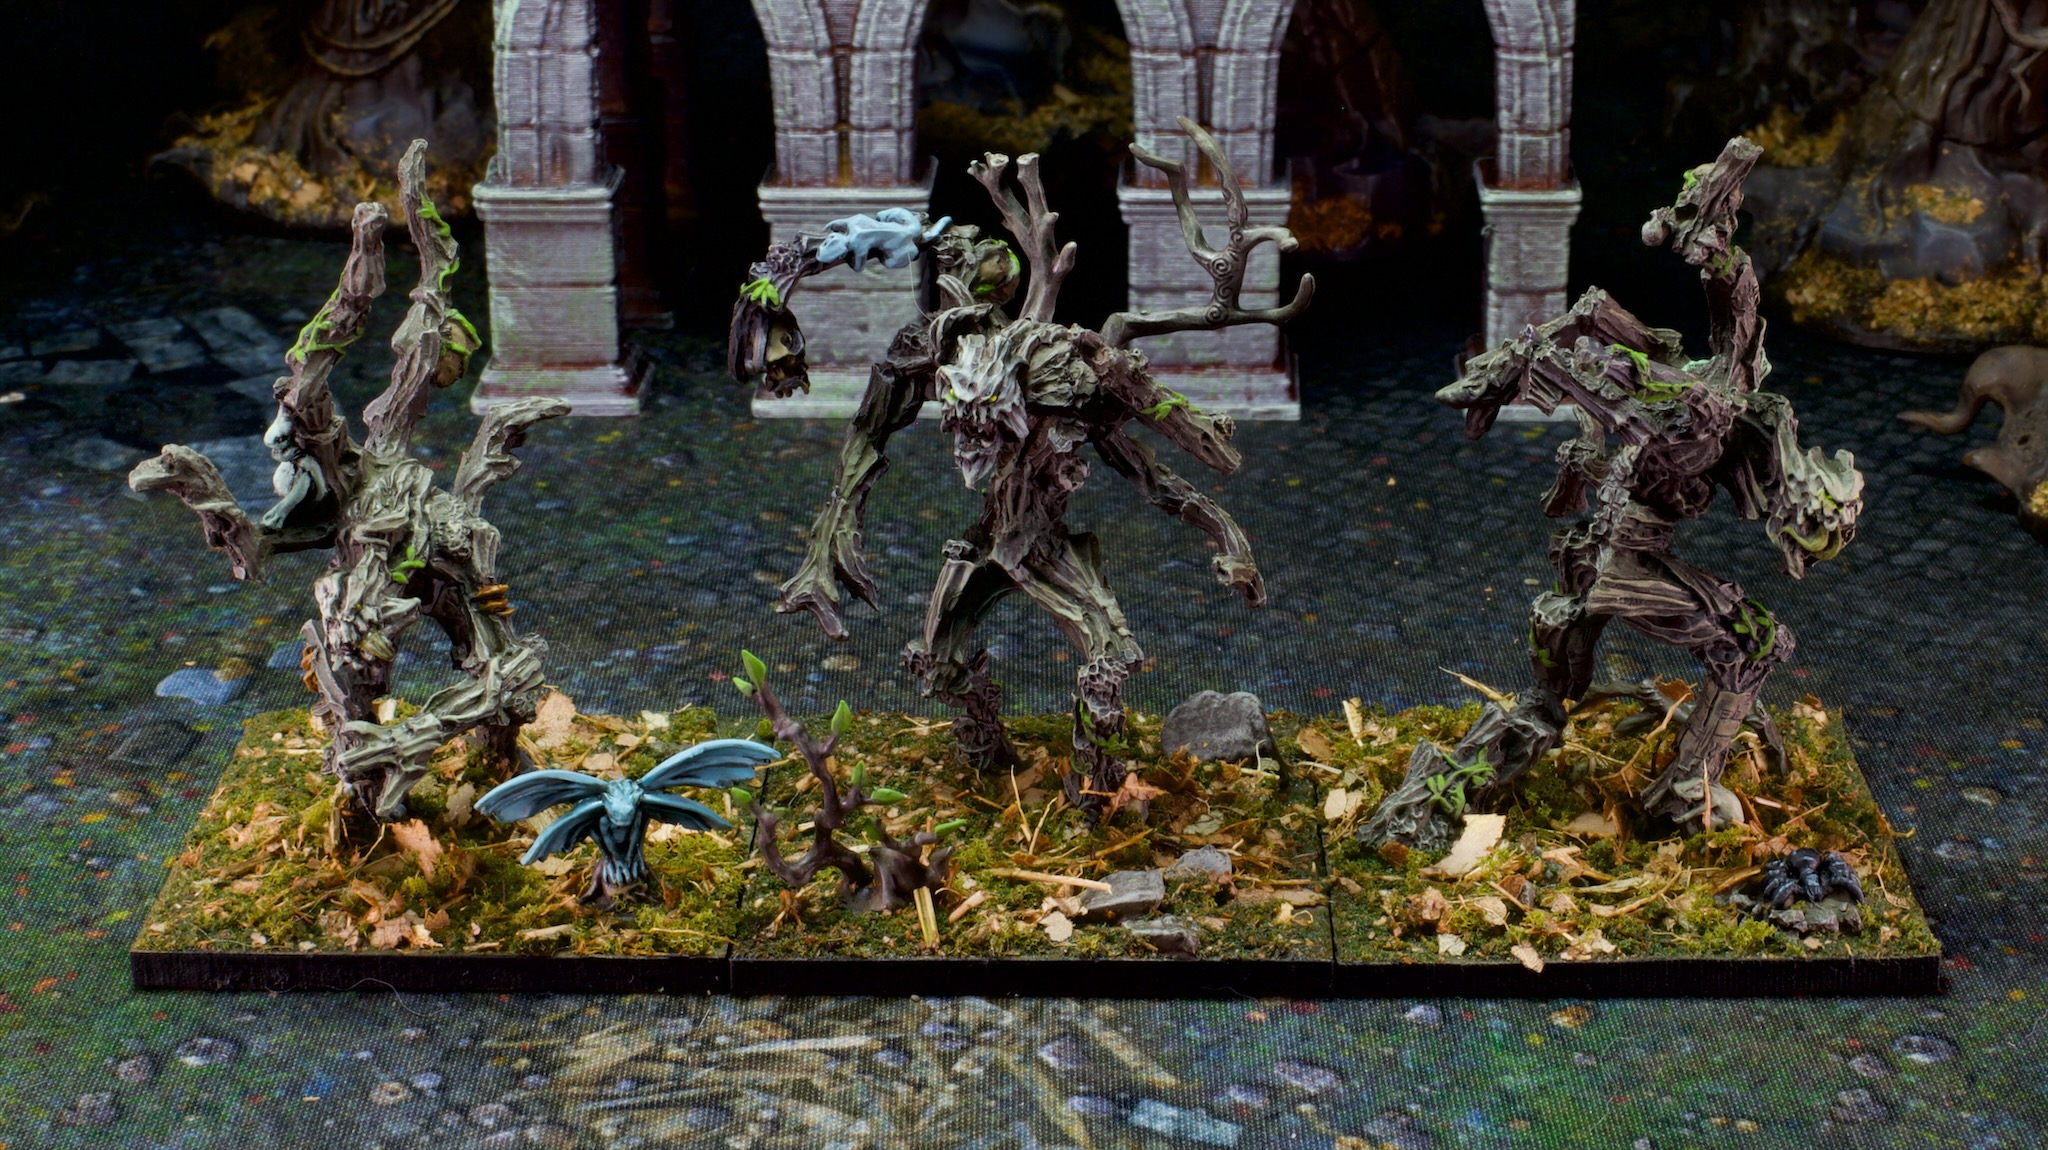
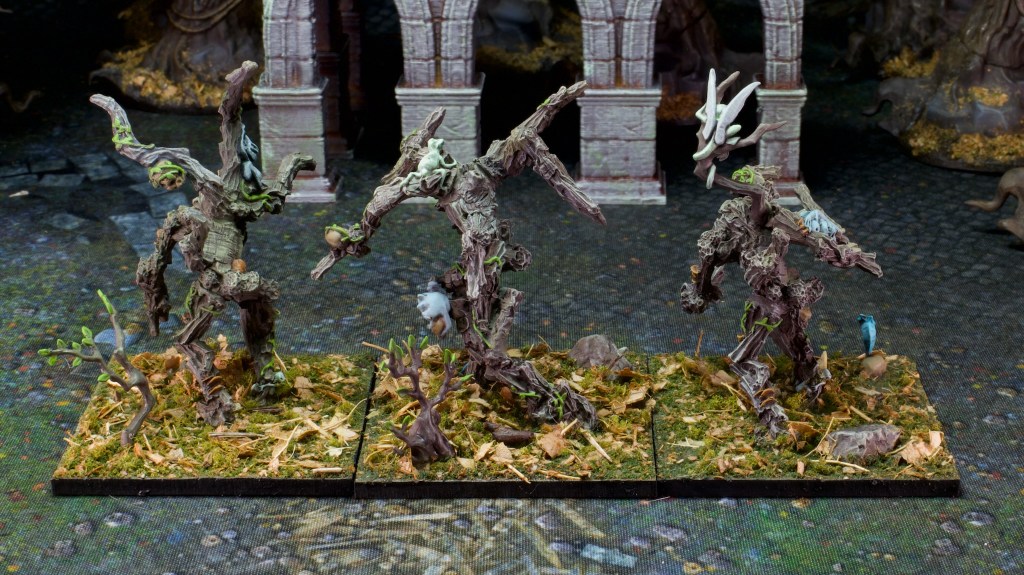
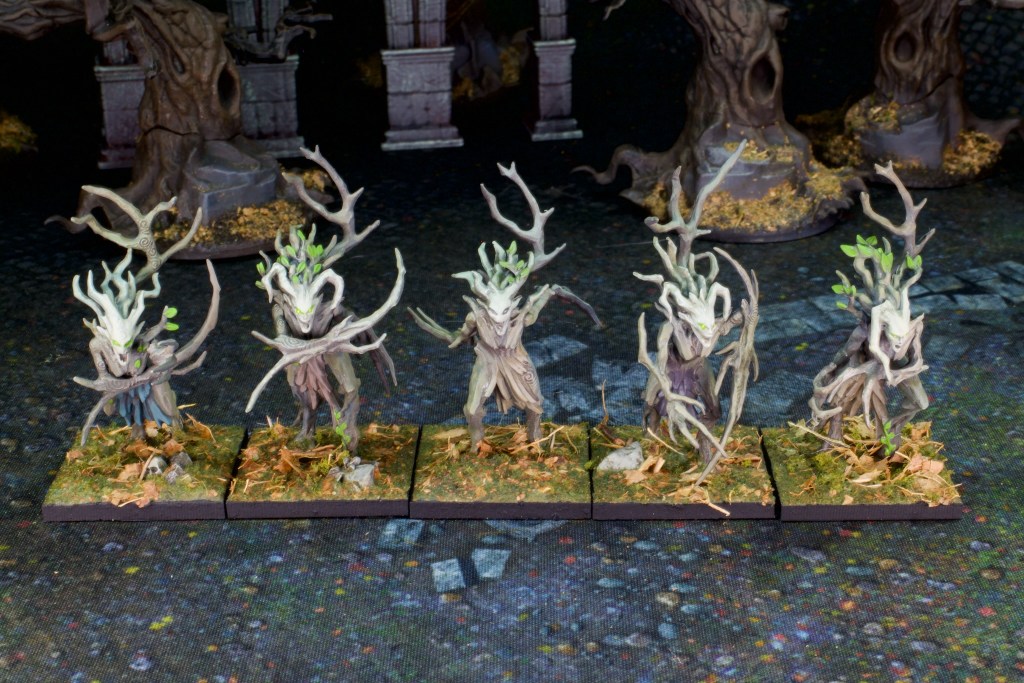
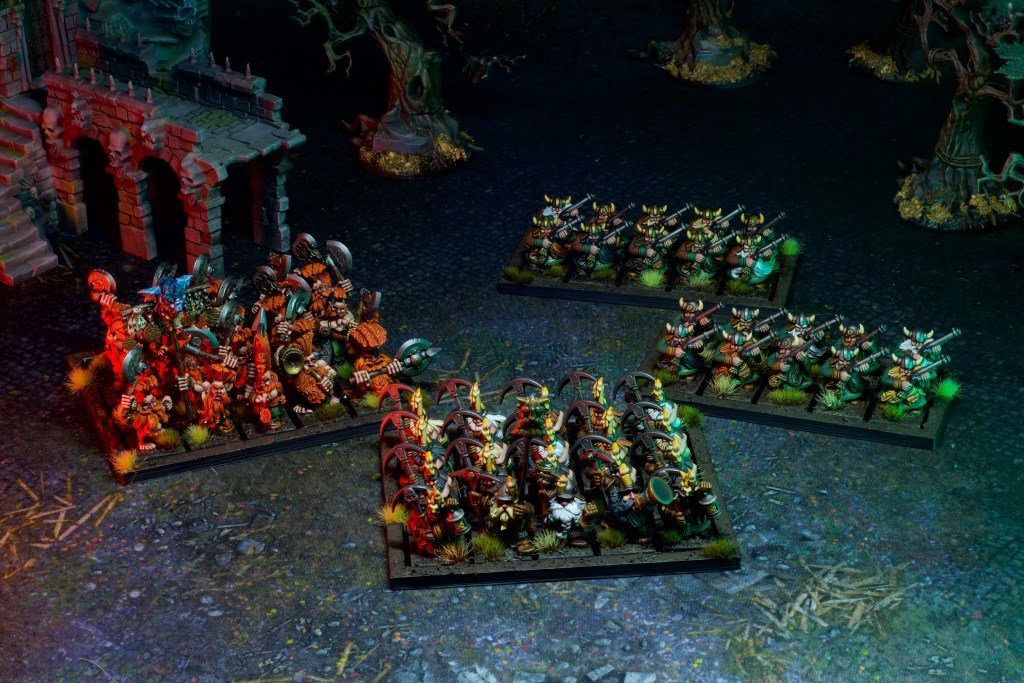
Back again with more forest spirits, this time Tree Kin, smaller than Treemen, but bigger than Dryads!
I’ve had half of these models for quite a long time now, as part of the wood elf army I put together around 2007. The other half I recently inherited from a friend who generously gave me his. Both sets needed some care after years of neglect, but nothing a trip in the stripping bath and some fresh glue couldn’t fix! My models were built as is, but he’d done some cool conversions on his to spice them up a bit (there only being 3 variants, it’s nice to have some extra variety in a unit of 6!).
I painted these in the same manner as my Dryads and Treemen, hitting them with the airbrush in random patches of greens, browns, and blues, then highlighting them as guided by this eclectic mix. See those posts for more detail on this.
These models are covered in little critters (called spites!), which were quite fun to pick out in various colours. I decided to stick to a blueish/greenish range for these to make them relate to each other while still having some variation.
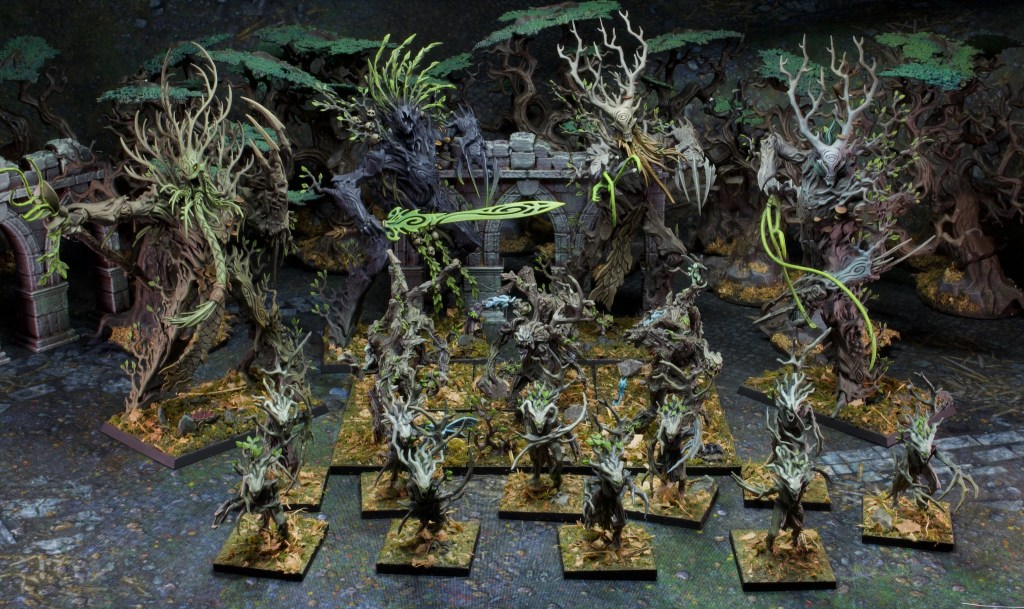
As I’ll be moving on to the elvish side of the army now, I thought it would be fun to have a family portrait of all the forest spirits I’ve painted so far.
I won’t be able to run all 4 treemen till I paint a lot more models for the army, but I’m planning to run one in the first thousand points. I suppose I can rotate them between games for now! As I said above I’ll start painting elves next, and have some archers ready to start painting now. Presumably those will for the focus of the next post unless I get distracted which is always a possibility!
The Old World release has had me going around in circles reading, getting excited about an army, army list writing, model building, model painting, rinse and repeat for another army. So I’ve started a lot of things but not finished much! One thing that I have realised doing this is that I really enjoyed painting those Treemen last post and wanted to paint some more foresty units!
So I broke out some dryads from the foam cage of an army case, rebased them on the new base size and got to painting them! Much like the treemen, this was rather free-form painting, starting with an airbrushed basecoat of a patchy mix of browns, greens, and blues and going from there.
This has turned out to be a rather fun way to paint, and gives rather nice results for these rather organic models. I think this would work quite well for something like Tyrannids in Warhammer 40,000.
I think the shots from the rear show the patchy nature of the paint work well, being flatter and less obscured with detail.
One thing I do need to figure out is how I’m going to paint the elvish section of the army. This works well for all the forest spirits, but I’ll need to try out something for the non-tree people!
Regardless of how I decide to do the elves, I’m pretty committed at this stage to paint up a small force of Wood Elves for the Old World. In fact I’m leaning towards choosing them as my army for our Border Princes campaign. I’m finding the new rules don’t suit how I’d like to run my Dwarves at 1000 points (But look excellent for running them in bigger games!) so that may cause me to pivot to a different army.
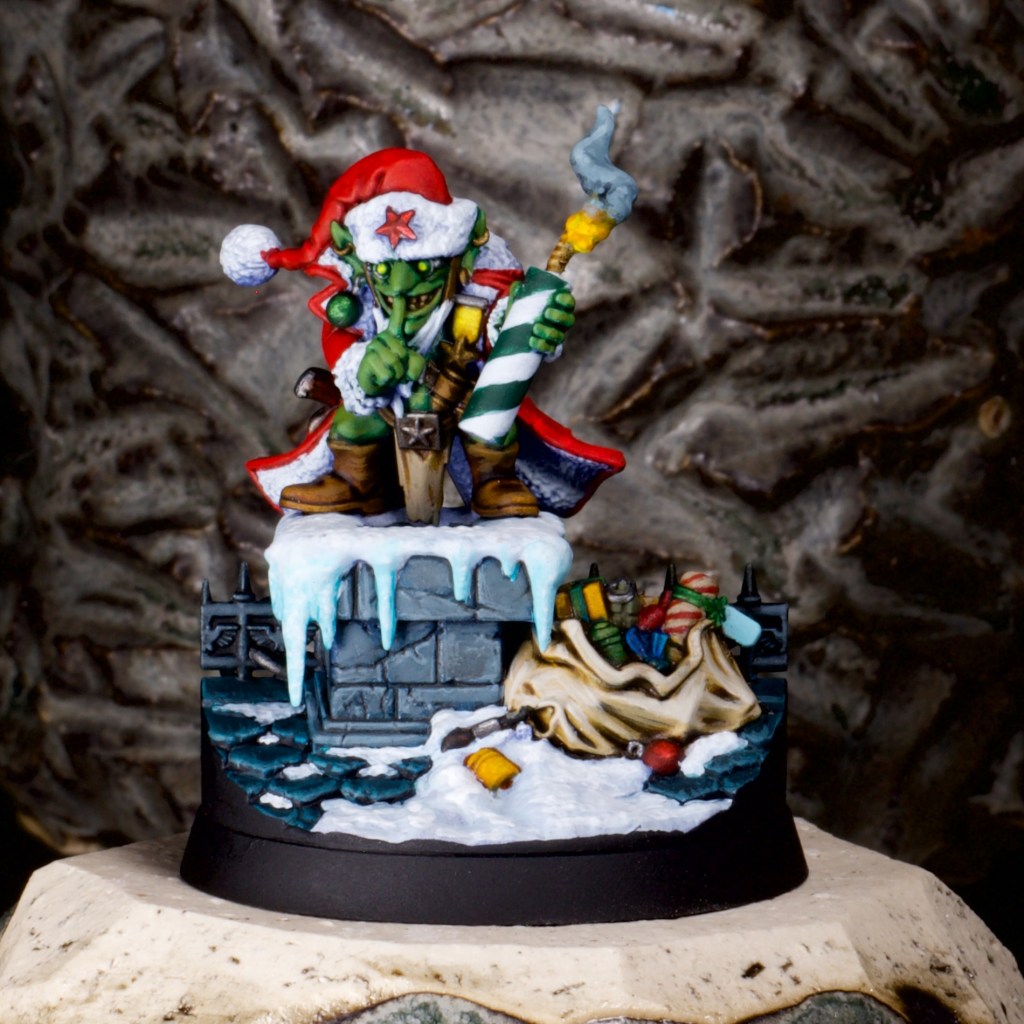
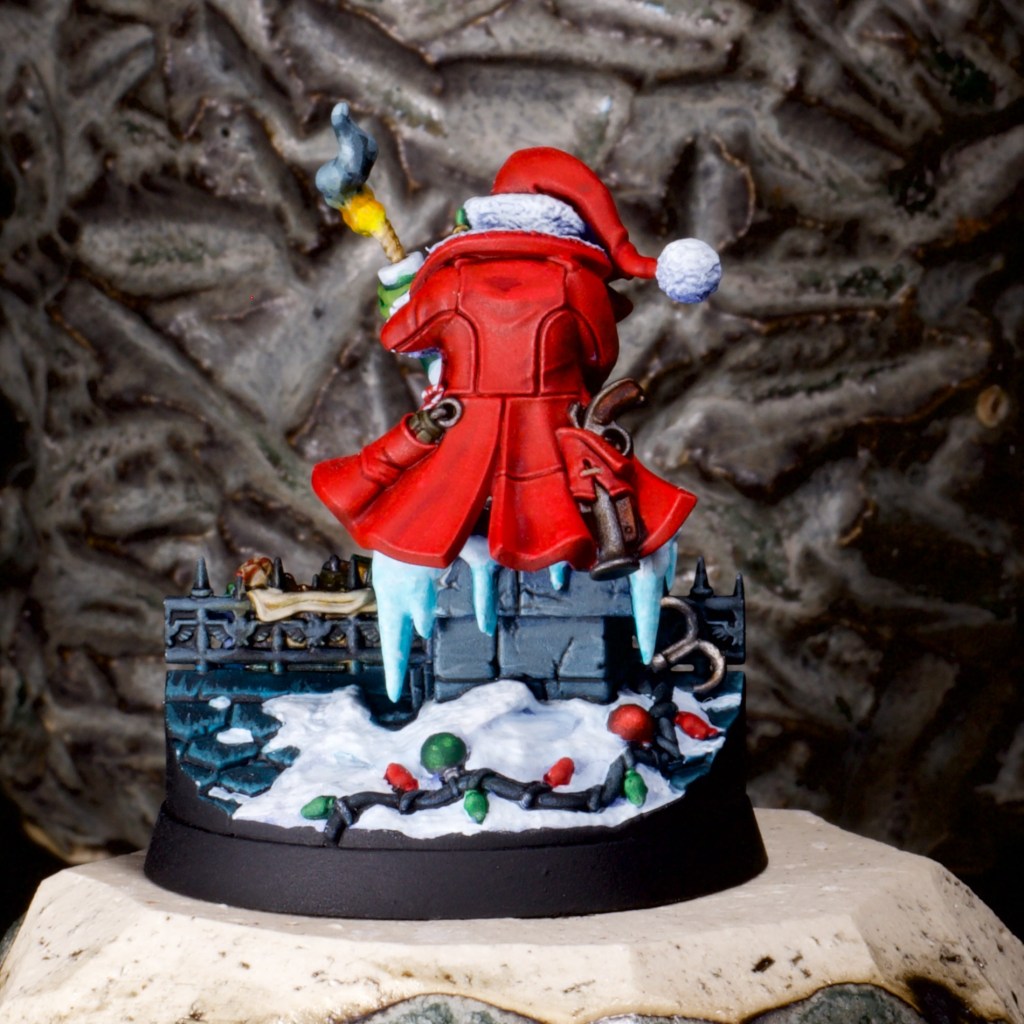
On a different note, I painted this mischievous Christmas goblin for a friend a couple of weeks ago and finally managed to meet up to hand it over so I figured it was time to post up some pictures!
A rather fun model to paint!
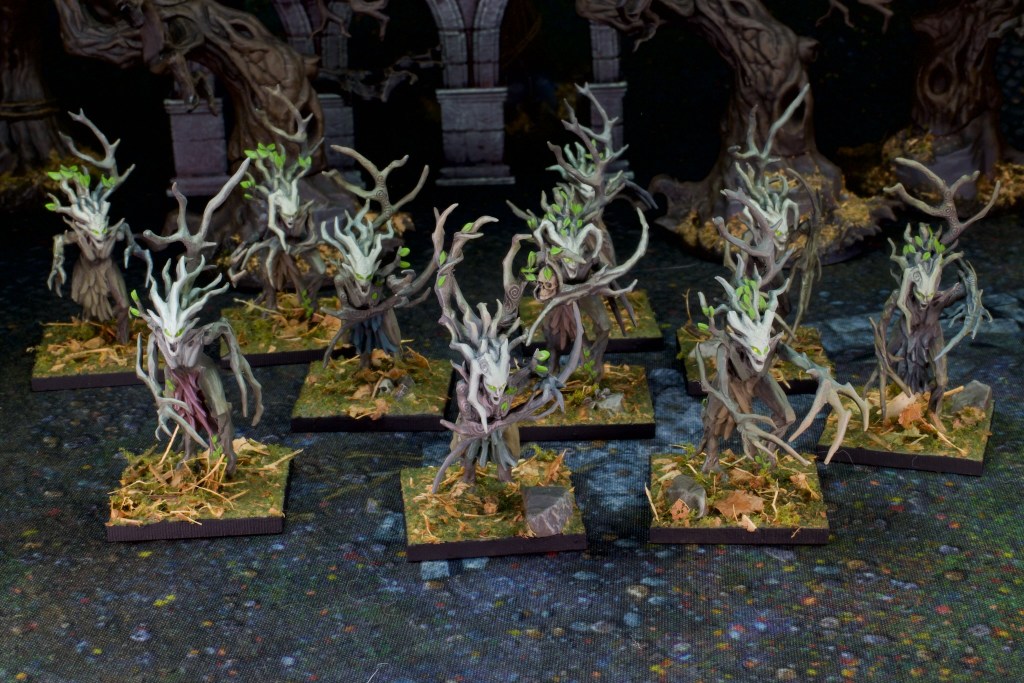
I’m most of the way through some more Wood Elf models (still Forest Spirits!) so expect a post on them soon!
One of the things that has me excited about the new Warhammer ruleset is that the armies are self-contained in the main army books, so I can start planning out all sorts of armies without having to wait for them to be re-released for the game. Given that I have a decent collection of models that will be useable in it, I’ve decided I’ll have the most fun if I work on models for the Old World in general rather than painting one army after another. This means picking up what I feel like painting most and getting it done! Last week we had Tomb Kings, this week Wood Elves!
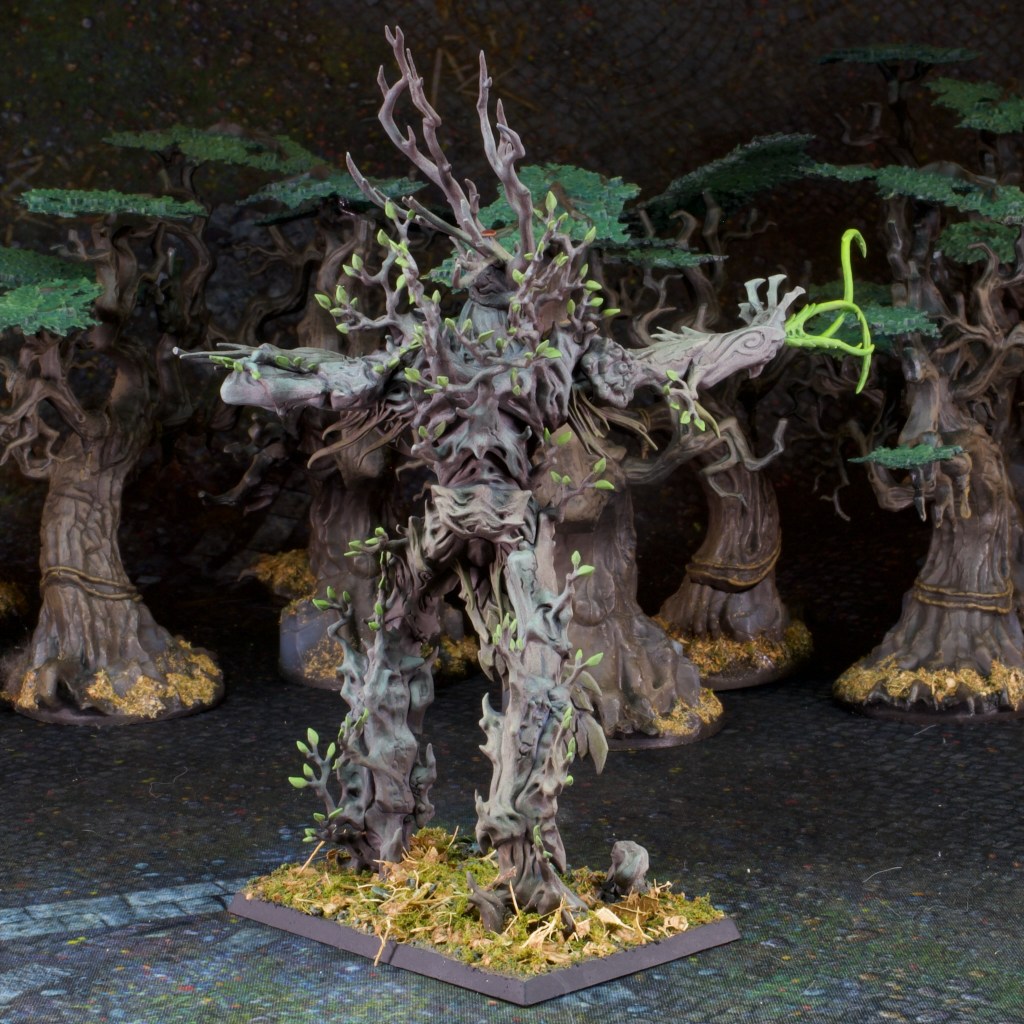
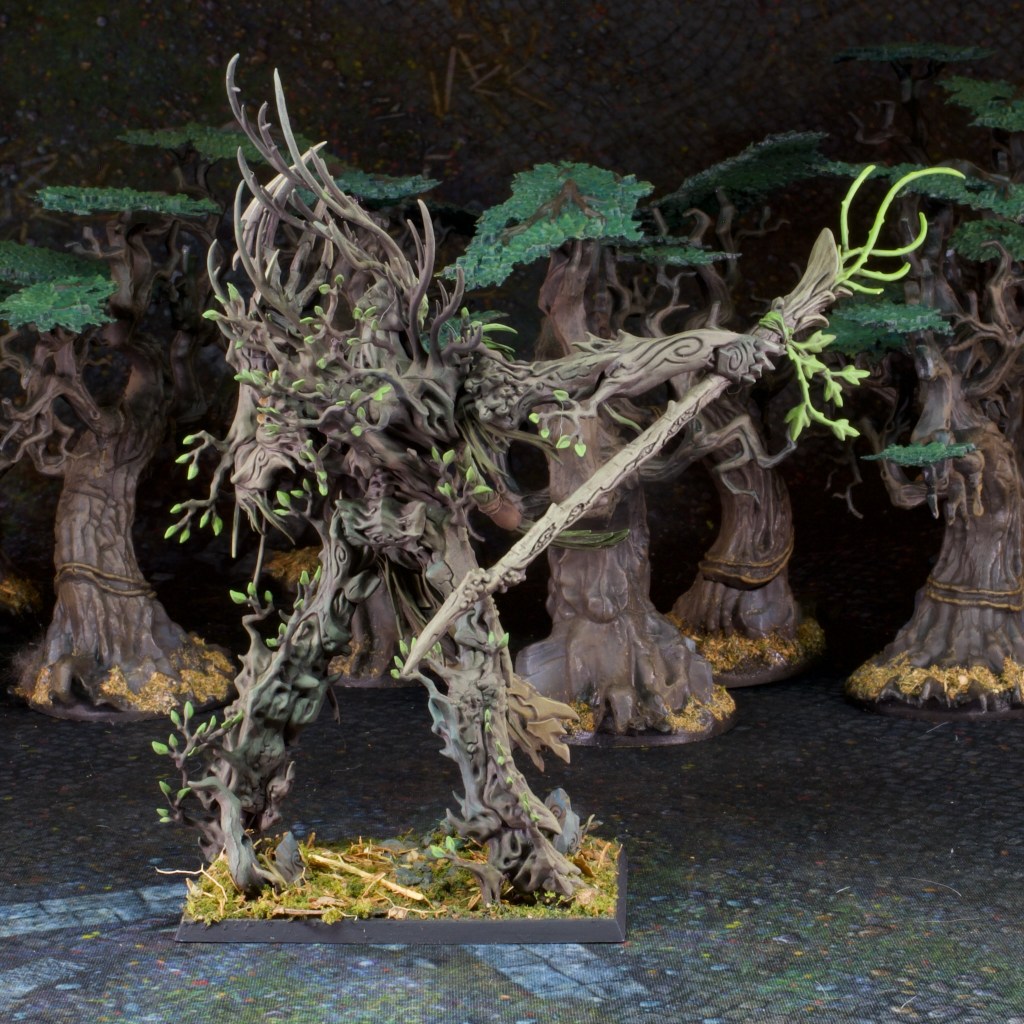
After the base sizes for the new game were announced for models, I had a hunt through my collection for models staying on the same base size that I could paint while I wait for my Tomb Kings starter set. I came across these treemen which have been sitting undercoated in a case for close ten years, and I decided they deserved some paint after their long entombment! These actually belonged to my wife when she had a period of interest in tabletop gaming (as a result of which we met!), and I’ve inherited them since.
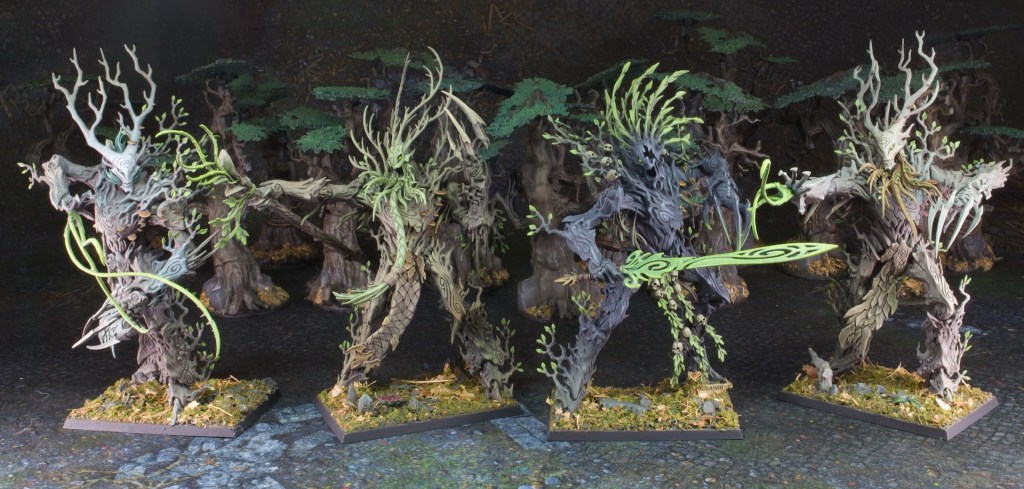
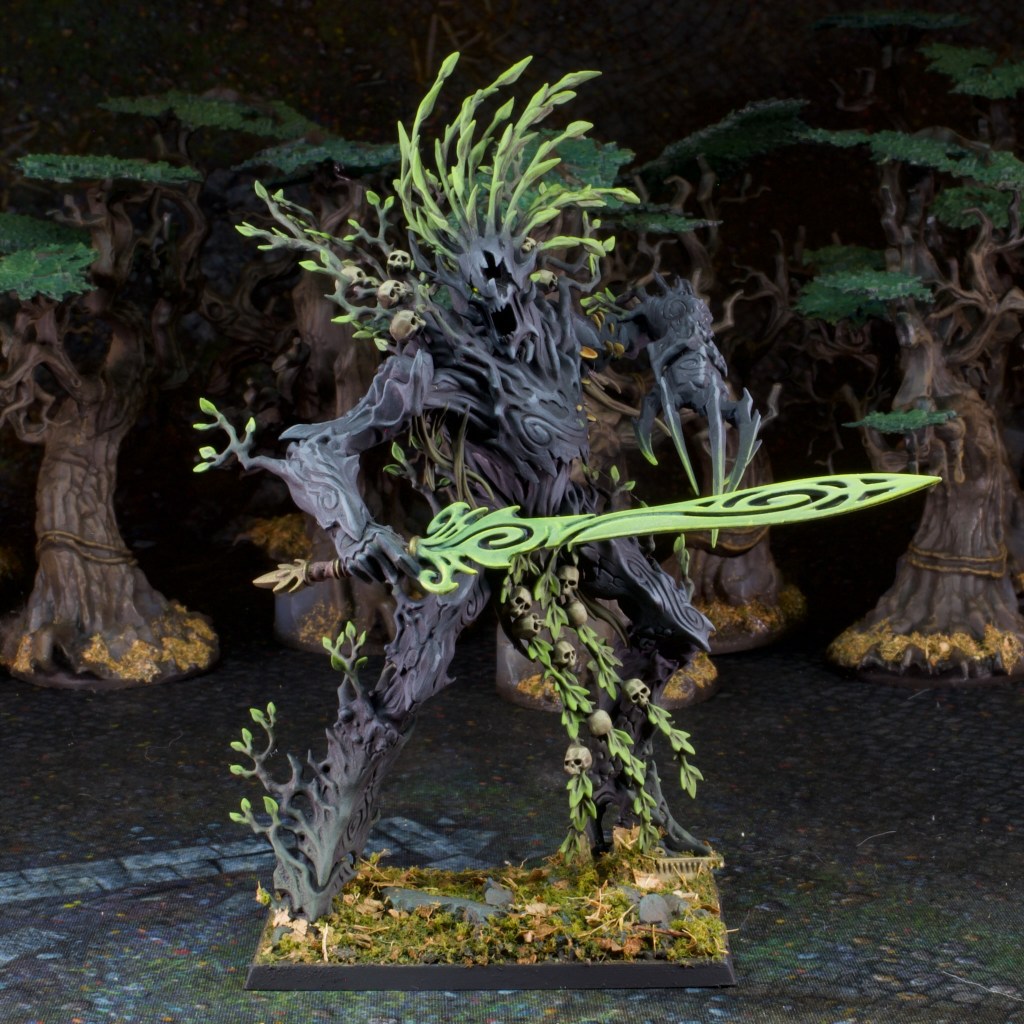
We have 3 variants here, 2 treemen, a treeman ancient, and the named character Durthu. I’ve taken photos of each side of each, and put them into a slideshow for each model so you should be able to scroll sideways though them.
Treemen
Treeman Ancient
Durthu
From a painting perspective, these models were painted in a rather freeform manner (apart from Durthu which had much more of a plan, detailed below). I first took to them with the airbrush and put on random patches of greens, browns, blues, greys. I then started highlighting the models, roughly following the patchy undercoat. This required a lot of mixing, as the patches of airbrushed paint blended into each other. So no paint recipes here, each area was done on its own and the ratios based on whatever made sense there. I think this gave a really naturalistic look to these models as trees are far from uniform in nature, being covered in all kinds of mosses, lichen, mud, etc.
This was an extremely fun way to paint and I’ll definitely replicate that on the rest of the forest spirit models in the army.
Durthu as I mentioned above had a much more deliberate plan in his painting, driven by my experiences walking in the local bush land here in Perth. It’s rather common to come across burnt bush around here, either from bushfires, or burn offs done to reduce the impact of future bushfires. The forests end up black after these events, but nature here is built to live through these events, and when rain comes life springs anew from the ashes, revealing what I think its a pretty amazing sight: bright green new growth surrounded by pitch black burnt forest. Here are some photos I’ve taken of what I’ve seen here.
Having grown up near temperate European forests, I find this quite an amazing sight and have always wanted to paint a model that tries to replicate the effect. That’s what I tried to go for on Durthu, his main trunk is blackened by fire, but bright new leaves are coming up.
Dwarfs were the first Warhammer models I bought, but Wood Elves were my first “proper” (i.e. built to a decent size) army for Warhammer. I have a lot of models for that army, although most are in a dire state so I’m excited to repair and repaint them and get them back on the table with the new ruleset.
I’m using these new rules to indulge my love of painting whatever I feel like at any given time so I’m not sure what I’ll be painting next! Potentially some more terrain for the Border Princes campaign, we’ll see when I sit down at the painting table next!
To the surprise of absolutely no one I’ve been very excited for the relaunch of classic Warhammer as the Old World and doubly so now release is just around the corner. As part of said release I ended up ordering one of the stater sets, and not the one that might have been expected given the fact I’ve been painting Bretonnians recently. So off to the dusty tombs of Khemri for me!
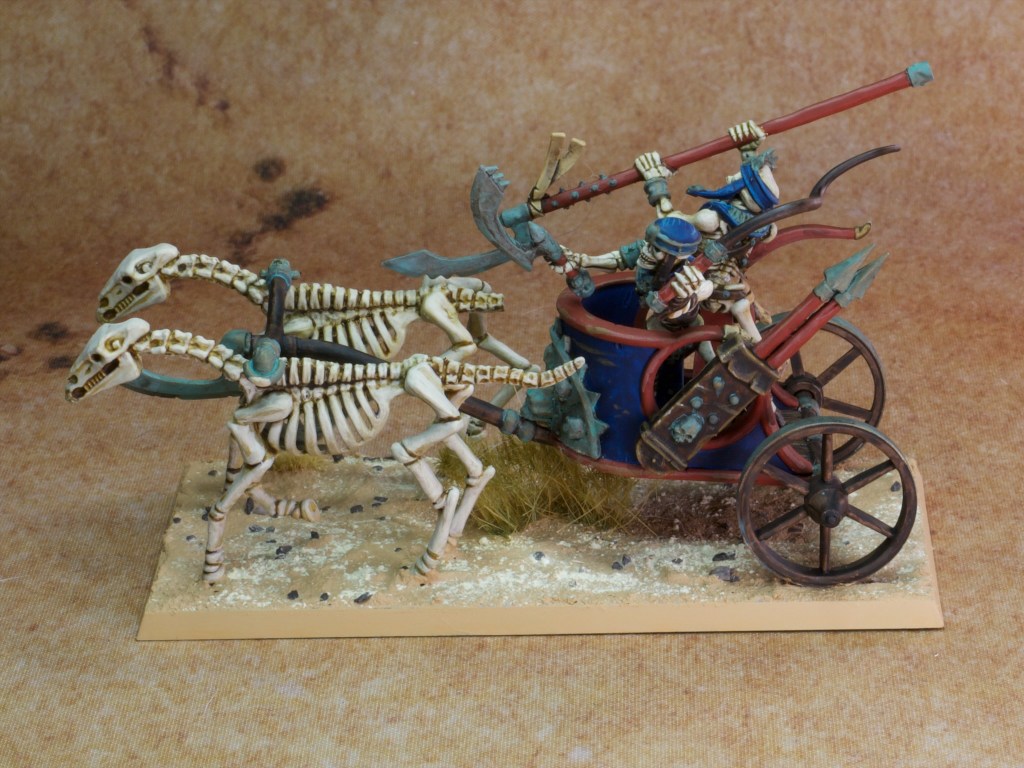
Clearly I was excited about Tomb Kings after that, so I scrounged around my forgotten sprues pile and found a full box of Tomb King chariots! Well not so full, one of the crews was missing, probably cannibalised for some long forgotten project. I decided then that this crew-less chariot should serve as a character mount, and low-and behold I had in my possession a model of Prince Apophas, the mass of beetles with a head (very the Mummy). I’d gotten Apophas as a fun alternate Wraith for my Vampire Counts many years ago and had converted him to wield a scythe of all things, and promptly never painted him. I therefore had an empty chariot and a purpose-less Tomb Kings character on my hands and settled on making him my chariot rider!
Given his previous stage of conversion, the original dagger the model came with was long lost, and while I still have the original head, I wanted to change that to make this a bit more than just Apophas on a chariot. I had a look around for promising heads and found Arkhan the Black’s head as a spare on the Mortarchs sprue, left over from when I built Neferata many years ago. That seemed like a good fit so on it went. I thought his arm position was well suited to be cracking a whip, so I had a look around for an appropriate donor model, and cast my eyes upon a poor metal dark elf chariot rider, again leftover from some previous project (see, you should never throw anything away), and cut off his whip to give to my new chariot rider.
These 3 chariots will join up with the 3 that come in the starter army to make a nice chariot block, when I get these I’ll build the command models so the unit has the usual banner/musician/champion. Speaking of the starter army, I’ll not be getting this till February, as Australia is a few weeks behind the rest of the world for receiving their stuff unfortunately, so I better write down my recipes so I can match up the new models with these!
Acronyms:
VMC: Vallejo Model Color
VGC: Vallejo Game Color
PA: Pro Acryl
S75: Scale 75
GW: Games Workshop/Citadel
AK: AK Interactive
Blue
VMC Dark Prussian Blue
VMC Andrea Blue
Red
VMC Cavalry Brown
PA Shadow Flesh
Bone
50/50 GW Aggaroth Dunes/Contrast Medium
50/50 VGC Bonewhite/AK Ivory
Leather
GW Wyldwood Contrast
For larger areas only:
VMC English Uniform
50/50 VMC English Uniform/VGC Bonewhite
30/70 VMC English Uniform/VGC Bonewhite
Bronze
S75 Necro Gold
GW Nihilakh Oxide
For larger areas only:
VMC Light Sea Grey – very thinned down, in uneven patches
Gold
S75 Elven Gold
GW Reikland Fleshshade
S75 Elven Gold
Scrolls/Fabric Straps
GW Skeleton Horde Contrast
VMC Iraqi Sand
Bases
AK Sandy Desert (Texture)
Mig Light Dust (Pigment)
Note that in addition to the above the models got a pin wash of dark brown enamel to pick out the details. If you’ve followed the blog for a bit you’ll notice that my usual application of GW’s Agrax Earthshade for shading is absent. I decided I wanted to get these models much brighter and less contrasty than usual to get that sunbaked feeling, hence the light enamel wash instead of the usual heavy acrylic wash.
These models were really fun to paint, and I look forward to the sea of bones headed my way in the new starter set! As for what I’ve seen of the new rules so far, I’m really liking. It’s capturing the essence of the editions I really enjoyed, that is 6th and 7th editions. We’ve already decided to use this new edition for our Border Princes campaign, and I can’t wait to get stuck into the new books.
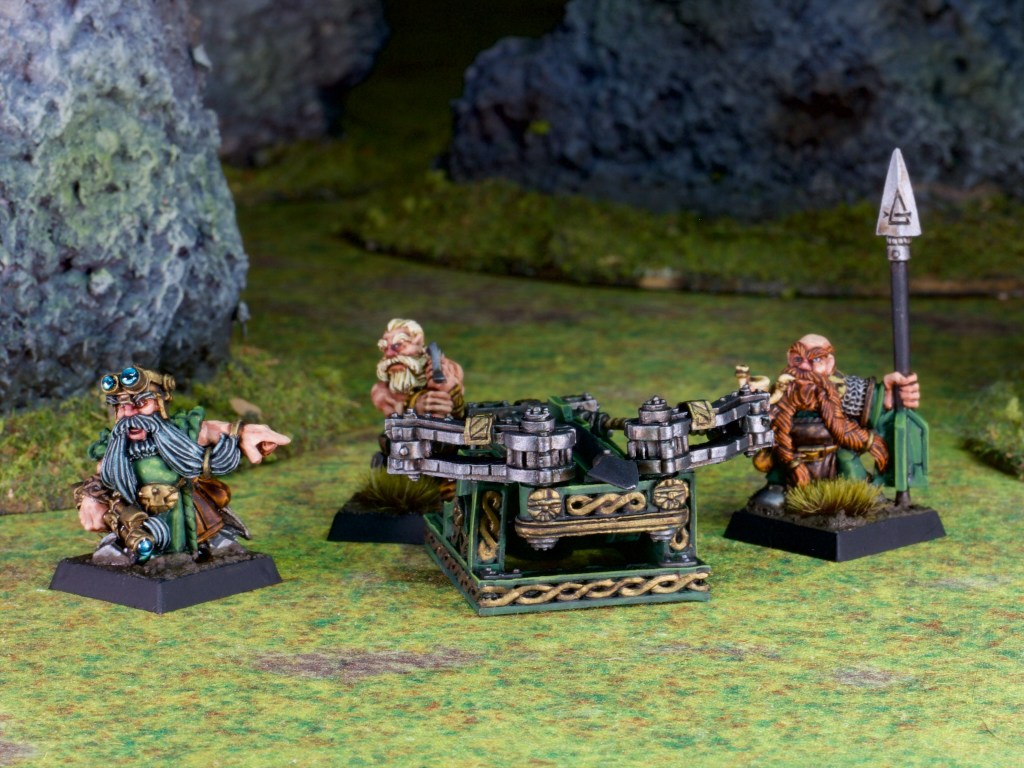
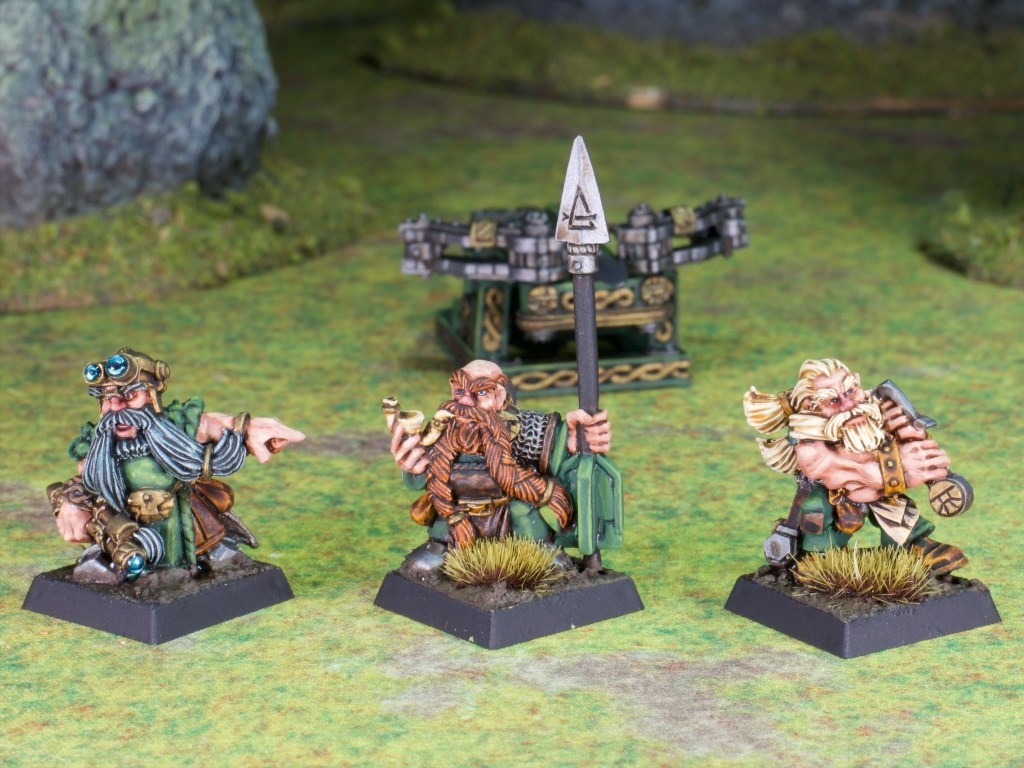
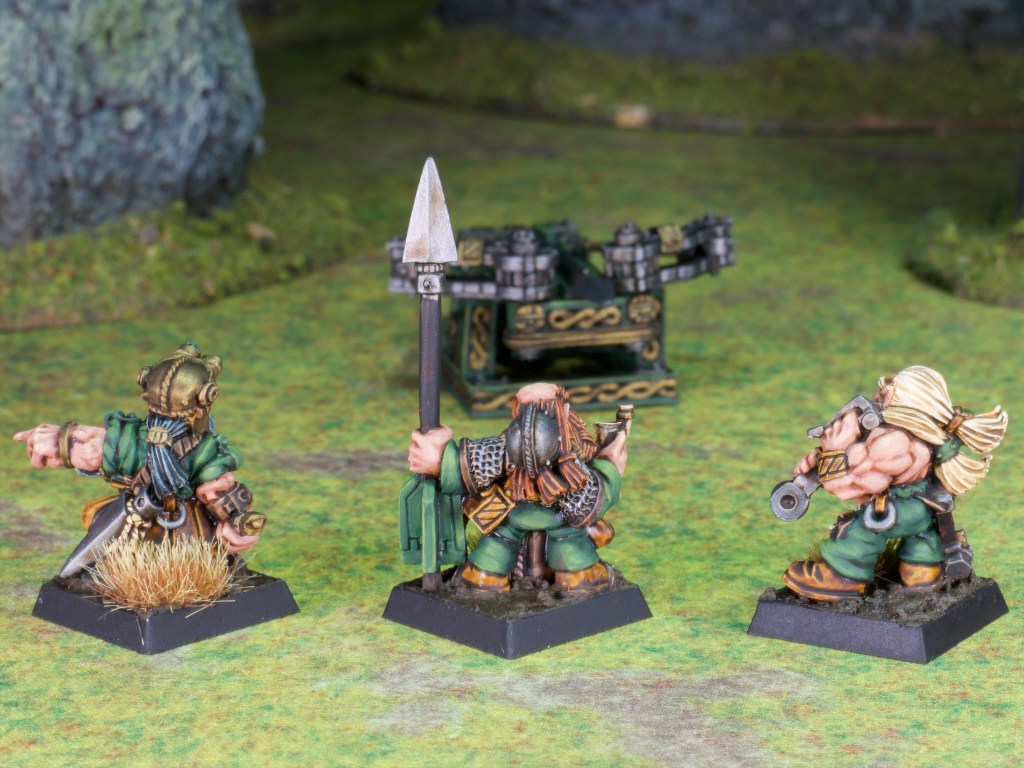
I’ve been on a small holiday this weekend, taking Friday off work and going up to Broome for a few days, which made for a lovely break. As an aside I really recommend going there if you ever get the chance, it’s quite an amazing location. I got back tonight and found I had the urge to get back into some painting so I finished off some reinforcements for my Dwarfs!
I’d actually started painting these a couple of weeks back and had the mostly finished by the time we left for Broome so there wasn’t much to do to get them finished up, but still nice to be able to to call them done!
This is a metal model from the range refresh Dwarfs got in late 6th edition Warhammer, which dates it to around 2005 I think. It’s a nice model, and I really like the crew although the bolt thrower itself was a bit fiddly to put together as multipart metal models tend to be.
There are some fun details on the, models such as the bolt held up by the middle crewman which has a rune from the game – Flakkson’s Rune of Seeking – carved into its tip (bonus to hit against flying creatures for those of you that are wondering!).
Painting-wise, these models are much like the rest of the Dwarf army, that is they follow the scheme I presented back in May.
It’s nice to add some more models to my Dwarf army, which I will be growing over time as I get through painting up the collection I purchased a while back. I do really enjoy painting Dwarfs, which is a good thing as I have quite a few more to paint!
It’s been a little while between updates, work has been rather busy and painting time has suffered as a result, but I’ve still been busy in the background! Quite a few models started over the last month, and unfortunately not many finished! Hopefully they will grace these pages soon, but for now here’s something I started this weekend and finished up early this week.
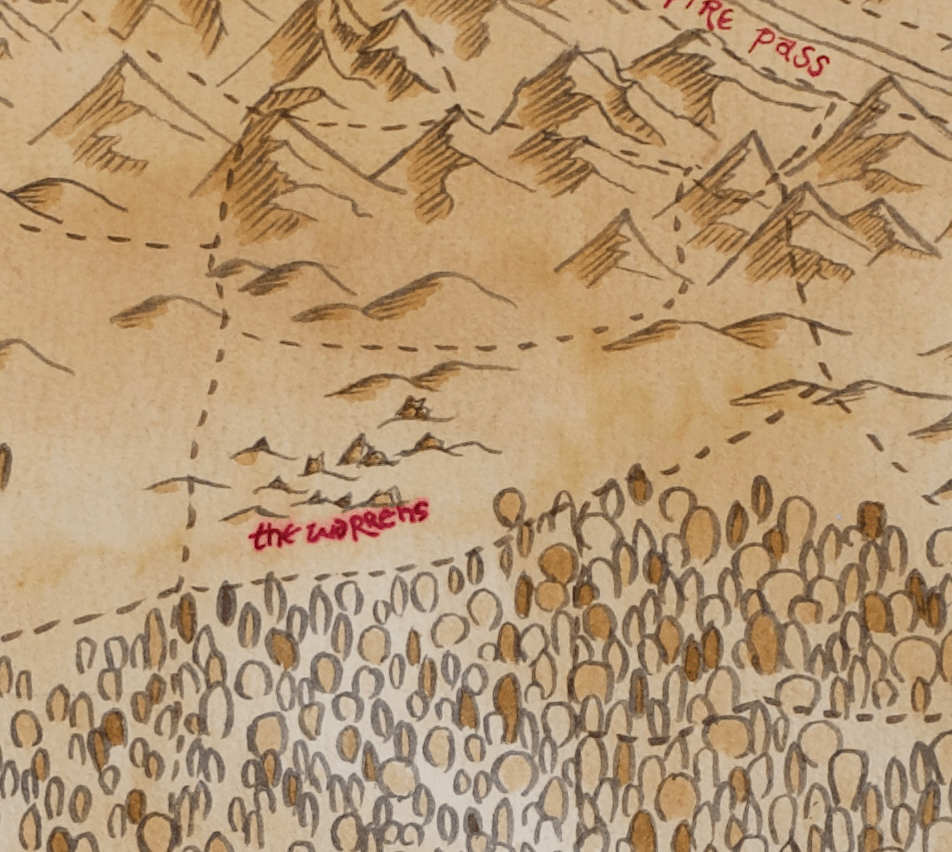
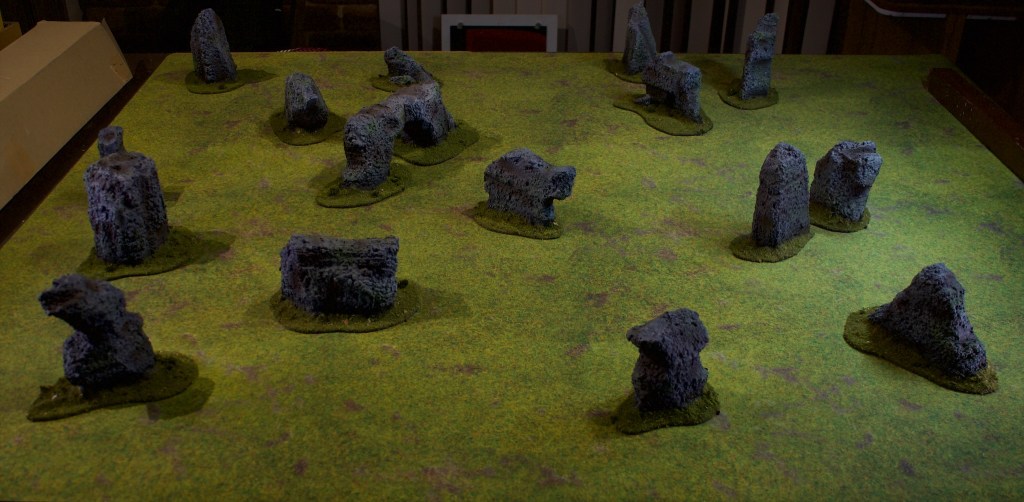
If you remember the map I drew for the Border Princes campaign, you might remember an area called “The Warrens”, that had a scattering of tall stones pictured in the area. This area has a special scenario associated with it (aptly named Rock Labyrinth!) that requires the board to be covered in rocky outcrops. This makes movement very difficult for ranked up regiments as you might imagine, and the scenario allows normally ranked units to fight in skirmish formation to ease their passage through the board.
The scenario consequently requires a great many rocks to be placed on the battlefield, many more than I had access to in my terrain collection so I decided to make up a batch for it.
These rocks are carved blocks of polystyrene, roughed up with a large wire brush and covered in homemade texture paint (mix of PVA glue, paint, sand, and bicarb soda). This texturing stage I did with my 3-year-old son who greatly enjoyed himself (He somehow got some on his back despite my best efforts to cover him with an apron!).
The goal was to have enough of these to play the Rock Labyrinth scenario on a 4ft by 4ft board, appropriate for the game size we’ll be playing during the campaign. The photo above shows them on a board of that size. It looks pretty cramped which is just right, mission accomplished there I’d say!
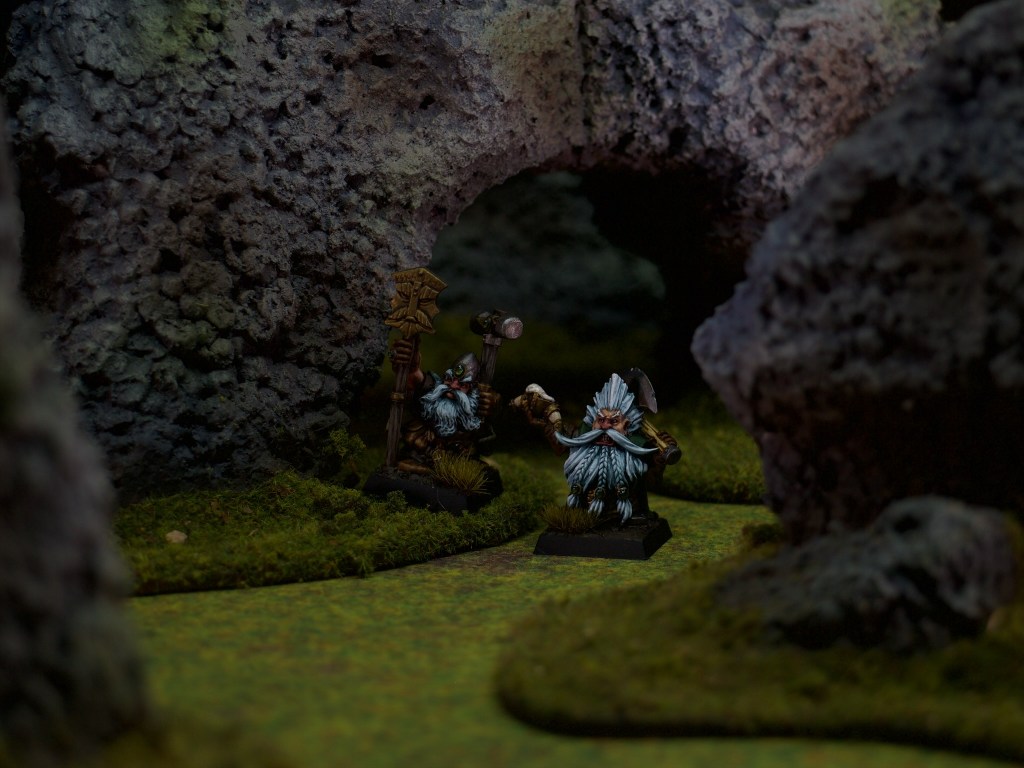
Turns out these rocks make for some fun backdrops for miniature photography so I couldn’t resist posing some models amongst them.
Here’s some proper dwarven terrain!
These were really fun to make, if a bit messy (I had the vacuum running while I was carving and still got polystyrene balls everywhere!). I look forward to playing some games using them, and I’m sure you’ll see them in the background of miniature shots in the near future.
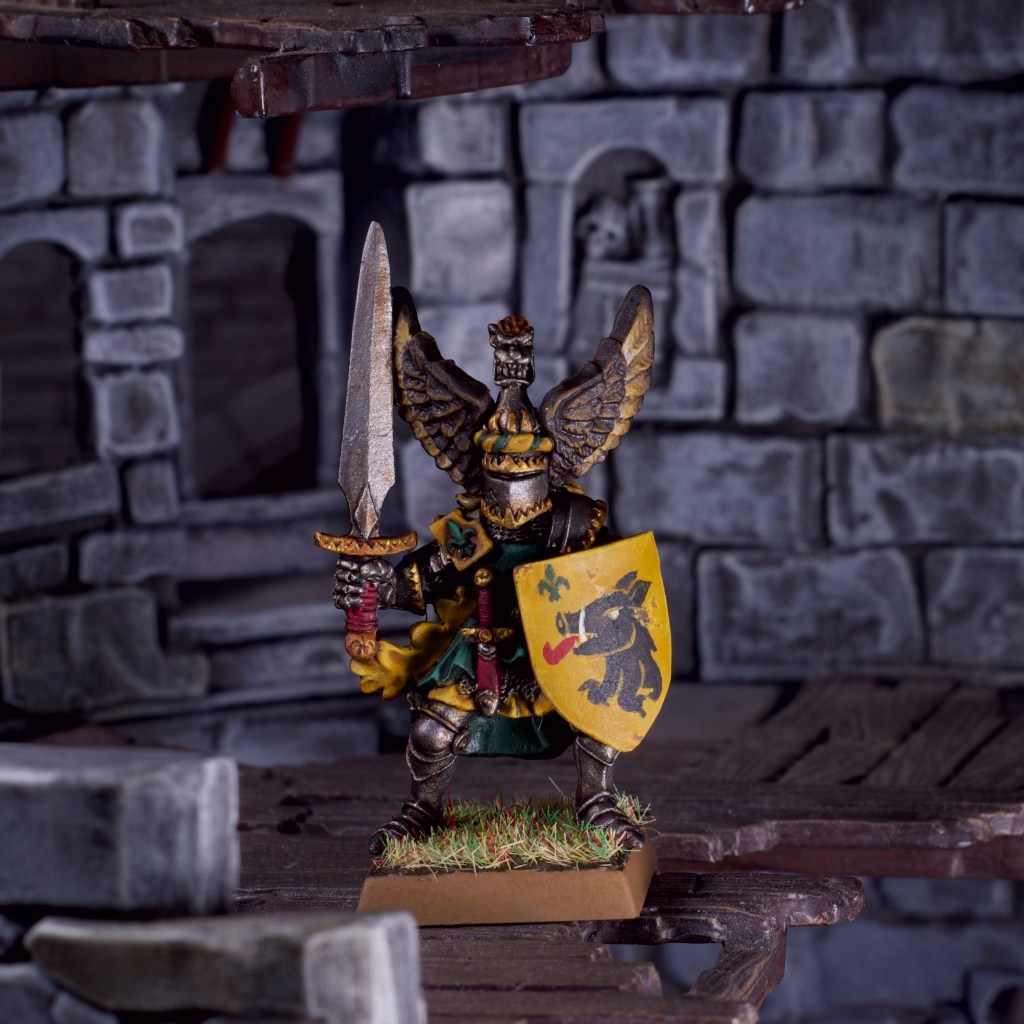
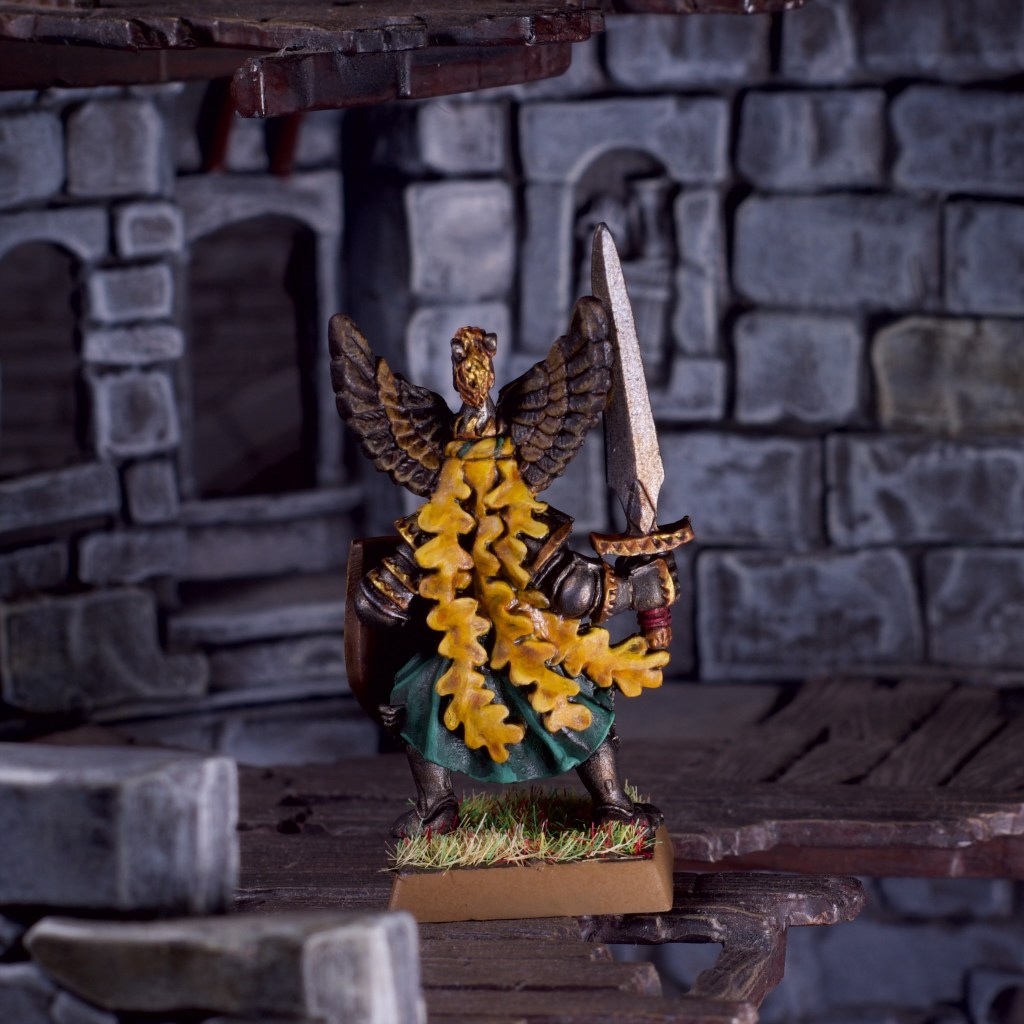
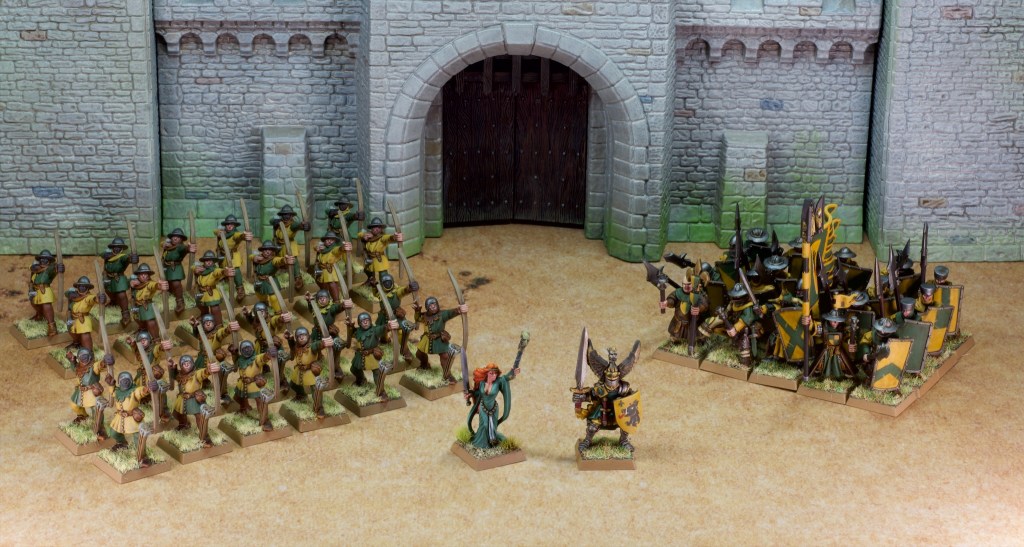
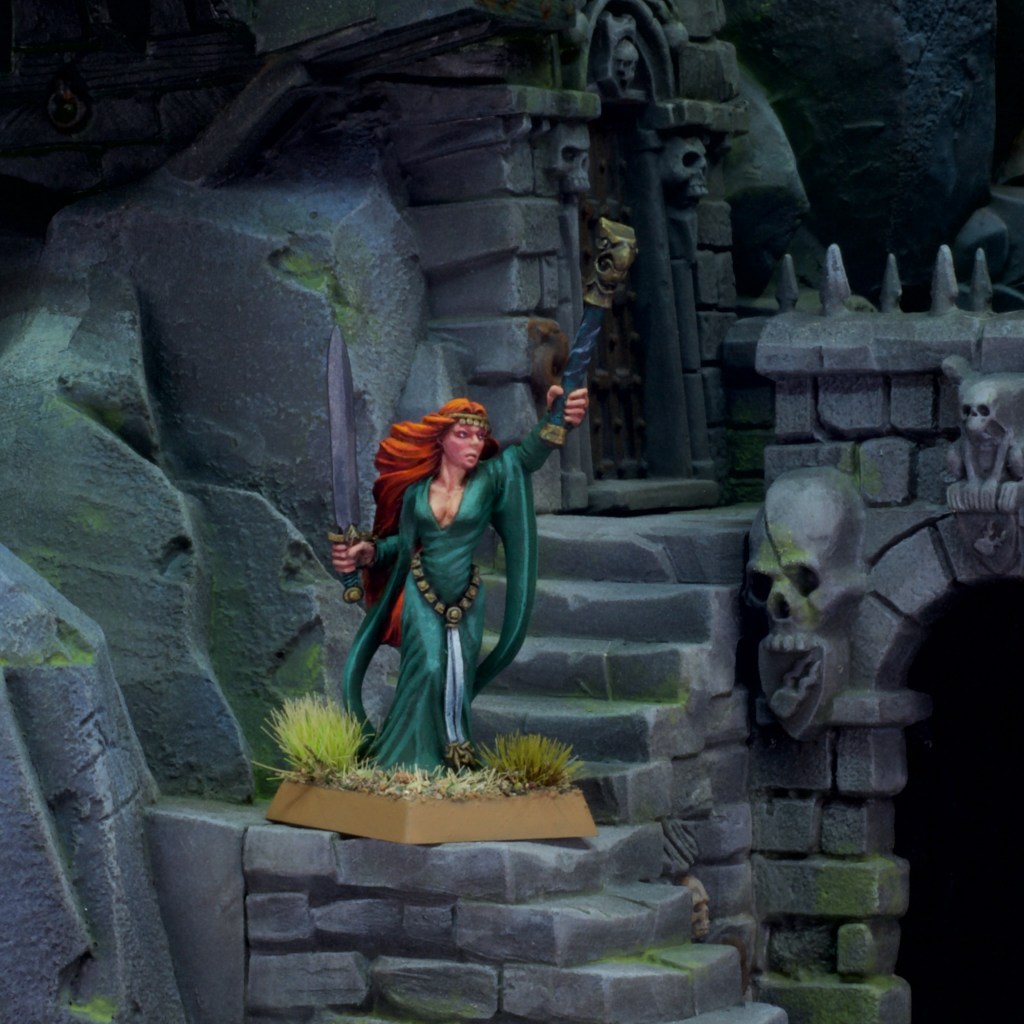
Back this time around with another character model, and in this case it’s the model that takes me to 500 points of Bretonnians! This rounds out my small defenders of Malko force, a small army that will defend the central town in our Border Princes campaign.
This model is (I think!) an old Questing Knight, which I’m using as a Paladin with the Virtue of Empathy (fights on foot with the peasants!). I really like this model and wanted to save it for last for this small force of defenders of Malko.
In my last post I showed a boar’s head on the men-at-arm’s banner, representing their lord’s heraldry. This model is said lord so he of course needed a boar’s head on his shield. I think the version I painted on his shield is an improvement over what I had on the banner which is the right way around!
Just like for the Damsel I went with a richer green for this model, to make him stand out from the peasant soldiers which have a much more earthy green. The yellow is also more saturated on him than on the other models in the army for the same reason.
As he marks a milestone for the army (and in fact all I need to paint for the campaign), it’s time for a group photo!
It’s nice to see them all together, and this now means I have the minimum I need for the campaign across the three armies (1000pts of Dwarfs and Vampire counts and the 500 points of Bretonnians). This of course doesn’t preclude me adding more to them, but now the blocker to the campaign shifts to the terrain we need for the locations on the map, so I might spend more time on terrain in the short term.
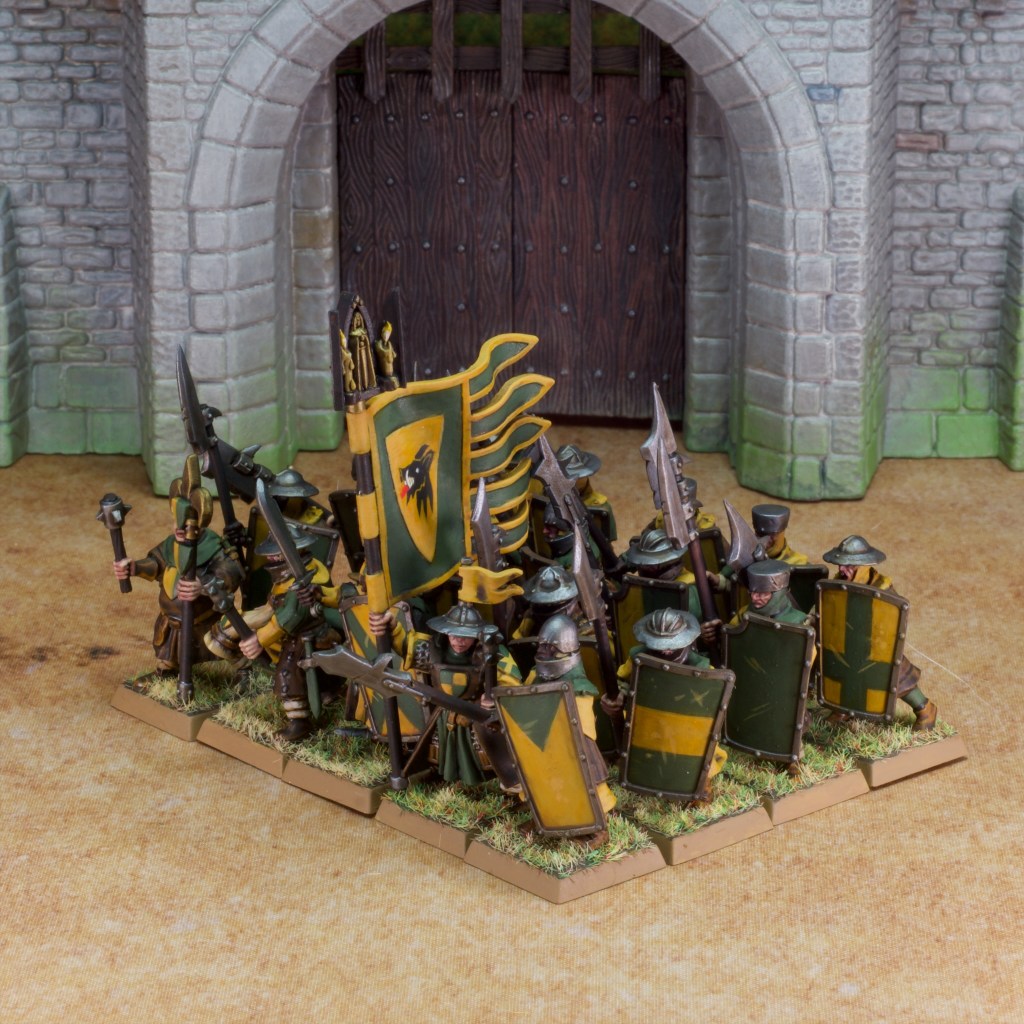
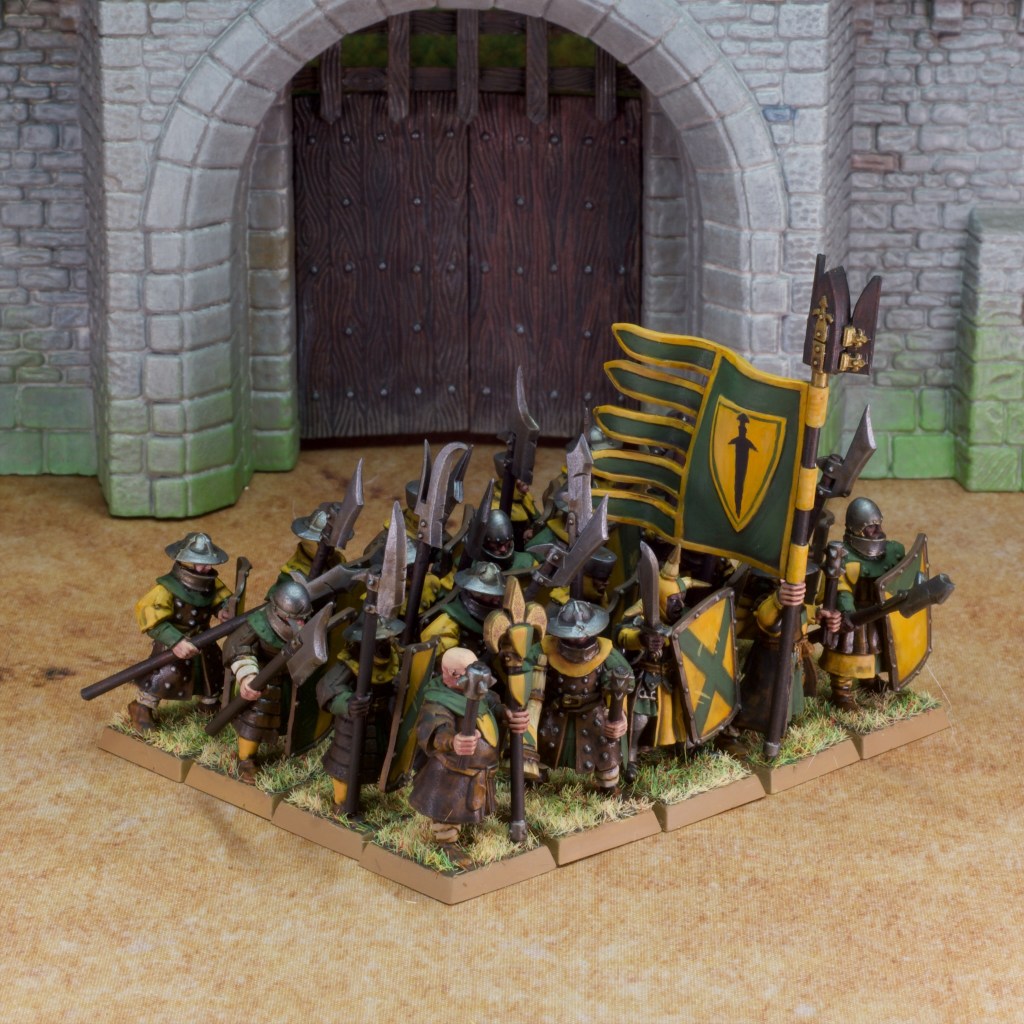
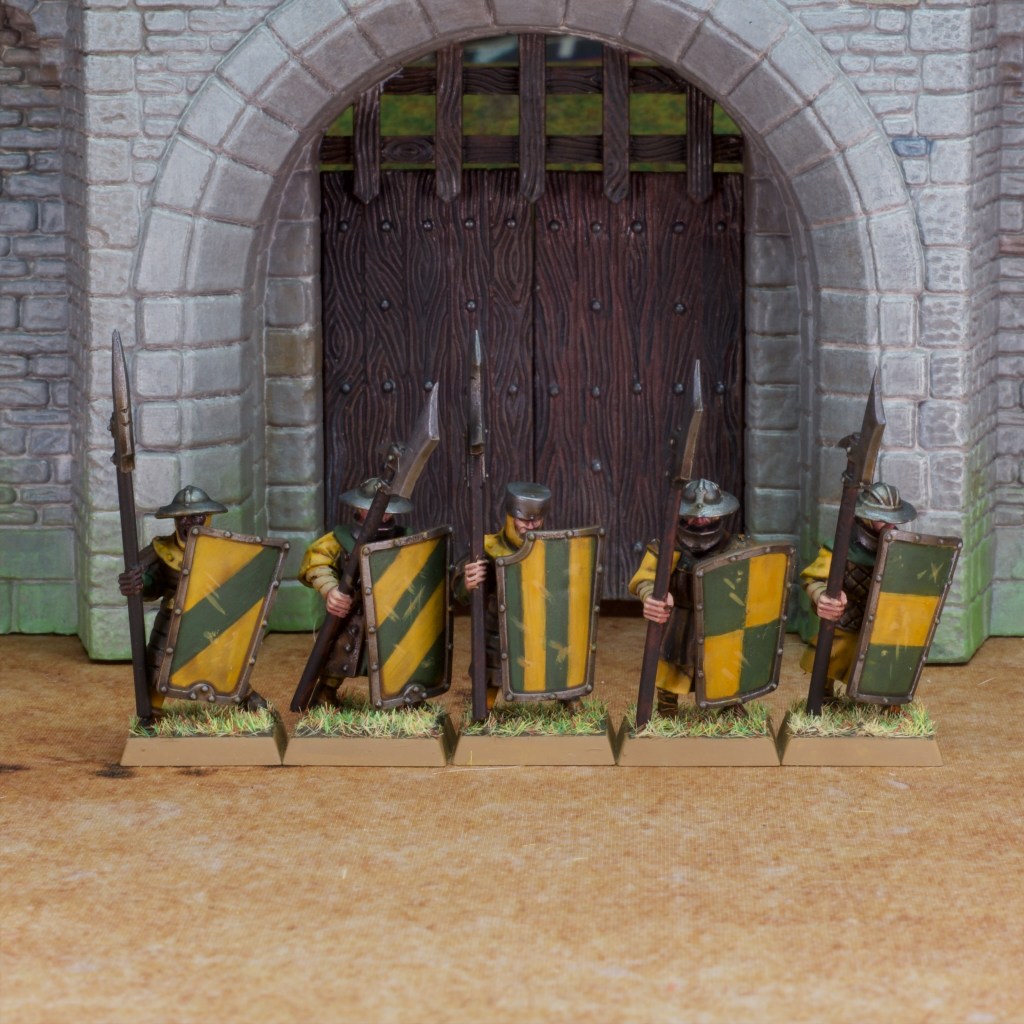
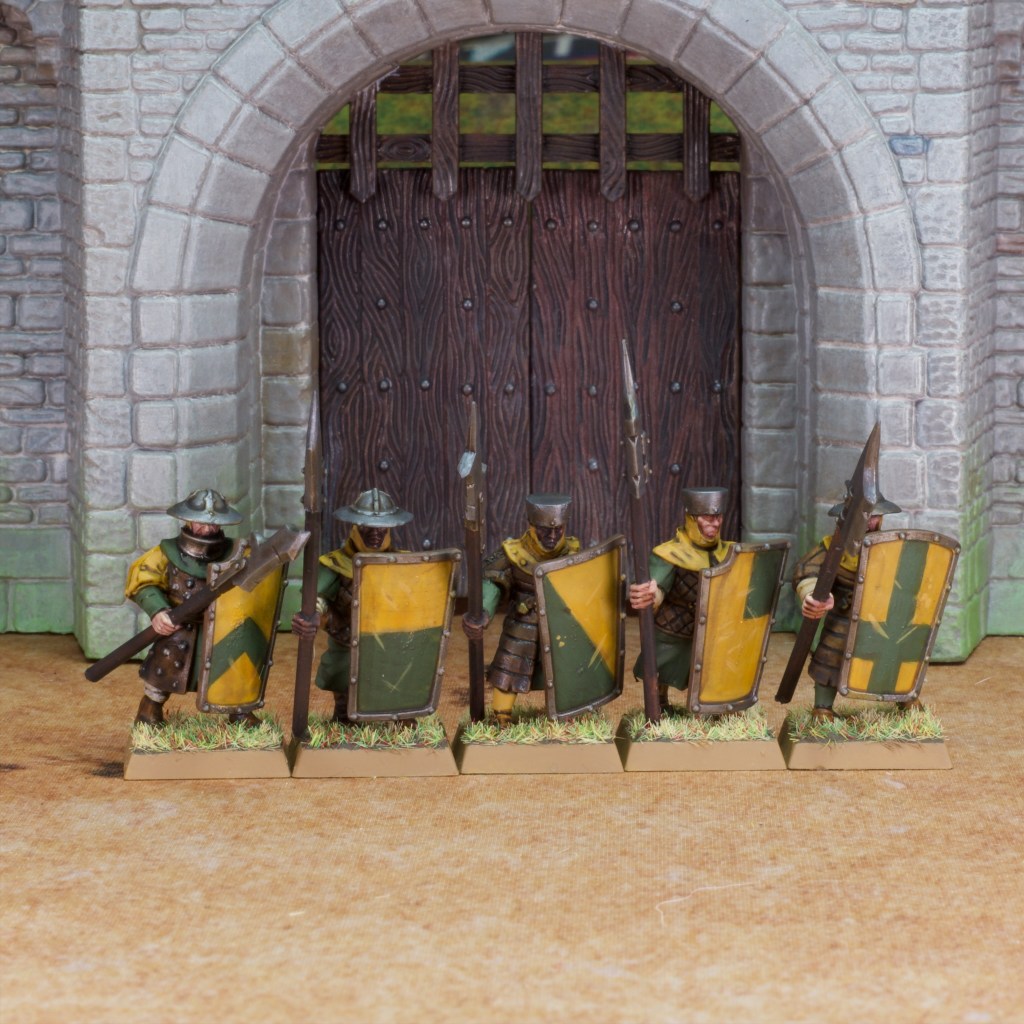
The latest unit off the painting table is some reinforcements for the small Bretonnian garrison for Malko, the town at the center of the Border Princes campaign map.
These are a unit of Men-at-Arms, the other main peasant unit in the army, the first being the archers I painted a while back. Just like the archers, these models came from a second hand lot I got on ebay at the start of this project. Little did I know that a few months after I got these, the relaunch of Warhammer as the Old World would be announced and that if I’d waited I could have just bought new models!
If I sound a little bitter it’s because these weren’t much fun to paint to be honest! I’m pretty comfortable stripping plastic models, so had no issues with the one-piece archer models, but on these men-at-arms I encountered a different enemy: glue.
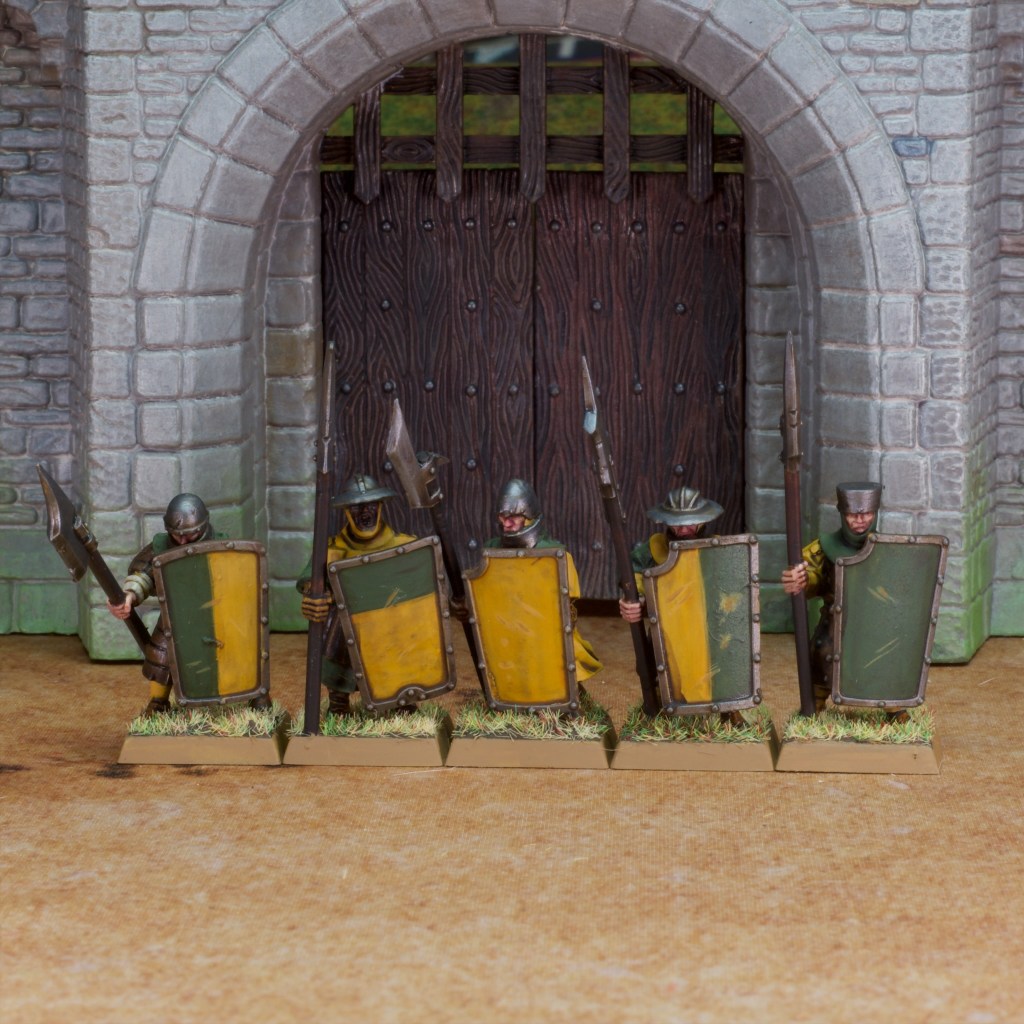
As you can see, these models are covered for the most part with large shields, and I knew I’d want to remove those for painting. The previous owner had generously doused the joints with glue and I ended up having to pry the shields off which resulted in some breakage. This left the models with some rather unsightly joins and I’d rather no one had a look too closely at the left arm on these!
The magic of ranked up models hides a lot of issues though, and while the damage dampened my enthusiasm for these, I do think they look pretty nice all ranked up. I had a great time painting the banner and the shields. For the shields I tried to paint on some basic heraldic looking patterns, with each shield being different to the others as you can see in the photos below.
For the banner I tried to free hand a heraldic boar’s head, as that’s the emblem I decided the noble leading these troops would have as his device.
On the other side of the banner I went for a sword motif to represent the men-at-arms.
I expect to have to do a lot of free handing when I get to painting some knights so this is great practice!
There you have it! While the process wasn’t the most fun, I am happy with how these look and glad to be that much closer to the goal of 500 points for these Bretonnians!
Small update again this week, with another model for my dwarfs! This time we have the White Dwarf himself, Grombrindal!
This is a pretty fun model, with his helmet serving as an impromptu ale flask, and quite the expression fixed on his face. This is one of the many Grombrindal models released over the years, of which I have a couple more. This one is one of the more useable in regular games of Warhammer however, being a single model on foot rather than a mini scene. I’ll use him as a Thane in the campaign games, and will have to look around see if they ever made any rules to represent the actual character in games!
I’d never seen the back of this model before and the large mullet I found there was quite the discovery!
This was a bit of a speed paint as it was done over the course of a single day, but I’m pretty happy with how he turned out and he’s happily sitting next to the rest of my dwarfs in the cabinet.
I’ve now had a nice little break from blocks of infantry, with the last few posts focussing on terrain and characters, but break over and I’m back to painting ranked models!
Back relatively quickly this time with some more progress for the Border Princes campaign in the form of a character model (hence the speedy update!).
This model is a classic Brettonian Damsel model, one of my favourite Warhammer models ever, and I loved painting it. This sculpt is very detailed and fine, and after admiring it in the pages of Games Workshop publications for so many years it was a pleasure to see it in person.
When I started painting it I quickly gravitated towards this red hair/green dress combo, having pictured Merida from the animated movie Brave and deciding that would be a good look for this model.
I tried to take special care around the face, having found my usual face army painting process resulting in rather rough masculine faces that would not suit this model. I ended up working my way down rather than up as I would usually do. I started with GW’s Kislev Flesh as a base coat (this is my usual final highlight for caucasian skin tones), and glazed reds in she shadows and on the cheeks to shade and give a bit of life to the model. I used Vallejo Scarlet Red and GW Contrast Volupus Pink in turn, both very watered down for some very thin glazing.
The rest of the model was done much faster, with the hair done with a mix of red and yellow GW contrast paints to start with and then layered with regular acrylics (to the extent that almost none of the contrast shows through).
For the dress I wanted a slightly satiny look, so I highlighted my green basecoat by mixing in some pale blue a couple of times and placed some fairly harsh highlights to give that shiny material look.
Overall given the time taken I’m very happy with the result!
Another small piece of additional work went into printing and painting up some movement trays for my painted dwarfs units, which you can see below:
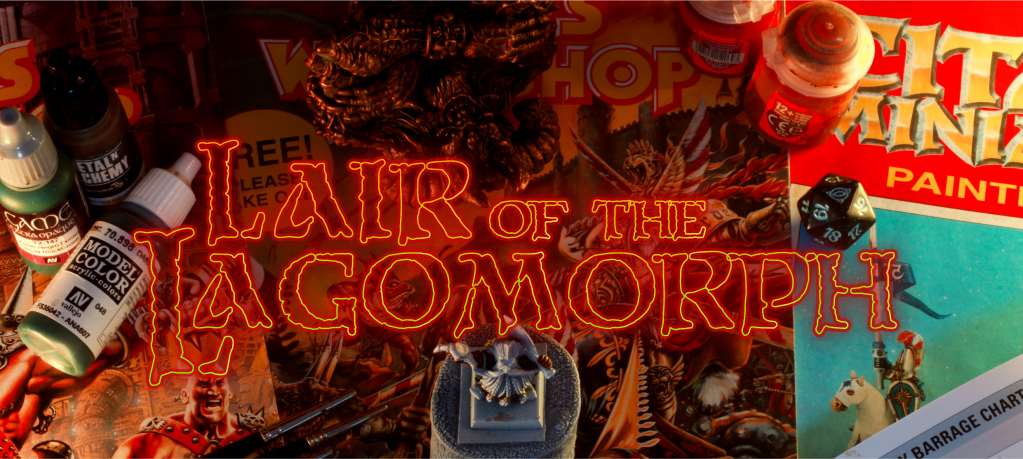
Three Years Already!
September marks three years since I’ve started this blog (which feels crazy to me, can hardly believe it’s been that long). This post will also mark 120 posts on the blog which is not bad going!
To celebrate and mark the occasion I decided that my trusty header that had served me well all this time needed an overhaul.
Out with the old…
I spent some time this afternoon putting together a collection of stuff I though looked neat and photographing it to use as a backdrop for the header. I then set about sorting out the text, and ended up with something that definitely has a Stranger Things crossed with Warhammer vibe, but there are worse influences out there!
…and in with the new!
I’ve also decided to make this a little bit more official and finally get a proper domain for the blog: http://lairofthelagomorph.com. I’m treating this as a bit of a reward for myself for having stuck to this blogging thing for 3 years, here’s to many more!